Regardless of the brand and regardless of the cost, motherboards can die. I had a motherboard given to me a good few years ago which had bent pins. I was going to fix it and get it back up and running, but when I came to look at it, it had some other issues and it just wasn't worth fixing. I hate wasting anything, though, and I needed a good wall clock. The bit-tech mod cave is full of tech and a standard clock just wouldn't do, so let's make our own!
This isn't a hard mod; it isn't even particularly clever or original, but it is fun and I really like it! You could use anything really: an old HDD, SSD, GPU - whatever you like.
First things first, find your dead component. Please do make sure it is dead, it would be a shame to waste anything that is working. Even if you no longer want it, one man's trash is another man's treasure. 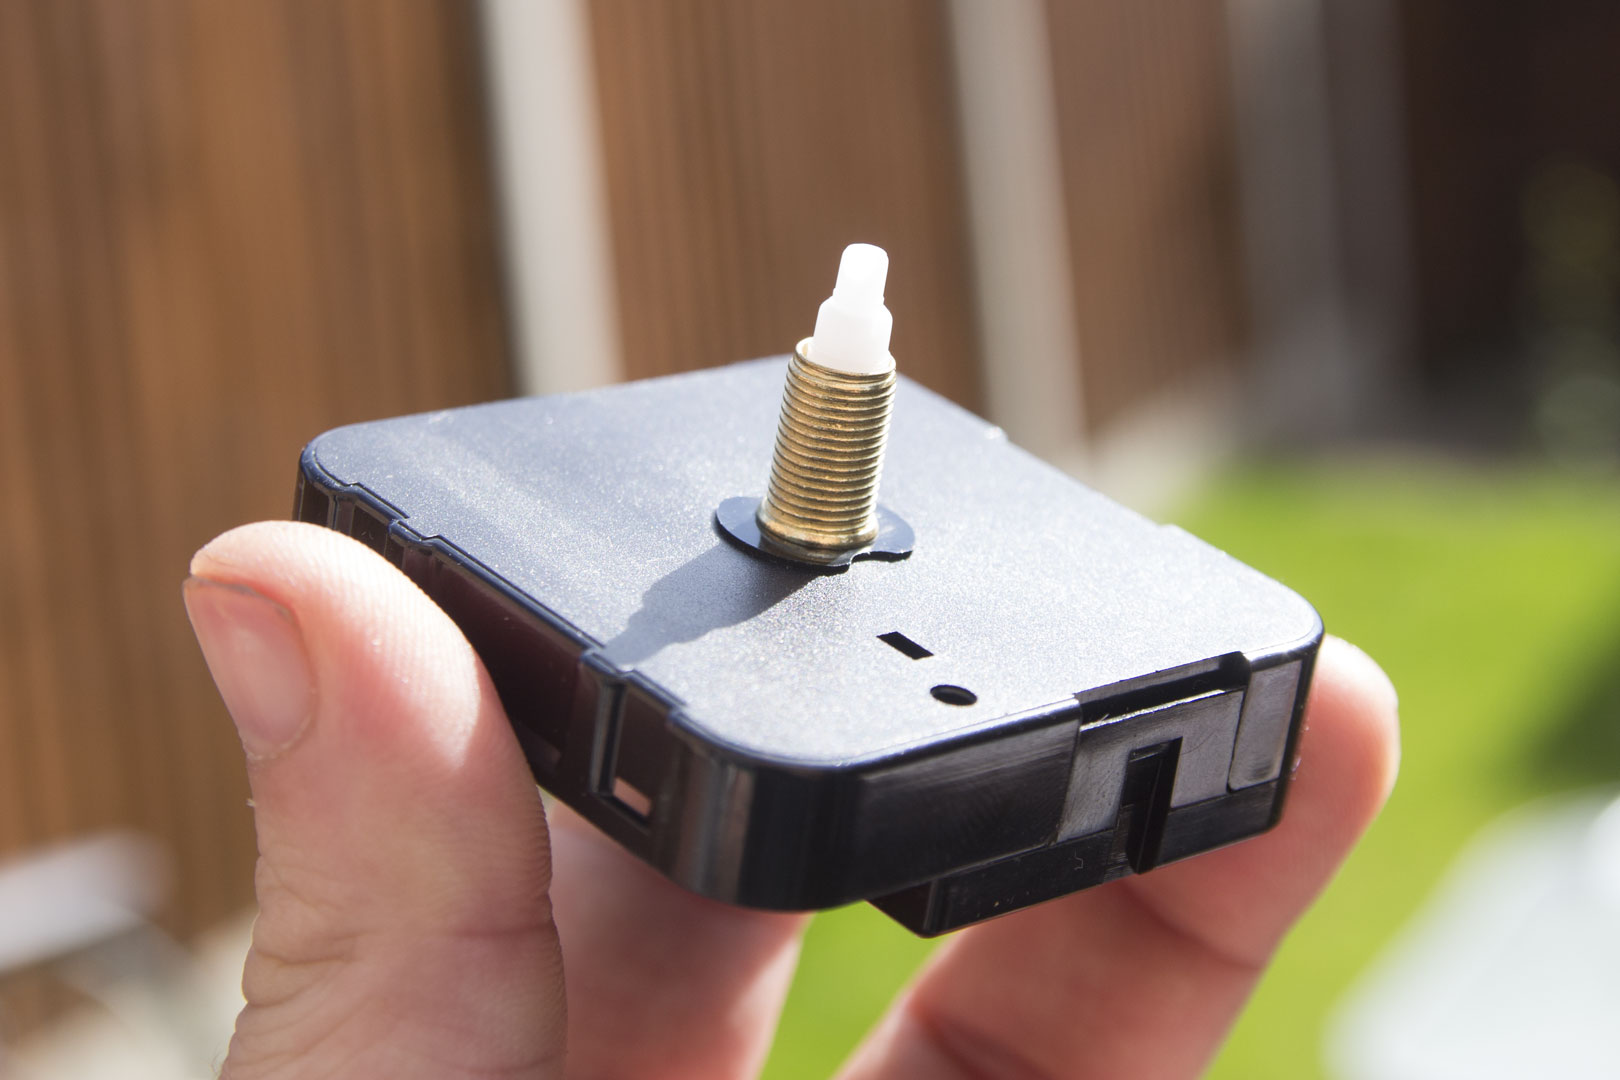
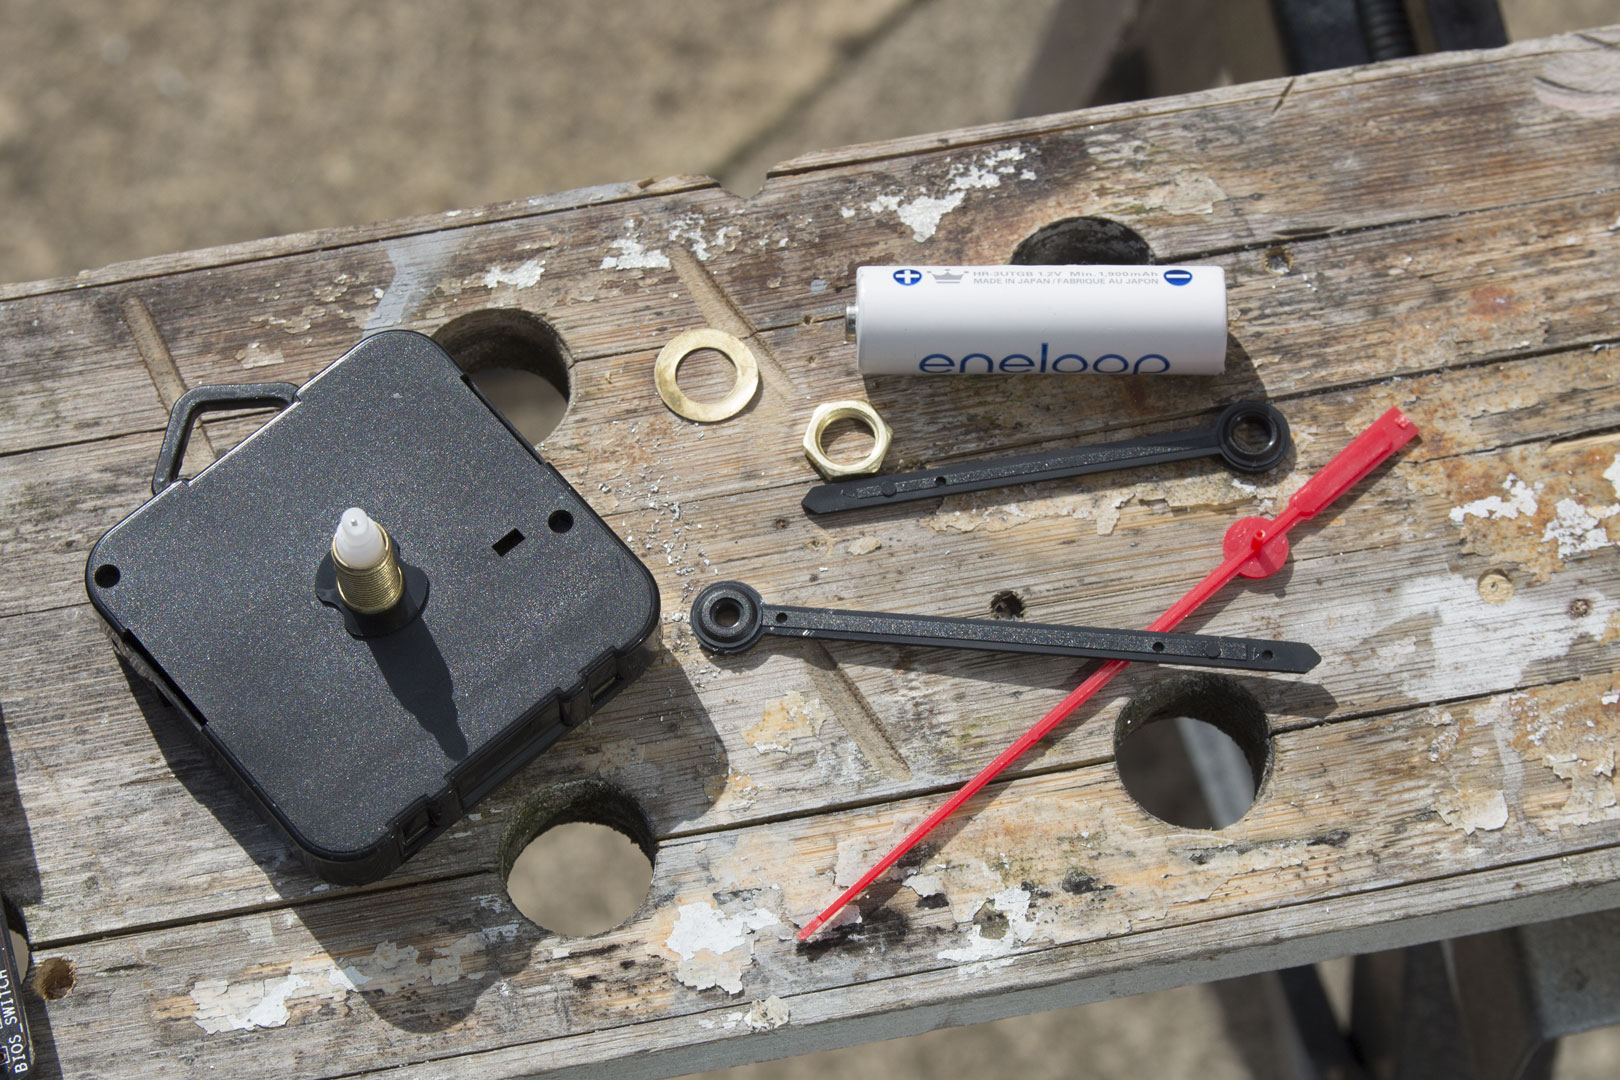 Next, find a clock mechanism. I paid £1.99 for mine from Amazon, and it works as well as any other as far as I can tell. If you have an old or broken clock kicking around though, try to recycle that.
Something to bear in mind: Make sure you get a mechanism that has a long enough stem for what you want to do. Mine needed to be rather large, as I wanted it to go through the motherboard and the socket.
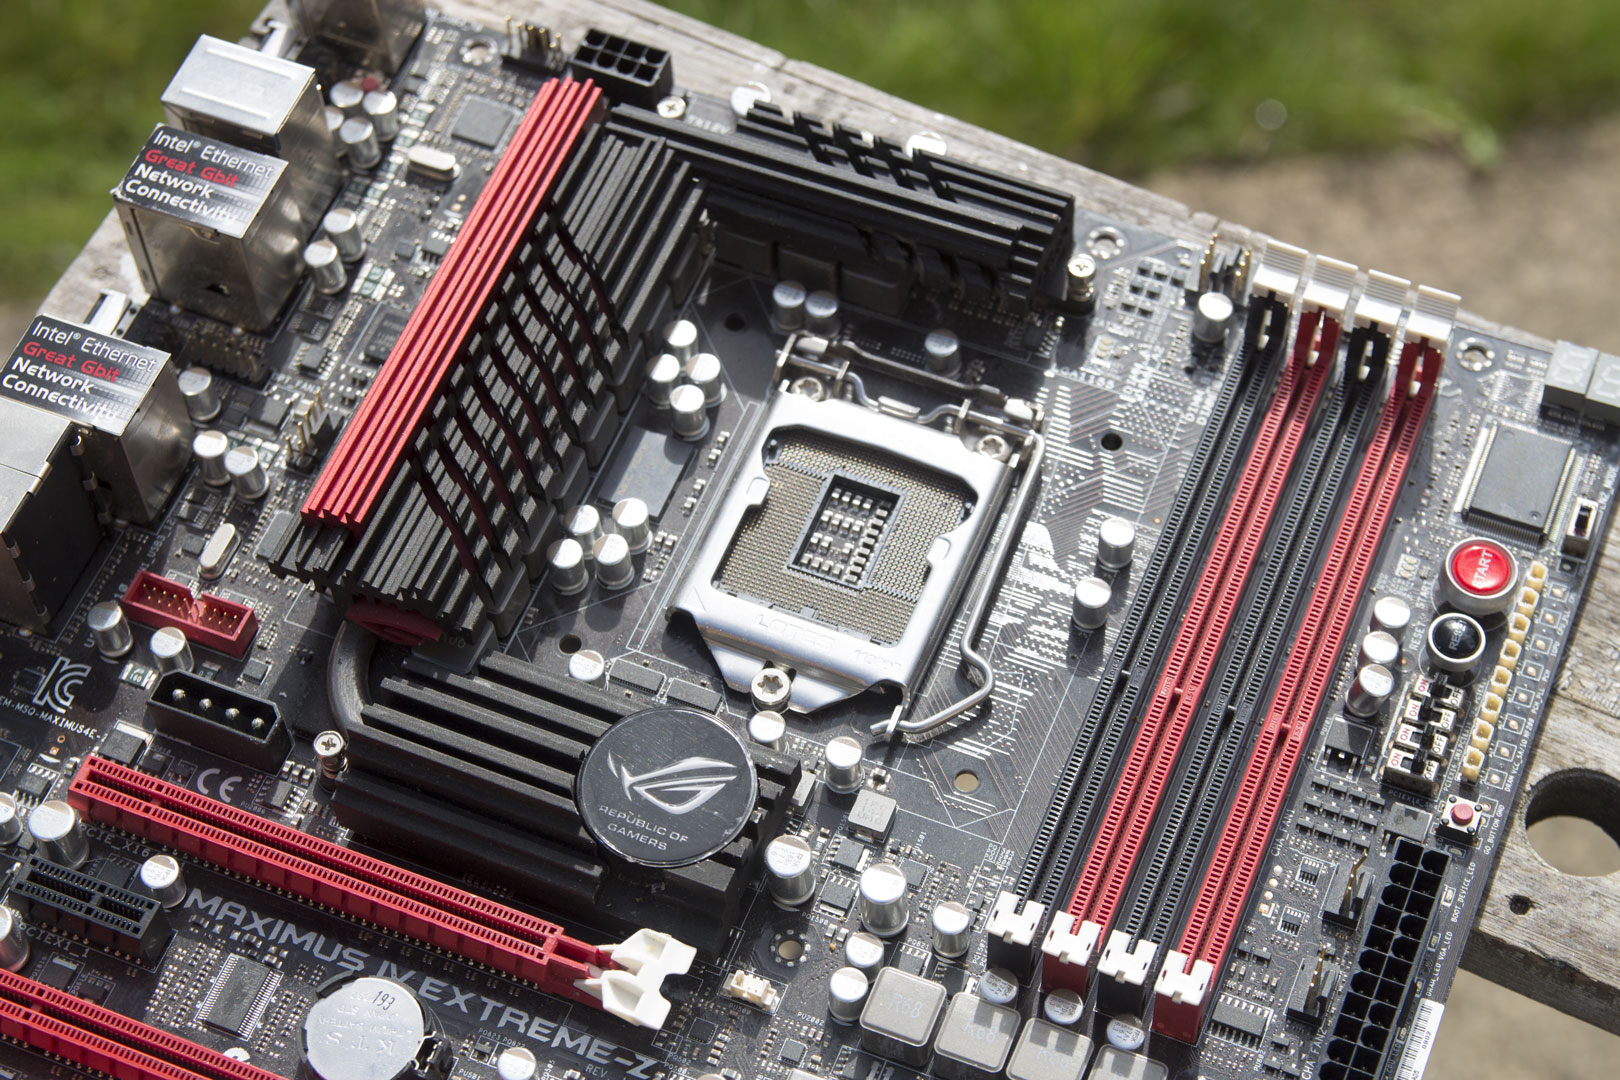
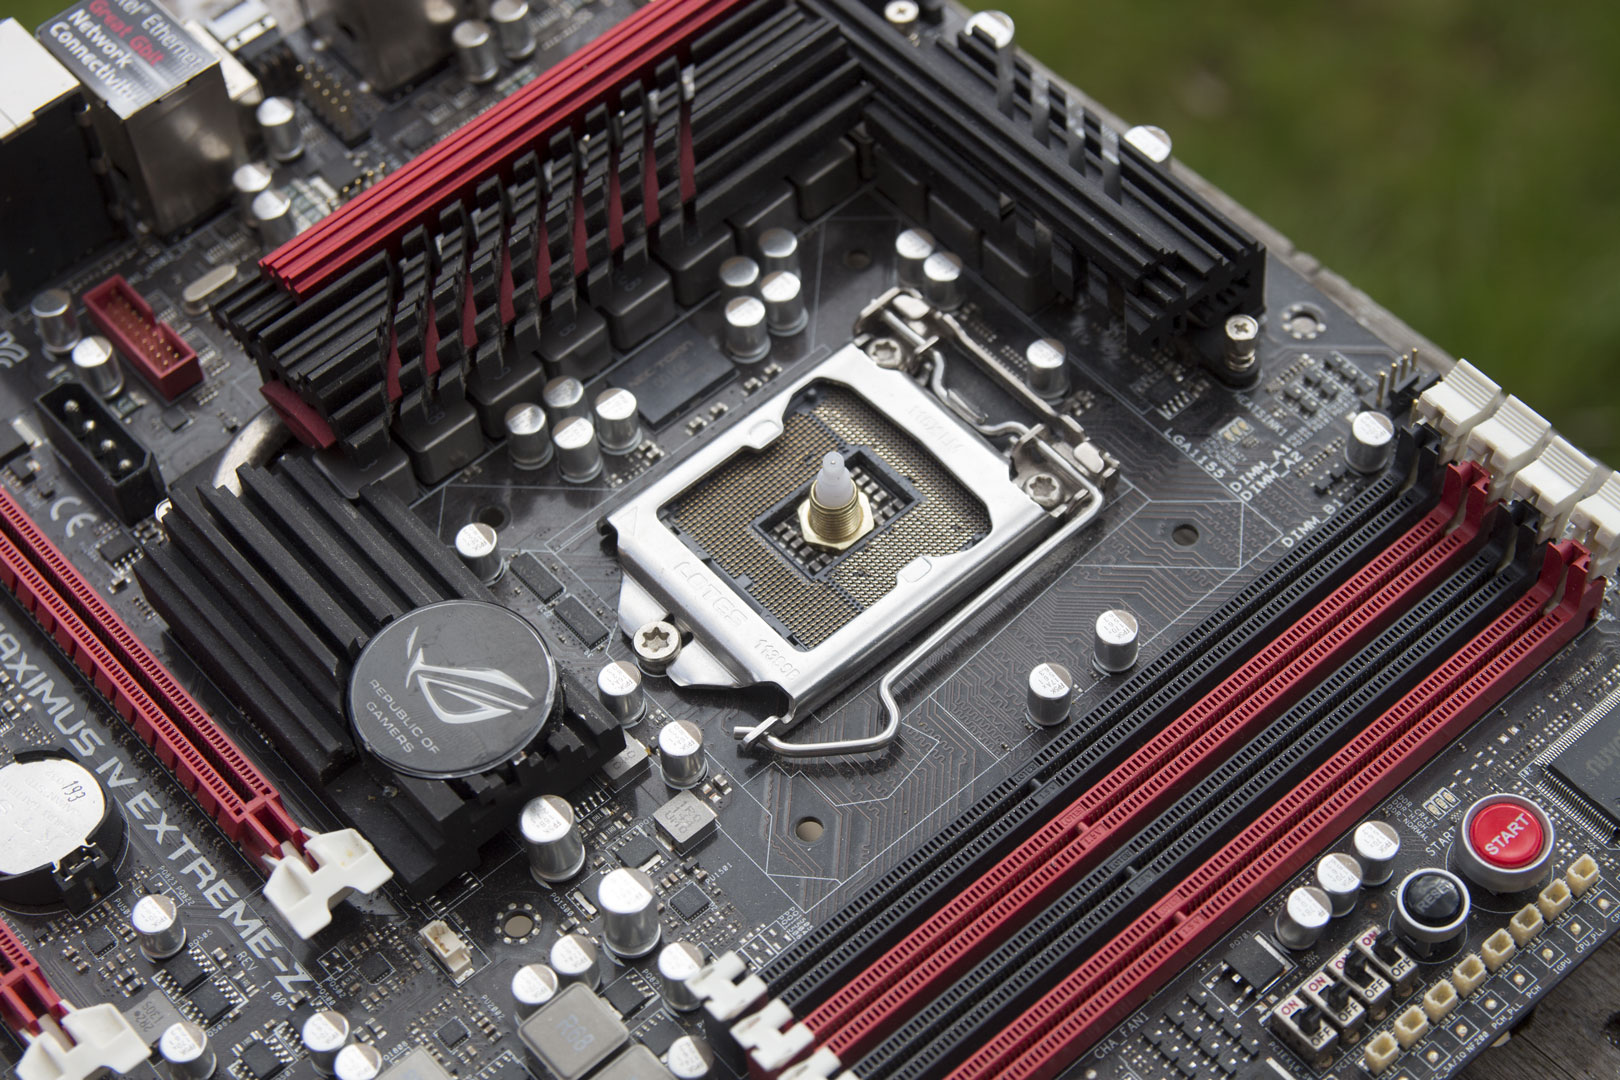
The first job was to drill a hole through the motherboard in the centre of the socket and then pop the mechanism through and fix it using the nut provided.
 Then add the clock hands. I had to cut my clock hands down, as the heatsinks on the motherboard were in the way. I knew this was going to be an issue, which is why I did this test fit first.
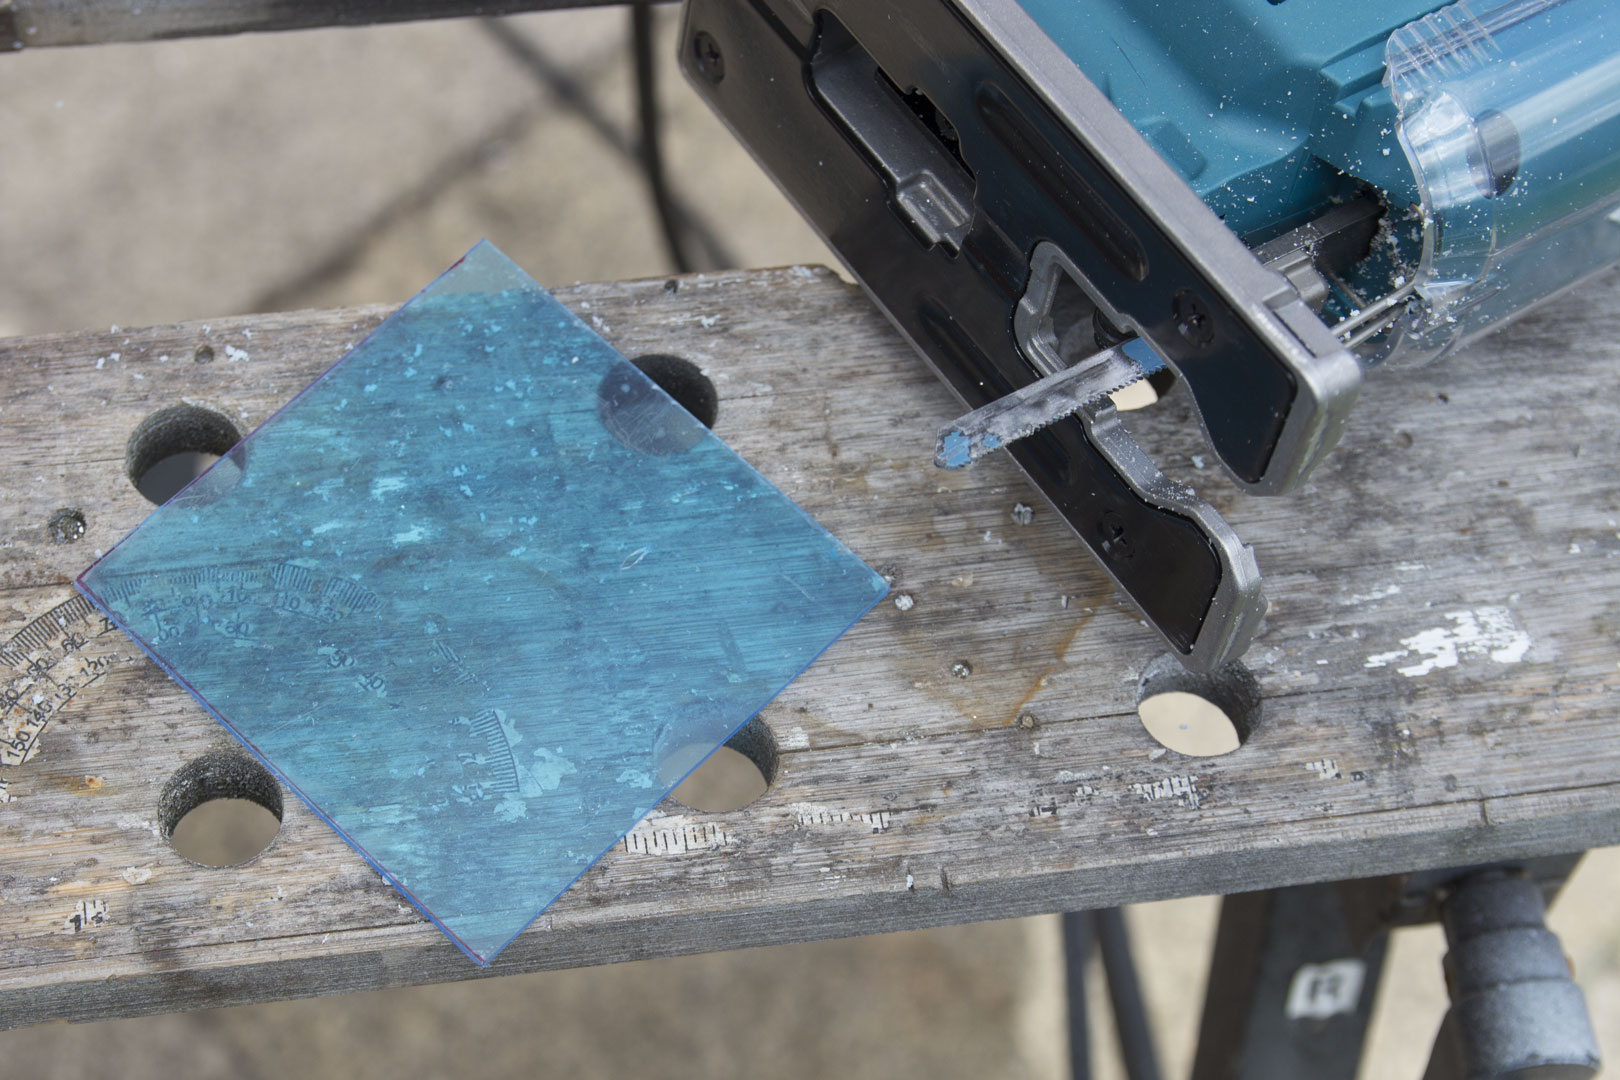 Once I had done the test fit, I cut a square of acrylic out. This is 95mm x 95mm and should fit nicely over the socket.
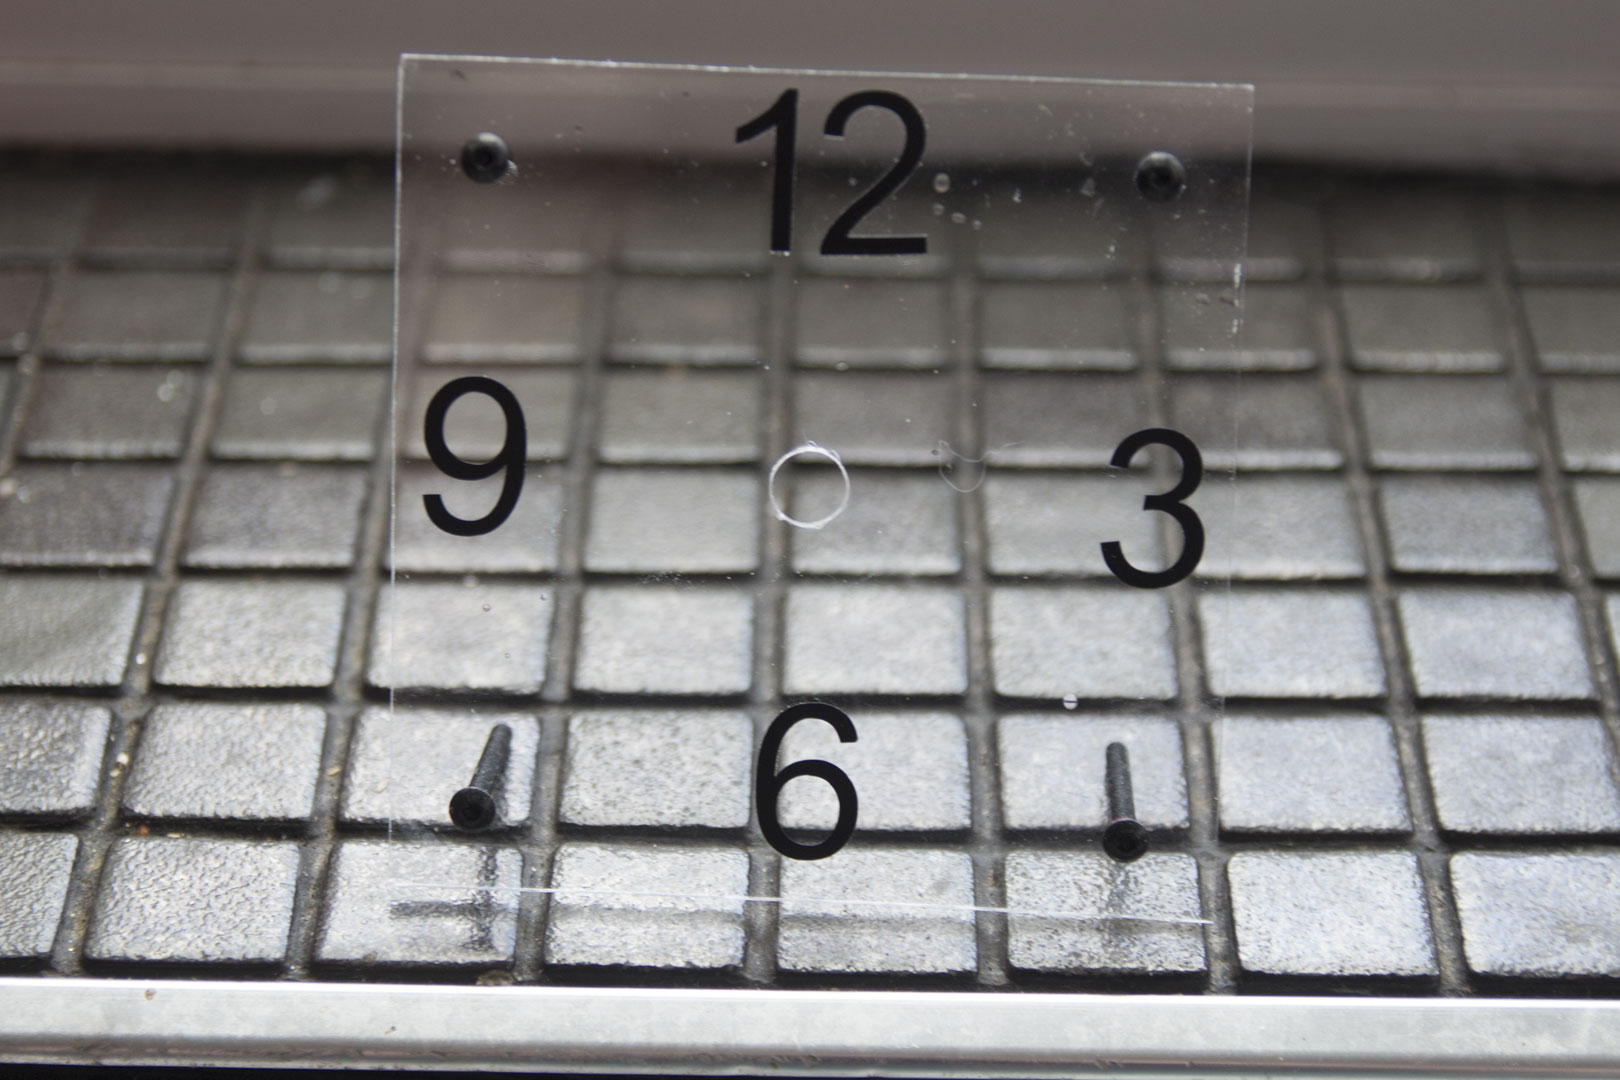
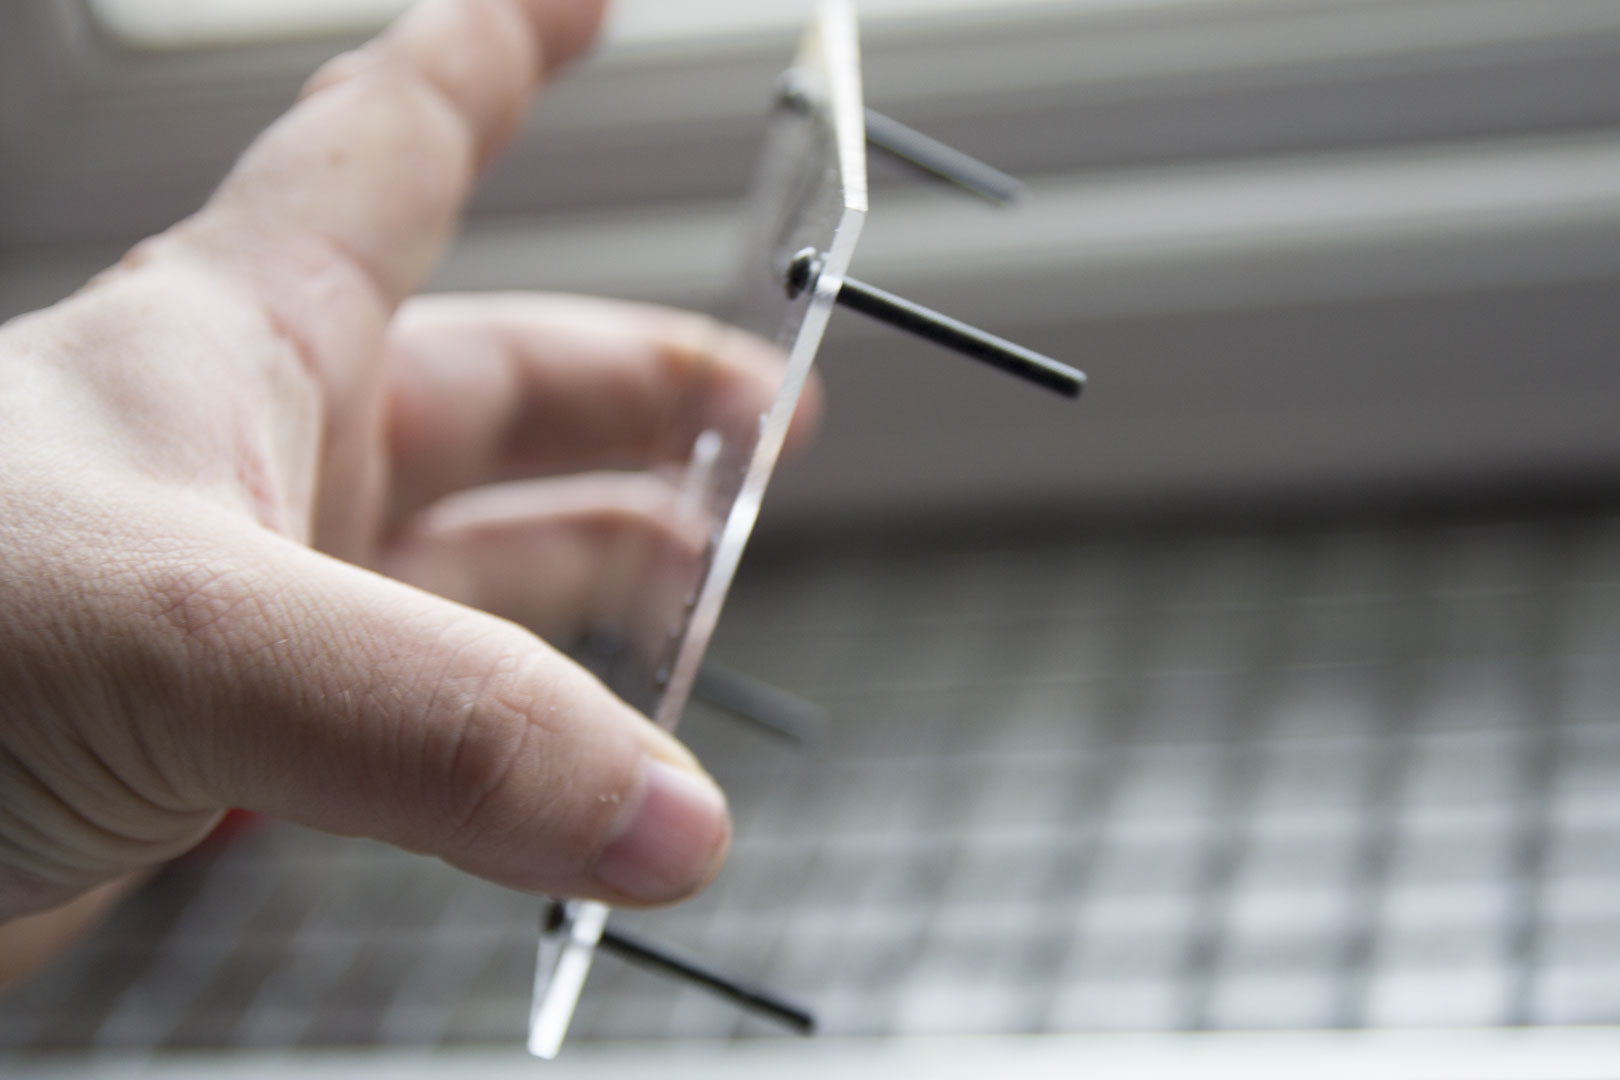
I drilled four holes around the outside of the acrylic and then one in the centre. The centre hole is for the mechanism, and the four outer holes are for attaching the acrylic to the motherboard. I also knocked up some numbers using my vinyl plotter. I will be changing these to another colour in the future to matte red, but unfortunately, I didn't have any to hand. The screws need to be long enough to go through the acrylic and motherboard, so you may need some spacers or washers too. Use some nuts on the back of the motherboard to attach the acrylic to the board and then assemble the clock like before.
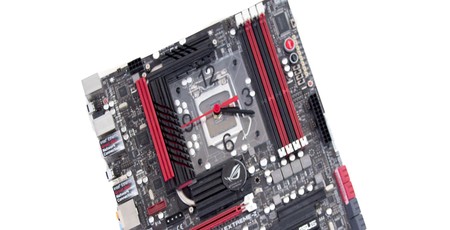
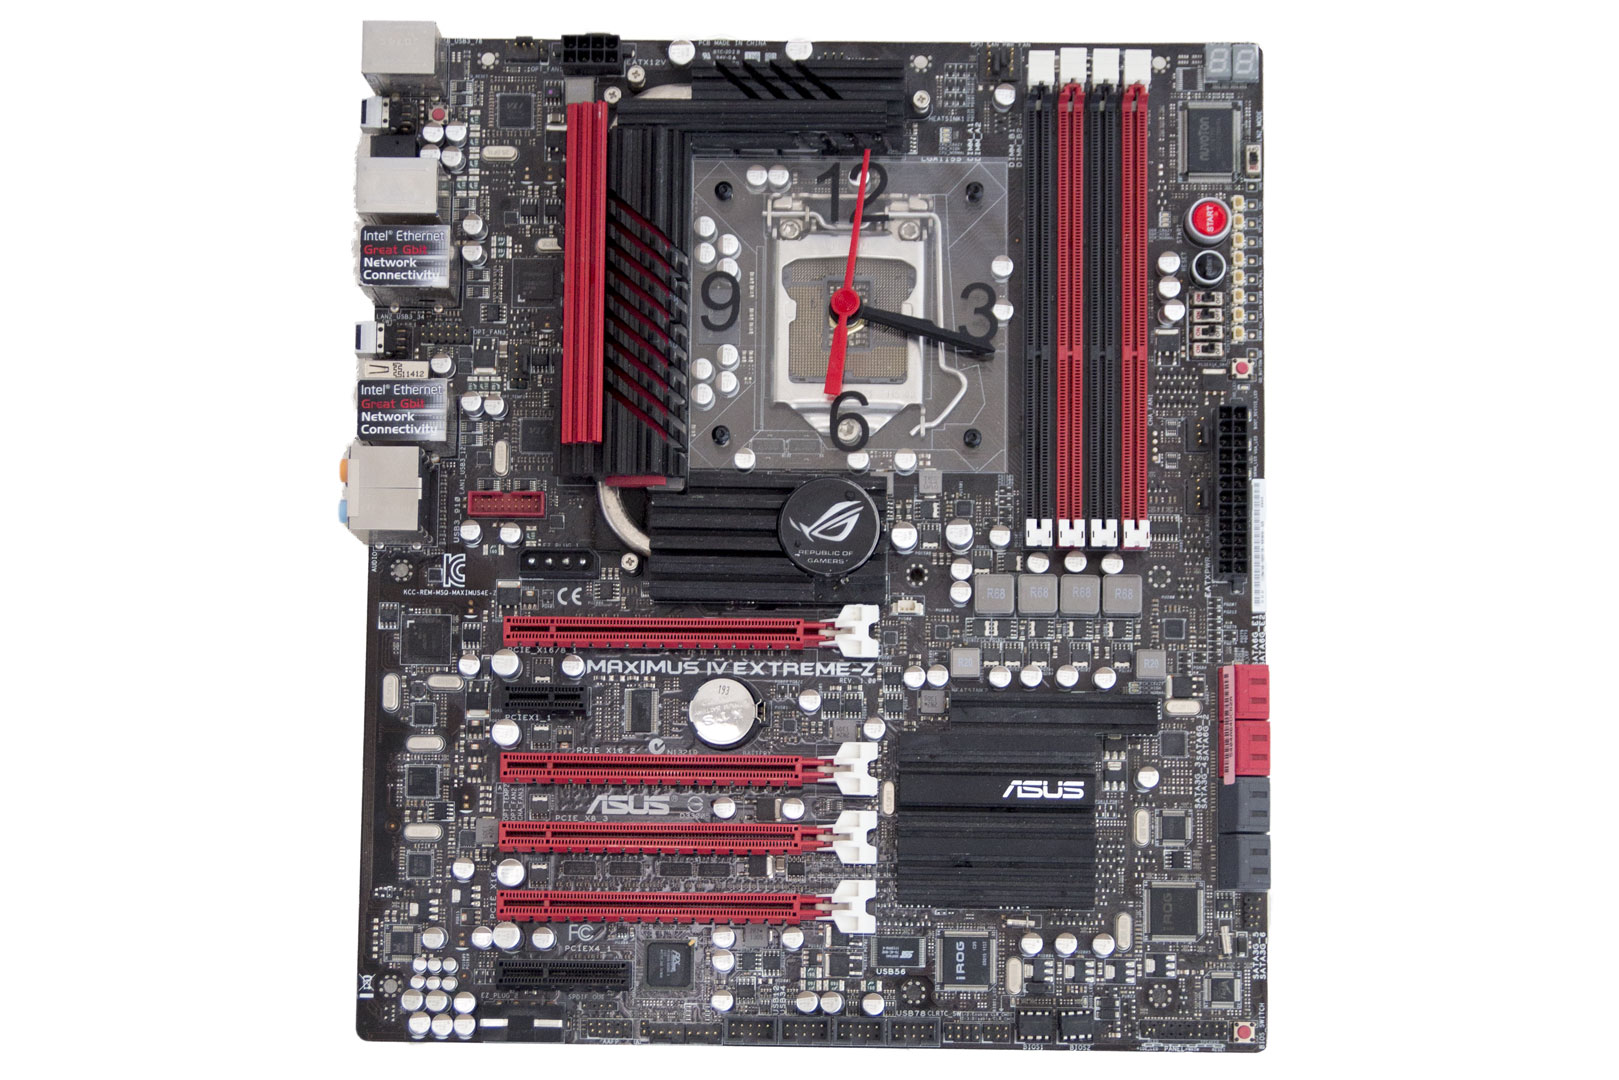
Once it's finished, it will look something like this. The acrylic looks far more pronounced than it actually is, which is due to the camera angle and the lighting. The acrylic is far less noticeable really, but if I take a picture of it so the acrylic is true to the eye, the numbers are impossible to see - one of the reasons I need to change their colour.
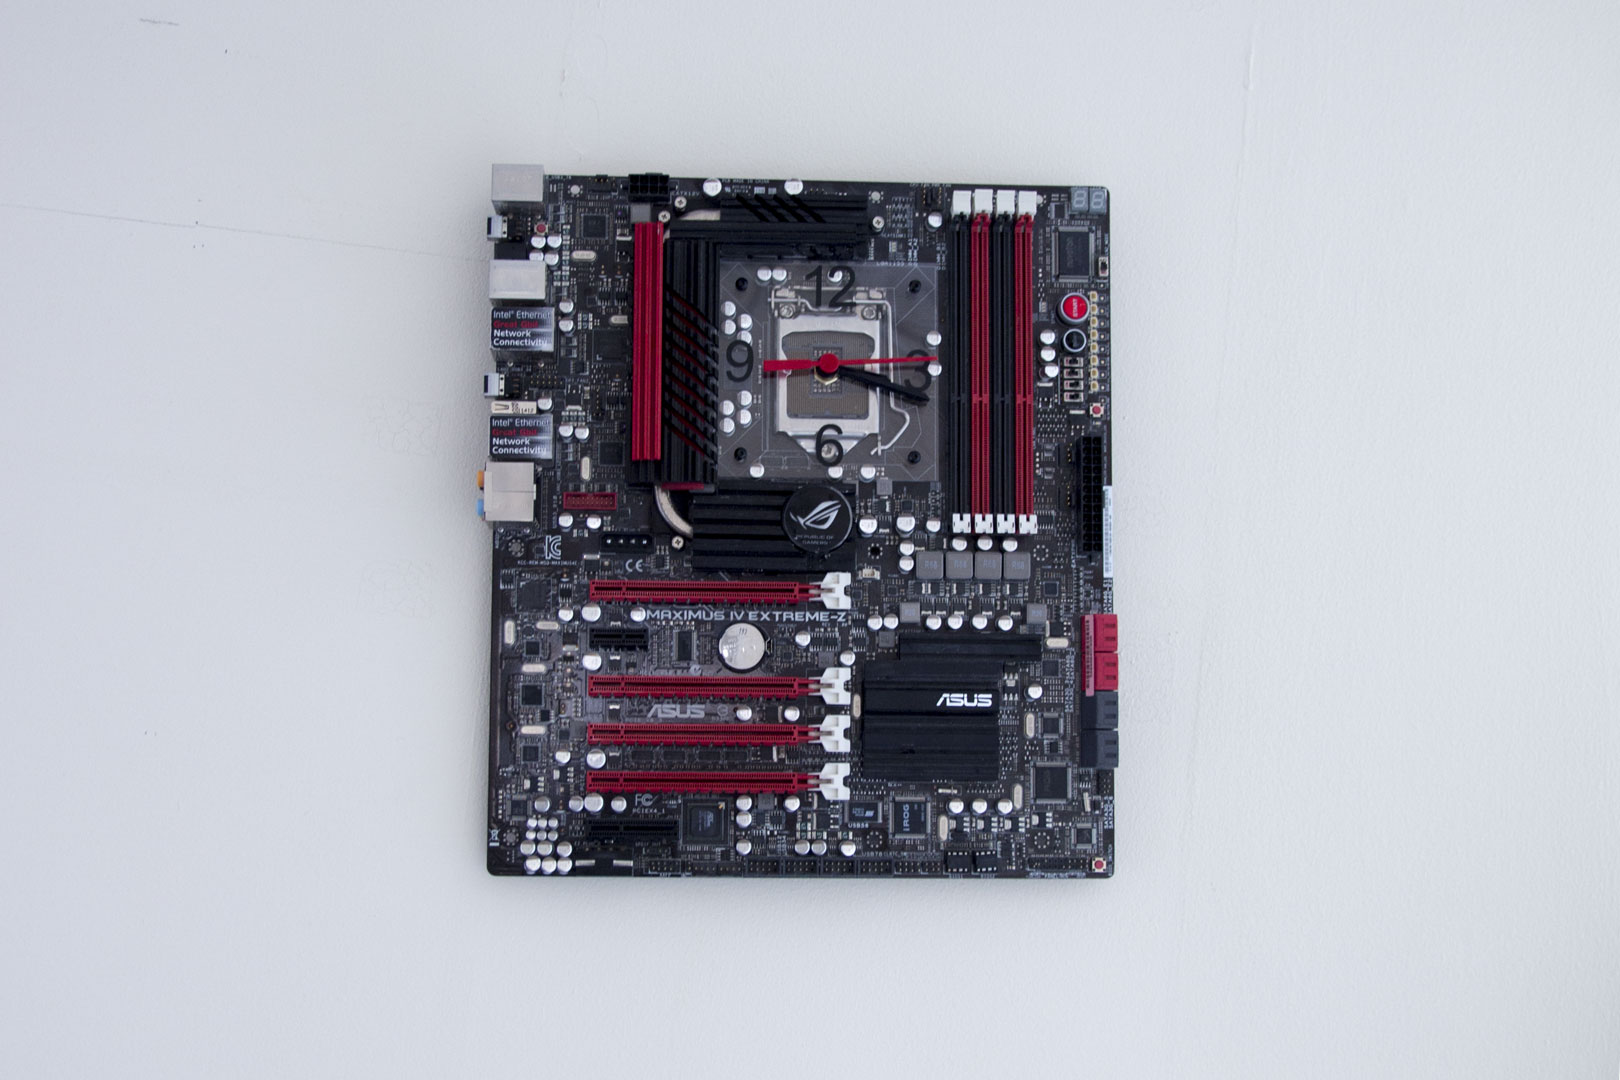
I popped a screw into the wall and hung up the motherboard; I think it looks great! Having seen that picture, I think we need to get the walls cleaned; no doubt that will be my next job.
Well, that is it. How easy is that? Mods don't have to be hard, and they don't have to be complicated. Little mods like this often make really good talking points, and this one is actually useful as well. I really like making little things like this but often don't get chance. This one is super quick and easy, though, so I thought I would give it a go.
If you used hardware to make something like this, show us! Also, do you think these little silly mods are fun? If so, let us know! We will try to think of others.


MSI MPG Velox 100R Chassis Review
October 14 2021 | 15:04


Want to comment? Please log in.