Modding as whole is quite an expansive field, but there's a reason why so many identify with their trusty dremels: the need to cut things. Whether it's cutting into an existing chassis or fabricating a new part from sheet material, templates can make this task much more efficient. I often find myself needing or wanting to make parts from scratch, so I thought I would shed some light on a method I like to use that's very much tried and tested.
This won't be a guide to CAD as such, but it will show you how to use commonly available software to produce diagrams that can both increase your accuracy and speed. I find that with a suitable template to work off, my cuts are straighter, holes are more accurately centred, and my work in general is just more consistent.
For this guide I'll be using Autodesk Fusion 360 to generate my template, as it's free to use for individuals and small businesses. It's also a rather powerful CAD package. Of course, it's also completely possible to use any other app of your choice that you have experience with or access to, such as maybe Illustrator and Inkscape. Rather than focusing on the aspect of constructing the sketch itself (as that's fairly program- and mod-specific) I'll be going over the process of taking your sketch and turning it into something you can cut from by hand. This is quite a quick process, so hopefully it will be worth the read if you don't use this method or a similar one already!
Let's Get Started
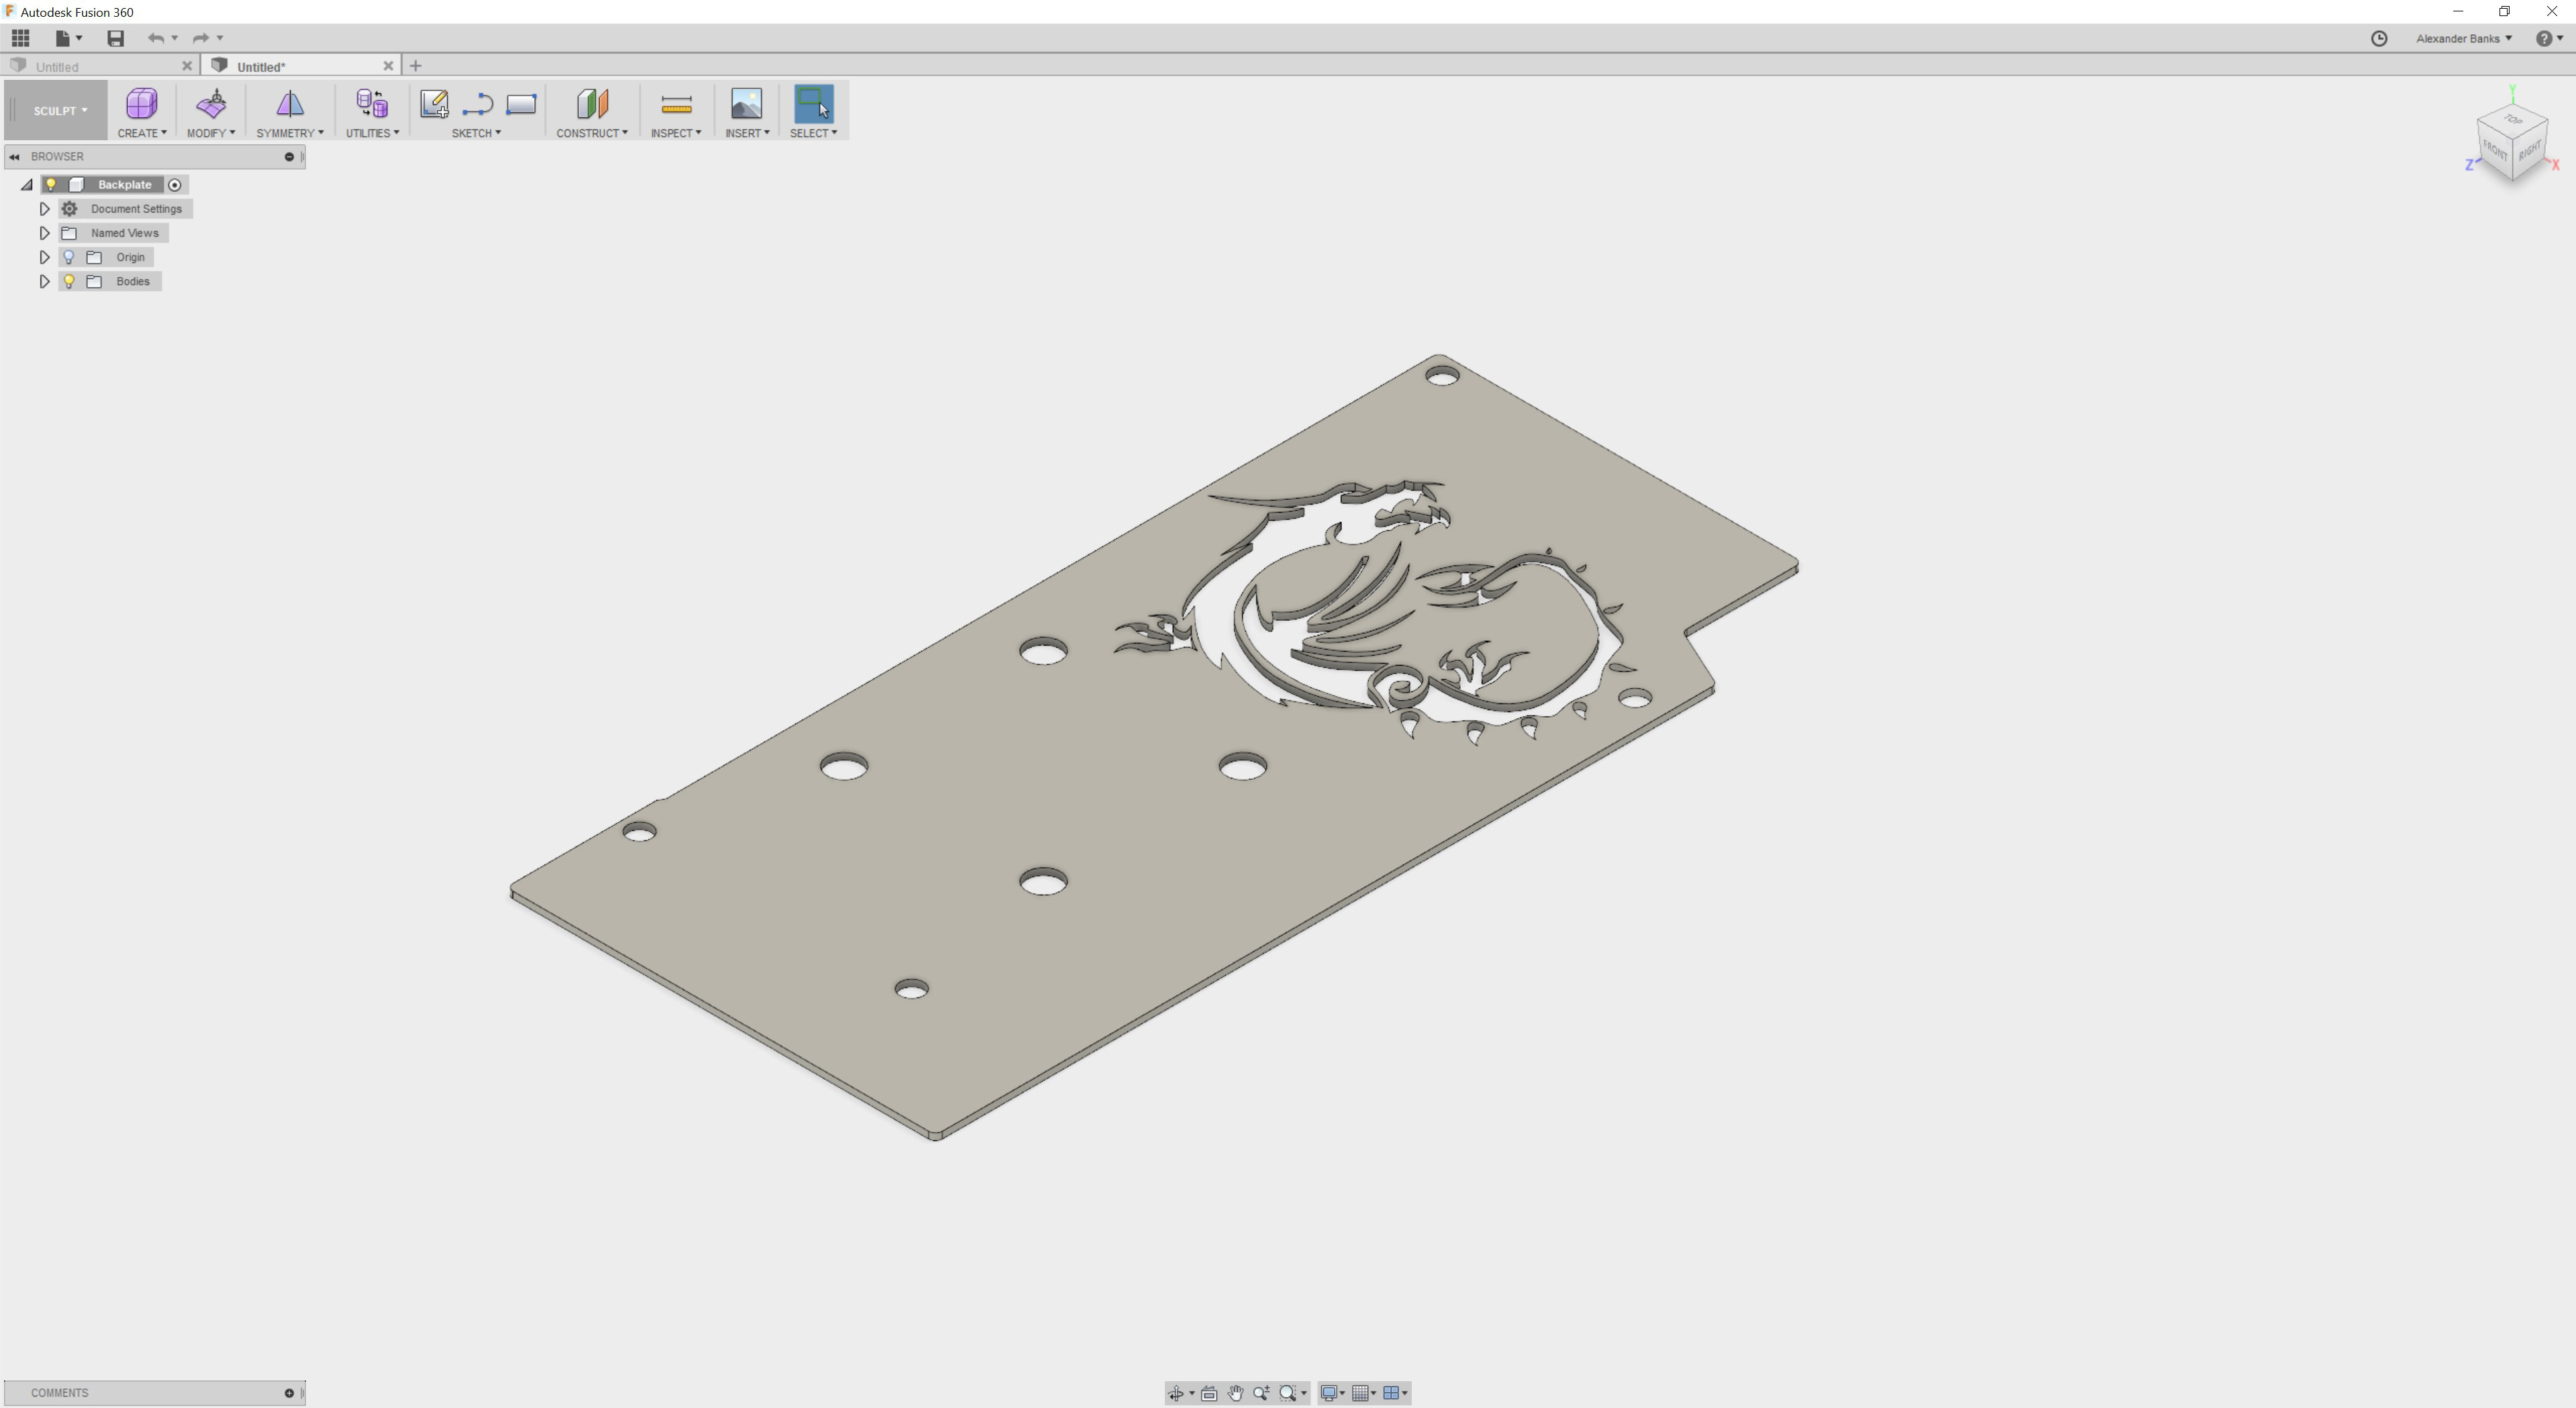
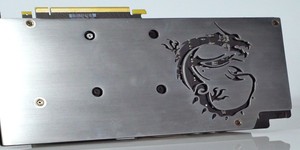
We'll be working from this file that I prepared earlier for making a GPU backplate. It's exactly the sort of thing you may expect to be cutting out either from plastic or metals, so it's a prime candidate for a template. It's best that you're fairly comfortable with a CAD program first. Fusion in particular has a wealth of online tutorials to help newcomers get to grips with it, and designing parts like this is fairly simple and only uses the more basic sketching tools in the app. With Fusion, make sure that the part is 3D first - this is important because we will be making a drawing from it.
Making the Drawing
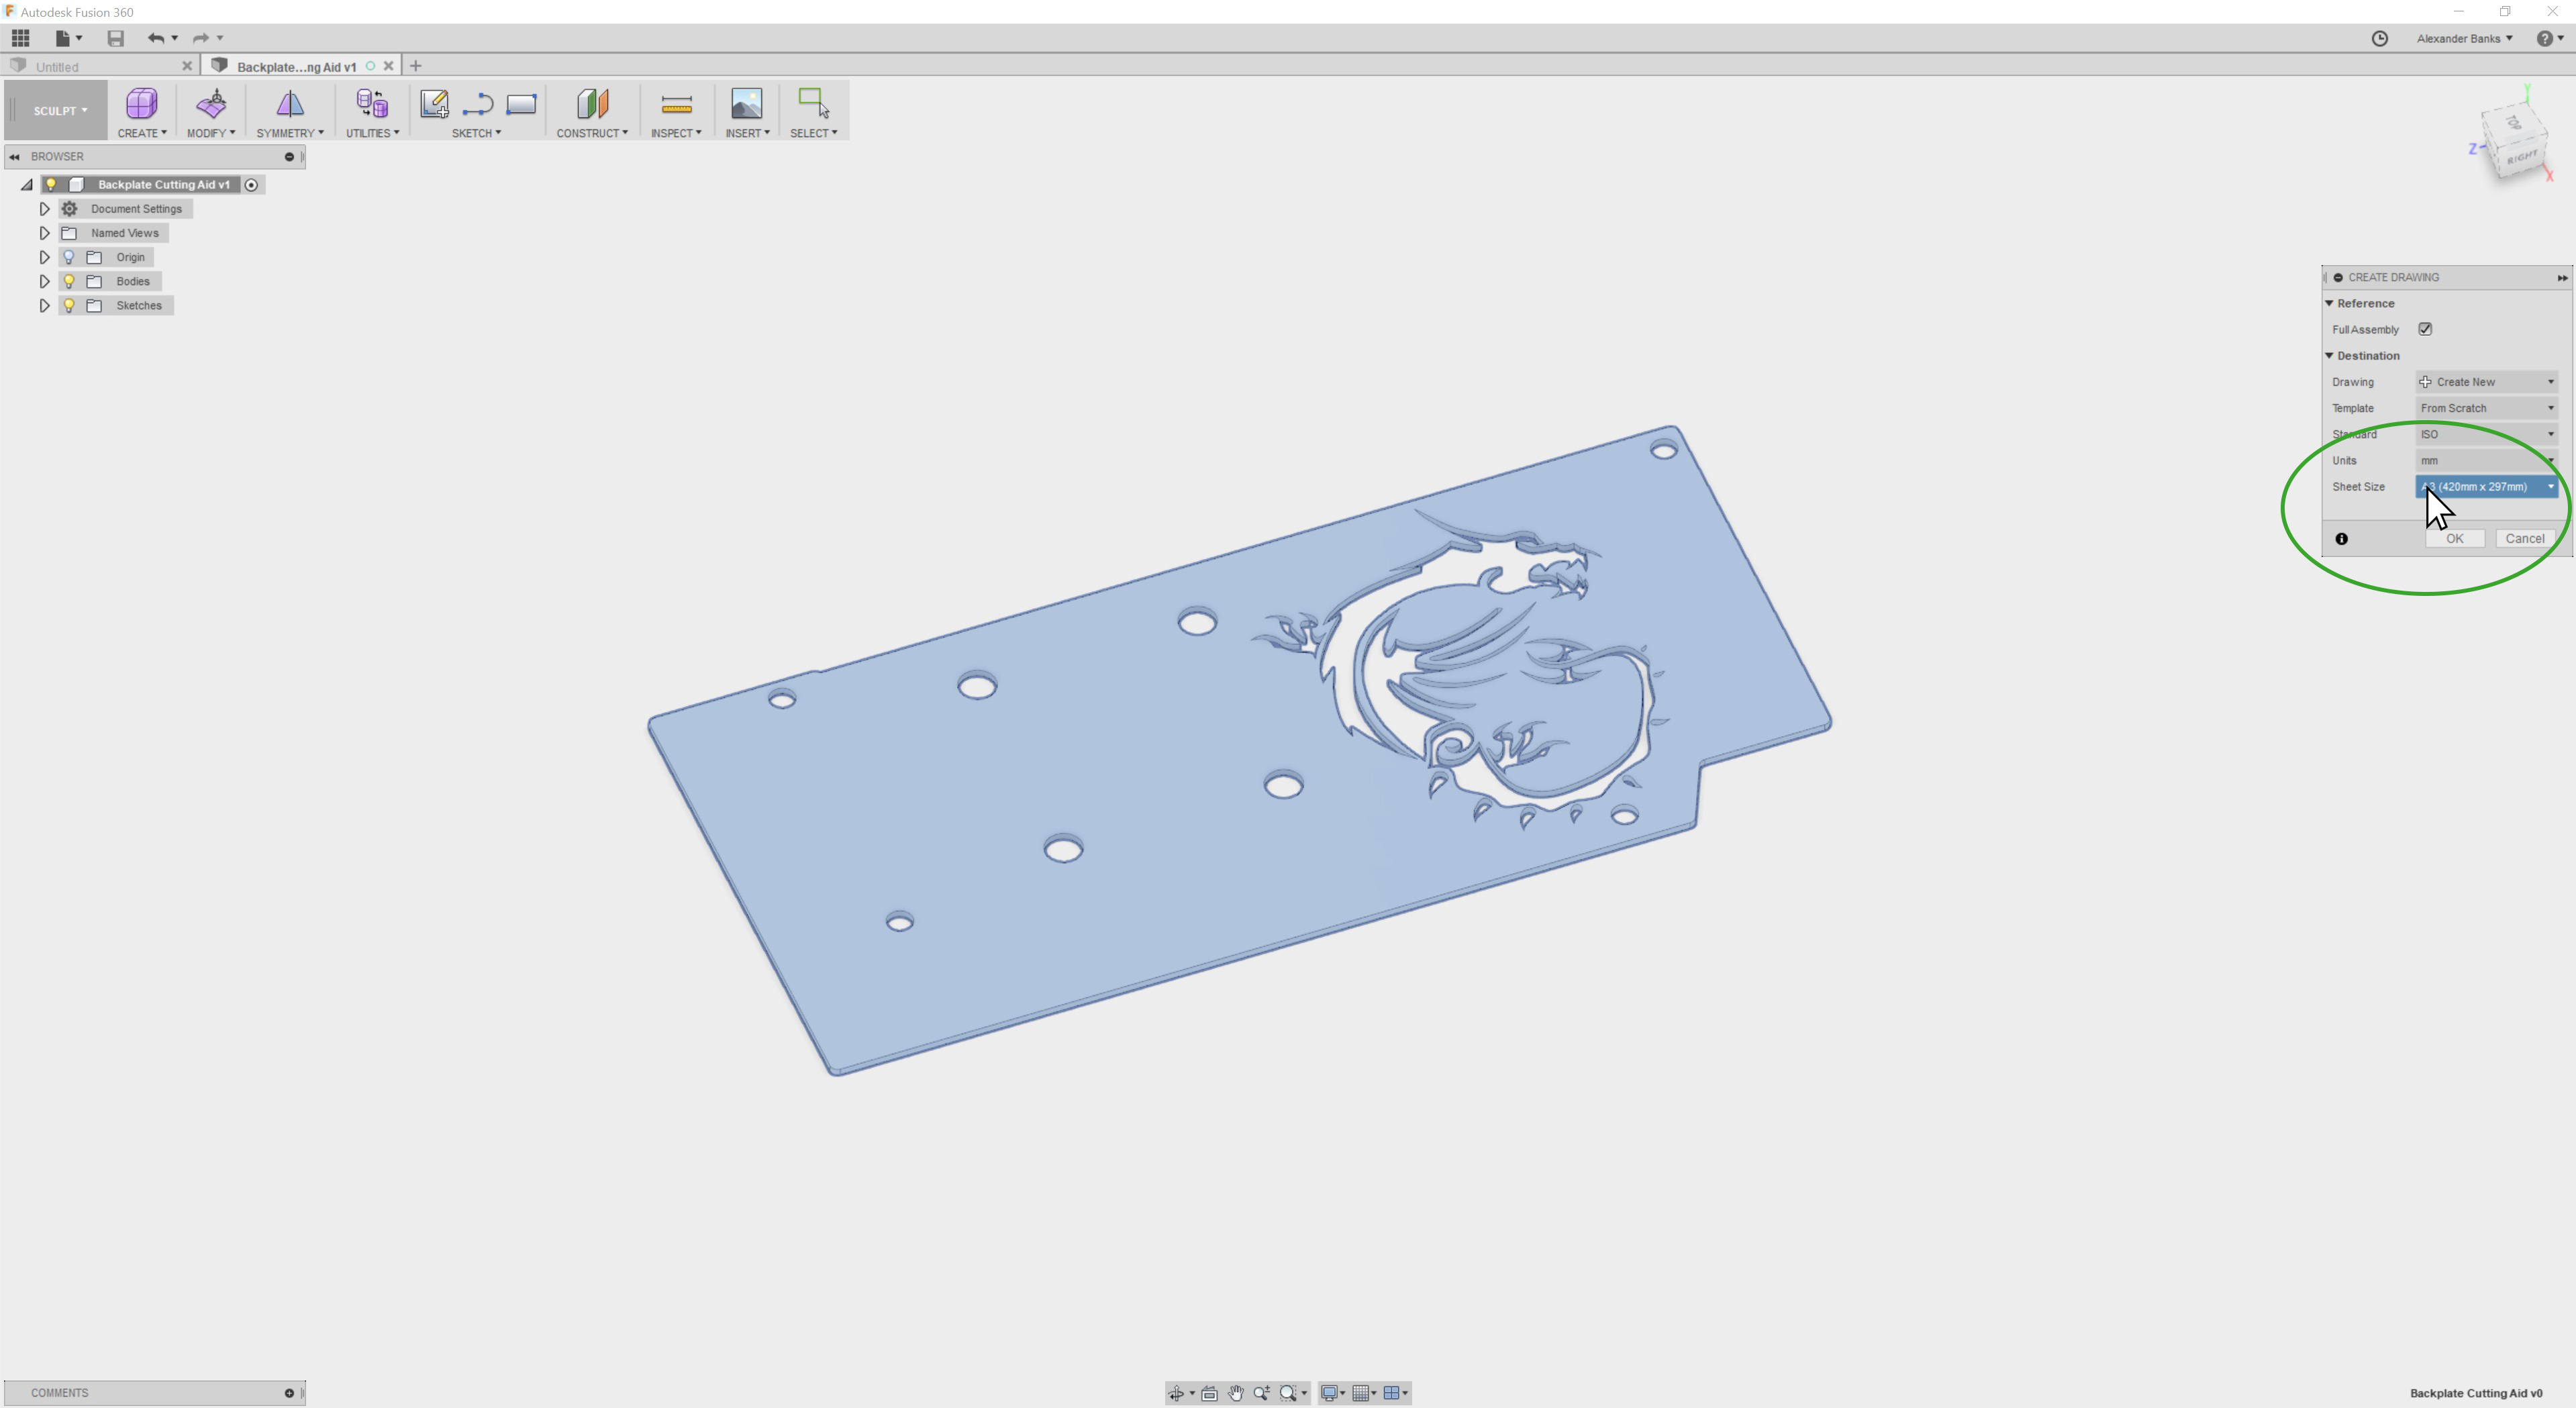
With our 3D part now loaded into (or made in) Fusion, it's time to make a drawing. The drawing will allow us to export in several different formats, one of which is PDF. It will also allow us to choose different views of the model from which to make the template, which could be handy if working on a more 3D object. To make the drawing, head to File >> New Drawing >> From Design. You'll then be presented with some options for the drawing. Choose a page size that fits your design; mine fits into an A4 sheet of paper, so I chose that. I tend to leave the other options stock, but you can change them if you prefer.


Exporting the Drawing
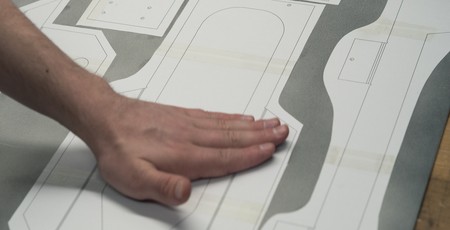
Once you've got the drawing open, it's time to place our object on the page and get it ready for exporting. Initially, there is a very pixelated version of the model on display, but don't worry, as this is just a preview for placement purposes. On the right you'll see a number of important options, namely 'Scale' and 'Orientation'. It's vital that in the Scale box you type that it's 1:1 and not any other scale, else your print out will not be accurate in real world units. Change the Orientation to match the view you want for the object - in my case this was 'TOP' - then click where on the page to place the drawing. I like to remove the existing information template; just click it and hit delete.

Once it's properly placed, it's time to export. We're going to be using the PDF format, although you can use DXF if you plan to cut your template on a plotter or import it into another drawing program. Click on the 'Output' tab and choose 'Output PDF'. In the resultant dialogue box I prefer to click off lineweights, as this will keep the lines light and thin, but if you want stronger ones keep that option ticked and it will scale them for you.


What if the template is larger than your printer can manage?
Aha! We will be looking at that one in just a moment. Since not everybody has access to a large format printer, the easiest way is to poster print on smaller sheets. To do this, when choosing the page size just choose one large enough to fit your project. I'll do one with A3 sizing to demonstrate.
RELATED ARTICLES


MSI MPG Velox 100R Chassis Review
October 14 2021 | 15:04


Want to comment? Please log in.