
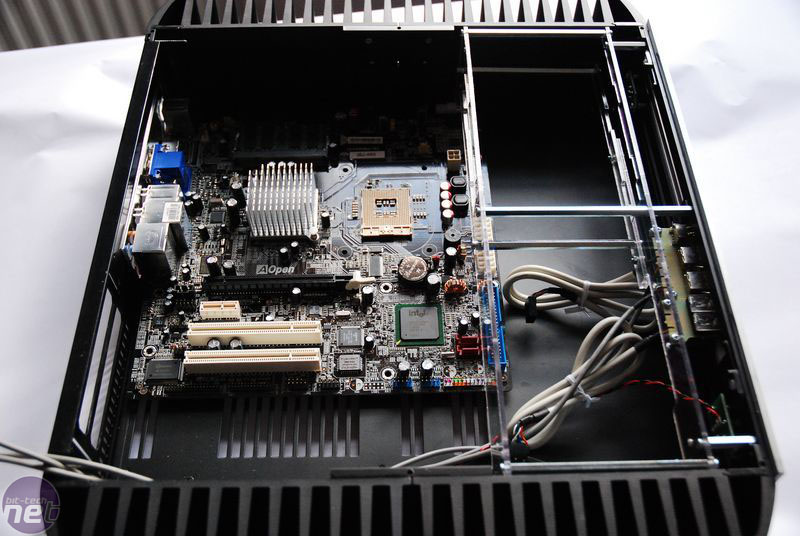
The Case
The HFX Mini will accommodate any ATX motherboard, although it was designed with particularly mini-ATX HTPC motherboards in mind, and in principle will manage to cool any CPU with a TDP of up to around 70W (and a graphics card up to the same). This is not going to suit a games rig: anyone dreaming of quad-core processing or anything more beefy than an Nvidia GeForce 8600 GT walk away now. The case simply won't be able to displace the heat.First impressions are of a well-packed, solidly heavy aluminium case. The biggest contribution to its weight comes in the shape of its two massive heatsinks on the side. The fins of the heatsinks are ridged for extra
The silver top and front panel are machined and brushed 3mm aluminium, while the main part of the case is 2mm powdercoated steel. It has to be steel -- aluminium does not have the structural integrity to keep the case from collapsing under the weight of its heatsinks and because of this, the HFX is a heavy case, weighing about 6kg. There are no appreciable sharp edges and the lot feels well-finished.

Click to enlarge.
With the case comes a plastic bag with a bunch of acrylic parts that will form the DVD/HDD cradle, a lot of metal screws and rods (already test-fitted in the picture above) and a heat pipe mounting plate. There is also a manual that does a reasonable job in describing how to put it all together, except that it is not at all clear what screws are used for what -- and there are several different types. However a bit of educated guessing generally helps to work it all out.
The manual actually refers mostly to the later acrylic-topped versions of the HFX Mini, but internally, construction of the case is pretty much identical so that does not matter. What does matter is that in its description of how to install the PSU components, it hopelessly gets the different versions of itself confused (more on that later).
This is a particular bug-bear about the HFX kit throughout -- not all components come with complete (or clear) installation instructions and particularly with the different PSUs and the IR remote, things get rather vague. Moreover it is not at all clear which of the many different screws included in the package need to be used where, so you're left guessing and experimenting a bit. At times, quite a bit. This can lead to problems: some people have damaged blocks by using slightly the wrong length of screw, for instance.
WOW! vs. WTF?
Aside from poorThis kit is presented as easy enough to build by anyone who has at least once put a standard PC together, but this is, I think, taking slight liberties with the truth. Moderate modding skill is definitely required for the case to do what you want it to, and my impression from the mCubed Support Forums is that those who lack such l33t modding skillz appear to get stuck on some of the more tricky aspects of the case.
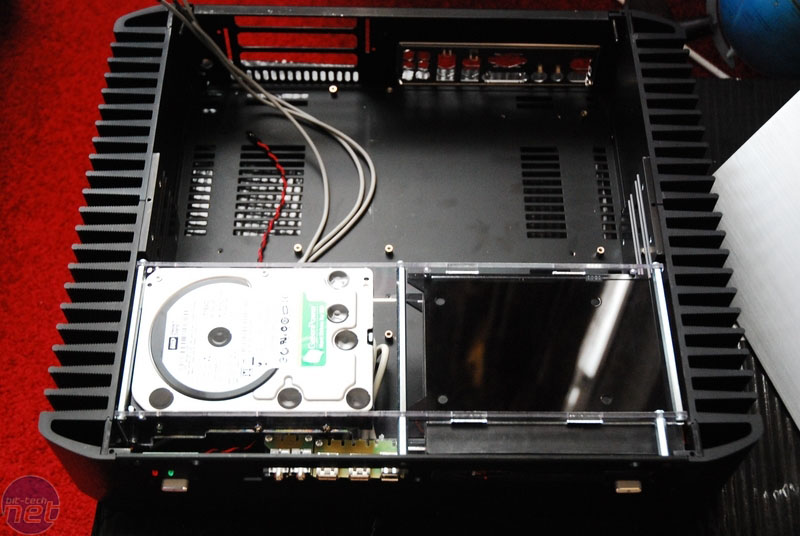
For instance, let's take a look at hard drive mounting. There are two options for this - one is a separate HDD sound-dampening box (sold conveniently for £29) which mounts in the front-bottom of the case, below the DVD drive. When using something as quiet as a WD10EACS, this is overkill. So, we look at option two, which is to mount it alongside the DVD. But what happens when trying to mount the HDD in that position?

Click to enlarge.
The HDD (depending on model) may interfere with the dome-shaped screw head that secures the acrylic HDD/DVD cradle to the front of the case. The easy solution is to countersink the hole and fit a countersunk M3 screw. Of course, that's a relative term - it's easy for the modder who has the tools, but more likely very frustrating for the relative newbie.
RELATED ARTICLES


MSI MPG Velox 100R Chassis Review
October 14 2021 | 15:04


Want to comment? Please log in.