
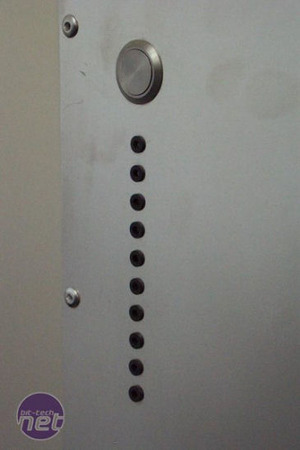
One issue that did cause a lot of headaches was the front panel of the case, where the Power switch and LEDs were to be mounted. After much deliberation I decided that I would use panel mounts for the 3 mm LEDs, of which five were red and five were green. As can be seen on the finished panel below, there is a vandal proof push button to operate all of the systems at once, with the power and HDD activity LEDs in a line below.
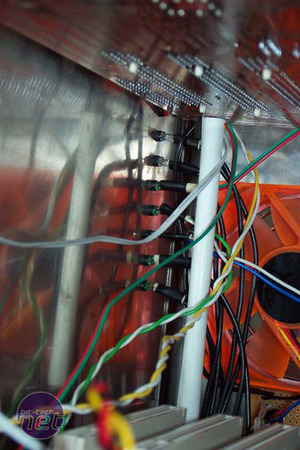
This is how the LEDs ended up fitted into their LED panel mounts. The breadboard seen in the bottom right connects the power switch to each of the motherboards. By using a piece of breadboard soldering mess was reduced significantly.
What follows are the designs for the other panels that were drawn up by me as final designs
Back of the case where the PSUs are mounted.
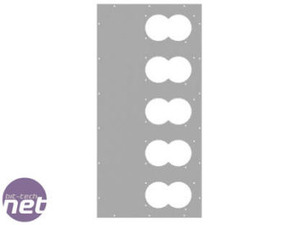
Left side panel, where the five fans will be attached, along with access spaces for the systems.
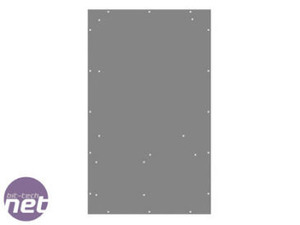
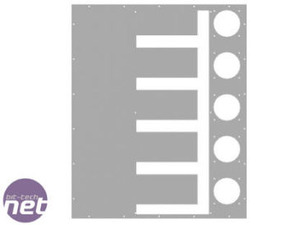
The base and top of the case with all of the relevant holes for the motherboard / hard drive rack / PSU mounts.
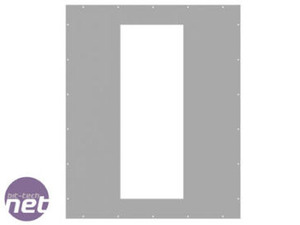
This is the right side panel with window for inside viewing - this panel will not be permanently attached to the case to allow for easy maintenance.
With the basic case design finalised a decision had to be made on how the panel work was to be cut and from what material. My considered options were:
1. To be made out of 2 mm aluminium, steel or stainless steel.
2. To be cut by hand 100%.
3. To be cut to shape professionally, but with detail work to be done by hand.
4. To be cut using lasers.
The choices I decided upon were to build it from 2 mm aluminium (so that it would be light and easy to cut if alterations were needed) and that I would have it cut and detailed using a laser facility, for the best accuracy.
I set about e-mailing drawings to various companies in my local area and the quotes that I received ranged from £180 to £115. After various e-mails to these companies I decided on a company called “Laser Profiles”, who could do the work for a reasonable price to an accuracy of 0.3 mm. I was told the work would be ready within a week.
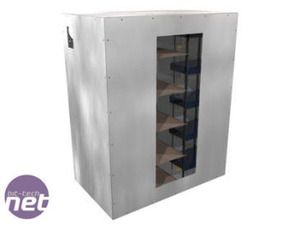
Here is a 3D representation of the finished case with the final designs sent off to be cut:
This is how the LEDs ended up fitted into their LED panel mounts. The breadboard seen in the bottom right connects the power switch to each of the motherboards. By using a piece of breadboard soldering mess was reduced significantly.
What follows are the designs for the other panels that were drawn up by me as final designs
Back of the case where the PSUs are mounted.
Left side panel, where the five fans will be attached, along with access spaces for the systems.
The base and top of the case with all of the relevant holes for the motherboard / hard drive rack / PSU mounts.
This is the right side panel with window for inside viewing - this panel will not be permanently attached to the case to allow for easy maintenance.
With the basic case design finalised a decision had to be made on how the panel work was to be cut and from what material. My considered options were:
1. To be made out of 2 mm aluminium, steel or stainless steel.
2. To be cut by hand 100%.
3. To be cut to shape professionally, but with detail work to be done by hand.
4. To be cut using lasers.
The choices I decided upon were to build it from 2 mm aluminium (so that it would be light and easy to cut if alterations were needed) and that I would have it cut and detailed using a laser facility, for the best accuracy.
I set about e-mailing drawings to various companies in my local area and the quotes that I received ranged from £180 to £115. After various e-mails to these companies I decided on a company called “Laser Profiles”, who could do the work for a reasonable price to an accuracy of 0.3 mm. I was told the work would be ready within a week.
Here is a 3D representation of the finished case with the final designs sent off to be cut:


MSI MPG Velox 100R Chassis Review
October 14 2021 | 15:04

Want to comment? Please log in.