The Mineral Oil PC by Andrew Mollman
Original Project Log: HereForeword by Antony Leather
A lot of people are put off of water cooling because of the hassle it usually involves. While those that have done it will probably argue it's easy, it's clearly a lot more complicated, expensive and potentially dangerous (for your hardware) than air cooling. Imagine then, planning not to just have tubes of coolant running around your case, but to completely submerge your hardware!
The thought sends shivers down most people's spines. Even if the coolant is non-conductive (that's probably a good start) there are no cases that are totally air tight, meaning you're looking at building your own case, and that's just for starters. It's no wonder then that PC's featuring full-submersion are very rare.
Andrew Mollman, also known as legoman666 on our forums, certainly had plenty of problems during his project - but all credit to him as he stuck with it and the result is a fascinating project which is one of the most popular threads on our forums. It's over to Andrew for a complete walk-through of how he made his brilliant Mineral Oil PC...
Research and planning
Even before I completed my first custom case in early 2004, I was intrigued by the idea of an oil cooled PC. I had seen a few here and there that looked successful. However, I wasn’t quite ready to attempt such a daunting task myself. My first case was not a scratch build, but rather a wooden shell built around the skeleton of a regular tower. My second case, completed in 2008, was a step in the right direction in that I built it completely from scratch. During 2008, I slowly built up the plan in my mind for my oil cooled computer.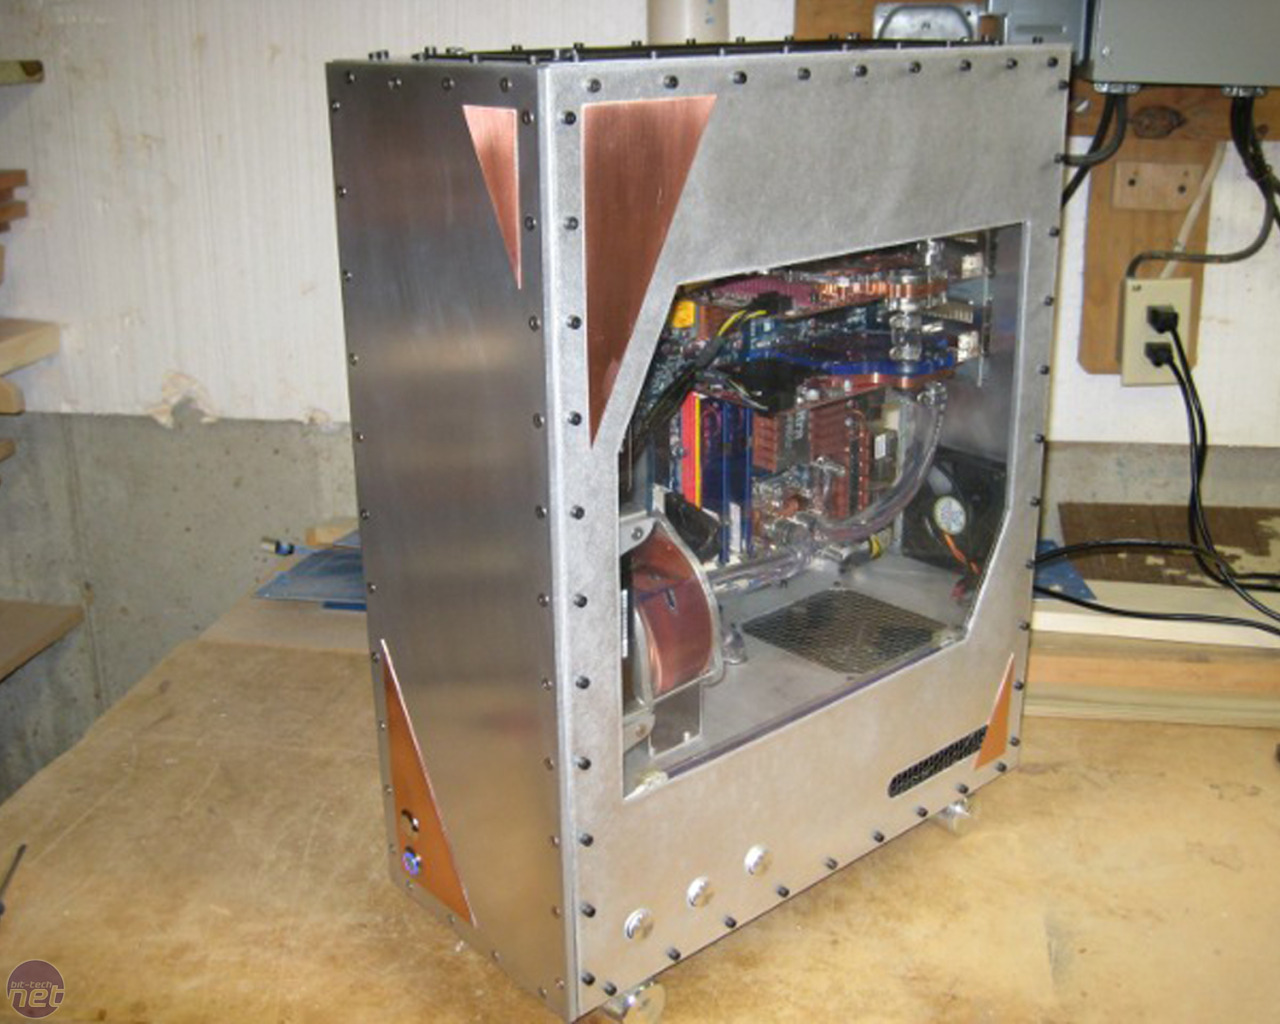
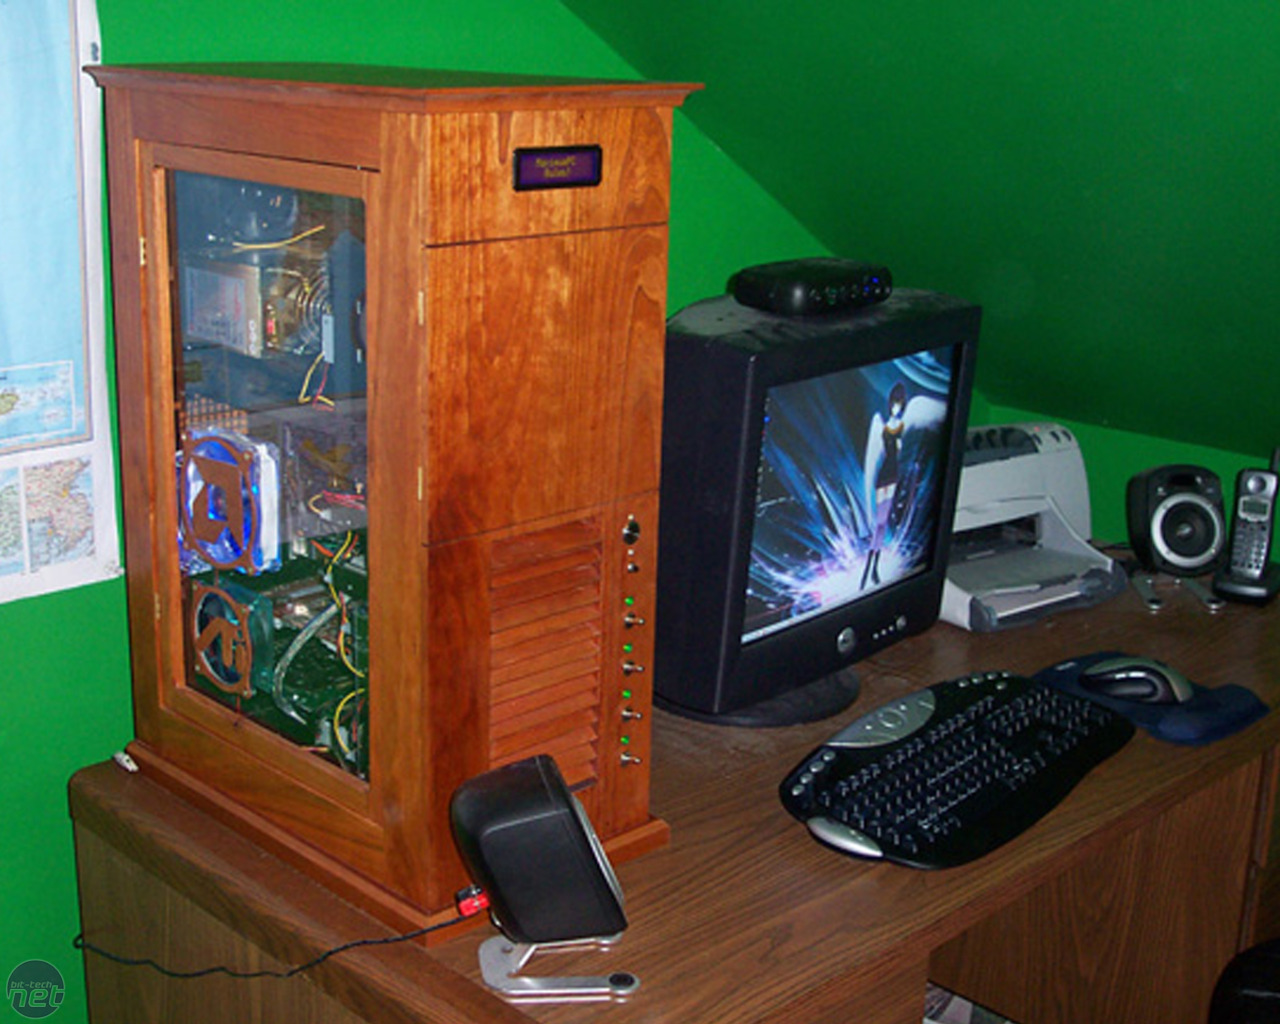
My previous projects
My oil PC began with a lot of research and planning. I used Google SketchUp to design the general layout of the case. My initial sketches called for a three-compartment design. The compartment below the oil tank was to contain two triple 120mm radiators, eight 120mm fans, and two pumps. The middle compartment, the tank, made of 1/4in acrylic, was to house the motherboard, a peltier-cooled CPU, two power supplies, the video cards and everything else except the hard drives.
After weeks of refining the design, one of the pumps, one of the power supplies, the peltier cooling and two of the 120mm fans were scrapped. To minimize the amount of potential leak points, I decided to rotate the motherboard so that the PCI expansion slots faced upwards. The upper compartment is nothing more than a house for the cables coming out of the top of the PC and a house for the hard drives.
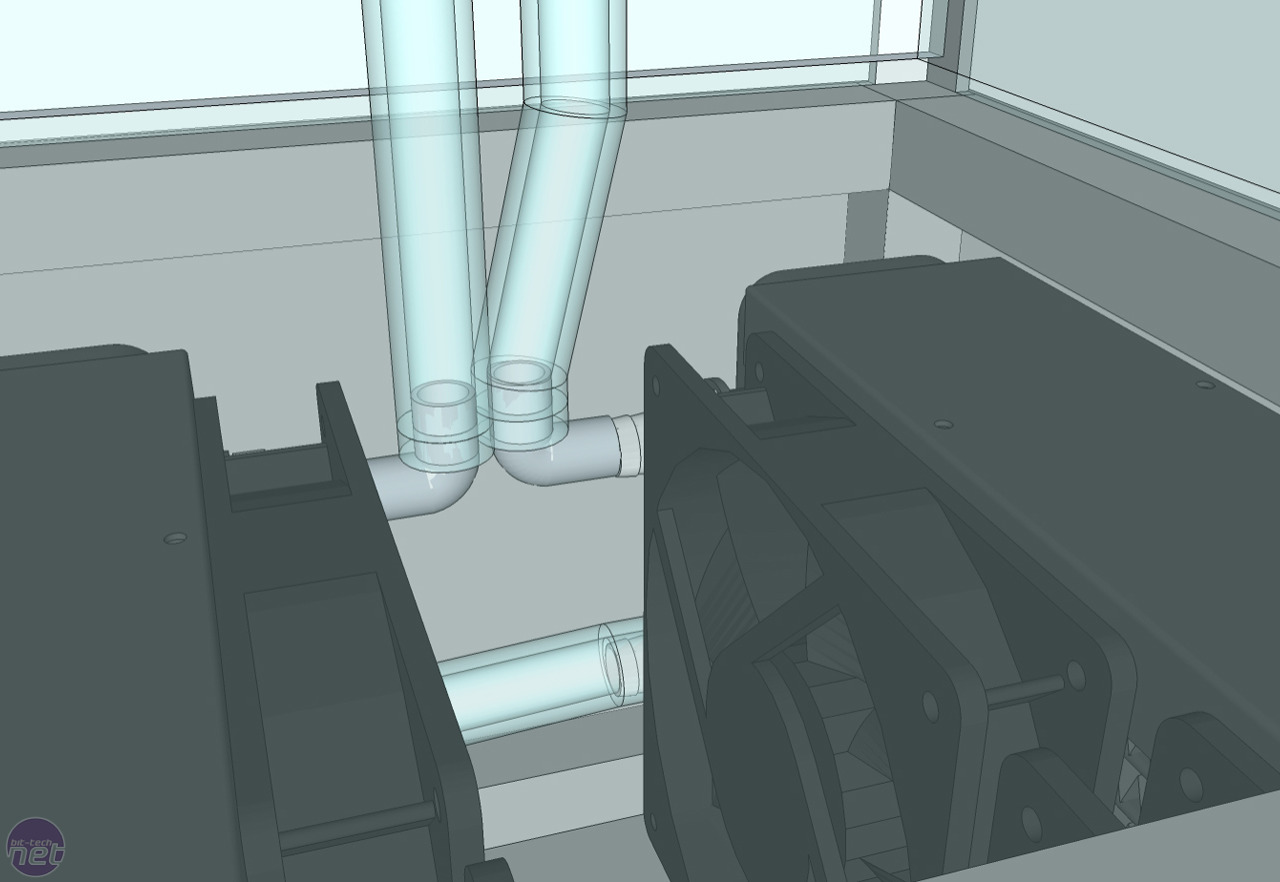
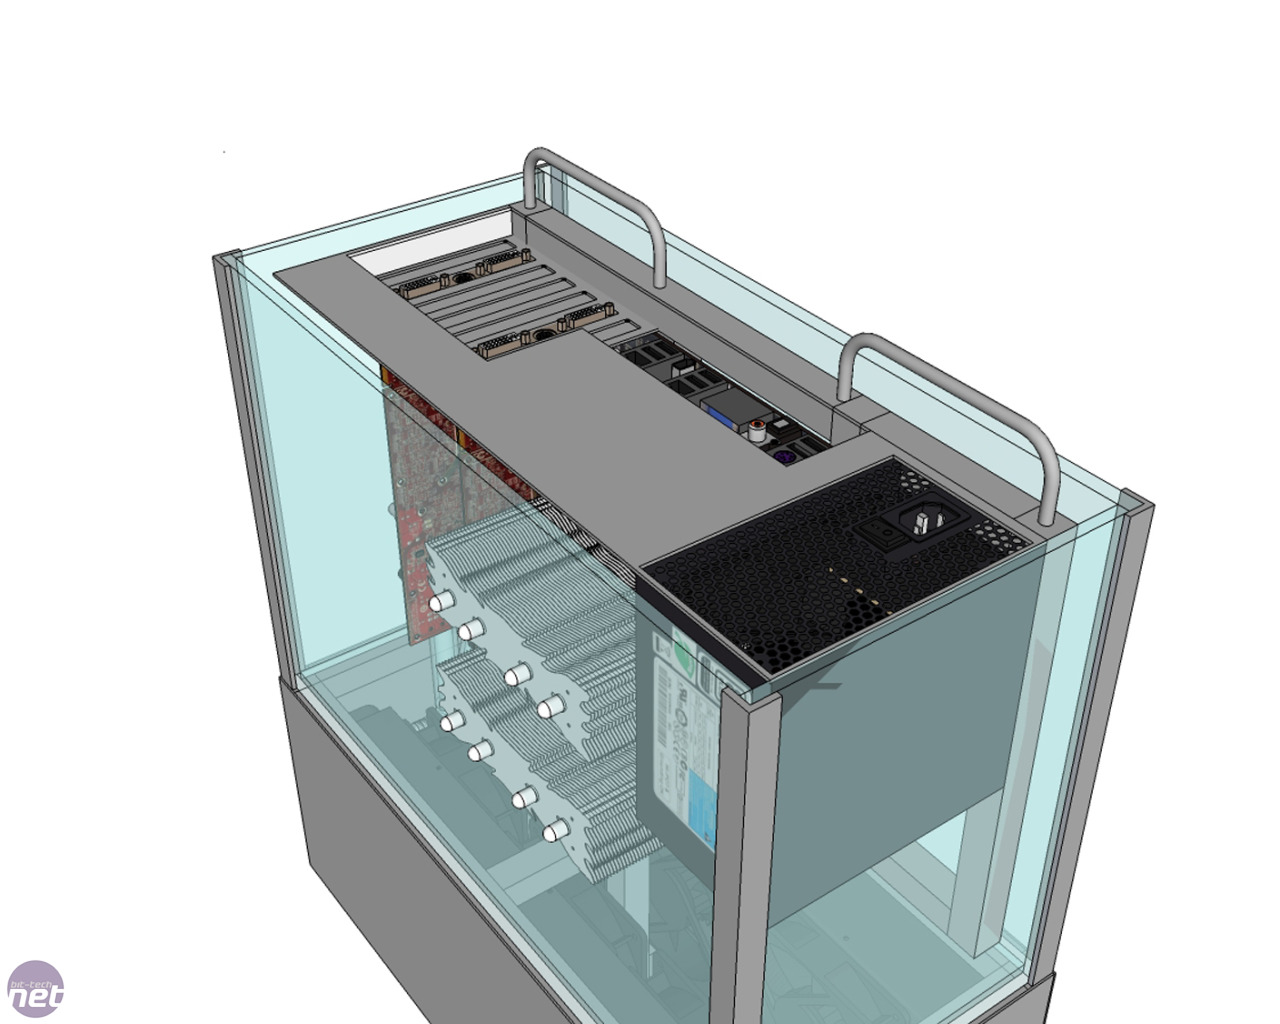
[i]Design work on the Mineral Oil PC begins
One of my main goals was to make the case more user friendly than my earlier cases. I hadn’t thought things through properly when I designed them and ended up with cases that were a pain to work on. To remove a side panel required the removal of 40 screws, for example. 76 screws needed to be removed in order to swap out a hard drive or the power supply. It got old very quickly.
 With this fresh in my mind, I designed Mineral Oil PC to be easy to work on. I made the top compartment hinged. Now swapping out a hard drive only requires me to open the lid and remove two screws. I also wanted the motherboard to be easy to access, so I bought drawer slides for the motherboard mount. To access the motherboard, all I have to do is open the lid and pull up on the handle attached to the motherboard tray.
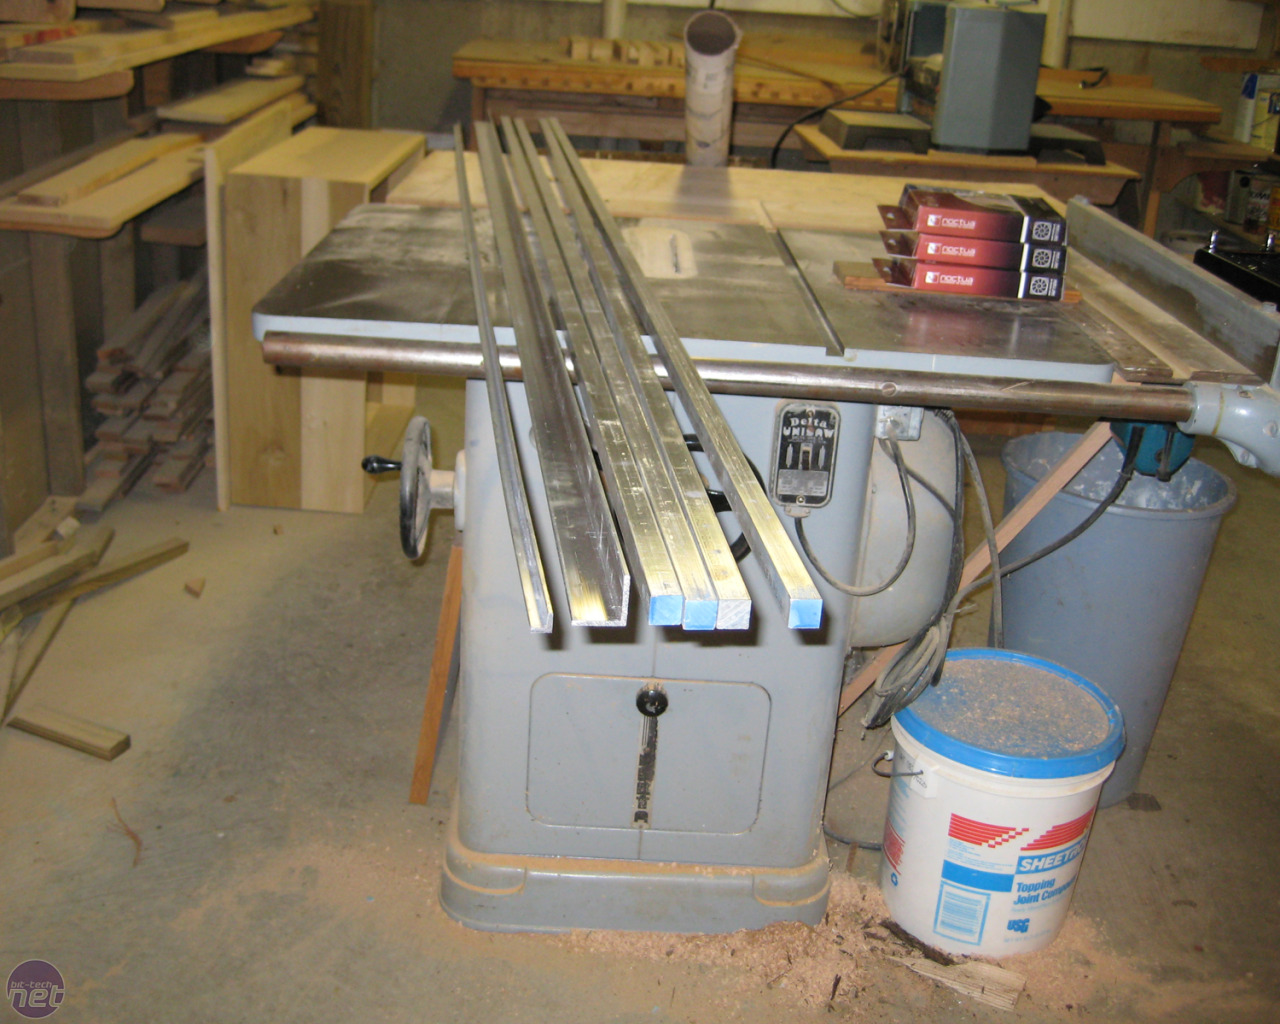
With the design phase completed, I ordered the raw materials for the case. This included nine square feet of 1/4in acrylic for the main tank and a sheet of 3/8in acrylic for the back of the tank. The extra thickness on the back sheet is to allow screws to go into it. My order of aluminium contained eight feet of 1.25in angle, 16 feet of 1/2in angle, 32 feet of solid 3/4in bar stock and nine square feet of 0.05in sheet.
RELATED ARTICLES


MSI MPG Velox 100R Chassis Review
October 14 2021 | 15:04

Want to comment? Please log in.