How to Build an Arduino Circuit
The project we're going to be working on is a simple Morse code flasher, but rather than using a buzzer - which is sure to get on the nerves of anyone in your immediate vicinity - we'll be using an LED.Thankfully, this circuit is incredibly easy to build - don't worry if you've no electronics experience. All you need is:
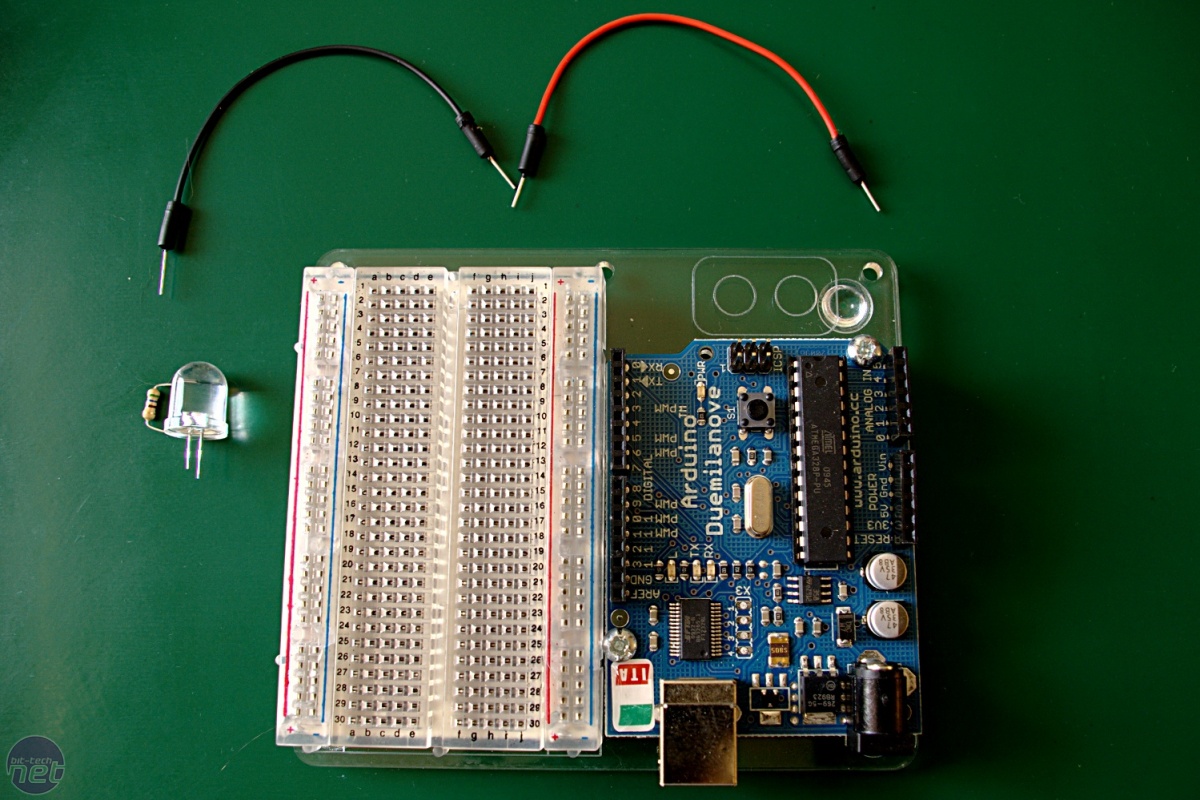
The parts you'll need for your first circuit
- An Arduino compatible board
- Some wire (plus a breadboard if you want to make life simple for yourself)
- An LED
- A resistor for your LED (something in the range of 470-680 Ohms)
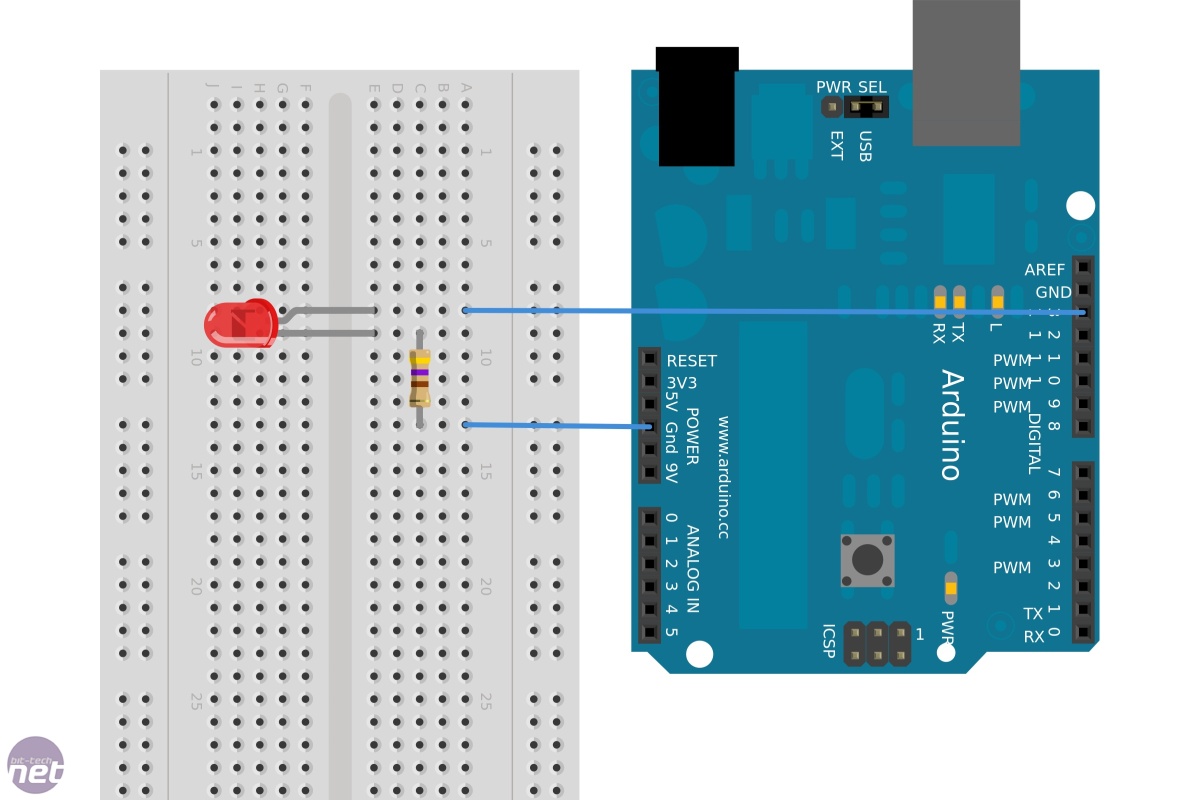
If you've not got that project to hand, don't worry. We're going to be using Pin 13 of the Arduino to control the LED, so you want to go from there to the positive (longer) leg of the LED, from the negative (shorter) leg to the resistor, and finally back from the resistor to one of the ground (GND) pins on the Arduino to complete the circuit.
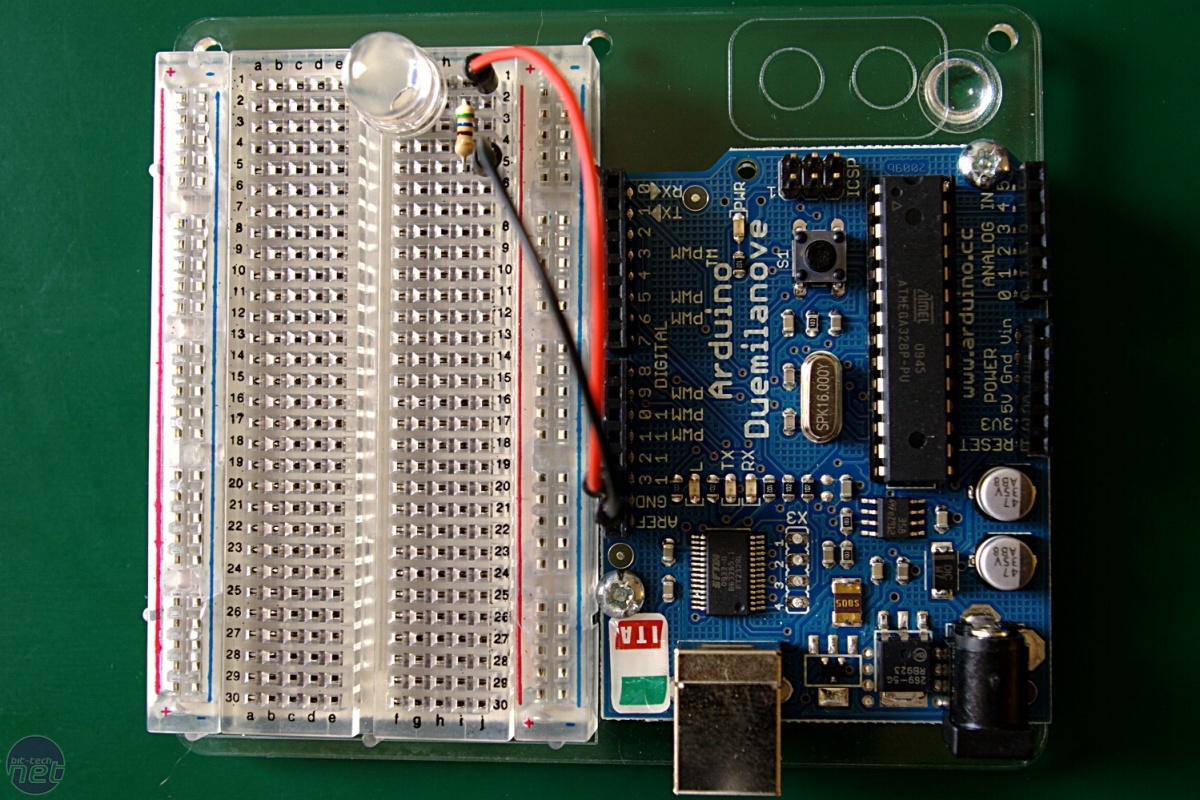
The finished Arduino circuit
On an Arduino board, a digital pin can have one of two states: HIGH or LOW. When a pin is set to HIGH in your program, it sits at +5V and powers whatever is connected to it. When it's set to LOW, it sits at 0V and does very little. By toggling whether Pin 13 is HIGH or LOW, we'll be able to turn the LED on and off.
You'll notice that some pins on the Arduino are marked PWM, which stands for Pulse Width Modulation. These pins are still digital connections - meaning they're either on or off - but support a cheater's method of providing different amounts of energy to motors or lights: as well as being HIGH or LOW, the can be toggled many times a second to cause an LED to flicker or a motor to slow - providing the illusion of analogue control.
For this simple introductory circuit, however, we're not going to be worrying about PWM - our LED will either be on or off without any variation in brightness. In more complicated circuits, PWM can be used in conjunction with an analogue input connected to a photoresistor to change the brightness of the LED according to ambient lighting conditions, but that's beyond us right now.

It's not complicated - but it's the start of something big
Once you've built the circuit, you're ready to start programming. Download and install the IDE - which, as it's written in Java, is available for Windows, Mac OS X, and Linux - and you'll be ready to write your first program.


MSI MPG Velox 100R Chassis Review
October 14 2021 | 15:04

Want to comment? Please log in.