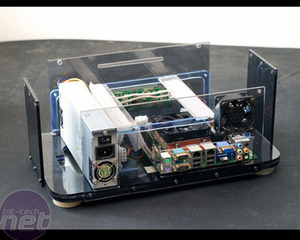
The Reflection HTPC by Wolverine

Written by Magnus Persson

June 2, 2008 | 03:12

Tags: #magnus #wolverine

Companies: #ac-ryan #msi #seagate

The Internals

The Reflection HTPC by Wolverine Filling the shell

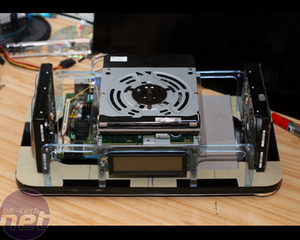
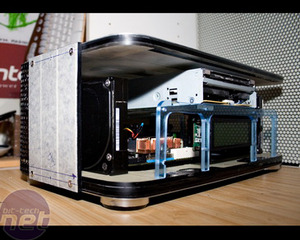
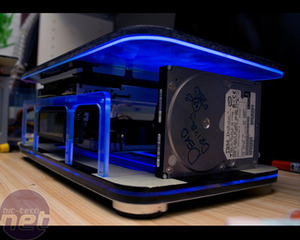
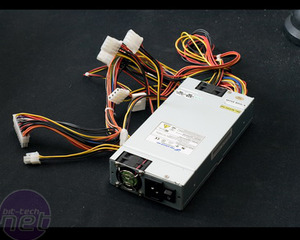
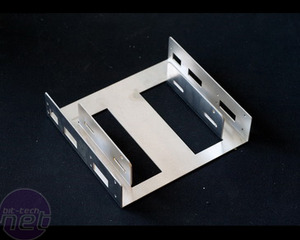
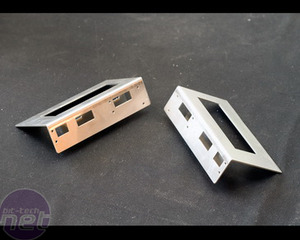
Even though I was using a very small MSI mainboard and FSP PSU, I had to try several layouts before I got to one that actually allowed me to fit all the stuff in that I wanted. The two Seagate drives had to stand on their sides, one on each side of the main board.

The Reflection HTPC by Wolverine Filling the shell The Reflection HTPC by Wolverine Filling the shell
Here in the early stages I used two old dead drives to measure everything up. That allowed me to make sure I didn't accidentally drop one of the good 1TB Barracuda drives.

The Reflection HTPC by Wolverine Filling the shell The Reflection HTPC by Wolverine Filling the shell
I also id another quick test with some UV night shots just to get an idea of what was to come.

The Reflection HTPC by Wolverine Filling the shell The Reflection HTPC by Wolverine Filling the shell
Now it was time to get the hard drives mounted properly and also get the PSU in place. I used a 5.25" to 3.5" adapter from an old Lian Li case, which I cut down to make two angular mounts for the HDDs that were screwed in to the base of the case. Then the 1U FSP PSU was slotted in on its side and unwanted cables were removed.
Discuss this in the forums
YouTube logo
MSI MPG Velox 100R Chassis Review

October 14 2021 | 15:04

TOP STORIES

SUGGESTED FOR YOU