
Face Off
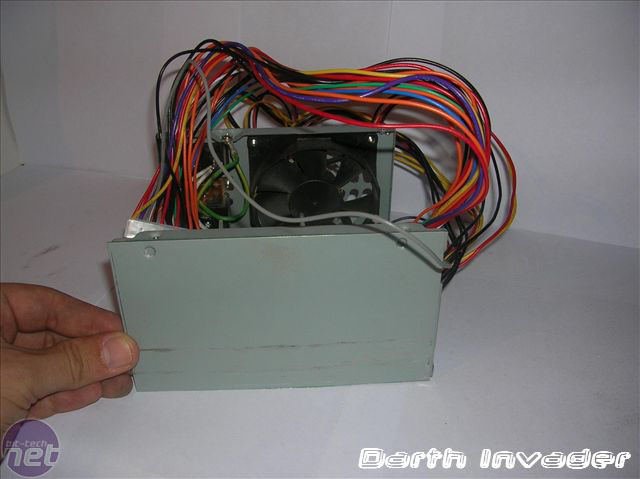
Now that we have the outside cover off and modified to our liking, it's time to put that new front end on this puppy.The front plate is needed as a place to put the modular connectors. You don't have to reuse the PSU lid, but it is the cheapest option - it needs to be a material strong enough to drill through and cut though. Remember if you make it see-through then it show the mass of cables inside it, and if you're not confident in the cleanliness of your soldering and cable tidying skills then you might want to use something opaque.
Remember, it's wisest to be extremely careful not to touch any of the PSU innards if you can at all avoid it. Oh, and if you have ignored our advise and do happen to run a huge jolt of juice down your arm, don't say we didn't warn you...and, uh, we're not liable, OK?
With that handy little pep talk out of the way, let's get back to our modding, shall we?

In order to attach the new faceplate to the old one (after all, why cut off something we didn't have to and that could still prove useful?), we need to do a little work. The first step is to find out good mounting points that are not in the way of anything internal, and that still provide enough metal for a fastener to do its job. Then, just drill the holes in!

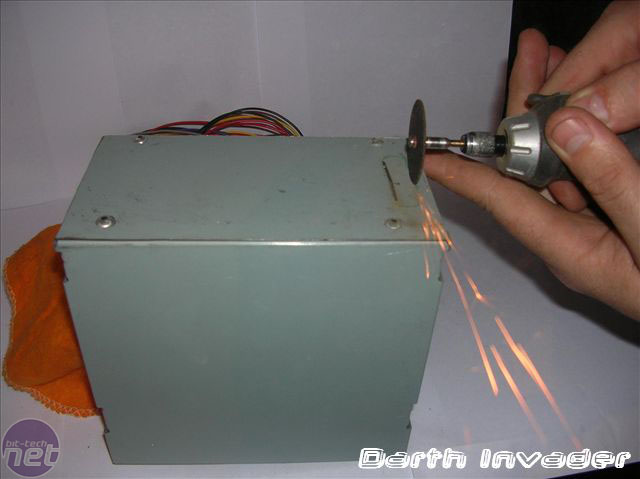
Pop-rivet guns are great bits of kit and if you do have one handy, this is a perfect opportunity to use it. Otherwise, some good nut/bolt combos (with very short bolts) will work just fine, and maybe even add some extra looks if you use them right! Whatever your choice, make sure your drill bit above is the right size to fit your fastener.
With the new faceplate on, it's already time to get ruining it. Darth planned to use a 25-pin serial connector for the ATX plug, which was put on the left side of the PSU, as that's where its power leads came from - yours may be arranged differently so check beforehand. Remember, it's much easier to move a few four-pin molex plugs a few inches than it is to move a larger 24-pin ATX just one inch! Don't worry about perfection, though - most plugs and jacks have a metal lip that will cover over messy holes.
Please note - if you are using a beefy PSU (over about 400W-500W), this connector may not be sufficient. You should look to using heavier gauge connectors that can allow for more current if you would like to do this mod with a higher-power PSU. However, the general concepts in this guide will still apply, no matter what plug you use!
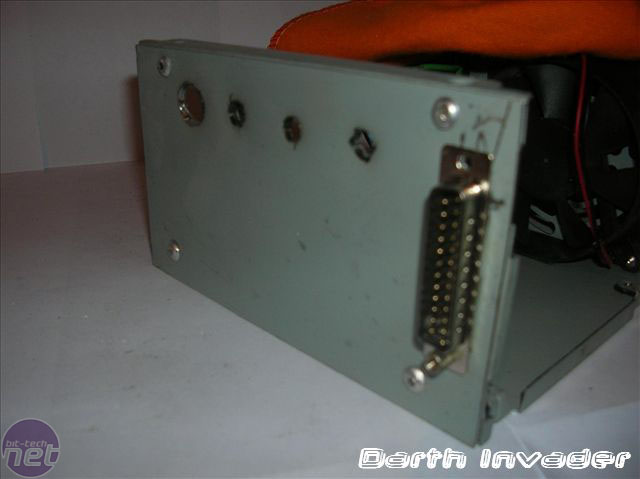
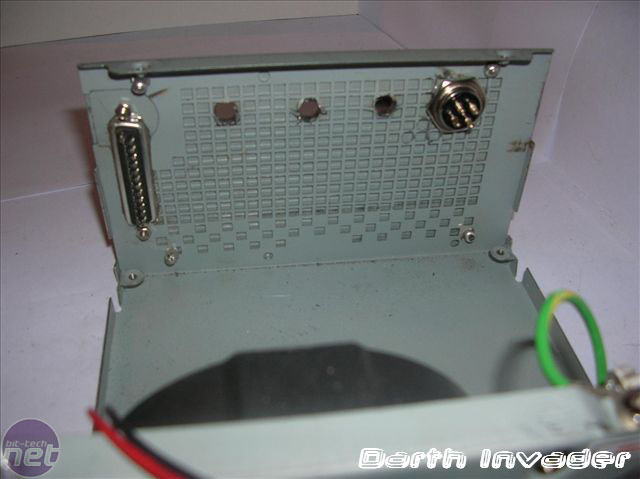
Once the 25-pin port is in place, it's time to drill through the faceplate for the microphone jacks. Choose a drill bit that's the right size for your plug of choice and get drilling! Remember you need as many molex connections as there are provided originally (or less if you feel you don't need as many as was previously provided - but that's what modular is for, right?) - Darth has made space for four here for example. Splitting the wires for extra molex rails is ill-advised because you might be stressing the PSU components when you come to switch it on.
RELATED ARTICLES


MSI MPG Velox 100R Chassis Review
October 14 2021 | 15:04

Want to comment? Please log in.