
Modular PSU Tutorial Info
Skill Level: IntermediateTime: Around 6 hours (+48hr initially leaving the PSU to drain)
Cost: Around £15 /$20 USD
Guide Creator: Darth Invader
Tools: Needle-nose pliers, Soldering Gun, Solder and Flux, Dremel, Screwdriver
Parts: 25-Pin serial port (male and female), four microphone jacks (at least 4-pin, male and female), PSU, plexi or modder mesh replacement PSU lid
Introduction
Some days, it's hard to be a modder in the current technology boom. It seems that everywhere you look, the great ideas that once only existed in top end mods can now be bought for a tenner on some site. Fan controllers, LCD displays, coloured and sleeved power supplies - you name it, there's now a commercial product for it.Of course, such products don't always suit all needs - and at some point, don't these products themselves become yet one more thing we need to mod? And what happened to old school originality and hard work? Well, fear not, dear friends - it's far from gone. Some people still like to do things the old-fashioned way, and let's be honest - you can't buy certain looks out of a box.
Maybe that's why some things are still best when done at home - including the modular PSU. If you've got a decent but somewhat old PSU (or a new, silent one, many of which are not modular) then look no further. We'll tell you how to take your old PSU and make it better than ever for about $20 and a few hours of time.
This particular guide is courtesy of our forumite Darth Invader, so make sure to stop by his original thread and thank him for his hard work!
Before We Start
The capacitors inside of a working PSU are dangerous. Please leave the PSU unplugged for at least a few days in order to drain them. You can help expedite this by leaving the PSU power switch on and "hot-wiring" it by plugging a paper clip to connect the green and black wires on the ATX connector pin (only these two) and letting it sit at least two days.Set up and Tear Down
Before we can get down and dirty inside our PSU, we have to fix the dirty PSU. So, let's get this thing open, shall we?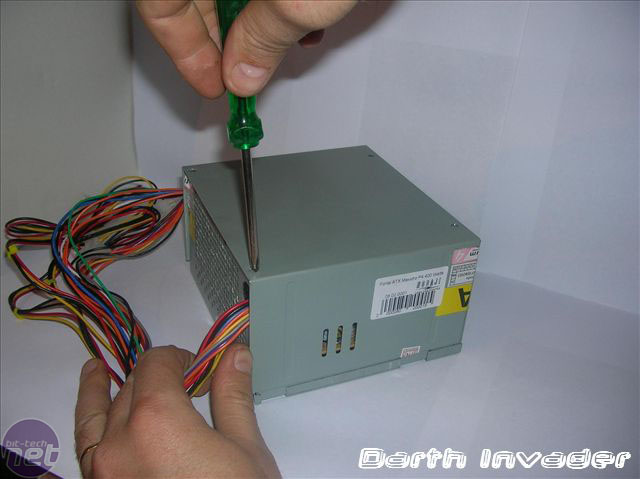
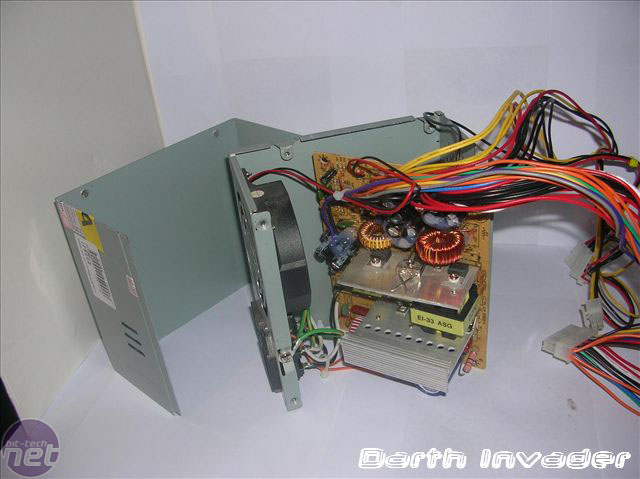
This may seem obvious, but start by unscrewing the lid from the top of the unit. Four screws later, you should be looking at the insides of your PSU - unscrew that circuit board, too.
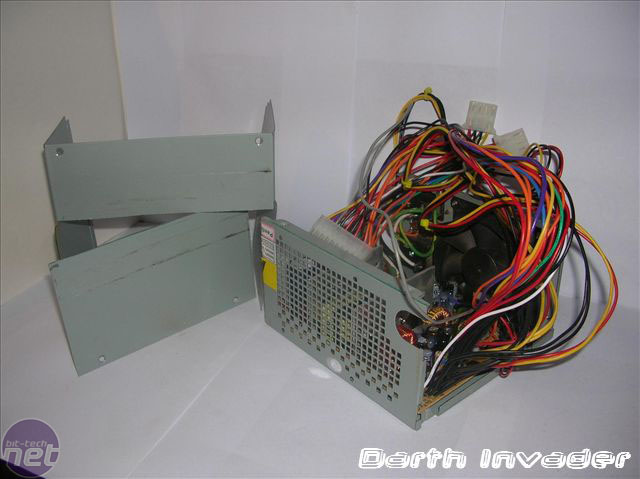
The lid itself will become our new "faceplate", which will cover over the mesh on the front grille. If your PSU doesn't have a grille and instead is a solid front, you don't need to do this part. For those of you who have one like Darth's here, stand the cover up beside the PSU. Then draw a line the height of the PSU front across the upright top, and cut it - voilà, a new front plate!
Now's also the time to get those wires unhooked from that hole in the corner - we won't be needing them for a little while, so it's best to get them out of the way!
RELATED ARTICLES


MSI MPG Velox 100R Chassis Review
October 14 2021 | 15:04

Want to comment? Please log in.