
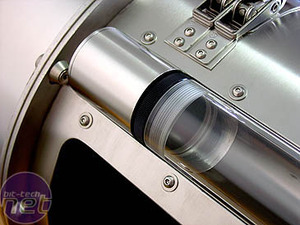
Reservoir
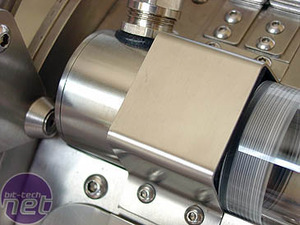
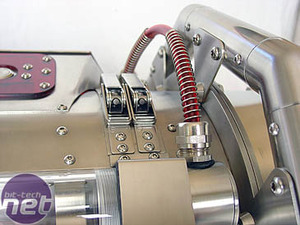
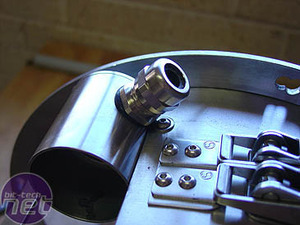
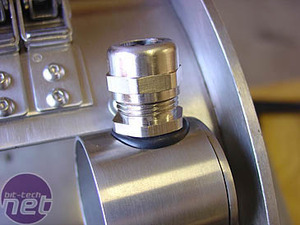
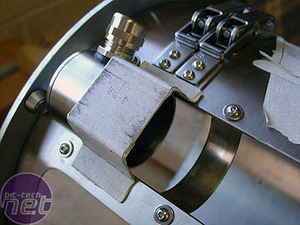
Mounting the reservoir was the first thing I tackled when I got back into the project. I needed a method that was secure, protected the reservoir ends and fitted in with the appearance of the rest of the case. I settled on screw-down brackets, with foam underneath. The brackets are the same width as (and line up with) the two steel bands that encircle the case, thus appearing as part of these encircling bands. To complete the look of the steel pipe sections that extend from the ends of the reservoir, I added steel cable glands, springs and hoses, which run to the timer.
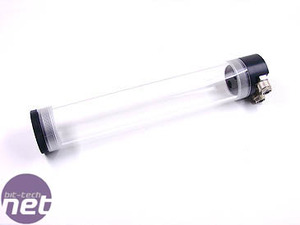
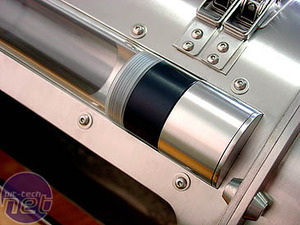
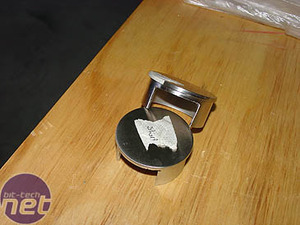
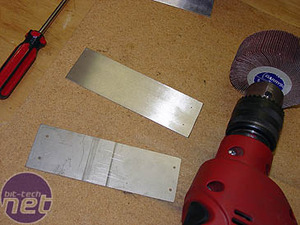
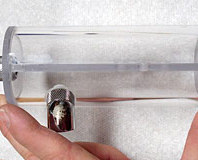
I used an Innovatek reservoir supplied by Coolercases. It is extremely high-quality, and you can see from the picture that it has a thicker base than its screw cap. This meant, in order to have the plexi tube centered in the top of WMD, I had to cut the steel pipe sections different lengths. A short section to go with the base of the reservoir....
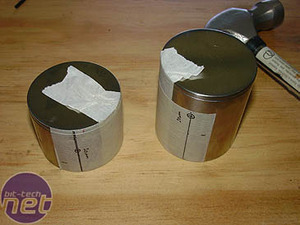
...and a long section to fill in the top of the reservoir. First thing to do was measure and mark the pipes. I always use masking tape to cover a piece before marking, as it is more accurate to draw on, easier to see and helps protect the finish from scratches when cutting or drilling. Whenever I drilled anything on the case, I always used a centre punch and hammer to make a tiny indentation in the centre of the drilling mark to stop the drill bit slipping and scratching the piece.
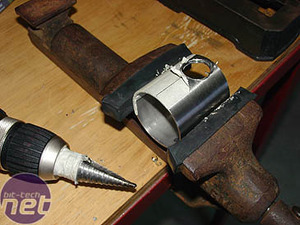
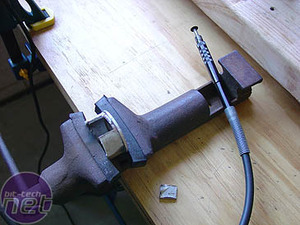
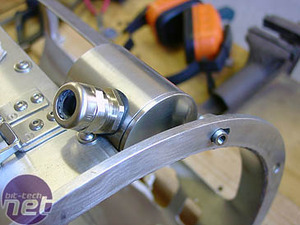
I had to drill a hole for the gland which was bigger than any drill bit I owned. A hole-saw was no good as the steel was way too tough (and curved) and would have stripped the teeth from the saw. My only alternative, at least with the tools I had, was a step drill bit (above left). Even then it was tough going and my crappy drill press wouldn't do it so I used a hand-held electric drill - which afterwards died in a puff of smoke. It was a cheap drill. After drilling the outside pipe, I had to dremel out a section of the end caps so the glands would fit through.
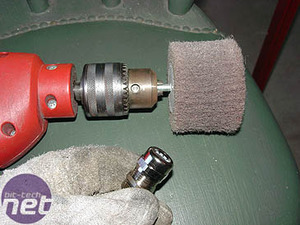
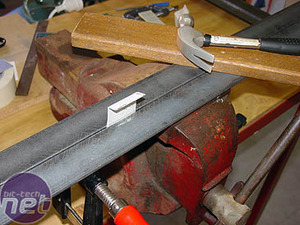
With both ends cut, I used a polishing brush to give the glands the same 280 grit polish as the rest of the case (they were a lot shinier previously).
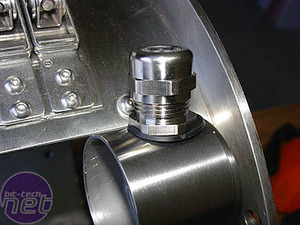
Because of the curve of the pipe, I wanted to use a rubber grommet to hide any exposed threads. I tried out a normal rubber washer before settling on cutting a rubber wire grommet in half and stretching one half over the end of the gland.
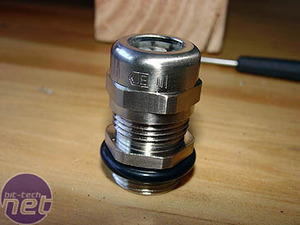
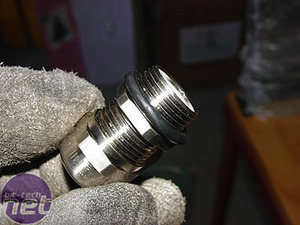
A tight fit over the end of the gland, but a good fit once inserted into the pipe. (Hmm, maybe modding really is like sex? - Ed.)
The rubber makes a good seal. (QED - Ed.)
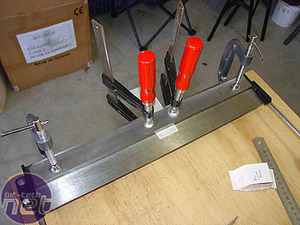
The brackets were cut out of 1.2mm stainless steel and pilot holes were marked and drilled before polishing with a flap wheel. I then clamped the brackets into a small bending brake and bent each end.
The two bends in the middle of each bracket were done by clamping the piece between angle iron, in a vice, and using a block of wood (struck with a hammer) to bend them over. The limitations of the bending brake (i.e. the impossibility of doing two short, opposite, bends) forced me to do it this way. The first bracket fitted well and I used this as a template.
RELATED ARTICLES


MSI MPG Velox 100R Chassis Review
October 14 2021 | 15:04

Want to comment? Please log in.