
Etchs and Masks: Preparing to paint
OK. Now you have had a glimpse at Macro Black, It's time to go into some detail on how it was produced. The first step, painting the case.There are four steps to painting this case:
<ol><li> Planning.<li>Making the stencils.<li>Surface preparation and masking.<li> Painting.</ol>On a project like this, planning is crucial. Once you have started painting it is very difficult to go back and add a clear area you forgot to mask off. So make sure you plan every little detail before you start painting. To achieve the ultra high gloss mirror finish the case was painted from the inside. Clear areas were masked off, which would become the chrome details after painting.
Black was chosen as the colour for several reasons. I like black and silver, I think it looks bold but stylish. Secondly black is the most effective colour to produce the effects I was after. Finally I knew I could obtain all the materials I needed if I went with black. Originally, I had intended to design my own symbols for the etchs, but on reflection decided to stick with something everybody was familiar with.
I looked at symbols that consisted purely of straight lines, such as the Radiation and Lightening bolt, thinking they would be easier to make. I didn't really like them, but I did like the Biohazard which is all curves! Hey! why make it too easy? So I went with the Biohazard theme.
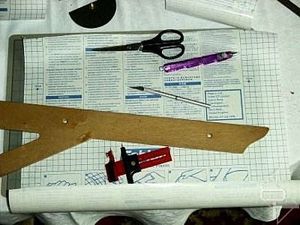

OK, with the planning done, it's time to make the stencil masks which will become the windows and the "etches". Starting with the easiest first: the side window. After deciding on the shape and size, the mask was cut out from clear "sticky backed plastic" - Fablon in the UK. I used this material in preference to modellers/artists masking film for reasons of cost. Of course I could have used ordinary masking tape and newspaper, but I thought it would be easier to make and fit complete masks as a single piece.
Note the adhesive on Fablon is designed to be permanent unlike the "low tack" glue used on proper masking materials so removal after painting is slightly more difficult. I took the picture with the backing still on so you could see it!

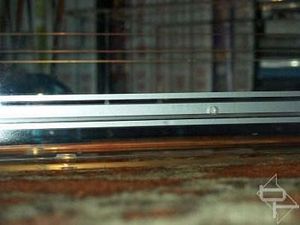
Car body pinstripe from a local car accessory shop was used for masking the case body lines.
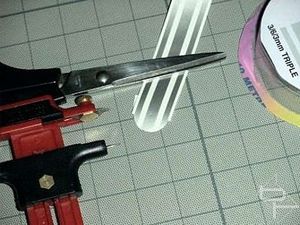
I used a compass cutter from a craft shop to round the ends to give a more "designed" look.
The triple stripe that I used has a backing which holds the stripes together as one. The backing is removed after sticking the strip, leaving the three separate stripes. I used the stripes purely for masking but they looked very nice after painting and could have been left on. Since I wanted light to shine through the stripes I removed them once painting had been completed.
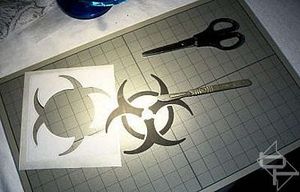
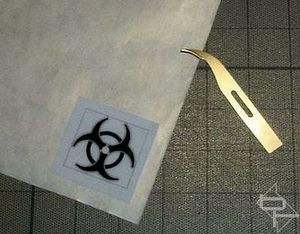
The Biohazard mask was made by printing the shape onto inkjet compatible "clingfilm". This is a thin translucent white plastic sheet with a printing surface on one side and a low tack adhesive and backing on the other. I bought this handy stuff from a local computer fair. After printing, the backing was removed and the clingfilm stuck to masking film, Frisket, which can be bought from model/art/craft shops. I then used a scalpel to cut out the symbol.
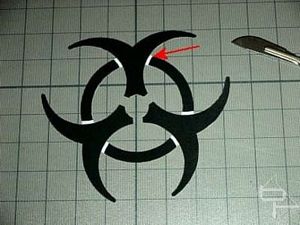
To hold the shape together to aid fitting, I left several small parts uncut. The Frisket backing was removed and the symbol stuck onto the case. The clingfilm was then peeled off leaving just the Frisket mask stuck in place on the case.
The previously uncut sections were removed using the scalpel. The mask was rubbed down with a soft cloth to ensure its edges were stuck down properly to prevent any paint creepage spoiling the sharp edges during painting. As a side note, Frisket makes an excellent "normal" window etch as you can see.
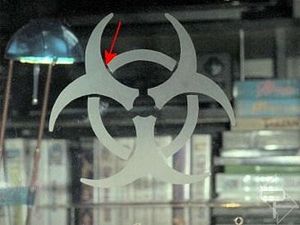
The above procedure was repeated on a smaller version of the symbol for the power/HDD activity light on the front of the case.
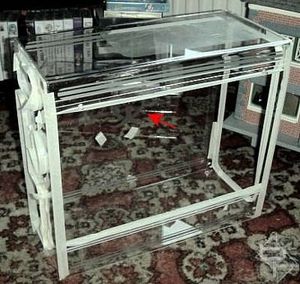
Once all the masks had been fitted, the case edges were masked off using masking tape and the case body covered with newspaper to protect it from any overspray. The red arrow indicates the Biohazard mask. Before masking the inside of the case was washed with a mild detergent solution to remove any dust and finger marks.
RELATED ARTICLES


MSI MPG Velox 100R Chassis Review
October 14 2021 | 15:04

Want to comment? Please log in.