

THE HD RACK
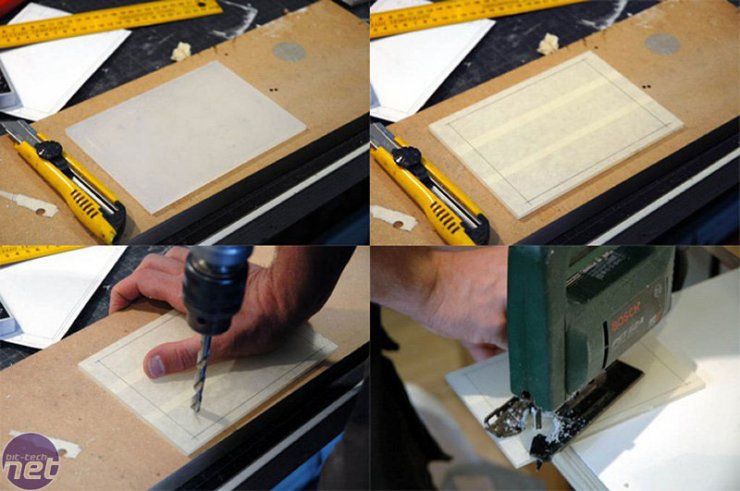
<ol><li> The first panel I have to cut out: I removed the plastic cover on the plexi (this is the frosted plexi) - I hoped the paper would stay on, but it came with plastic and comes off very easily ;(</li> <li> I covered the plexi with large masking tape and drew the cut-out shape on it.</li><li> Drilling time: I\'m drilling with a metal bit on a very low speed, the slower the better, to make a hole to fit my jigsaw in. After a while (few weeks) I discovered that it is much easier to drill nice holes in plexi with wooden bits- DOH!</li><li> Cutting the panel with my trusty jigsaw, with a small metal blade in it.</li></ol>
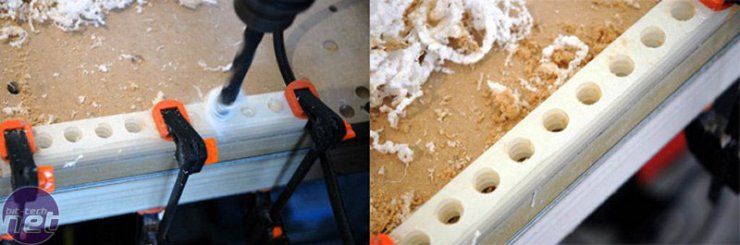
Needing to drill holes in the side panels of the HD rack, I clamped the four rails together to guarantee that all the holes would line up with each other once it is assembled.
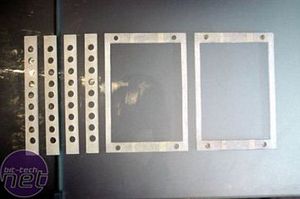
These are the front panels of the box (right) and the finished sides. The HD\'s will come through in the middle of the front panels. The holes at the sides are for screwing in some bolts later - a screwdriver fits nicely through.
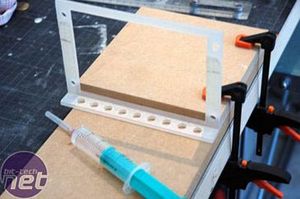
This is my super-sophisticated gluing rig ;-) The side pieces need to be glued to the front panels - that large syringe contains the glue.
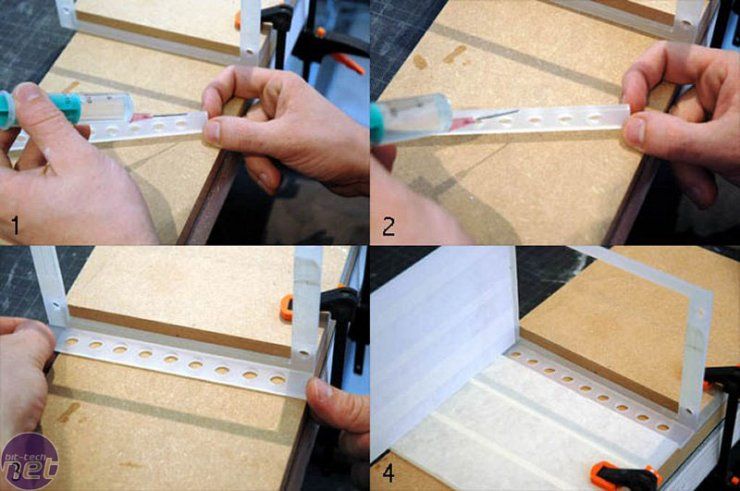 <ol><li>The adhesive I used came with the plexi - I\'m not really sure what it is, but it has a funny \"chemical\" smell to it, and it appears to melt the plexi together.</li><li>Getting the glue on the edges with the big needle - pretty handy stuff, but it must be the best way, because this is the way it came.</li><li> Putting the piece in the correct place. You have to be very quick with this adhesive because otherwise it won\'t bond anymore - I guess about 10-15 seconds.</li><li>All the pieces in place so it can rest and dry. I did this for every sidepanel, taking about 2 hours!</li></ol>
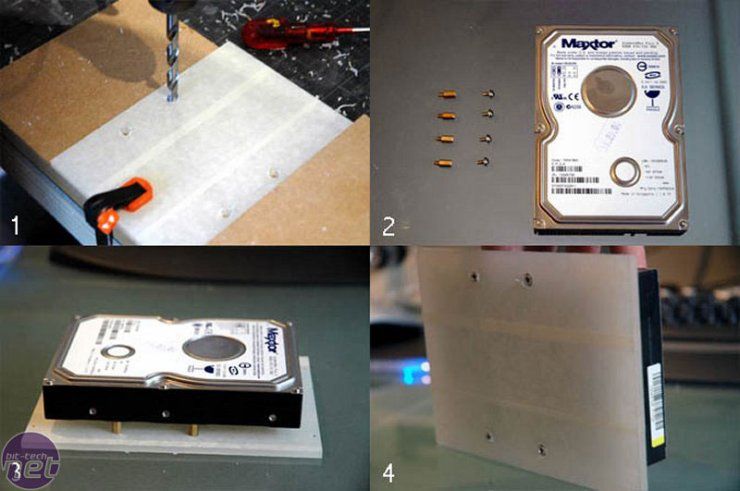 <ol><li>Starting with the cut baseplate plexi, I drilled four holes for the mounts using a 3mm drillbit.</li><li>Standard issue Maxtor 80Gb hard drive, with regular motherboard stand-offs and screws </li><li>Using the regular mounting holes on the underneath of the drive, I mounted it to the plexi </li><li>There is a second layer of plexi to attach to this, so I countersunk the screwheads so they were flush </li></ol>
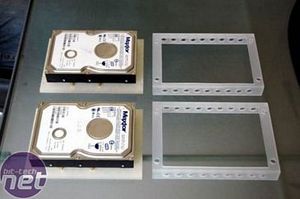
Of course, using two hard drives means repeating everything again. Having glued both racks, and mounted both drives to their baseplates, I had to make the second baseplate layer before final assembly.
 <ol><li>Same size as the first baseplate, drilled 4 holes on the sides and tapered them out a little to fit the bolts in them. </li><li>The bolts were then glued in place </li><li>Close-up of glued bolts.</li><li>The final result: hard drive with double-height baseplate.</li></ol>
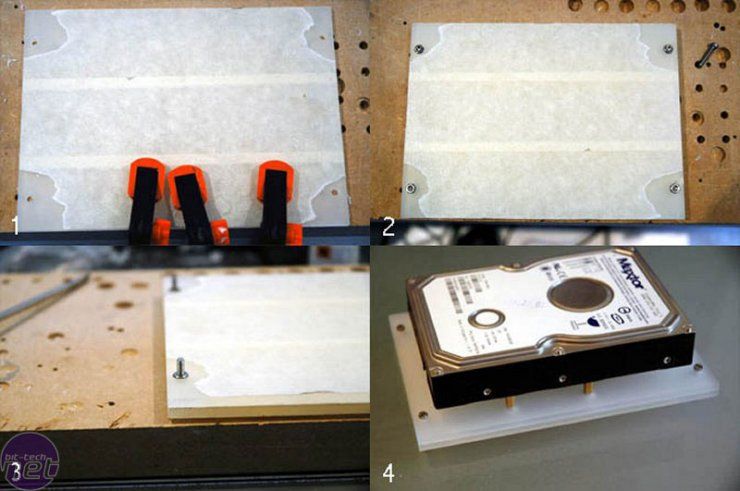
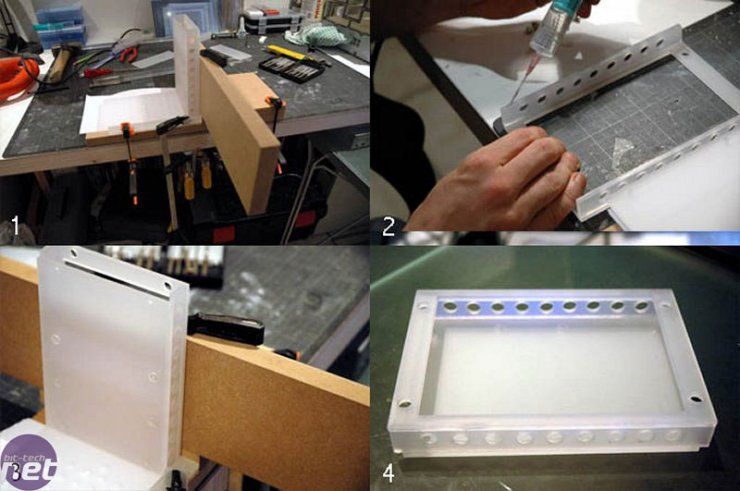 <ol><li>Yet another custom-jig ready for more gluing </li><li>The Plexis adhesive was carefully applied to the top edge of the side panels... </li><li>... ready for bonding the baseplate to it. </li><li>Et voila! </li></ol>
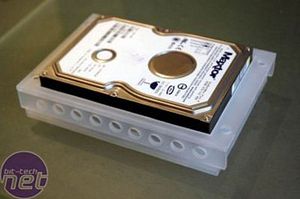
The finished result: custom HD rack #1 with drive full installed - nice!
RELATED ARTICLES


MSI MPG Velox 100R Chassis Review
October 14 2021 | 15:04

Want to comment? Please log in.