
Covering the Rear ...
I needed to make and fit a cover for the rear of the switch-bay, fix up the bolts and add the switches and LEDs.
I took some 3mm (1/8\") neon acrylic and fashioned an \'L-shaped\' piece that I will be using as the rear cover. The piece was cut out of the corner of a sheet using a hacksaw. I try and cut out of sides and corners of sheets so I automatically get 1-2 straight sides for my set-square to work off. The two ends were chamfered with a router before filing, sanding (320 then 1200 grit & sanding block) and polishing. The piece was bent by ruling up, clamping to my small worktable, heating the edge with a heatgun and folding down with a wooden block. I left the protective paper on when doing this as it helps stop the piece bubbling from excess heat, although 3mm bends readily as it is fairly thin.
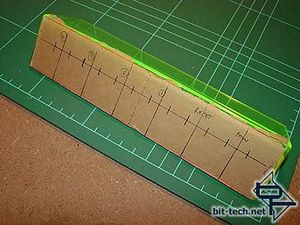
Using a centerline as a reference, I measured and marked where I would drill the holes. Each hole lines up with a corresponding switch from the front bezel. The holes are to pass through all the wiring from the front switches. I first drilled 3mm pilot holes very carefully with a plexi-drill then...
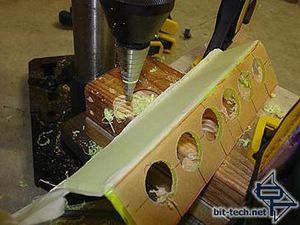
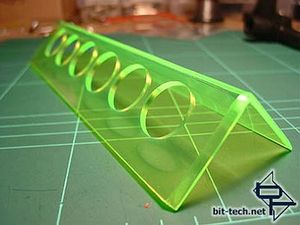
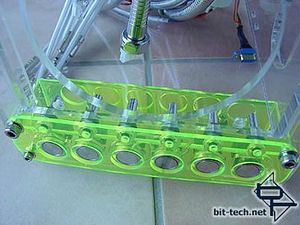
... used a step-drill to drill 7/8 inch holes (after some tricky clamping and supporting of the cover). Trying to drill the holes before bending would have likely resulted in the top edge of the holes warping when bent due to heat and the bending action as they sit right next to the bend. After a final clean-up, the chamfered edge of the cover really catches the light well and gives a bright neon glow from certain angles. Not so obvious in this image but you can see it better in others.
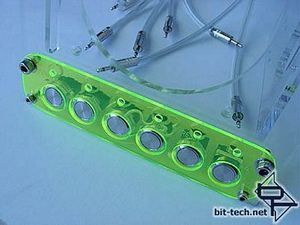
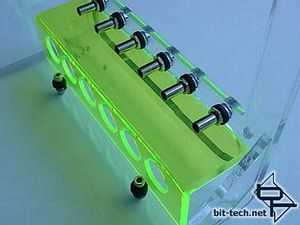
The front cover after I shortened all the bolts with a dremel. Fits nicely and the two larger 6mm bolts at the top also fasten the bottom of the front bezel to the case. I polished and test-mounted the vandal switches (yet again). The switches were polished with a buffing wheel on my small bench grinder. The rear cover sits in place up against the underside of the LED holders.
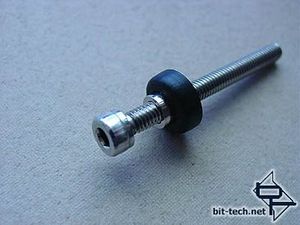
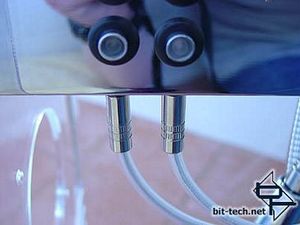
Two 4mm socket head cap screws (these were shortened after the pic was taken), with chrome spacers and rubber washes inserted through holes in the bottom of the case (secured with dome nuts) hold the rear cover in place against the LED holders. I didn\'t want to glue it as I wanted it to be easily removed and gluing it (my second option) would have prevented this. The rubber also acts as a cushion preventing stress on the plastic and maintains the tension on the cover - so no coming loose.The LED holders were attached to the case.
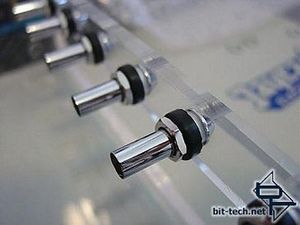
The front of the LED holders sit nicely into the 11mm holes drilled in the removable front of the case. The LEDs that will go in these will eventually be sanded with 320 grit to even the light out and cut down the harshness when viewed from the front (those water-clear lenses can be too bright!). I placed a rubber surround made from a cut-up grommet around the rear of each holder to provide tension on the nut and to help fix the rear cover in place - plus I thought it looked cool and tied in with the other LEDs with rubber surrounds throughout the project.
The LEDs, once fitted, will just touch the rear of the 5mm hole in the front cover. They will retain their colour as they shine through the hole, but will light up the front panel nicely. I plan on white LEDs for the 4 control switches and green for Power and HDD activity, the green and white fitting with my theme.
The switches will be wired up later in Part-3 of this series of articles.
<br>Remaining Jack Plugs & Cables ...
I also got busy and wired up some more cables and jack plugs with the good old fish tank hose and Techflex sleeving. I wired up the LEDs in the PSU and the power for the VFD.

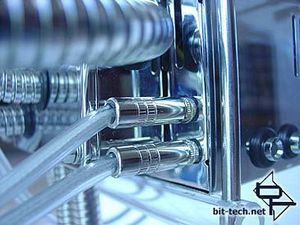
From junction box to PSU LEDs (you can see the holders bottom right of the second pic). I also wired up the two on the other side ...
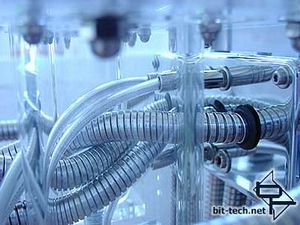
... from junction box to PSU.
I needed to make and fit a cover for the rear of the switch-bay, fix up the bolts and add the switches and LEDs.
I took some 3mm (1/8\") neon acrylic and fashioned an \'L-shaped\' piece that I will be using as the rear cover. The piece was cut out of the corner of a sheet using a hacksaw. I try and cut out of sides and corners of sheets so I automatically get 1-2 straight sides for my set-square to work off. The two ends were chamfered with a router before filing, sanding (320 then 1200 grit & sanding block) and polishing. The piece was bent by ruling up, clamping to my small worktable, heating the edge with a heatgun and folding down with a wooden block. I left the protective paper on when doing this as it helps stop the piece bubbling from excess heat, although 3mm bends readily as it is fairly thin.
Using a centerline as a reference, I measured and marked where I would drill the holes. Each hole lines up with a corresponding switch from the front bezel. The holes are to pass through all the wiring from the front switches. I first drilled 3mm pilot holes very carefully with a plexi-drill then...
... used a step-drill to drill 7/8 inch holes (after some tricky clamping and supporting of the cover). Trying to drill the holes before bending would have likely resulted in the top edge of the holes warping when bent due to heat and the bending action as they sit right next to the bend. After a final clean-up, the chamfered edge of the cover really catches the light well and gives a bright neon glow from certain angles. Not so obvious in this image but you can see it better in others.
The front cover after I shortened all the bolts with a dremel. Fits nicely and the two larger 6mm bolts at the top also fasten the bottom of the front bezel to the case. I polished and test-mounted the vandal switches (yet again). The switches were polished with a buffing wheel on my small bench grinder. The rear cover sits in place up against the underside of the LED holders.
Two 4mm socket head cap screws (these were shortened after the pic was taken), with chrome spacers and rubber washes inserted through holes in the bottom of the case (secured with dome nuts) hold the rear cover in place against the LED holders. I didn\'t want to glue it as I wanted it to be easily removed and gluing it (my second option) would have prevented this. The rubber also acts as a cushion preventing stress on the plastic and maintains the tension on the cover - so no coming loose.The LED holders were attached to the case.
The front of the LED holders sit nicely into the 11mm holes drilled in the removable front of the case. The LEDs that will go in these will eventually be sanded with 320 grit to even the light out and cut down the harshness when viewed from the front (those water-clear lenses can be too bright!). I placed a rubber surround made from a cut-up grommet around the rear of each holder to provide tension on the nut and to help fix the rear cover in place - plus I thought it looked cool and tied in with the other LEDs with rubber surrounds throughout the project.
The LEDs, once fitted, will just touch the rear of the 5mm hole in the front cover. They will retain their colour as they shine through the hole, but will light up the front panel nicely. I plan on white LEDs for the 4 control switches and green for Power and HDD activity, the green and white fitting with my theme.
The switches will be wired up later in Part-3 of this series of articles.
<br>Remaining Jack Plugs & Cables ...
I also got busy and wired up some more cables and jack plugs with the good old fish tank hose and Techflex sleeving. I wired up the LEDs in the PSU and the power for the VFD.
From junction box to PSU LEDs (you can see the holders bottom right of the second pic). I also wired up the two on the other side ...
... from junction box to PSU.


MSI MPG Velox 100R Chassis Review
October 14 2021 | 15:04

Want to comment? Please log in.