
I knew there had to be a better way to drill acrylic and after reading some of the acrylic guides on bit-tech and following some links I discovered these:
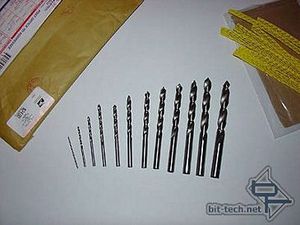
Plexi-Point drill bits! They have a very pointy end and a 0 degree 'rake' angle on the cutting edge. They drill through acrylic like a hot knife through butter with no grabbing, tearing, or chipping - nice clean holes! I couldn't find Plexi-Points in Australia (no one I spoke to here had even heard of them) so had to order from the US. I also found and ordered some cheaper plexi-drills: a 'Diamond Dust 3' drill set from Craftics. Tips from the plastics fabricators at Specialised Plastics & Wholesale (Newcastle, Australia) - these actually work:
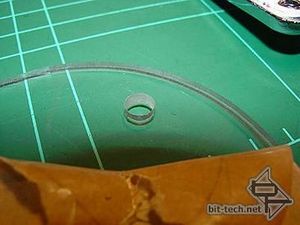
1) If you want a nice satin-smooth finish to the inside of your holes: coat the drill with Vaseline Petroleum Jelly (or similar product) before you drill.
2) Can't afford / be arsed with poofy plexi-drills? (are you insane!?) Take a normal HSS (NON-masonry) drill bit, whack it in your power drill (cordless may be underpowered) and drill it into a concrete slab! This will blunt it and help you drill nice clean holes in acrylic. This is the method the guys at the plastics fabricators (who don't have Plexi-Point drills) use. I prefer the Plexi-Points but this is still a viable option.
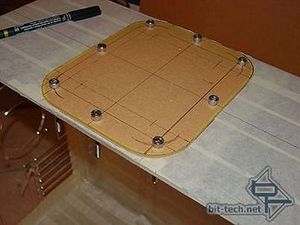
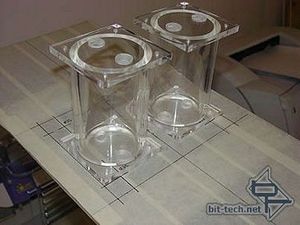
I squared off the top plate to the case and marked the holes from underneath - drilled (mmm ... happy now) and test fitted. The image on the right shows a test fitting the reservoirs (these will hang down under the top plate). As you can see I, of course, had done this before I started drilling holes and cutting things! I have just temporarily warped the space-time continuum to keep things easy to follow. The reservoirs are Criticool cast acrylic reservoirs and are well made and functional (not to mention looking very nice indeed). The great thing about these is the flexibility you have to mount them and configure the barbs/plugs how you want. They only came with brass barbs but I had already decided on getting them chromed.
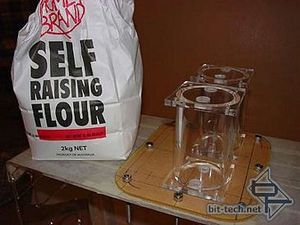
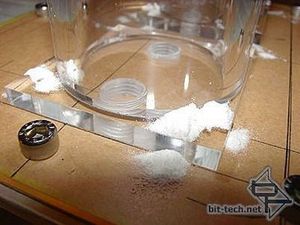
What's the flour for? Well, I couldn't fit a pen down the res mounting holes to mark them so a bit of flour was called for. Into the screw holes...
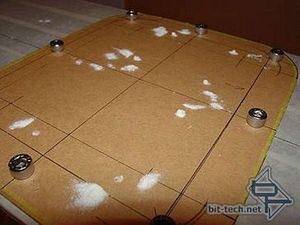
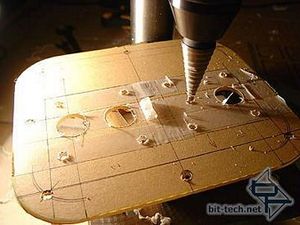
... Remove the res and voila! Hole positions marked (after I stuck a pen into the little piles of flour)! The hole positions were tricky as the pre-drilled mounting holes in the res were slightly uneven meaning that, once drilled, the holes would only line up one way. I had to use red electrical tape to mark which way the Res's had to face and on which side each one belonged as I test fitted. Drilling out the holes for the plugs that seal the refilling holes, I also drilled 4mm holes for the cap screws that will attach the Reservoirs. I once again used the Step Drill to drill the top plate where the refill holes' chrome plugs will protrude through.
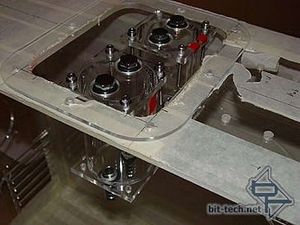

Res's fixed with 4mm Socket head cap screws, (cut to the right length later), with stainless steel washers and dome nuts to secure and cover the exposed ends. I used a stitched buffing wheel on my 'bench' grinder (it sits on the garage floor) with some polishing compound to polish all the stainless steel fasteners. The ends shine up like chrome (hard to see in this shot) and I polished all the threads as well. I experimented with polishing one of my stainless steel Vandal switches and it polished up very nicely! I used some cheap leather labourers gloves when buffing, they also protected my hands as the screws, etc, got quite hot during polishing.
Plexi-Point drill bits! They have a very pointy end and a 0 degree 'rake' angle on the cutting edge. They drill through acrylic like a hot knife through butter with no grabbing, tearing, or chipping - nice clean holes! I couldn't find Plexi-Points in Australia (no one I spoke to here had even heard of them) so had to order from the US. I also found and ordered some cheaper plexi-drills: a 'Diamond Dust 3' drill set from Craftics. Tips from the plastics fabricators at Specialised Plastics & Wholesale (Newcastle, Australia) - these actually work:
1) If you want a nice satin-smooth finish to the inside of your holes: coat the drill with Vaseline Petroleum Jelly (or similar product) before you drill.
2) Can't afford / be arsed with poofy plexi-drills? (are you insane!?) Take a normal HSS (NON-masonry) drill bit, whack it in your power drill (cordless may be underpowered) and drill it into a concrete slab! This will blunt it and help you drill nice clean holes in acrylic. This is the method the guys at the plastics fabricators (who don't have Plexi-Point drills) use. I prefer the Plexi-Points but this is still a viable option.
I squared off the top plate to the case and marked the holes from underneath - drilled (mmm ... happy now) and test fitted. The image on the right shows a test fitting the reservoirs (these will hang down under the top plate). As you can see I, of course, had done this before I started drilling holes and cutting things! I have just temporarily warped the space-time continuum to keep things easy to follow. The reservoirs are Criticool cast acrylic reservoirs and are well made and functional (not to mention looking very nice indeed). The great thing about these is the flexibility you have to mount them and configure the barbs/plugs how you want. They only came with brass barbs but I had already decided on getting them chromed.
What's the flour for? Well, I couldn't fit a pen down the res mounting holes to mark them so a bit of flour was called for. Into the screw holes...
... Remove the res and voila! Hole positions marked (after I stuck a pen into the little piles of flour)! The hole positions were tricky as the pre-drilled mounting holes in the res were slightly uneven meaning that, once drilled, the holes would only line up one way. I had to use red electrical tape to mark which way the Res's had to face and on which side each one belonged as I test fitted. Drilling out the holes for the plugs that seal the refilling holes, I also drilled 4mm holes for the cap screws that will attach the Reservoirs. I once again used the Step Drill to drill the top plate where the refill holes' chrome plugs will protrude through.
Res's fixed with 4mm Socket head cap screws, (cut to the right length later), with stainless steel washers and dome nuts to secure and cover the exposed ends. I used a stitched buffing wheel on my 'bench' grinder (it sits on the garage floor) with some polishing compound to polish all the stainless steel fasteners. The ends shine up like chrome (hard to see in this shot) and I polished all the threads as well. I experimented with polishing one of my stainless steel Vandal switches and it polished up very nicely! I used some cheap leather labourers gloves when buffing, they also protected my hands as the screws, etc, got quite hot during polishing.
RELATED ARTICLES


MSI MPG Velox 100R Chassis Review
October 14 2021 | 15:04

Want to comment? Please log in.