
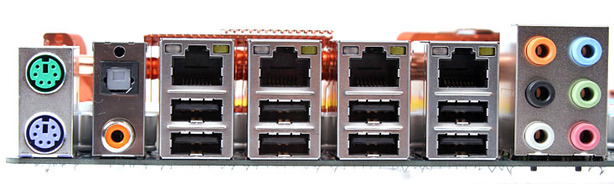
Rear I/O
The rear I/O is, well, full. Since Gigabyte only offers eSATA through PCI brackets anyway we’re only missing Firewire connectivity because the four RJ45 connectors frequent the tops of the very useful eight USB 2.0 ports now.The audio connectivity is excellent and while we still like to see a PS2 keyboard socket because sometimes a BIOS won’t pick up USB keyboards, we can’t understand while anyone would still use a PS2 mouse.
Since Gigabyte throws so many connectors on board it’s difficult to say what should be and shouldn’t be here – could the extra Gigabit Ethernet sockets be routed to pin-outs (we’ve seen it before on some Asus boards) and swapped for some Firewire to include some diversity instead?
But why would you buy a board with four Ethernet sockets if you didn’t really need them – there are enough P45 boards out there to get the features you exactly need and we think Gigabyte are good for sticking to its guns by providing something unique at least.
BIOS

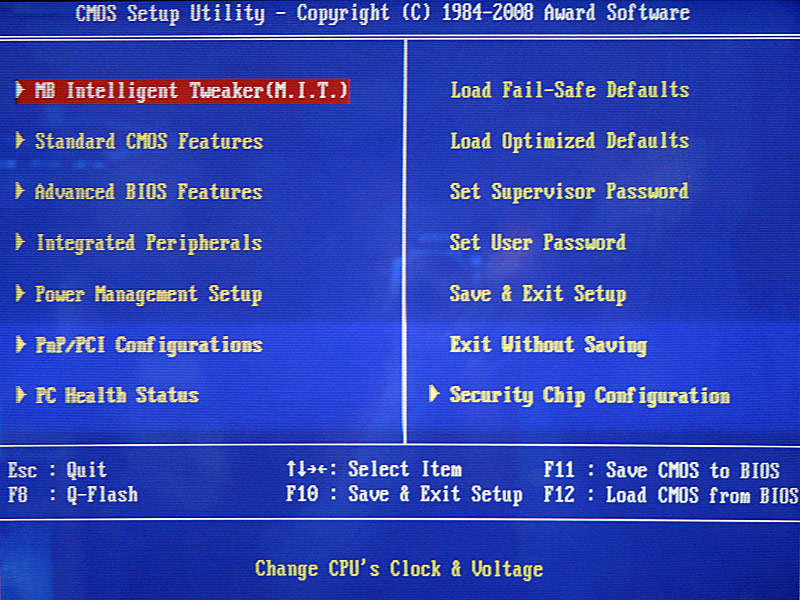

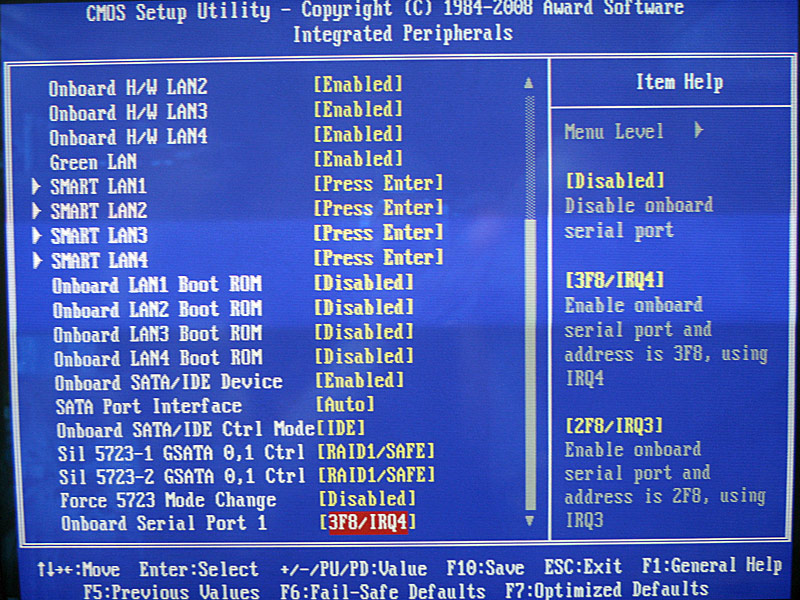 Gigabyte obviously went to town and came back with a truck full of goodies for us. Before we get to the nitty gritty, there are a few new nifty things included like the Green LAN which turns off unused Gigabit LAN sockets to save power, and the Silicon Image SATA RAID settings.
 These are set to RAID 1 by default because ‘hardware backup’ is assumed to be the most likely need of the less informed end user, but we still feel that Asus' GUI method in its ExpressGate feature is far more user friendly. Gigabyte puts this setting not only in the BIOS, which is unfamiliar territory to some, but it also buries it at the bottom of a sub menu and labels it something that would be considered obscure to many.
 The very useful Q-Flash, with its BIOS-level flash utility that lets you upgrade it from a USB memory key without having to fart around booting into DOS or using Windows utilities, is another firm addition. There is also CMOS profile saving and labelling with the F11 and F12 function keys so you can keep and quickly identify and reload your chosen profile should you need to clear the CMOS.
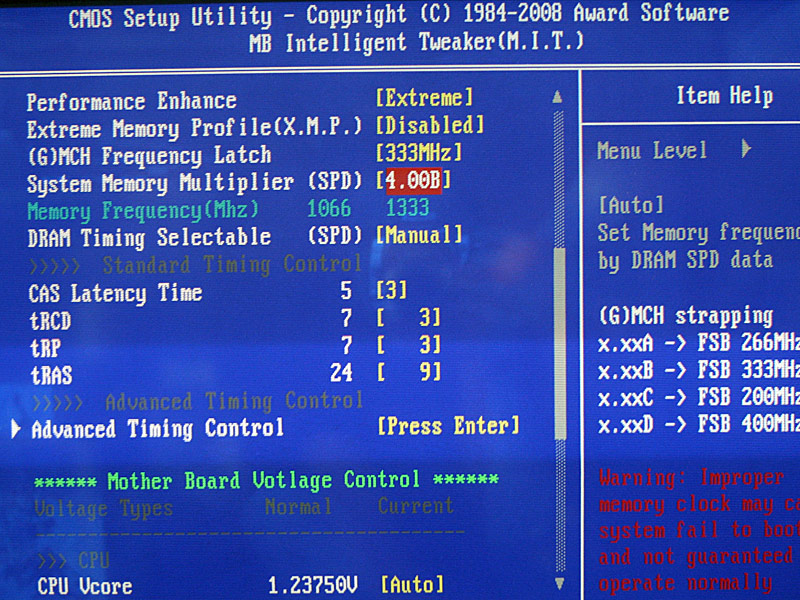
For tweaking the system there are some familiar settings like the clock drive voltages and CPU/MCH clock skews that jump in 50ms increments. There are also plenty of voltage options – the CPU voltage offers some particular finesse and instead of waiting forever with the ‘+’ key you can hit enter and type in the value you want instead: the BIOS will find the closest match. This makes things far, far easier.
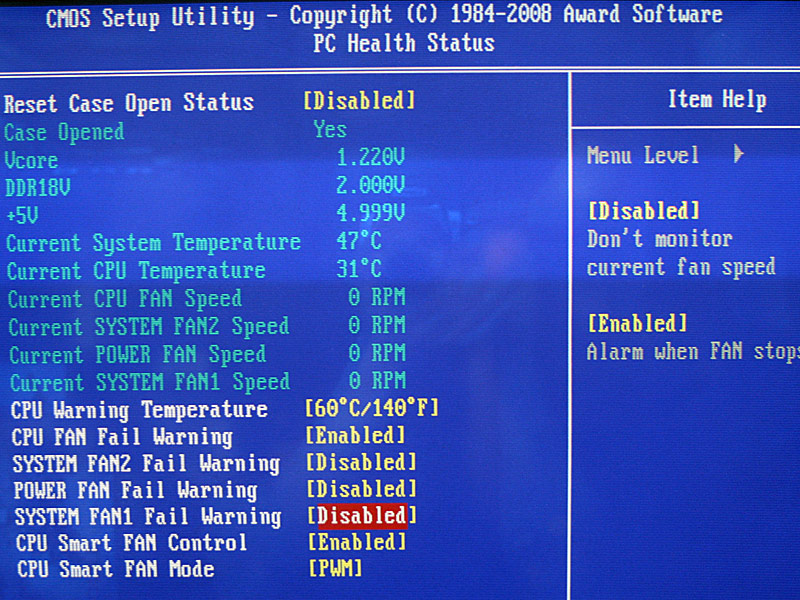
 The CPU and its Termination and PLL voltages go up quite a way but don't warn the user when you're reaching heights that will kill a CPU. Only the memory voltages flash red when things get dangerous. In addition, the level of control for these two is far less than that of the CPU at only 0.02-0.1mV compared to 0.00625mV. Gigabyte told us that this was a limitation of the controller.
There is both CPU (GTL) Reference voltages, as well as per channel DRAM reference, MCH and MCH-DRAM reference voltages too – all of which change automatically in relation to adjusting the CPU Termination voltage, which helps keep the ratios between the two in check. These (percentage) ratios aren't displayed though, that's a bit of work you'll have to do yourself. Finally, the DRAM Termination voltage is to do with the MCH-DRAM motherboard connection, not the on-die termination (ODT) of the memory itself. Gigabyte couldn't recommend a good value for this function, or how it helped specifically – we'd recommend you leave this set to auto.

Above this, Gigabyte has also split the north bridge frequency from the memory divider – you now have the option to set the north bridge frequency independently and seeing what memory dividers are available separately. It makes things a lot more intuitive – but if you're used to the old way of one long list, Gigabyte still gives that option too.
The memory timings are split into the four standard timing controls, then a sub menu allows the more advanced timings and phase adjustments. Using the ‘early’ F3h BIOS we've been unable to get the board stable after changing any of the options in this section – while we were able to get Everest results with tRFC, tWR and even slight tRD optimisations, we couldn't get the Command Rate of 1T to work at all or set the performance level manually to a level that matches the Asus P5Q Deluxe board.
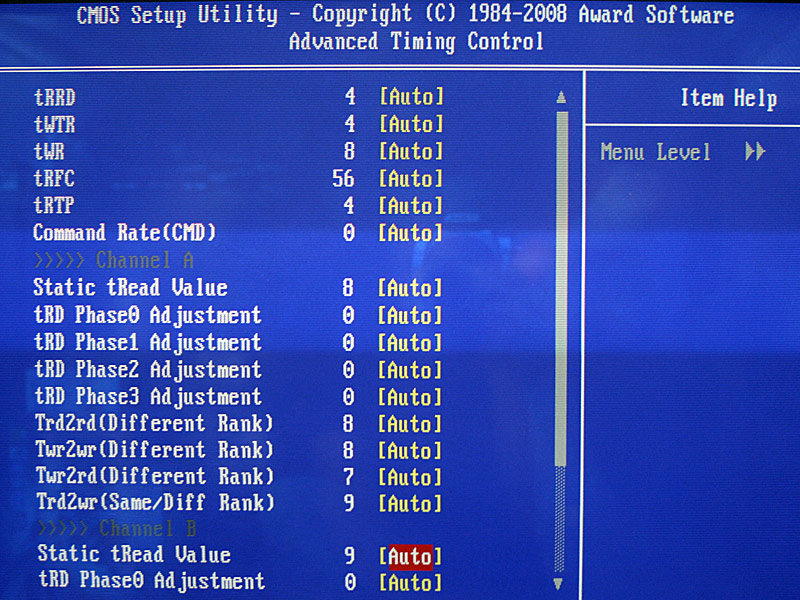
 Gigabyte told us that the tRD and phase adjust values can differentiate slightly between the channels, but that didn't help us unfortunately. We also asked what the ‘Performance Level’ setting did exactly, but we were bizarrely told it changes too many options to detail to us. Playing around on our own, we found setting this to ’Extreme’ does seem to compensate for manual control quite well, as we'll show in the performance results in the next few pages.
There is really very many clearly laid out options to play with, but if you're particularly keen on manual control like we are, wait out to see what the new few BIOS evolutions bring us – F3h is still early in the grand scheme of things and just isn't stable enough for what we currently want to do.
RELATED ARTICLES


MSI MPG Velox 100R Chassis Review
October 14 2021 | 15:04

Want to comment? Please log in.