mCubed HFX-112 T-Balancer MiniNG Review
Manufacturer: mCubedUK Price (as Reviewed): £29.99 (inc. VAT)
US Price (as Reviewed): Not available
The T-Balancer range of fan controllers by mCubed has a rather well-earned reputation of being conceptually excellent but hideously complex and uncompromising pieces of kit. We’ve had to grapple with them on more than one occasion before, and we’ve always come away with the impression that we could get so much more out of them if it they were just a little more user-friendly. Still, we like a challenge, so here we are taking a look at the most junior of the T-Balancer series - the miniNG.
The miniNG is a dual-channel fan controller that can support a maximum power draw of up to 100W. That might sound ludicrous, especially given that a regular fan only draws about 4W, but it means the miniNG has the ability to power a 12V water pump in addition to your case fans. It also means that there's plenty of scope for using splitter cables to connect multiple fans to each of the channels.
Controlling the fan channels are two analogue temperature probes which are supplied with the miniNG. The wires for the probes are a generous 80cm in length, meaning you shouldn’t have any problem reaching even the most remote nook of your case. Some manilla-backed double-sided tape is supplied for attaching the probes, but we can’t work out why you’d use it as you'd never place the probe between a chip and heatsink - the probe is too thick and will negate the usefulness of the heatsink. Strong, clear, single-sided tape would have been a better addition.
Click to enlarge
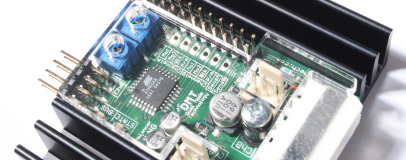
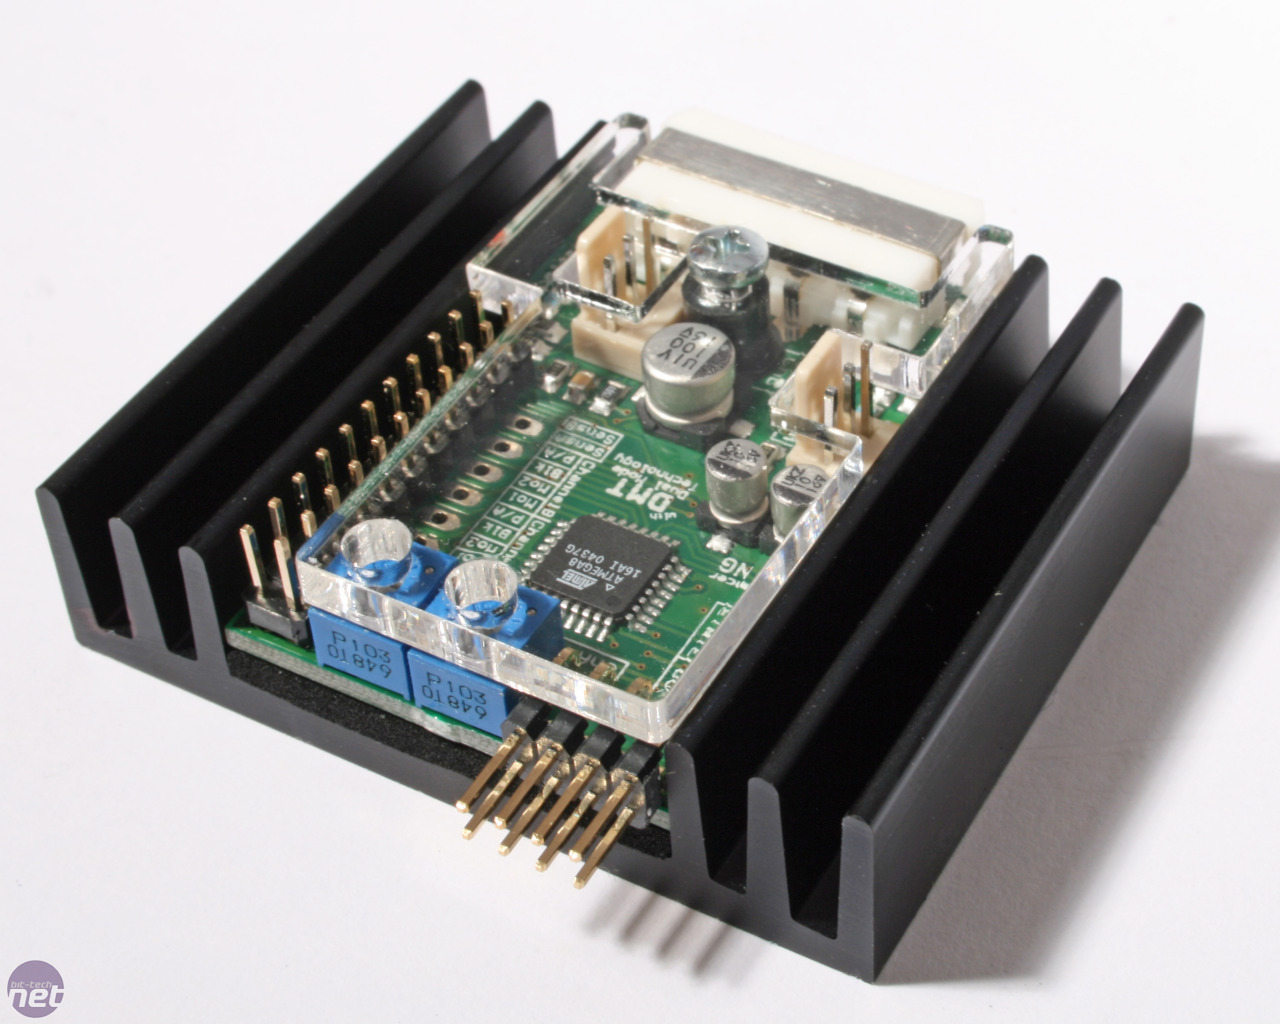
The controller itself is tiny; measuring only 60 x 50 x 16mm in size, it’s barely bigger than a Zippo lighter. This makes it easy to secrete inside your case, and two Velcro patches are supplied for mounting the unit. The PCB is sat snugly in a sturdy metal heatsink and covered by a well-fitted Perspex cover; these give the unit a pleasing feeling of quality engineering.
The PCB houses the molex power connector (white), the two 3-pin fan connectors and two blue, adjustable potentiometers. Also on the PCB are a long bank of pins used to adjust the settings of the miniNG, and a smaller bank that allows the controller to be connected to one of the full-size T-Balancers. Doing this slaves the two channels of the miniNG to the larger T-Balancer, essentially adding two extra fan and sensor channels to it.
You may notice that the miniNG doesn’t have any way of connecting to a PC, and this is because it eschews the usual T-Balancer control GUI in favour of on-board jumpers. This means the miniNG’s settings can be changed when its host PC is powered down but it obviously means that a degree of flexibility is sacrificed.
The miniNG has four main modes - Target Temperature, Curve, Step and Manual - which are changed by adding or removing jumpers to the long bank of pins on the PCB. Target Temperature and Manual mode are fairly straightforward, but Curve mode and Step mode are a little more interesting. Curve mode waits until a defined threshold temperature is reached before starting its fans up at 30 per cent speed. Fan speed is then increased along an increasingly steep curve as the temperature rises.

Click to enlarge
Step mode on the other hand waits until a given temperature is reached at the associated probe before starting the fans at 60 per cent speed. If temperatures continue to increase then the controller increases the voltage and speeds the fans up to 100 per cent.
The blue potentiometers are used to adjust the settings associated with the mode you have set the controller to. In Curve mode for example, twiddling the potentiometer changes the temperature at which the fan-speed curve starts and in Target Temperature mode the potentiometers adjust the target temperature that the miniNG is attempting to achieve. With no digital readout and no connection to a PC though, it can be difficult to know what you’ve set the potentiometers to. The setup guide mentions that the lowest setting is around 30oC and the highest around 70oC but it's still very much a case of trial and error until you get the settings right.
The miniNG also allows you to select between an analogue or PWM power supply. Analogue operation should theoretically be quieter but it may mean that the voltage supplied to a fan sometimes slips below what is necessary to keep it running. PWM mode on the other hand supplies power to the fans in pulses and changes the speed of these pulse to adjust the fan's speed. As these pulses are delivered at the full 12V, the fan should keep running, even down to very low speeds. The only disadvantage to this is some fans can emit a strange buzzing noise when fed with voltage in this way.
RELATED ARTICLES


MSI MPG Velox 100R Chassis Review
October 14 2021 | 15:04

Want to comment? Please log in.