
Inside the Asus Eee PC 901
Manufacturer: AsusYet again my inner seven year old has taken hold of me and insisted I find out what's inside the new Eee PC 901 without general consideration about how it goes back together. It doesn't seem all that long ago when we broke the Eee PC 900 open to see what was inside its green, silicon innards, and now we're doing the same with the arguably more interesting 901.
After all, everyone seems genuinely excited by the prospects of Intel's Atom processor family.
If you've been between rock and hard place for the past few weeks, Asus announced the new Eee PC 901 and Eee PC 1000 at Computex Taipei earlier this month - we published our first impressions of the 901 last Friday.
Both feature Intel's new Atom processors, with the smaller version being very similar to the older Eee PC 900, which used the same hardware as the original Eee PC 701, but featured a larger 8.9" screen and a higher capacity SSD.
We break things so you don't have to...
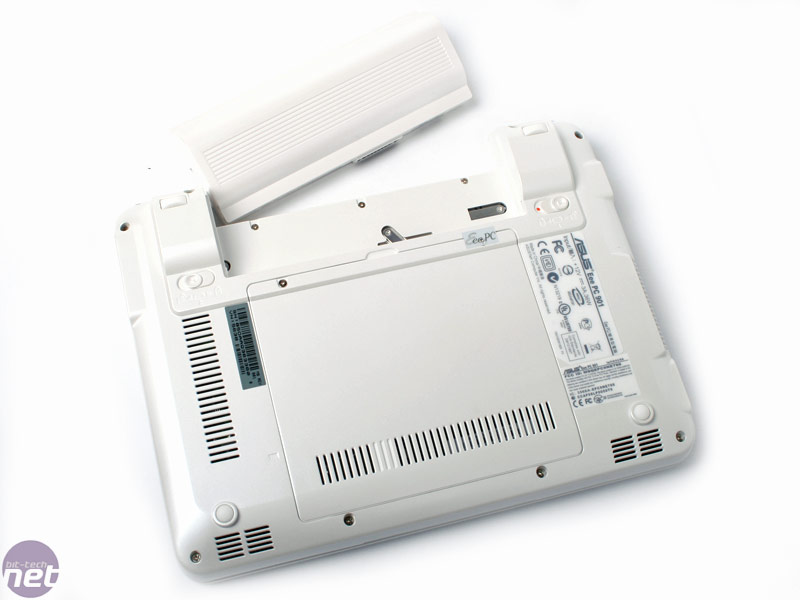
... unless you want to - and then we're right behind you!Getting in is relatively easy, providing you know where to look. You'll first need to remove the battery and take out all the screws on the underside (there should be 13 in total), including the one for the flap that hides the non-warranty voidable removable parts.
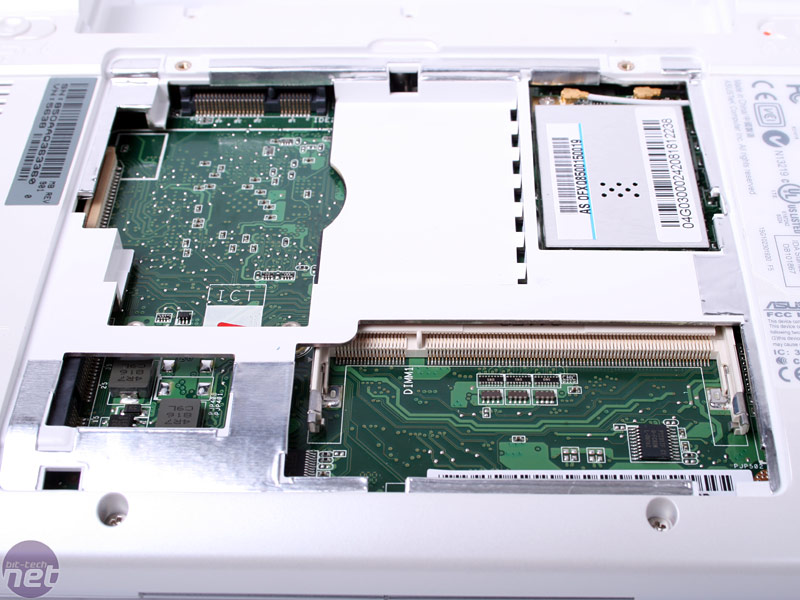
Once that's out, take out the 16GB SSD and the single DDR2 memory module - note if you want to upgrade you'll have to replace this DIMM with a bigger one since there's only one socket available in the 901. We're still keen to try this 16GB SSD in another notebook and we'd love to know how much of the 901's BOM (bill of materials) is taken up by the SSD.
To the left of the SSD slot and above the DIMM socket, there is the Wireless 802.11n module. Both antennas are connected to it - they run up and around the 8.9" LCD screen.
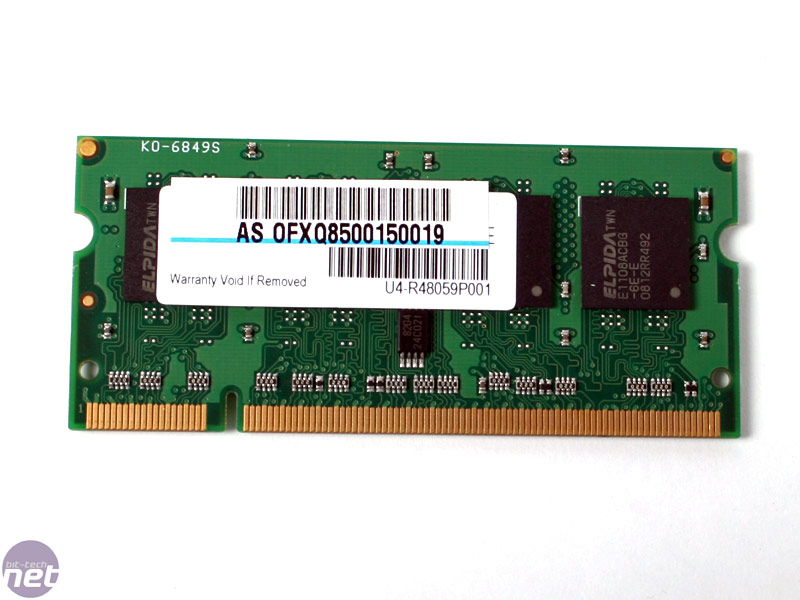
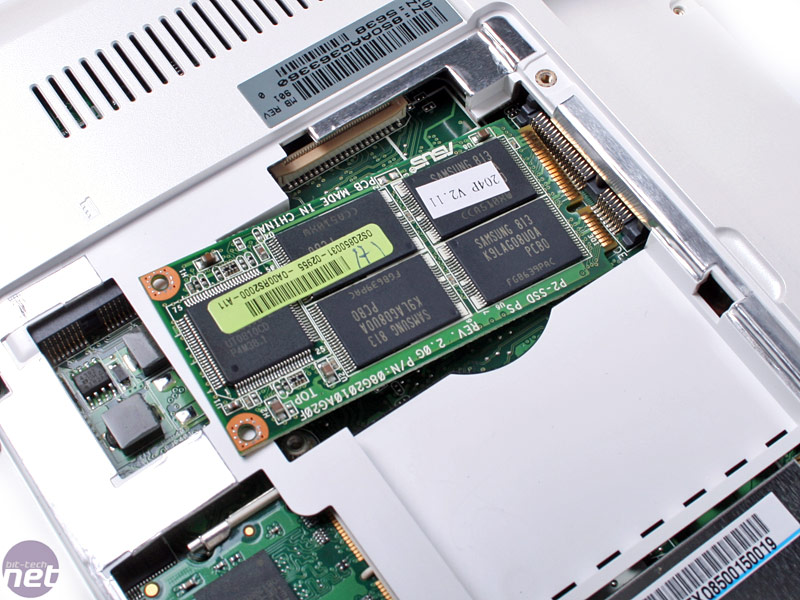
1GB Elpida So-DIMM and 16GB Asus-Samsung SSD module

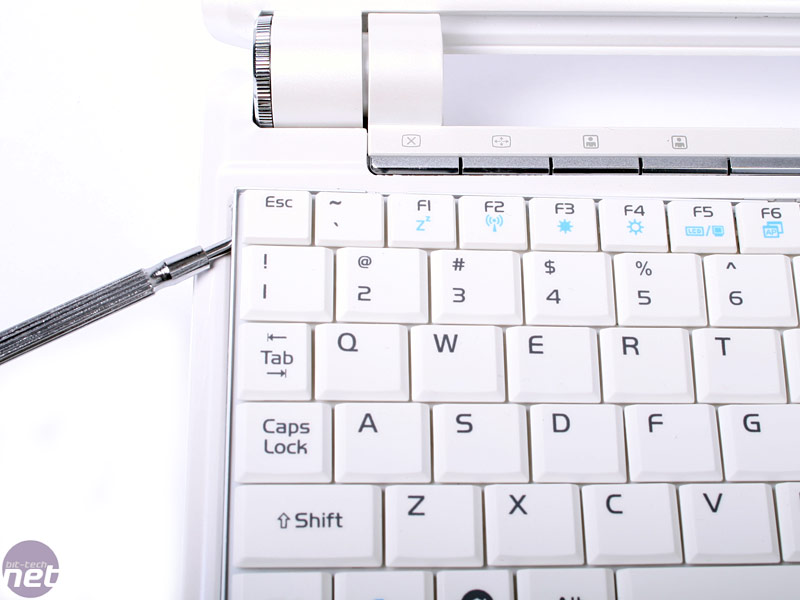
Next, you'll need to flip the 901 over and attack the keyboard as there are also screws underneath there too! In the top there are three very subtle clips that hold the keyboard in remarkably well and you'll need find a couple of strong but thin implements to remove them - we used a pair of watchmaker's screwdrivers (note: cocktail sticks don't work before you try).
With screwdrivers in hand, you need to simultaneously pop the keyboard upwards from both sides, while pushing the clips back into the plastic to remove it without damaging anything.
RELATED ARTICLES


MSI MPG Velox 100R Chassis Review
October 14 2021 | 15:04

Want to comment? Please log in.