How to Jump a PSU
September 20, 2017 | 15:00
One question I get asked a lot is, 'How do I test a liquid-cooling loop?' Typically, I'll tell them to just jump the PSU and run the pump, ensuring that your hardware will be safe in the event of a leak. This often creates more questions, however, the main one being, 'How do I jump a PSU?' Thankfully, it's very simple, and in this guide I'll show you two ways you can do it.
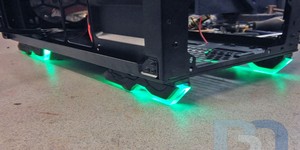
Jumping a PSU can be used for multiple purposes: testing a liquid-cooling loop, running a car stereo, powering LEDs, pretty much anything. Basically, you are just tricking the PSU into thinking that you've pressed your system's power button and turned it on. Some people even use this method to run dual-PSU systems, splitting the load with one PSU powering the motherboard and GPU like normal, for example, and the second PSU jumped and powering everything else. For us, the main use is to power a pump while testing custom loops. If it leaks, the rest of the system will have no power going through it as it won't be plugged in and your expensive hardware will be fine (once you've properly dried it, of course).
First, a few things to remember. When you usually use your PSU, the power only turns on when you press the power button on your case. This power button is attached to the motherboard and it is that that tells the PSU to power up via a specific pin on the main 24-pin connector. When you're jumping a PSU, as soon as you connect the necessary pins together, the PSU will power up, so make sure you have either turned the PSU off at the wall or via the switch at the back of the PSU itself.

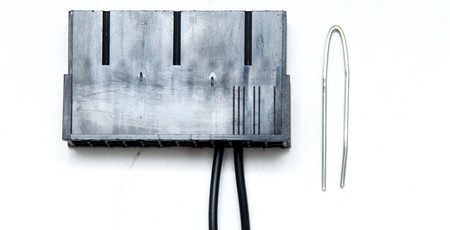
The first method we are going to look at is the 'paper clip test'. As the name suggests, all you need is a paper clip or some wire. This is definitely the cheapest option and can be done rather quickly. I always cut the paper clip/wire so that it is around 60mm long. In truth, it can basically be as short or as long as you like, but the smaller it is, the less likely it is that it will get knocked out or come loose.

Next, bend the wire so that it looks like this; it really is that simple. You are ready to go!
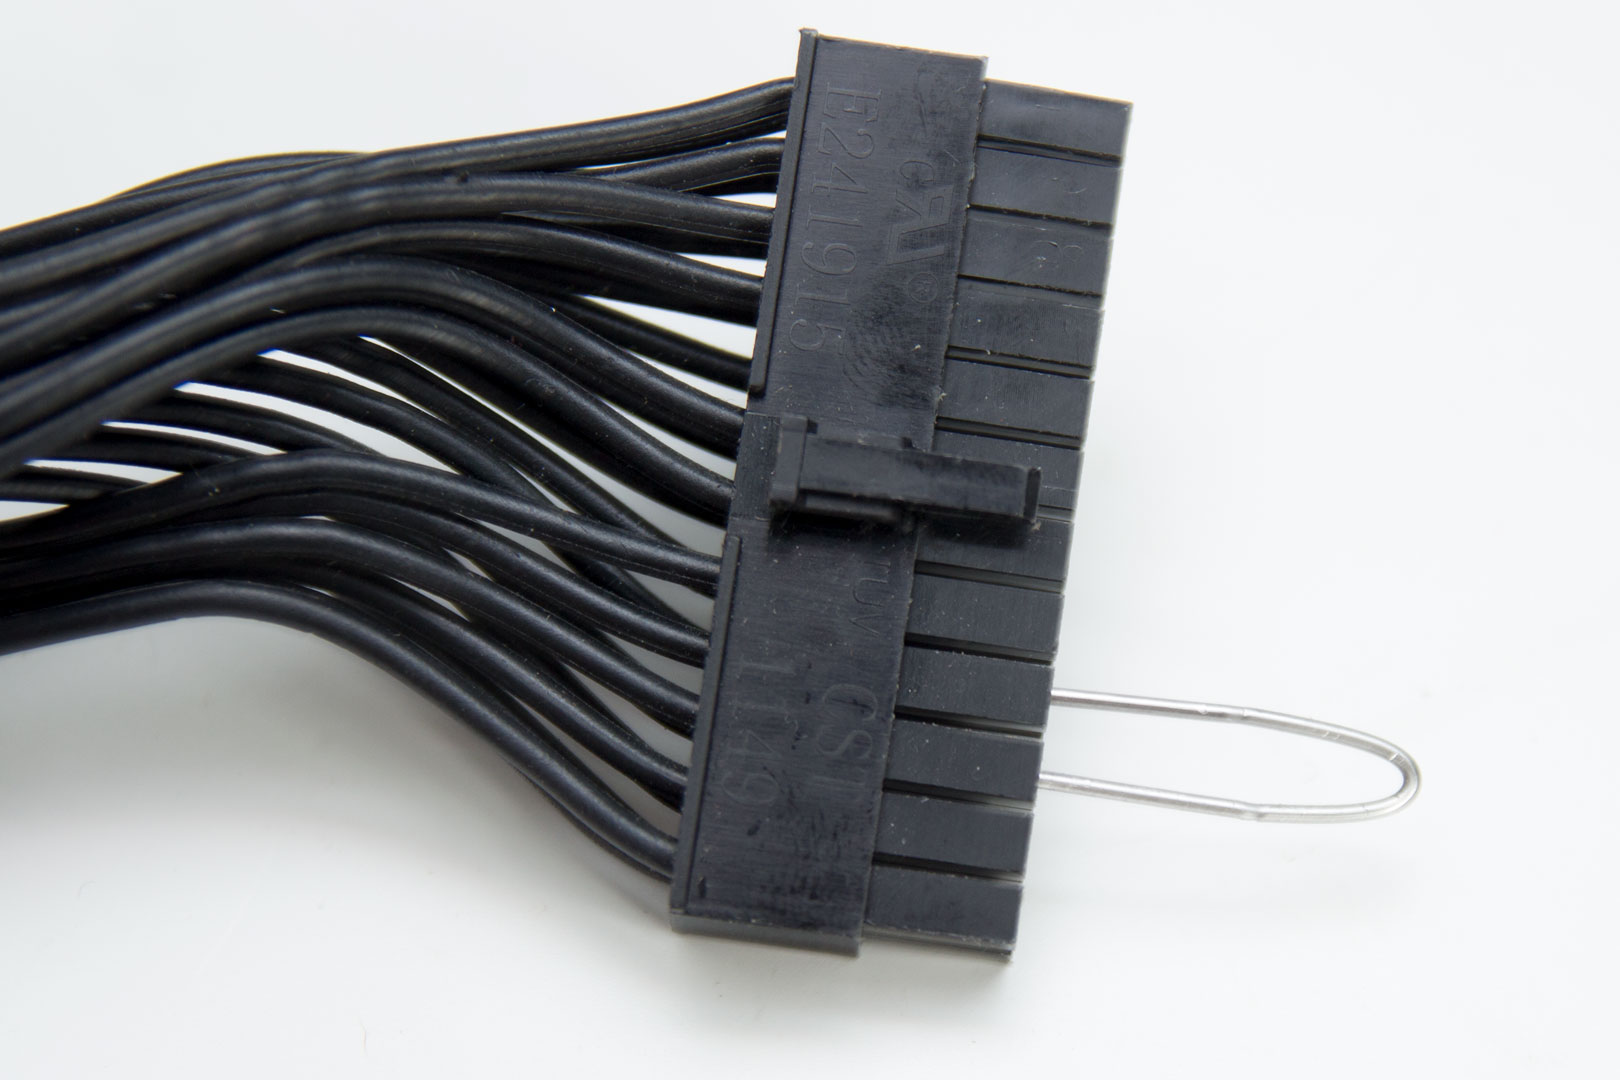
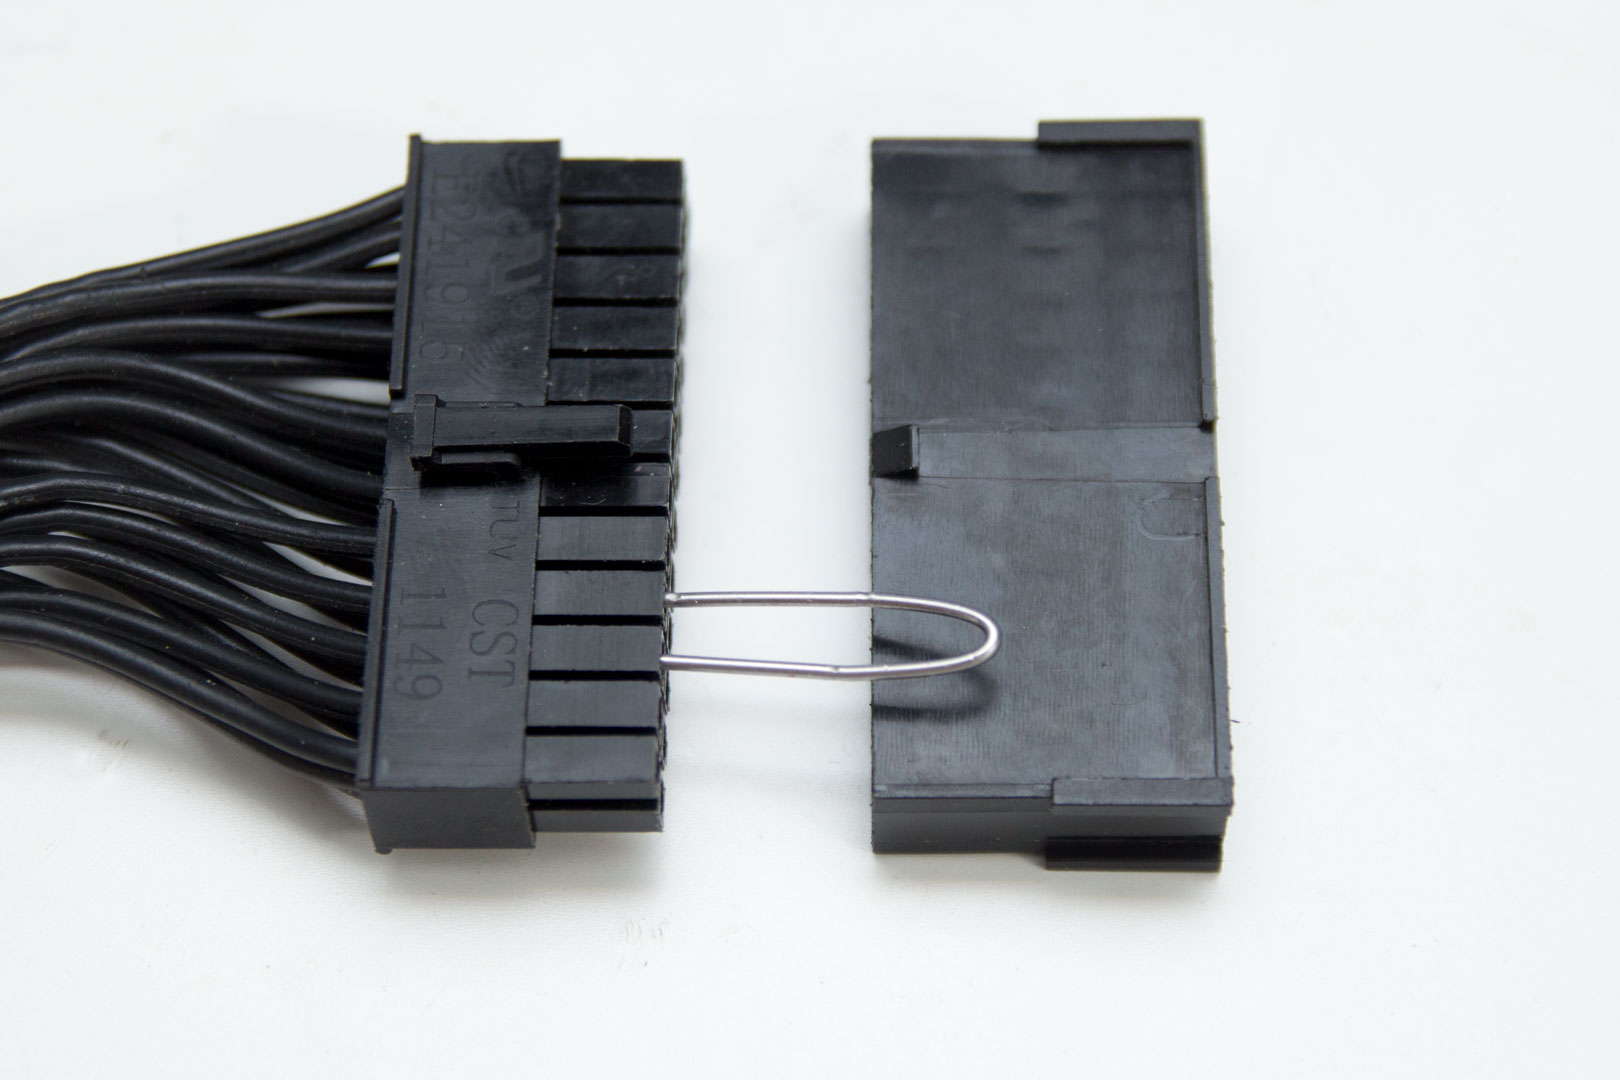
Now you simply put the wire into the 24-pin connector that comes from your PSU. You MUST connect the wire to the fourth pin from the left when you looking directly into the connector with the clip on top and the wires leading away from you. If you are using an older or value-oriented PSU, you can also easily identify this pin as the only one with a green cable plugged into it. However, modern and more expensive PSUs now typically have individually sleeved and uniformly coloured cables (as you can see above), so this method isn't always available. Either way, this pin is the PS_ON sensor that tells the PSU that it's plugged into the motherboard and that it's okay to supply the power.
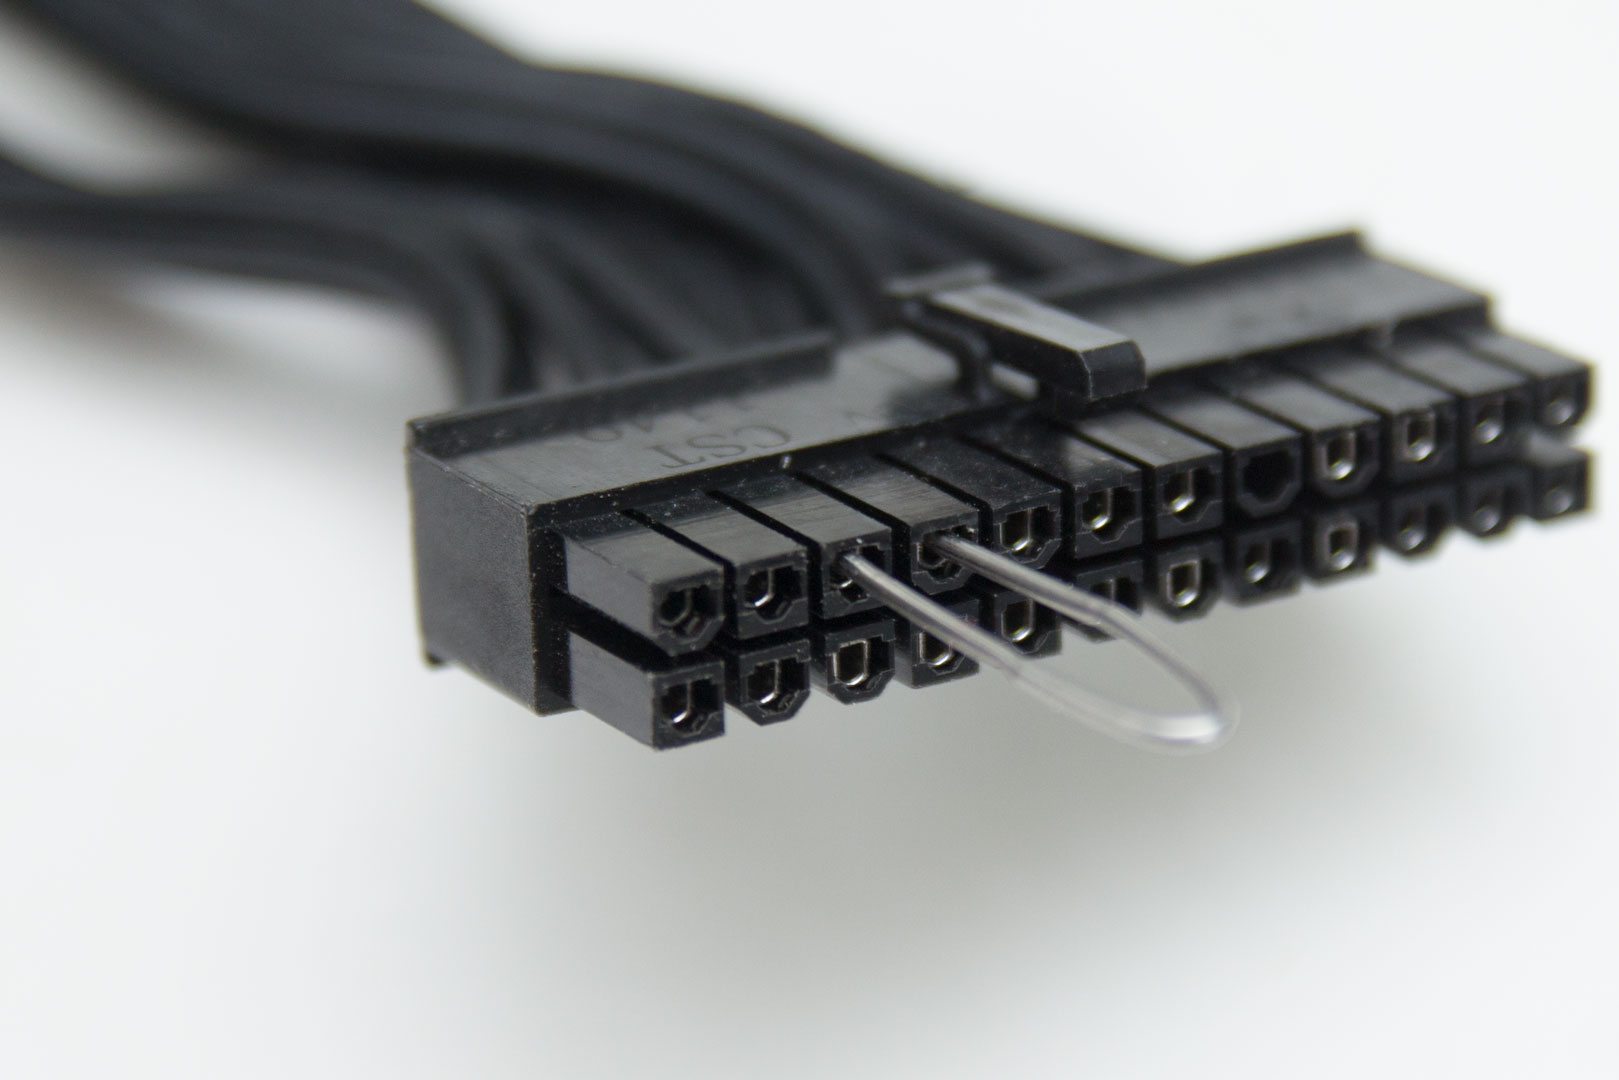
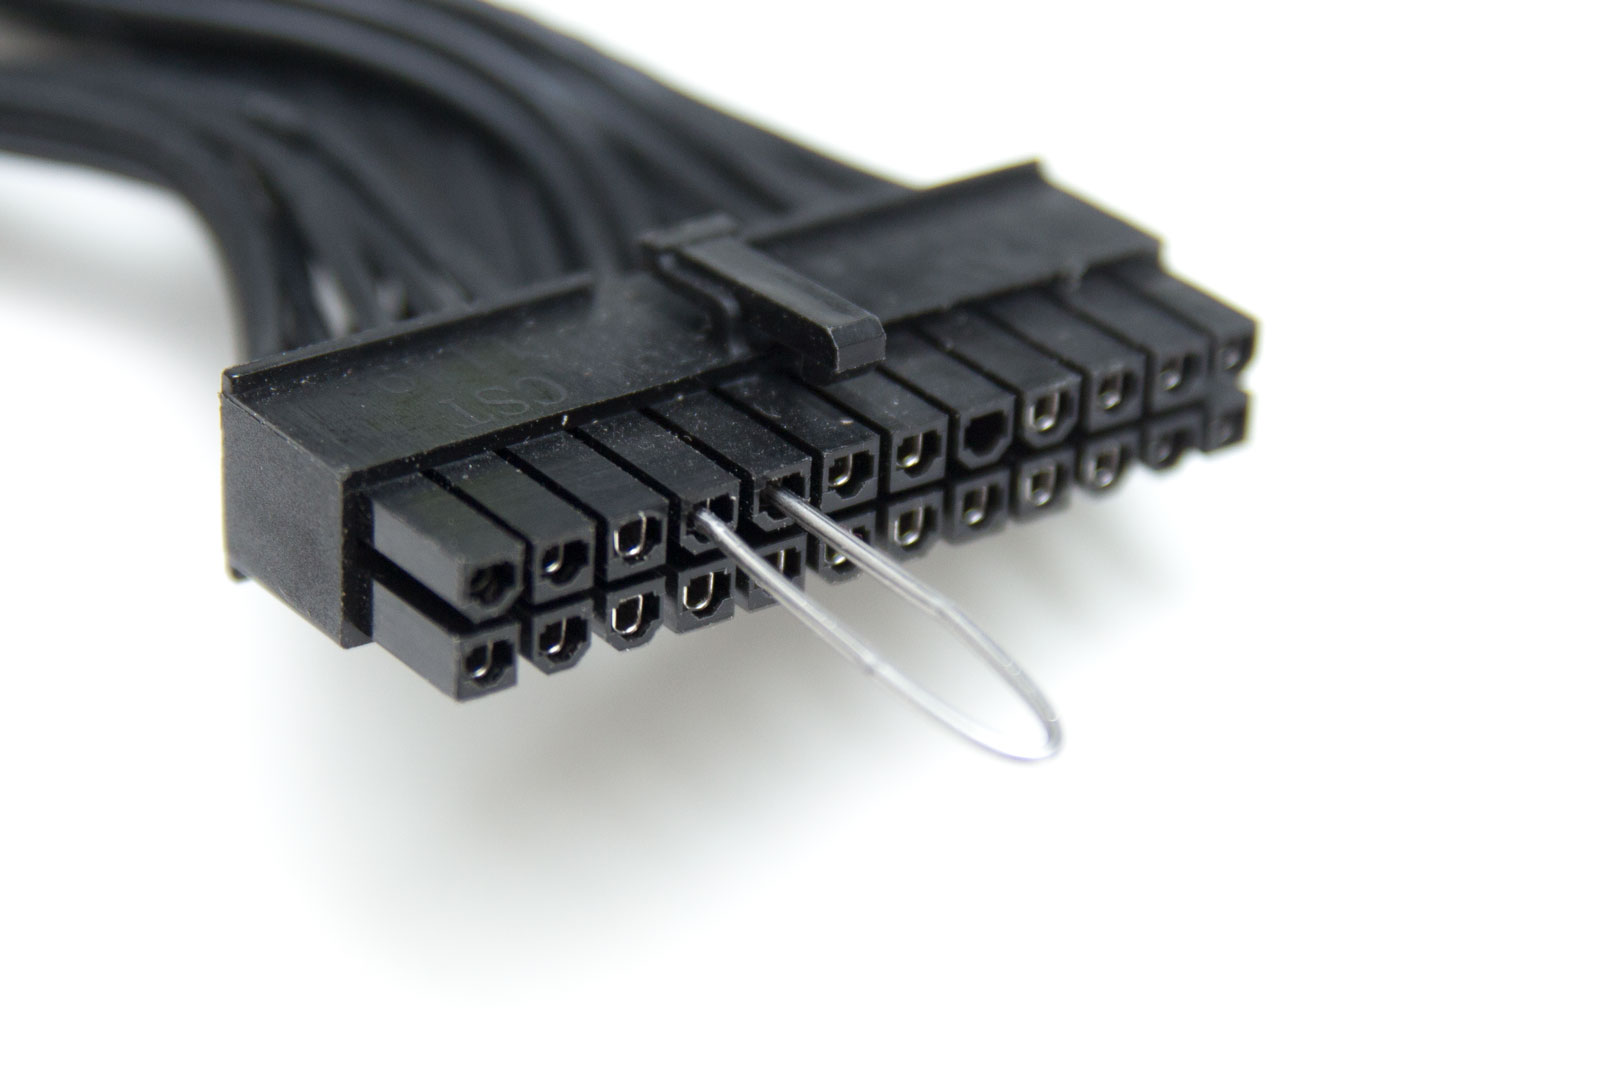
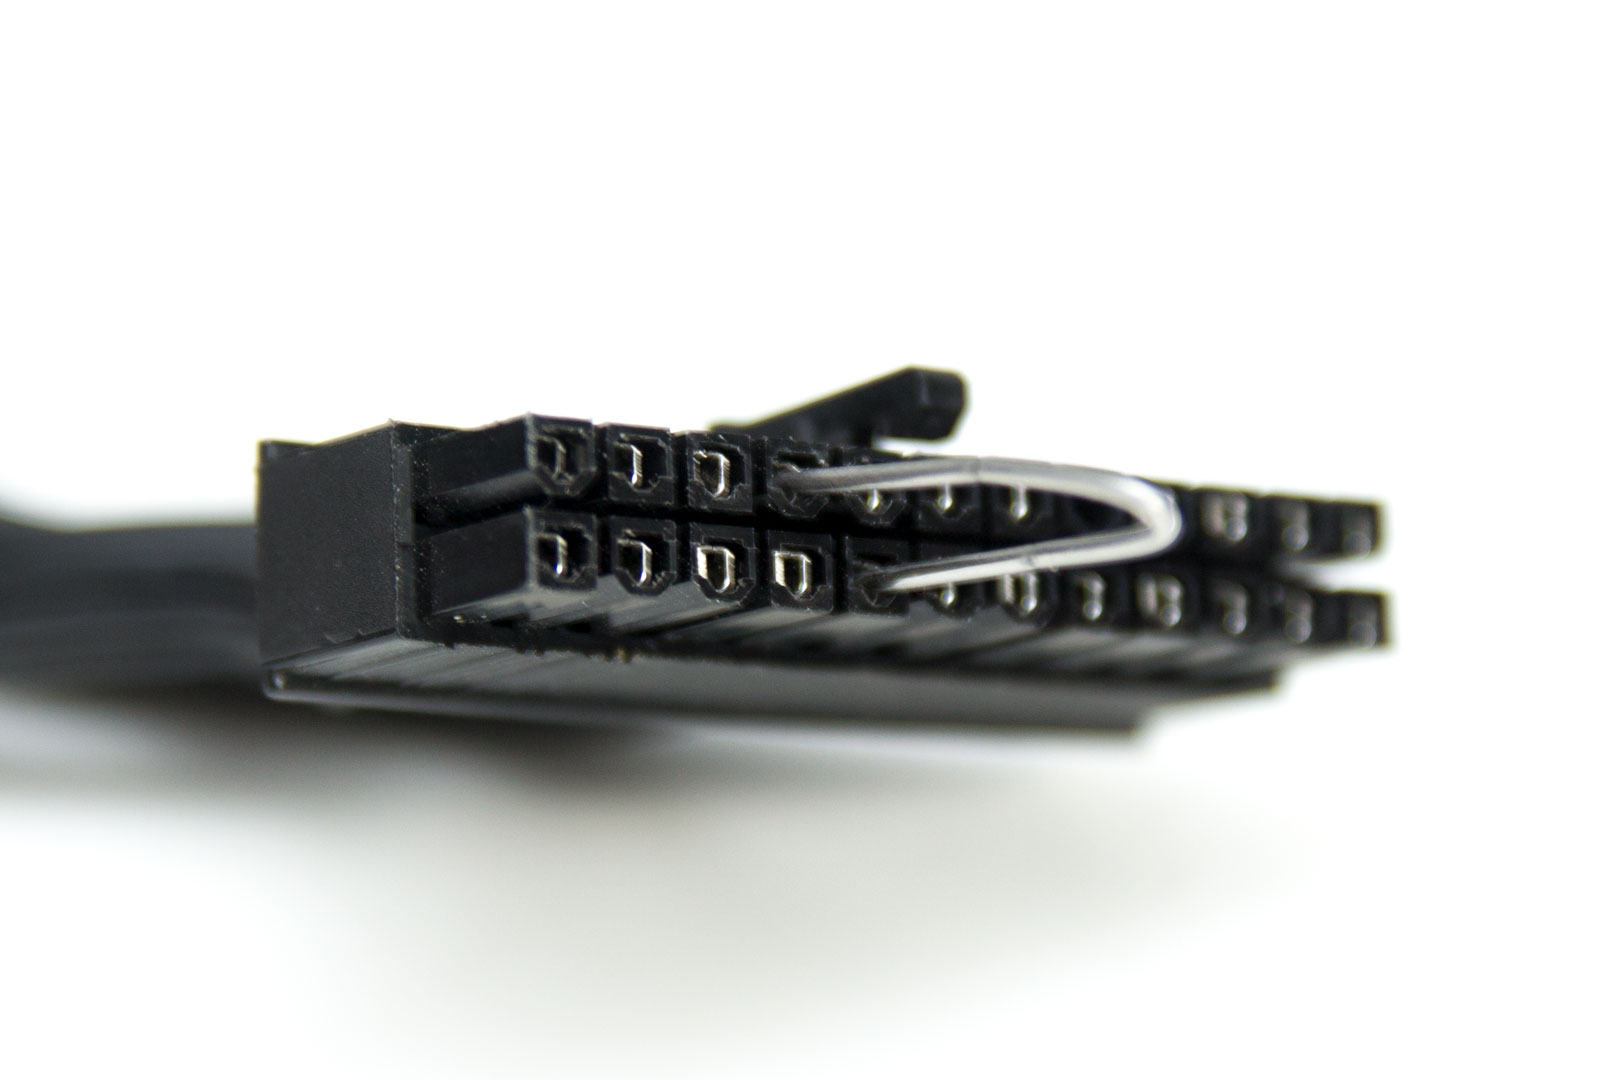
Now, the other end of the wire must go to a ground wire to complete the circuit. This is where some people get confused when checking how to jump a PSU, because different people use different ground wires in their explanations. There are eight different ground wires on a 24-pin cable, and any of them can be used. If you have an older style connector with multi-coloured wires, you can identify ground pins as those with black wires connecting them. The two pins either side of the PS_ON work fine (see the first two pictures above), but some people go diagonally like in the last picture above. Remember, as soon as you connect the two pins, the PSU will start to power anything that's plugged in, so make sure it's either off at the wall or at the back of the PSU beforehand. When you flick the switch on with the paper clip in place, it will power up. Touching the paper clip won't actually hurt you, but do be mindful that you don't knock it out by accident.
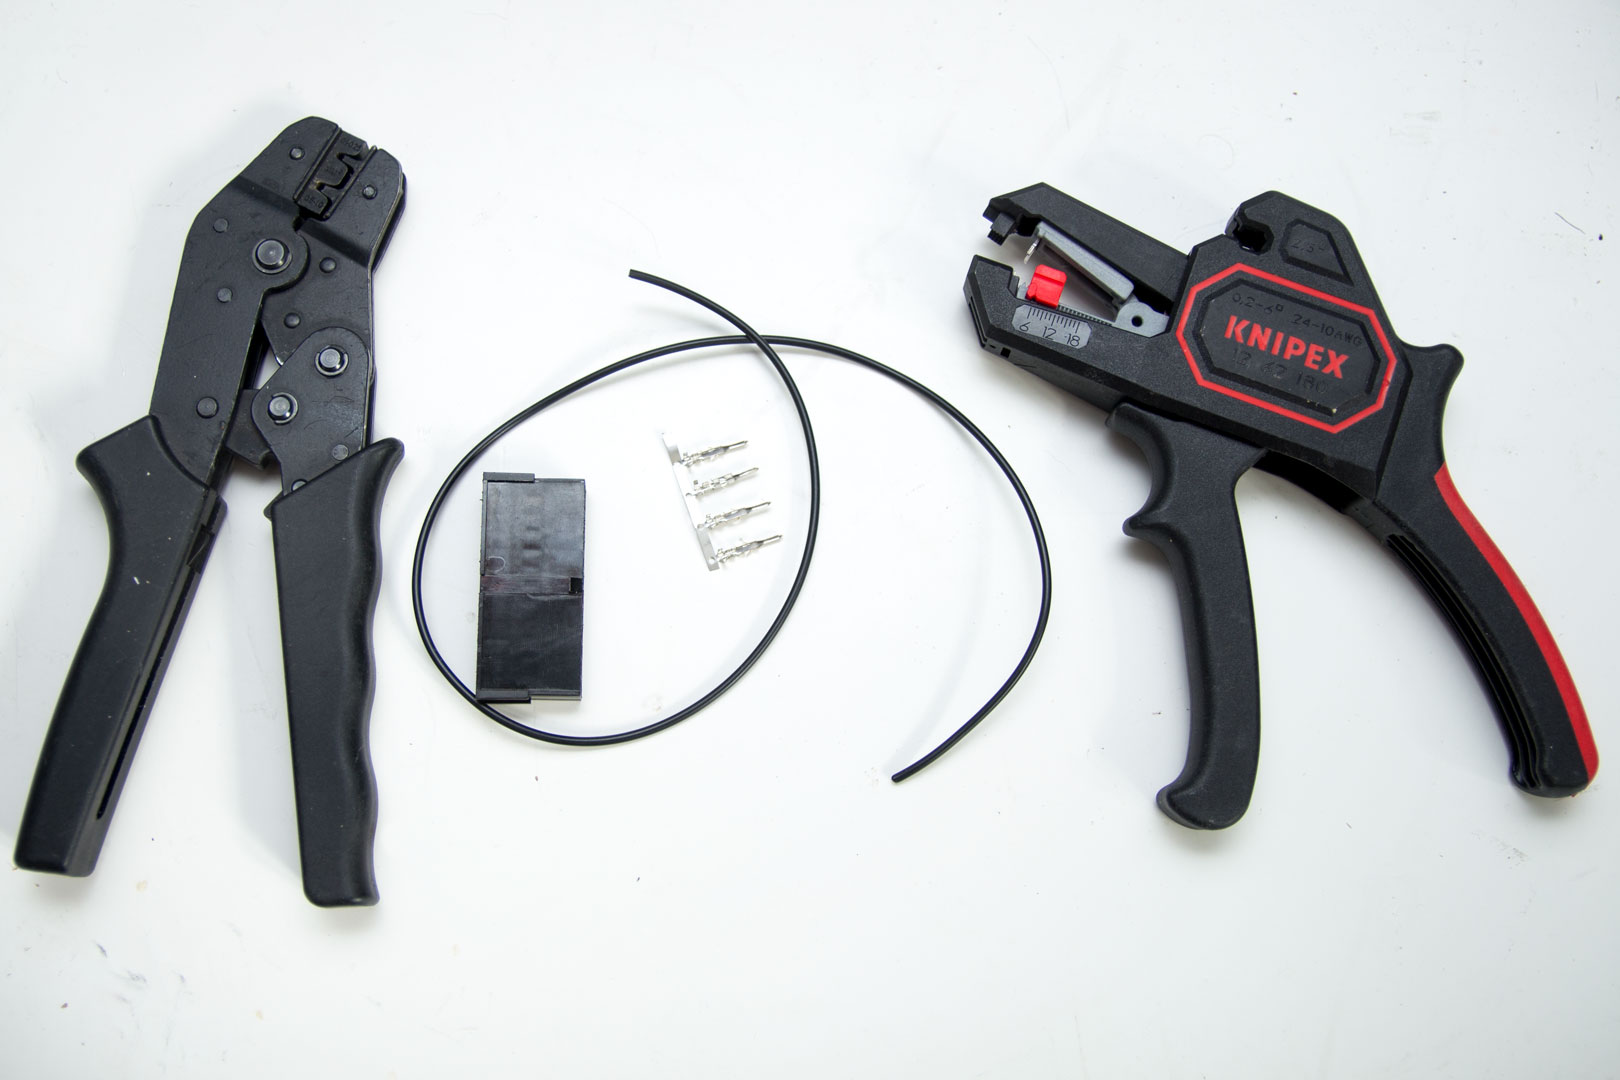
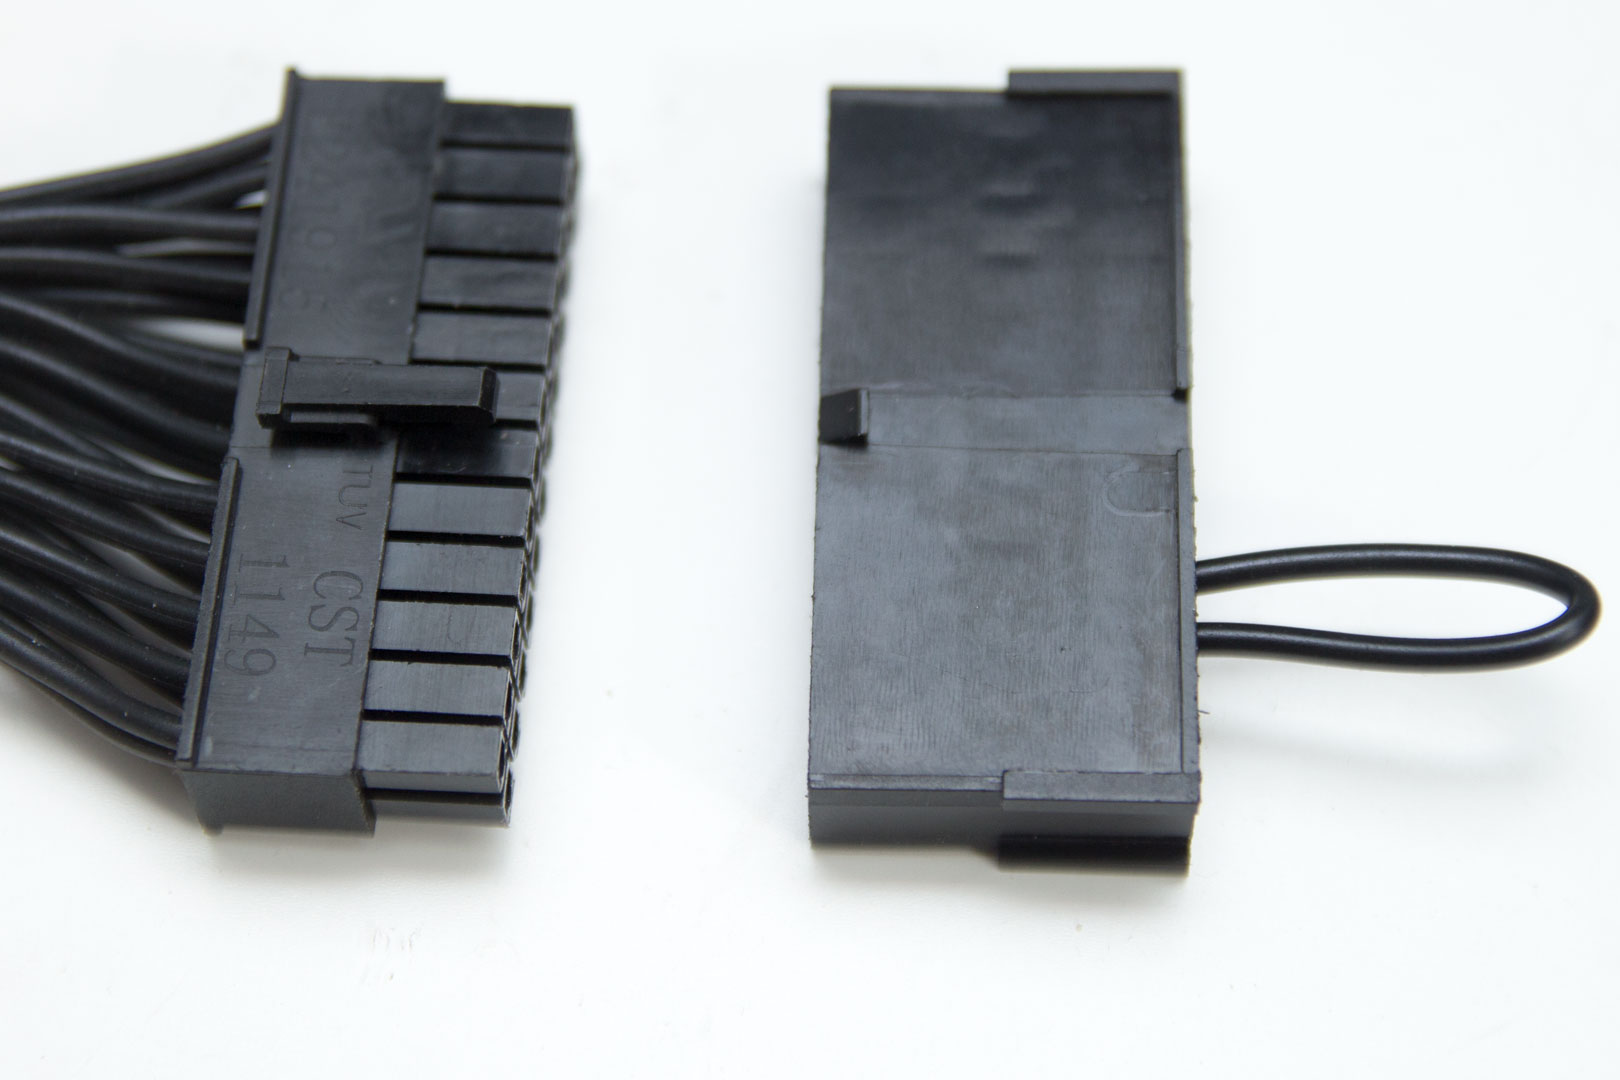
The second option is a little tidier and far better if you are building multiple systems or want something more permanent. You'll need some wire, some male ATX terminals, and a male ATX connector. Yes, this one is called the male connector, even though the PSU's connector fits into it. It takes its name from the terminals that fit inside it. If in doubt, just look at what your 24-pin connector looks like and get the opposite connector. It should look like the one that is on your motherboard.
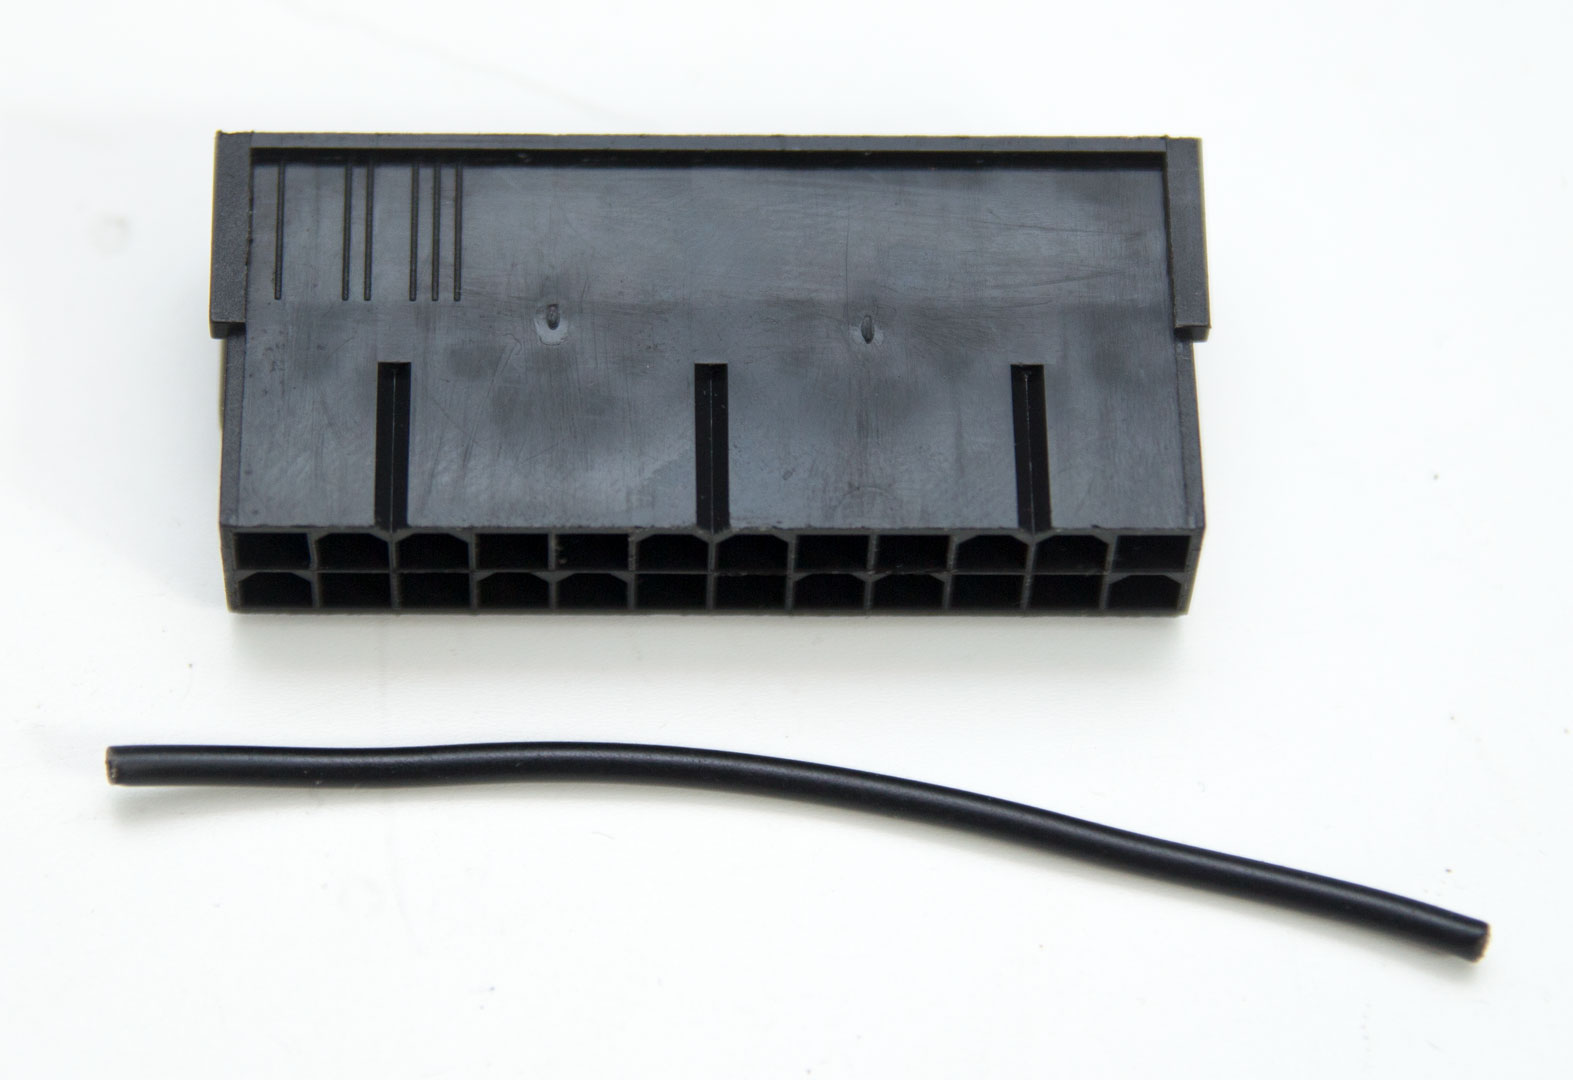
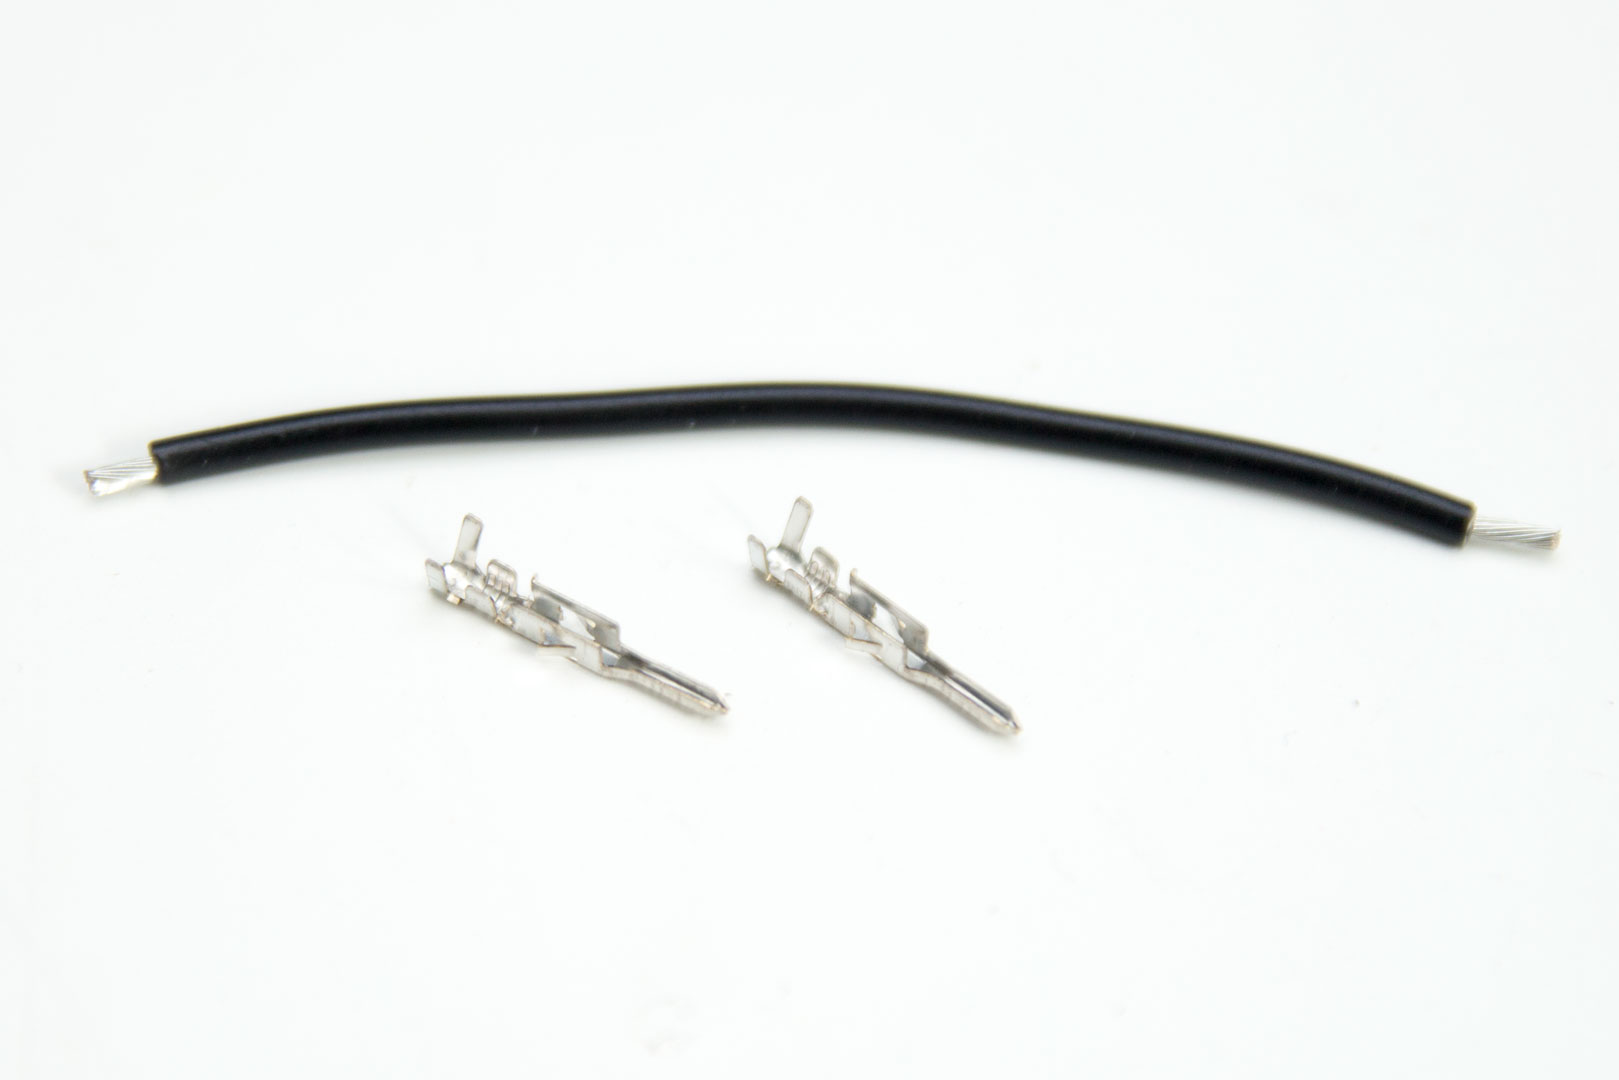
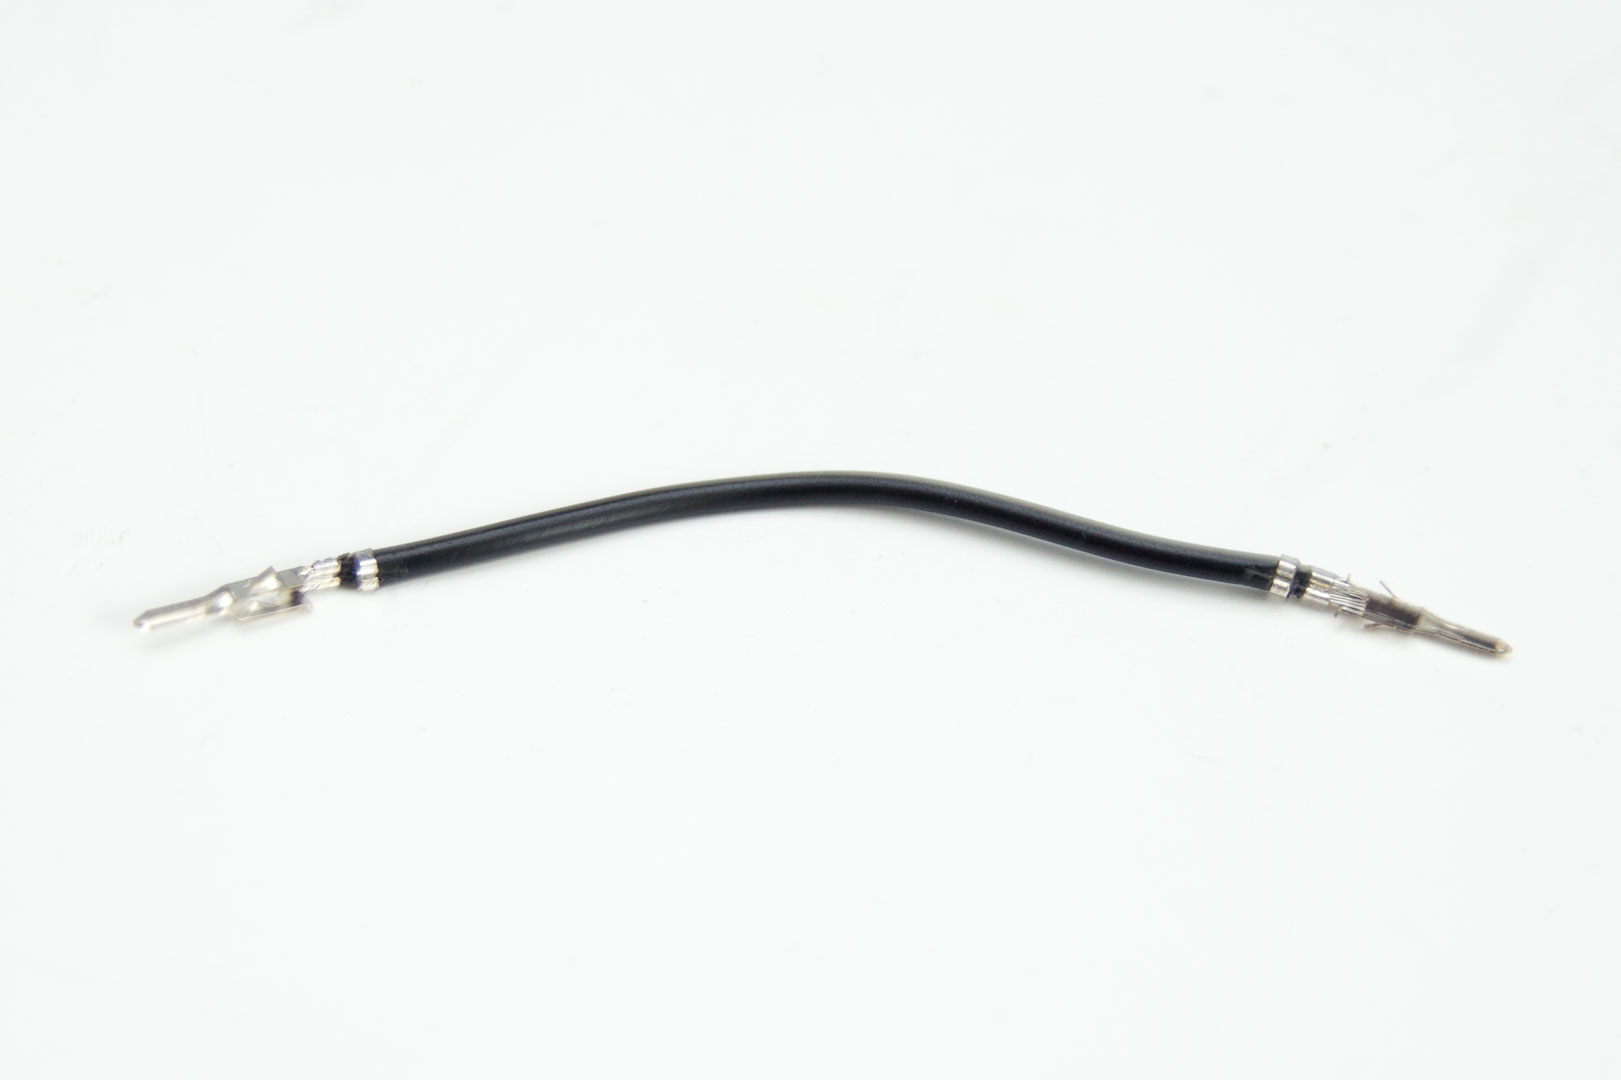
Cut the wire so that it is around 60 mm long, just the same as we did with the paper clip. Next, grab a couple of male terminals, strip a few mm of insulation from the wire, and crimp the terminals to the end of the wire.

These PSU jumpers can be bought for just £2 (excluding delivery) so are only really cost-effective if you have the tools already or you're about to order a lot of sleeving supplies. This cost me less than £1 to make and took a few seconds, so if you have the equipment already, it's certainly cheaper.
So, you can now power your pump, LEDs, or anything else without having to have power coursing through your motherboard - winner! Do make sure you are careful, and if you have any questions, just ask!
RELATED ARTICLES


MSI MPG Velox 100R Chassis Review
October 14 2021 | 15:04


Want to comment? Please log in.