
Share some more
Webmin may be very powerful, but that doesn't mean it's complicated to use. It offers easy interfaces to what many new users consider complex services. One of those services is Samba. As explained in the previous article, Samba enables file sharing on a network. In the previous article we configured Samba in it's primary form, through the use of flat files. Now, we will use Webmin to set up a share that links to the directory Torrentflux uses.
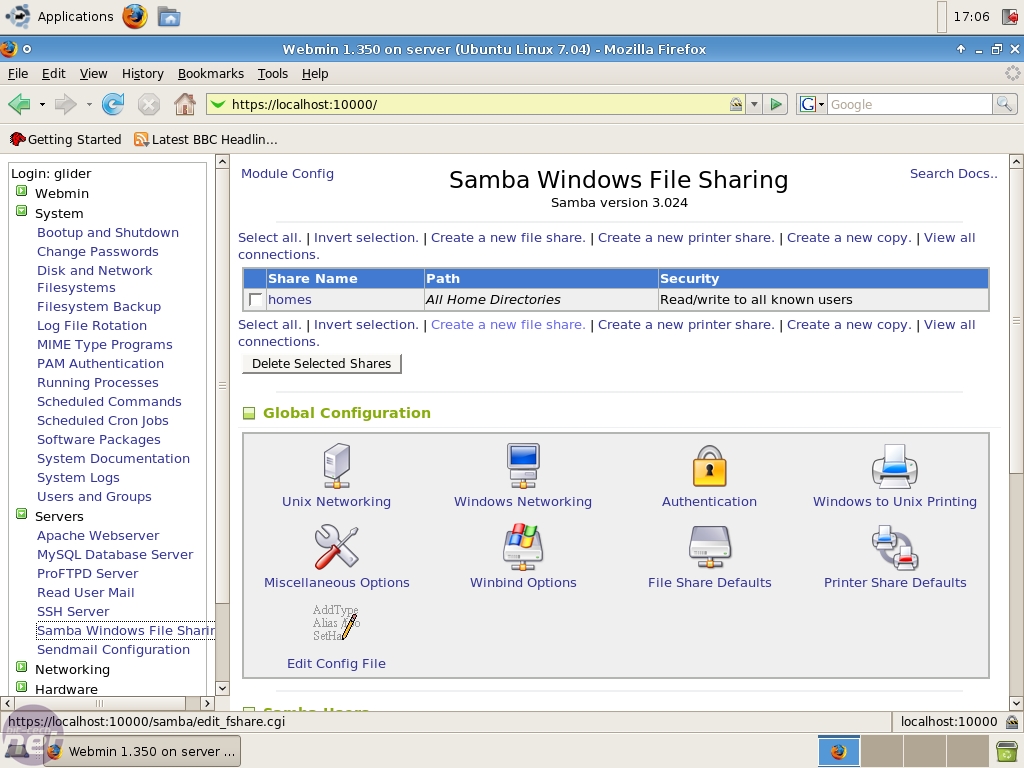
So, head over to “Servers” where you'll find “Samba Windows File Sharing". Click on the “Create a new file share. ” link and you'll be greeted with an easy interface to create the share.

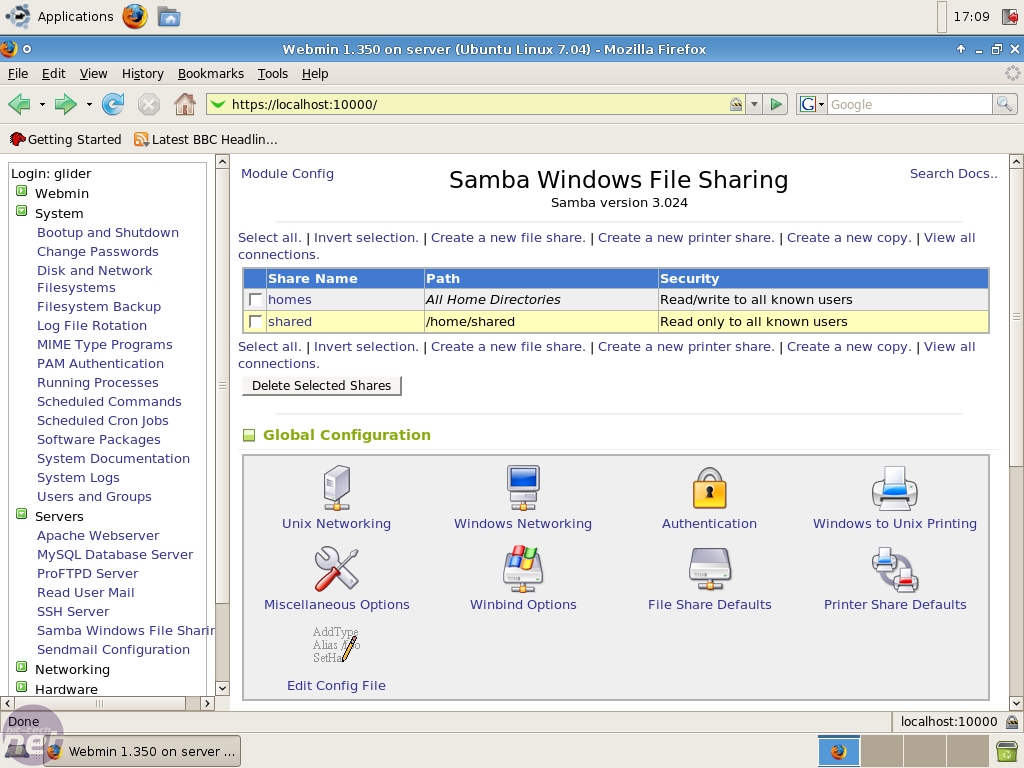
Fill in the fields as shown in the left screenshot and click “Create”. Now the shared directory we made in the first guide is shared across the network. But, that share is read only to the network. To alter it to readwrite, just click on the sharename just like you did in the user interface. Then click on the big lock named “Security and Access Control”.
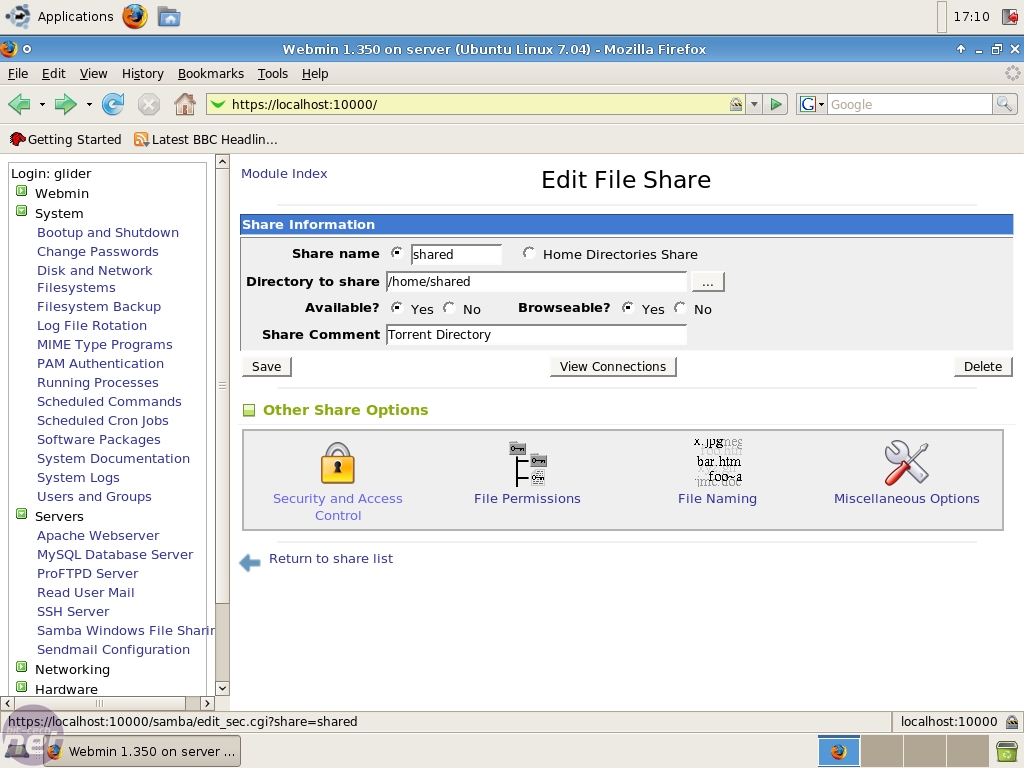
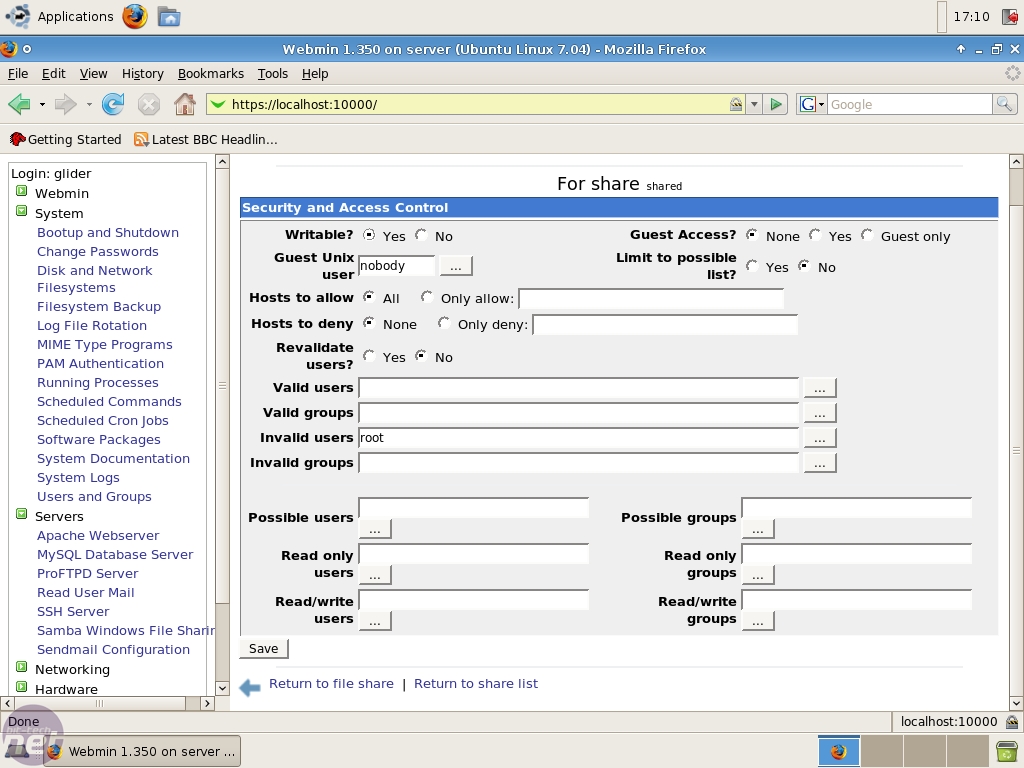
Change the “writable” radio button at the top to “Yes”. Also, have a look through all the possibilities you have, like restricting access to users. Don't forget to click “Save” twice to get back to the main menu. Also, don't forget to restart the server, by clicking “Restart Samba Servers” at the bottom of the page.
Dieting for servers
The strength of Linux, besides its Commandline Interface, is that servers running the OS don't need to have a lot of unused services running. But if you remember the first article, we started with a desktop install. This means there are a lot more services running, services we don't need on a server.It's about time we slim the server down some...
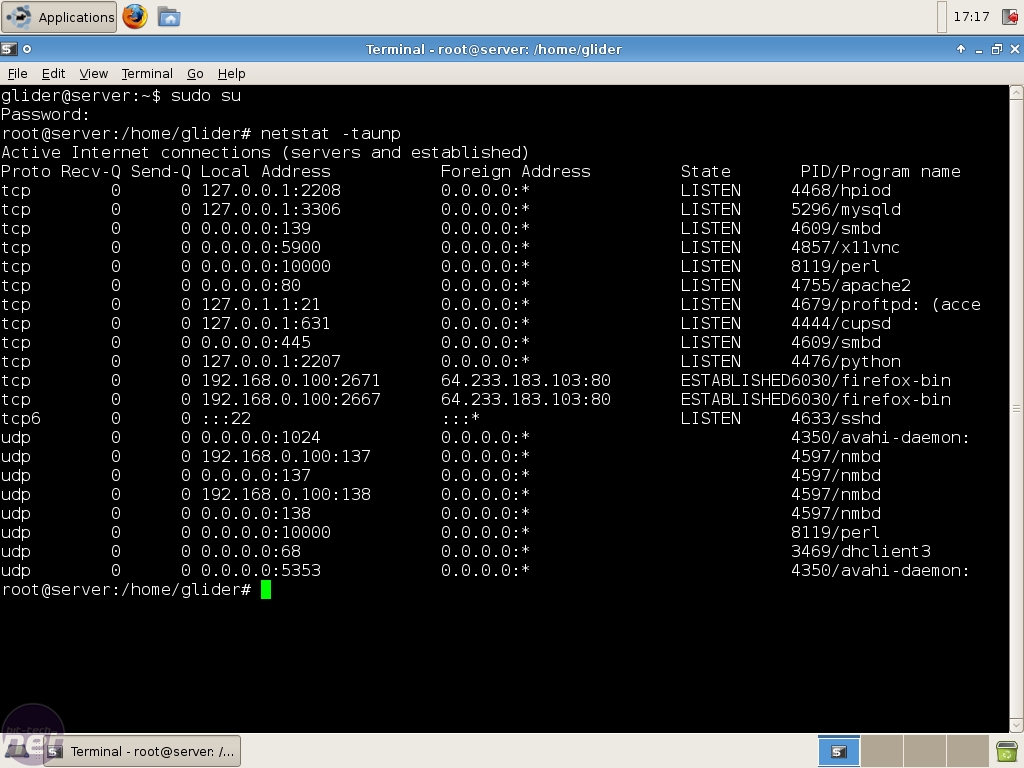
We'll do this from the command line interface, because it's a lot easier. So fire up that terminal. For the rusty ones, it's listed under “Accessories”. Because we are working on a low level, stopping services and such, we need to be root. Type “sudo su” to become root. To get an idea what services are listening on what ports, we use the “netstat” command. “netstat -taunp” lists all open ports and established connections. As you see it's quite a list.
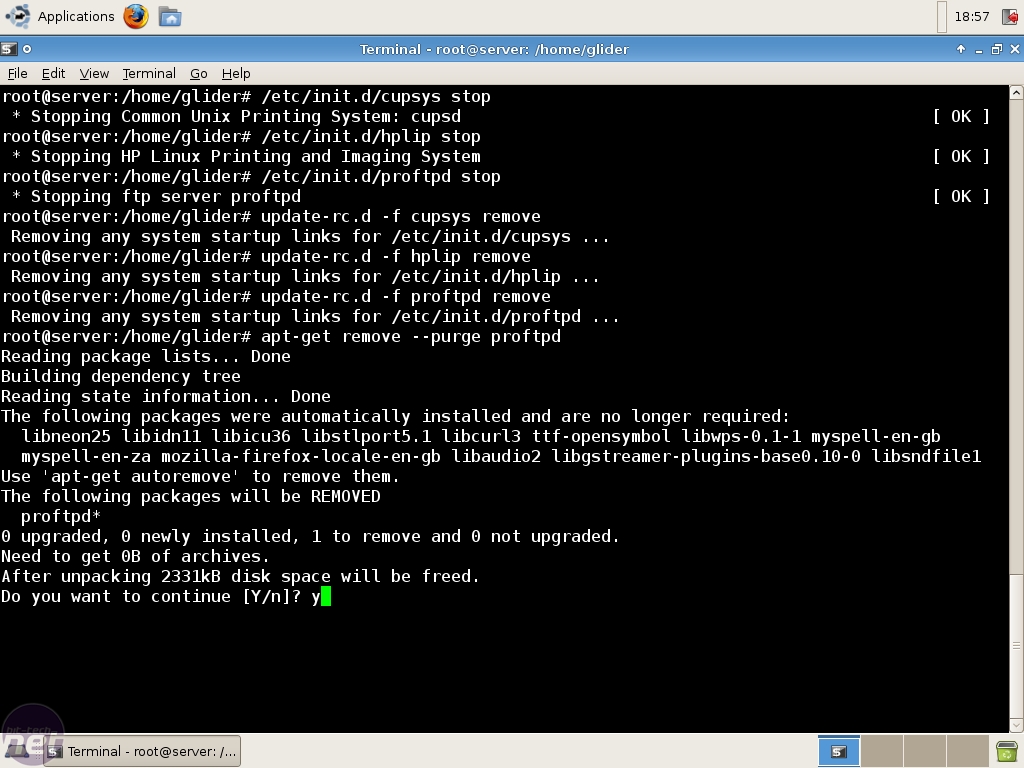
Today's victims are Cups, HPLIP and proftpd. We'll stop the services right now and make sure they don't restart. Proftpd, upon popular demand, will receive a more definitive treatment, and will be removed. But first things first, let's stop the services. This is quite easy, just type “/etc/init.d/cupsys stop”, “/etc/init.d/hplip stop” and “/etc/init.d/proftpd stop” to stop the three services.
While this stops the services right now, if you reboot the server they'll be up and running again.
To make our effort a bit more permanent we have to remove the “system startup links” from the different runlevels. Don't worry, it's about as easy as stopping the services. Just enter “update-rc.d -f cupsys remove”, “update-rc.d -f hplip remove” and “update-rc.d -f proftpd remove” to handle that. For those who want to remove proftpd, “apt-get remove –purge proftpd” will take care of that. There might still be some logs from the FTP server left over, but you can get rid of these by doing “rm -rf /var/log/proftpd”.
RELATED ARTICLES


MSI MPG Velox 100R Chassis Review
October 14 2021 | 15:04

Want to comment? Please log in.