
Wrapping Up
We're on the home stretch! We've installed our remote administration, disabled some old services, started using sFTP and SCP and shut down our GUI.With all that down, we've even found a way to access the server over the net and get our files. Right? Well, mostly. We still have one more pesky little step to go. If you try to connect to your server from the Internet right now, you'll get a lovely 404 error. Why? Because most routers (thankfully) block incoming ports that aren't specifically approved first.
Okay, now we have to leap this final barrier by redirect the needed ports on our LAN router. For some of you, this may be elementary (particularly if you've set up a Counter-Strike server or similar in the past). For the rest of you, though, don't worry - we'll cover it now.
Remember that we made our SSH server listen on port 2222 too? Well, now we will make sure that requests coming from the Internet on port 2222 get pointed to the correct IP on our LAN.
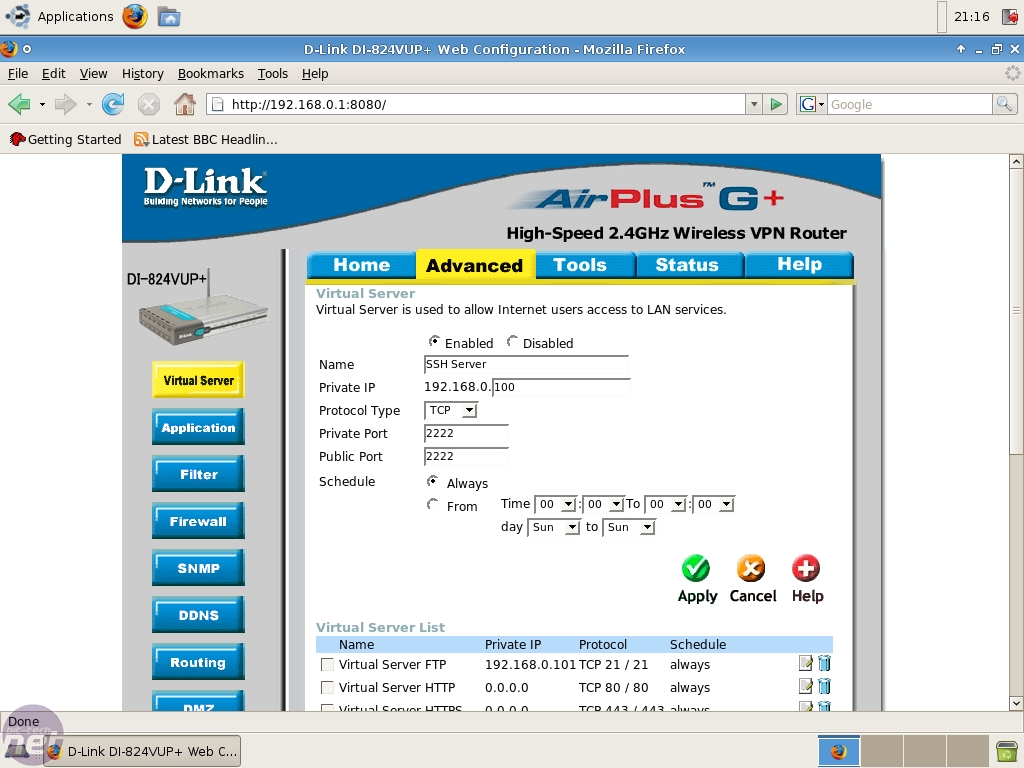

To do this, open up the administrative interface of your router, which is mostly located at the first address in your IP range, like 192.168.0.1. I'll explain the steps for my D-link DI-824VUP+ router, but you will most likely have a different brand and type. Don't worry though, the steps are usually similar on all brands. If you are very uncertain, head over to portforward.com; chances are that they'll have a detailed how-to specific for your brand.
Anyway, on my router I have to go to “Advanced” and select “Virtual Server”. I add a rule that points public TCP port 2222 to 192.168.0.100 (my server's IP) port 2222, which is enabled 24/7 and click “Apply”. My router restarts and now our SSH server is reachable on bit-serverarticle.no-ip.org port 2222. I repeat those steps, but now I remap public TCP port 12345 to private port 80, on which our webserver is listening, with the same settings.
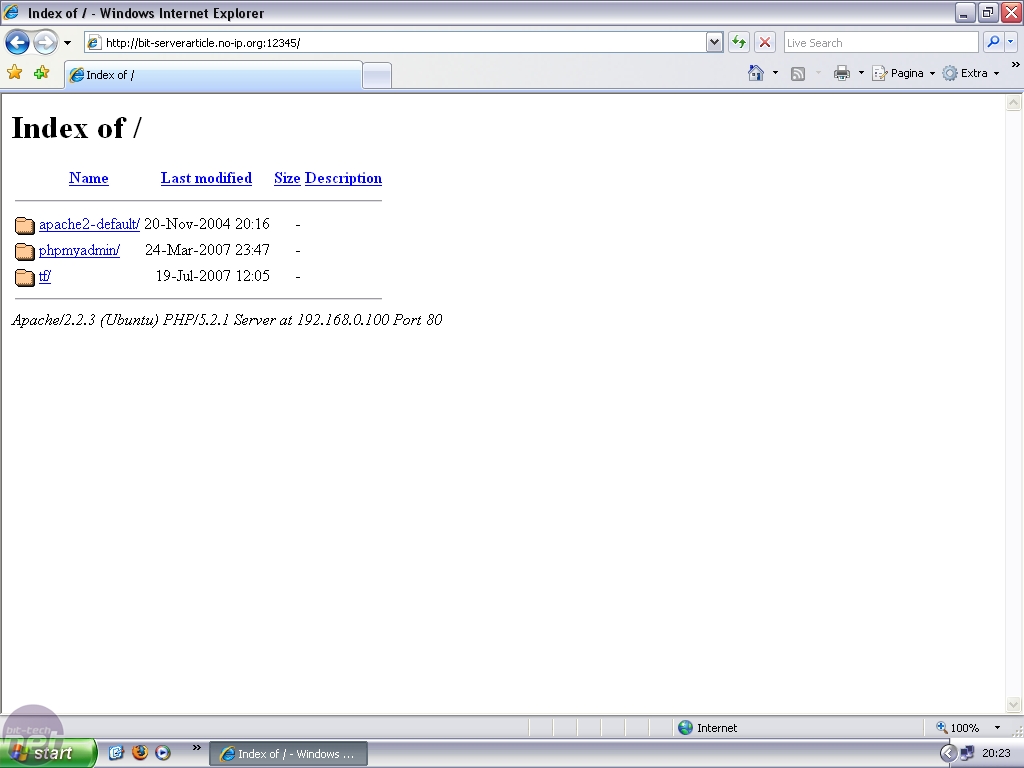
Now, when I browse to “http://bit-serverarticle.no-ip.org:12345” I'll end up on my webserver. For security reasons I don't redirect the Webmin port, but the clever ones amongst us will remember how to make SSH tunnels, like we did with the VNC access.
Conclusion
This ends my short update on the previous article and should help out with a lot of questions asked on the forum. Now our server has an easy to use administrative interface, it runs a bit more secure, wastes less clock cycles and is reachable from anywhere in the world that has Internet access.Of course, you can add in a lot more functionality to this server if you want, and we will in the next article. I hope you start to understand the power and ease that Synaptic offers. With a couple of clicks, a whole new service can be up and running.
Who dares to say that Linux is hard?
You can read the first article in this series here.
RELATED ARTICLES


MSI MPG Velox 100R Chassis Review
October 14 2021 | 15:04

Want to comment? Please log in.