
De-bling-anize
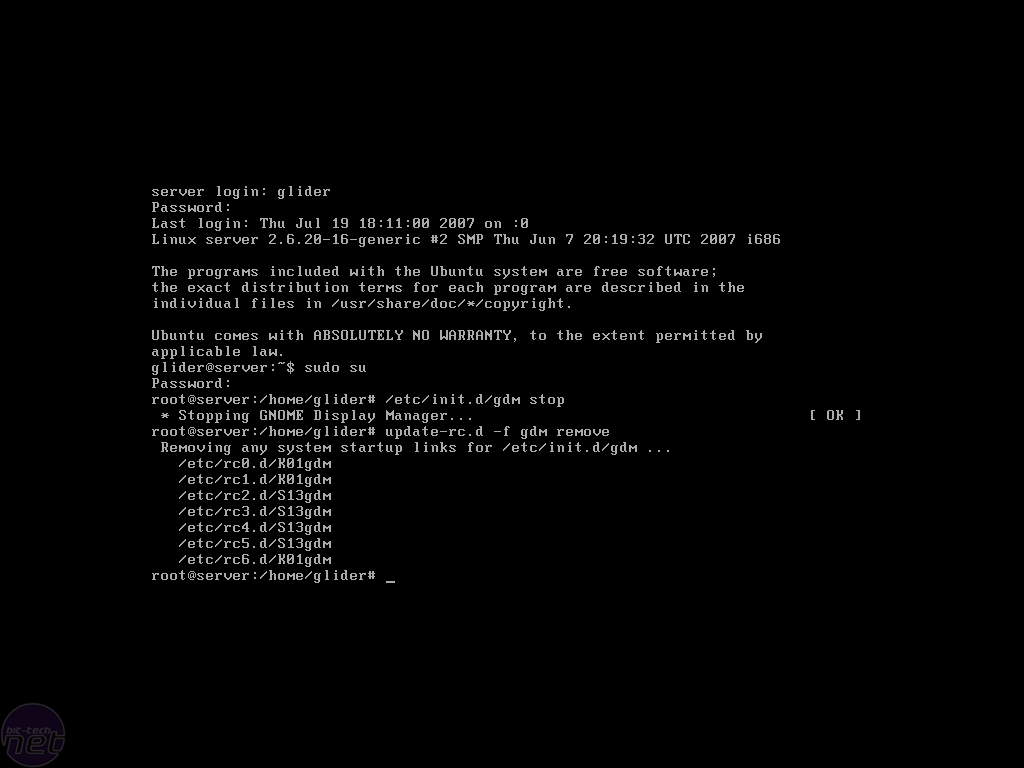
Another common question is how to turn of the graphical interface when you don't need it. The GUI takes up cycles to render, but isn't needed, unless you are working in the graphical environment. You won't be surprised when I say it's quite easy to do so. Just hit “control + alt + F1” and you'll be greeted with a command line interface. Login with your username and password and become the root user by issuing “sudo su”. It might seem that the GUI is closed down, but actually it isn't. Pressing “control + alt + F7” will show you that the GUI is still ticking.
To stop the GUI we use the same method as we did with the services. A simple “/etc/init.d/gdm stop” will stop the GUI. To prevent it from starting upon reboot, issue “update-rc.d -f gdm remove”. But how do you re-enable it if you need it? Well, log in through SSH and issue “/etc/init.d/gdm start”. This will start the GUI and then you can just VNC in like you did before.
Go public
By now we have a reasonably secure server, without GUI, which is sharing files across the LAN while downloading torrents. It would be nice if we could reach the server from the world wide web, so that we can access our files, schedule torrents or just look geeky. To be able to do that, we must have some kind of redirect to enable us to connect to our LAN. This is easily accomplished by signing up with a dynamic DNS service.There are a couple of providers for this kind of service, but I choose No-IP because I've been using it for ages and it has a very good Linux client.
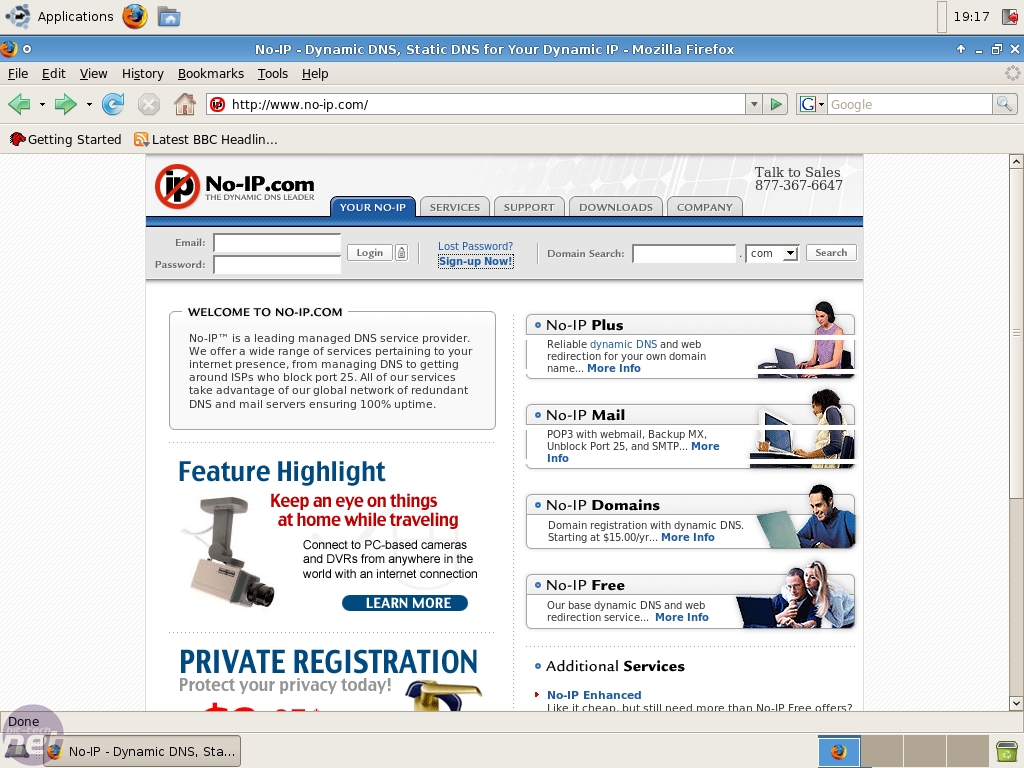
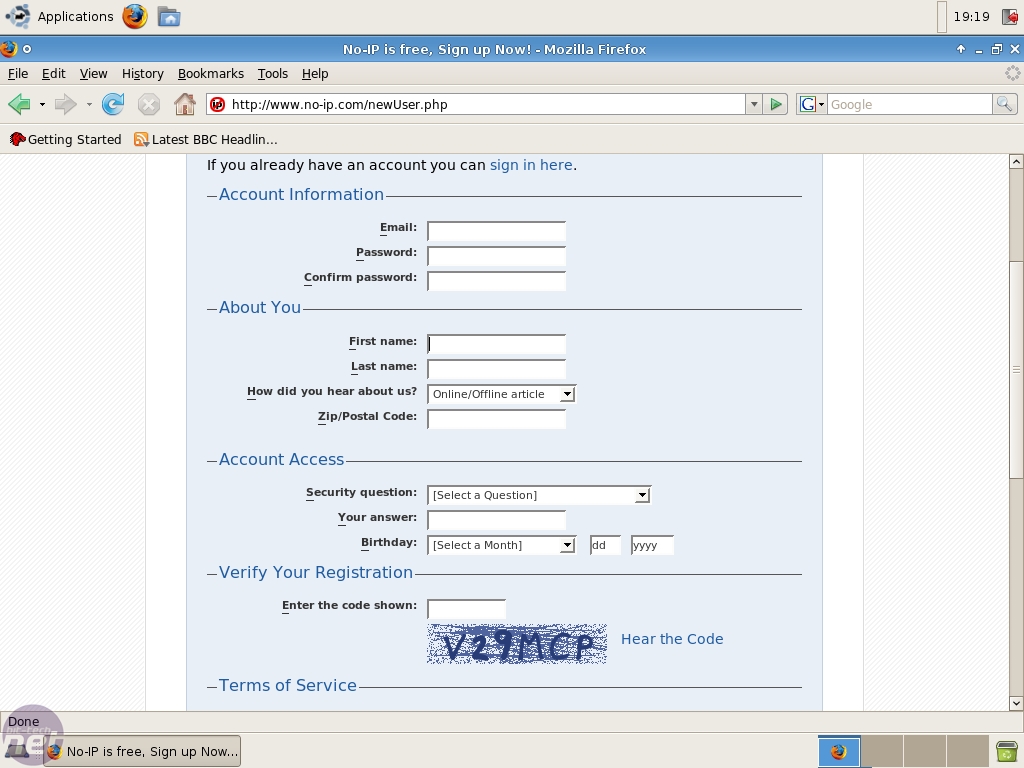
So head over to http://www.no-ip.com and sign up for a new account. You will get a form to fill in with personal data. It's important you give a real email address as it also serves as your login. After you fill in the form, scroll down and click the “I Accept. Create my account” button...once you've memorised the entire Terms of Service agreement, of course. Within minutes you'll receive a mail with a link to activate your account, as is with most services or forums.
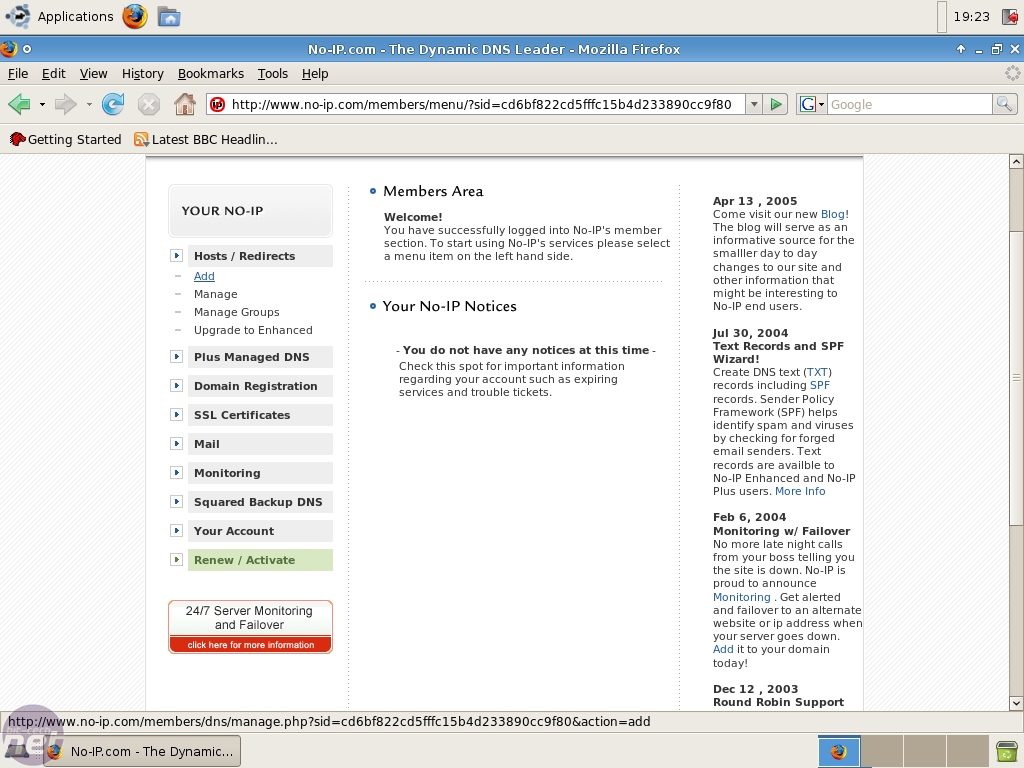
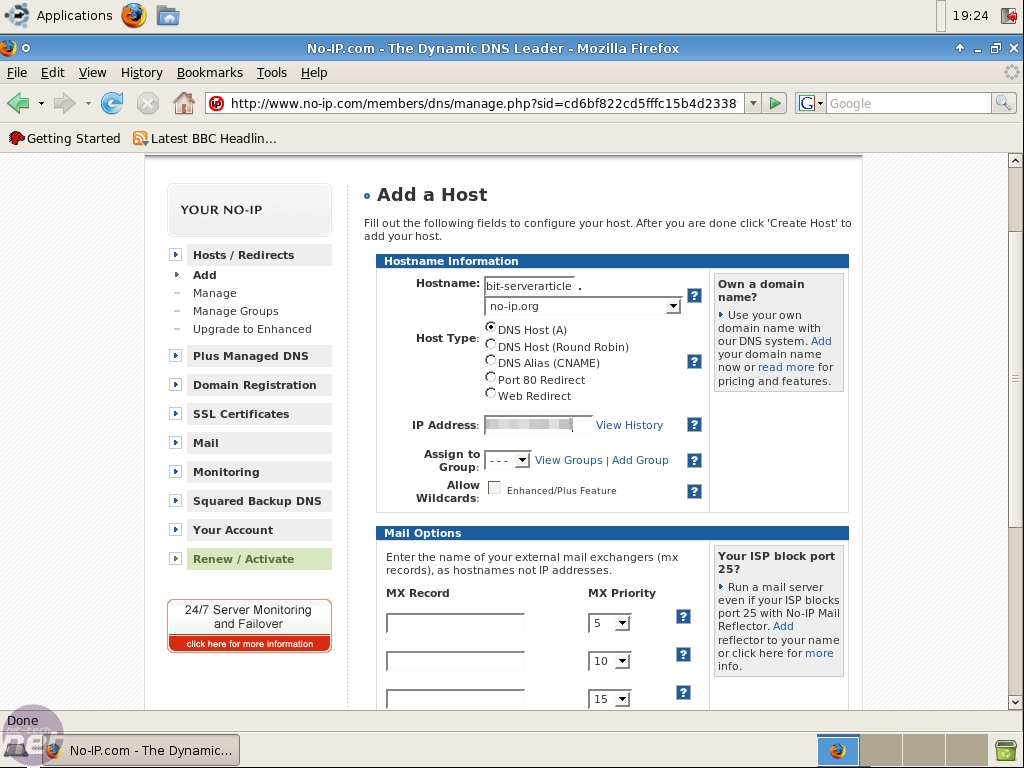
Now, we shall choose a host name which our server can be reached at from the internet, so log in with your email address and password. In the “Members Area”, click on “Add” listed under “Hosts / Redirects”. Fill in your desired host name and choose your domain name. I chose “bit-serverarticle” as host name and “no-ip.org” as domain name. This means that “bit-serverarticle.no-ip.org” will point to my public IP address.
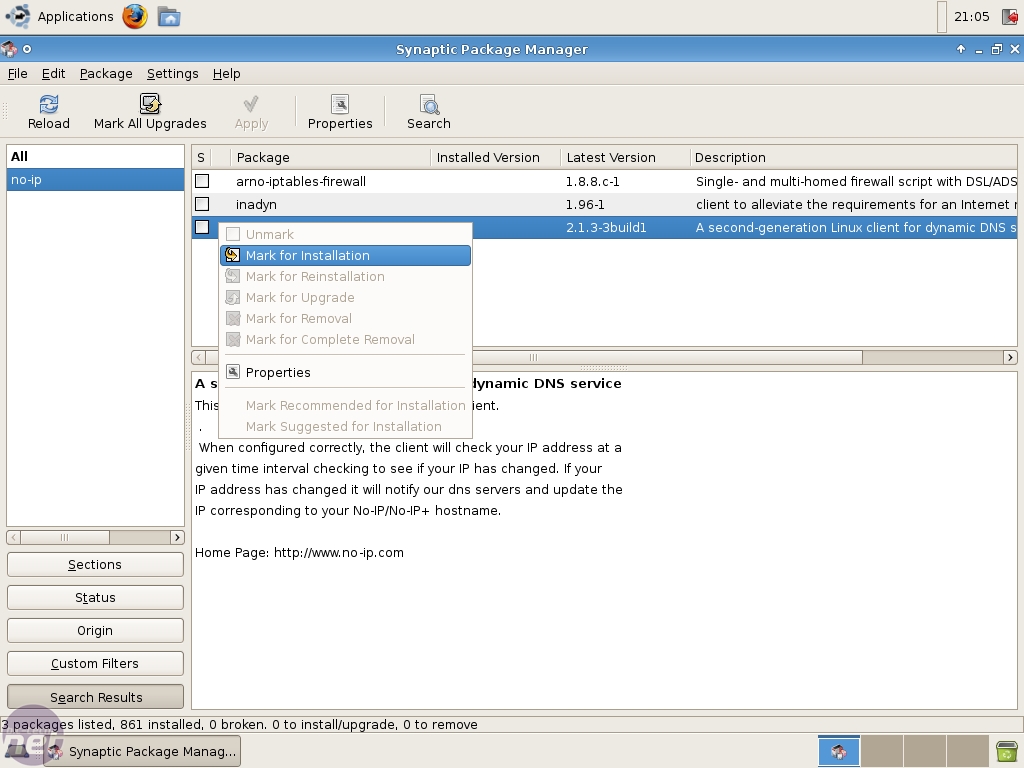
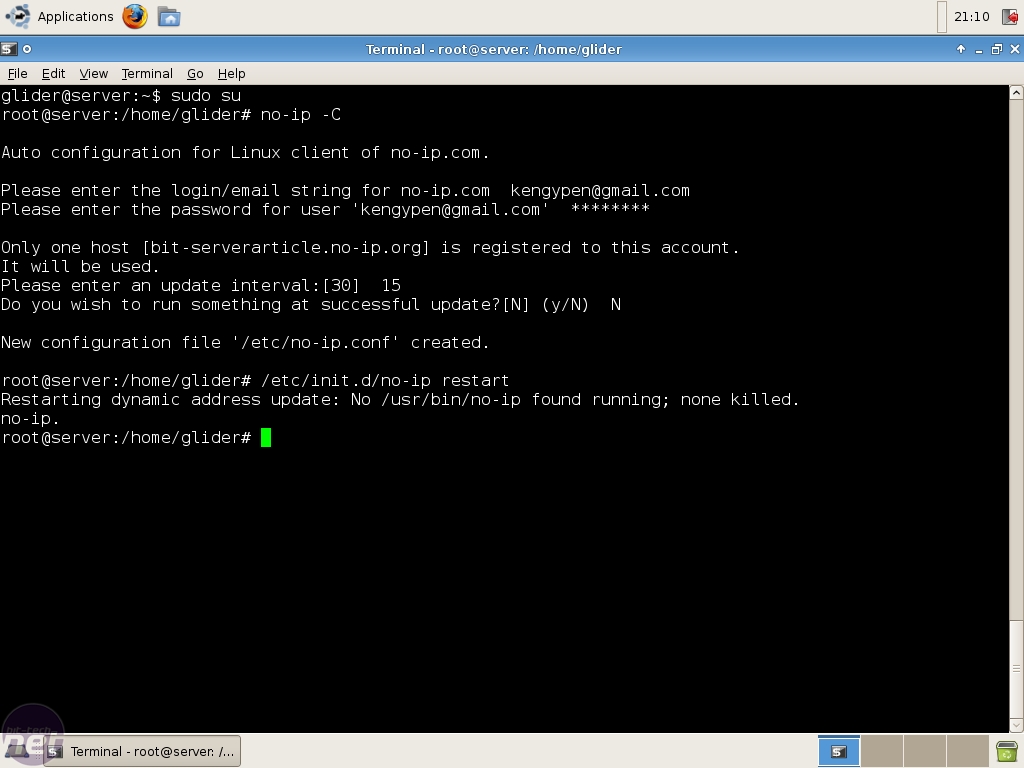
But how does the no-ip server know my address? Well, no-ip has a client to update the needed information on their servers. And we are quite lucky (or have chosen wisely) because that client is available in Synaptic. So, open up Synaptic and search for “no-ip”. Mark it for installation and click “Apply”, a known way of doing things by now. After Synaptic has done its job, fire up a terminal to configure the client. Become root through the usual “sudo su” and issue “no-ip -C” (note: that is a capital C). A wizard will start asking questions like your email address and password. Nothing challenging at all.
RELATED ARTICLES


MSI MPG Velox 100R Chassis Review
October 14 2021 | 15:04

Want to comment? Please log in.