
Let's get cooking
As well as using thermally demanding hardware, we then push it as hard as we can to maximise heat output and really torture test heatsinks. First we take an idle reading after booting the machine and leaving it at desktop for 30 minutes, recording the external ambient, internal case, CPU and GPU temperatures.Then we use the CPU/RAM stress test in Orthos Prime, which stresses both cores in one iteration of the software, leaving it to run for 30 minutes and recording the peak temperature recorded during the test.
All CPU temperatures are recorded from the MSI PC Alert 4 software in the operating system, and all GPU temperatures are taken from the hardware monitoring menu in RivaTuner. Ambient and case temperatures are recorded using thermal probes, from the same digital thermometer, and all temperatures are rounded to the nearest degree.
While we know we can't calibrate all the sensors accurately, we can use them to judge the change in temperature between idle and load, and by using the same hardware sensors every time, we can build a reasonable idea of the performance of the cooler by calculating the DeltaT value - the difference between the idle and load temperatures.
Seeing in red and blue.
We’re aware that our testing setup is a little one sided – we’re only using an Intel S775 setup for thermal testing, and haven’t even mentioned an AMD solution yet. This is because of Intel’s significant dominance in the single socket solution market, we feel it just isn’t worth performing a full battery of tests on an AM2 socket at this time, although we will be fitting compatible coolers to AM2 boards outside a case, to check they attach firmly and safely.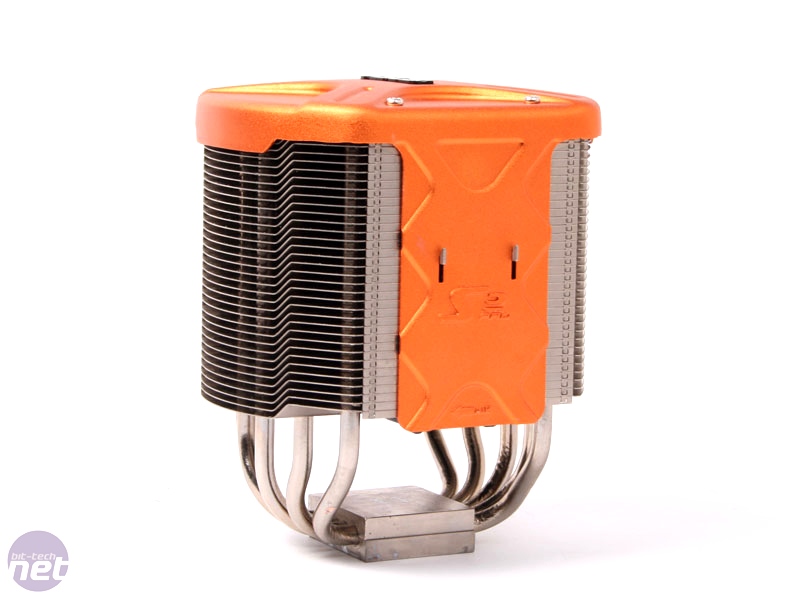
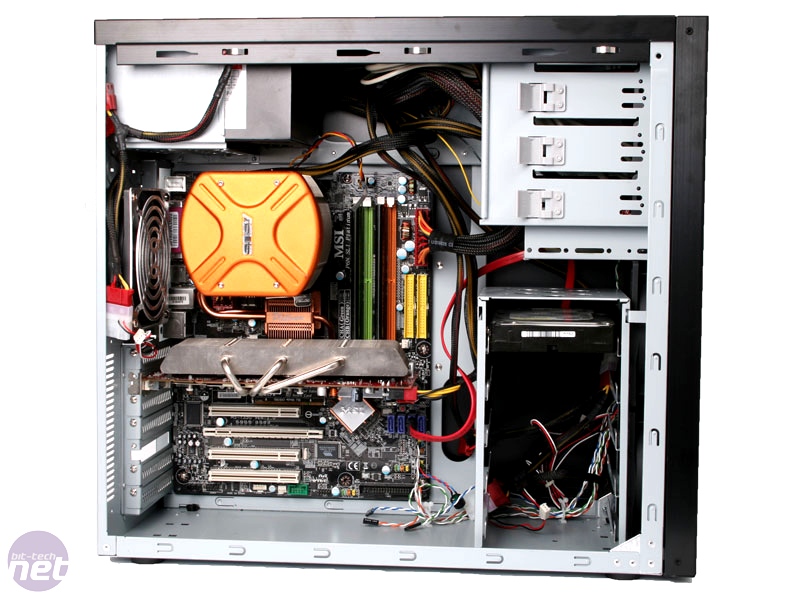
Click to enlarge - The Asus Silent square, and our completed control machine.
Repetition, repetition, repetition
While fitting and testing a heatsink once can give a reasonable idea of its mounting and thermal performance, there are always going to be instances where we won’t get a good contact between heatsink and processor, use too much TIM, or don’t mount the heatsink as securely as it should be. For this reason, we’re going to be repeating the fitting, cleaning, and testing process three times to ensure that not only are our results as accurate as possible, but that heatsinks we test can handle multiple fittings without their mounting systems disintegrating into scrap that clutters the bottom of your PC bit box.Results for our control test setup
Our trusty test setup, with the Asus Silent Square Pro mounted, performs reasonably well considering its quiet operation, with the CPU at 34°C when idle and topping out at 49°C when pushed to the limit. As this control setup will also be used to compare cases, we ran the graphics stress test too, with the GPU running at 40°C at idle and reaching a toasty 68°C when under heavy load. The gauntlet has been laid down!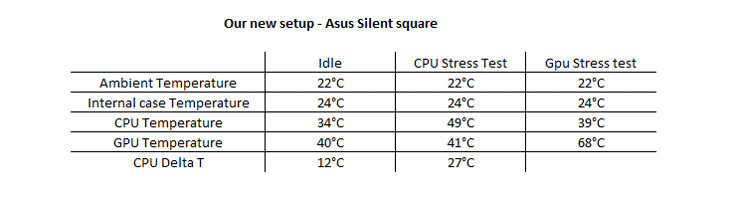
RELATED ARTICLES


MSI MPG Velox 100R Chassis Review
October 14 2021 | 15:04

Want to comment? Please log in.