
Assembly
Seeing that the target market for this kit is the newbie watercooler, we will assemble exactly according to the instructions to see if there are any errors, omissions, kit shortages that might make your first encounter with watercooling a bad one. Pouring liquid into your PC is not for the fainthearted but if executed properly this kit could remove any worries you might have.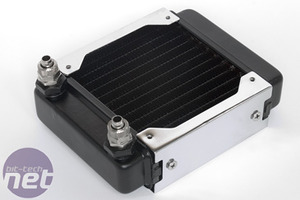
Let's start with the radiator/fan combination. First thing to do is to screw in the hose fittings; these are fitted with tiny rubber O-rings and screw in very solidly to the radiator - 10 out of 10 for quality! Once you have decided where to position the radiator and fan you simply screw them together and connect them to your chosen 120mm site using the standard four fan mounting holes.
There is also the option (if your case doesn't have a spare 120mm hole) to cut an opening with a jig or Dremel. There is even some beading provided to tidy up the cut. If you are going to do this, and you haven’t cut a hole in metal before, I recommend you have a look around the net for a guide, and practice on a similar metal if possible before hacking away at your precious case.
One thing I found might cause you to foul up is the orientation of the fan. Nowhere in the instructions it says whether or not the fan should suck through the vanes from in the case or blow through them from outside. There really is no hard and fast rule about this, but for a confused newbie a simple "experiment with fan direction for best results" could remove a potential installation headache.
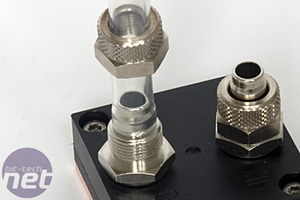
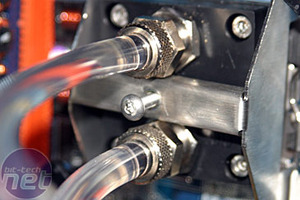
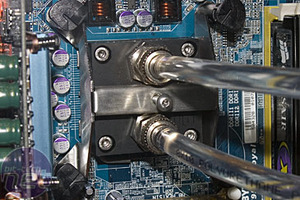
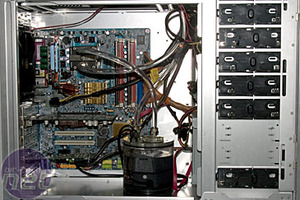
Next comes the waterblock. Screwing the fittings into the plastic block should be done with care, as over tightening could cause permanent damage to the thread. Although the instructions say you should fit the block first then the tubing, the picture on the right clearly shows that the screw on tightener that fits over the tube hasn't enough room to be tightened at all because of the motherboard mounting. We recommend that you measure the tubing, fit it to the waterblock, and then fit the block to the board.
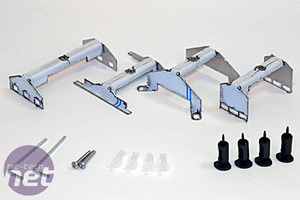
The selection of mounts included allow for fitting to all CPU types, and as you can see they were protected from damage by leaving on the plastic used during the manufacturing process. We selected the Socket 775 mount, which required a little assembly prior to use. Be careful to follow the instructions carefully though, because as we found out, disassembly is much more difficult than assembly if you put it together incorrectly. Once your chosen socket mounting is fitted, tightening the centre screw with the supplied Allen/Hex key is all that is needed to secure the block on the CPU.
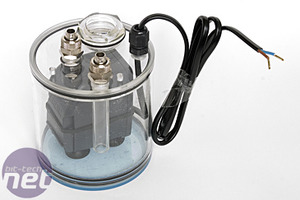
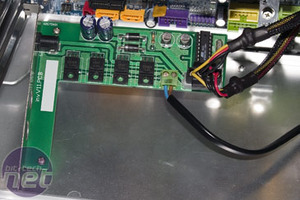
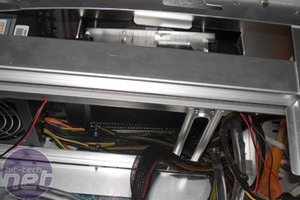
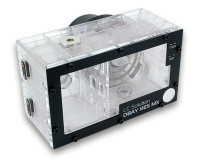
Next we screwed the fittings onto the pump station, once again taking care as the Perspex could crack if over tightened. When we looked at the ATX bridging adaptor we noticed that the connectors had no indication of polarity. Even worse, the manual didn't even have any reference to the ATX bridging adaptor at all. Rather poor in a complete kit for one of the components to not be even mentioned in the instructions! We fitted it as above and connected a four-way Molex connecter to the empty slot.
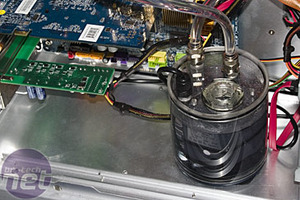
Once all the tubing is fitted and tightened (by hand as recommended), we filled the pump station as per the instructions, and powered up the loop. As we feared, the 500ml liquid was not sufficient to fill the loop completely, so we had to top up from some spare coolant we had in the labs. After running the system overnight to ensure there were no leaks and to eliminate all air bubbles that may have been trapped we fitted all the components left out during leak testing and moved onto seeing how well it works.
Let’s get on with it...


MSI MPG Velox 100R Chassis Review
October 14 2021 | 15:04


Want to comment? Please log in.