Scratchbuilt PC - Water Cooling and Hardware Mounting
May 21, 2012 | 07:13
Scratchbuilt PC Part 4 - Acrylic work and water cooling
In Part 3 of our scratchbuilt PC guide, we looked at how to work with acrylic in more detailed settings, such as shaping it and adding the final touches by making sure all the edges are straight, smooth and fit together properly. We managed to do this with a few simple tools such as a file and Dremel with a couple of different attachments.
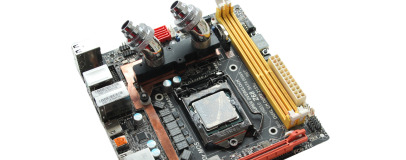
With the shell of our custom-built case ready for its hardware, we set about working on the various water-cooled components of the system, including the motherboard. Here we decided to make a custom waterblock for our Zotac Z68 ITX Wifi motherboard, in order to take the heat from the VRMs and chipset and into the coolant ready to be expelled from the case. In Part 4, we'll be finishing off the waterblock and also looking into ways to mount the rest of the cooling hardware.
See Part 1, Part 2 and Part 3 of our Scratchbuilt PC guide.

With the contact plate for our waterblock complete, and our EK VRM waterblock modified and ready for action, we had to find a way to mount the waterblock onto the contact plate. Solder is one way, but the easiest is to use thermal adhesive. We decided on some stuff made by Phobya that's available for the same price as a tube of thermal paste. It works in the same way as epoxy - mix the two parts together and then the adhesive sets, only here, the adhesive is also a fairly good heat conductor too, making it ideal for permanently sticking heatsinks and the like to hot surfaces.
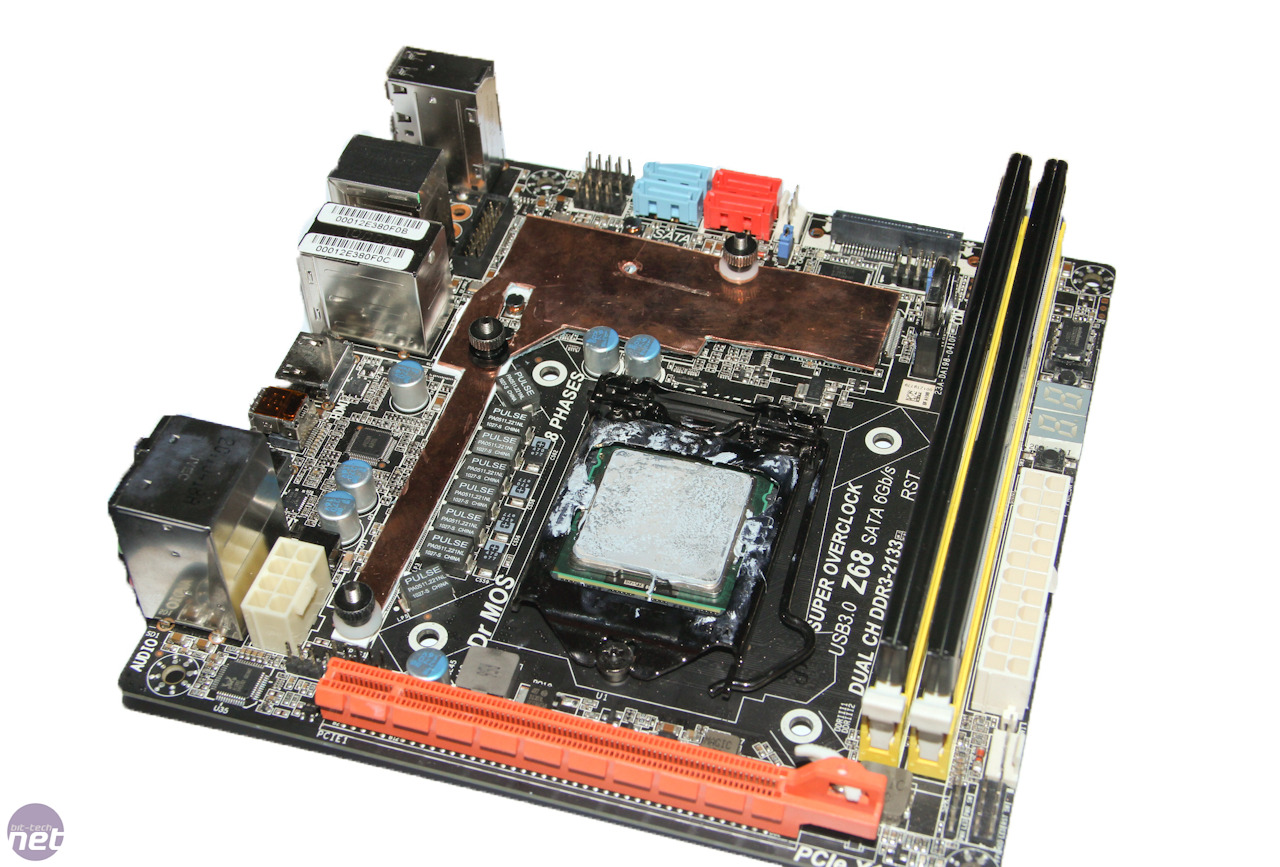

We lopped off lengths from the long mounting screws as these simply weren't needed and would get in the way. The rear of the motherboard looks pretty normal, just three mounting screws in place of the usual heatsink screws.
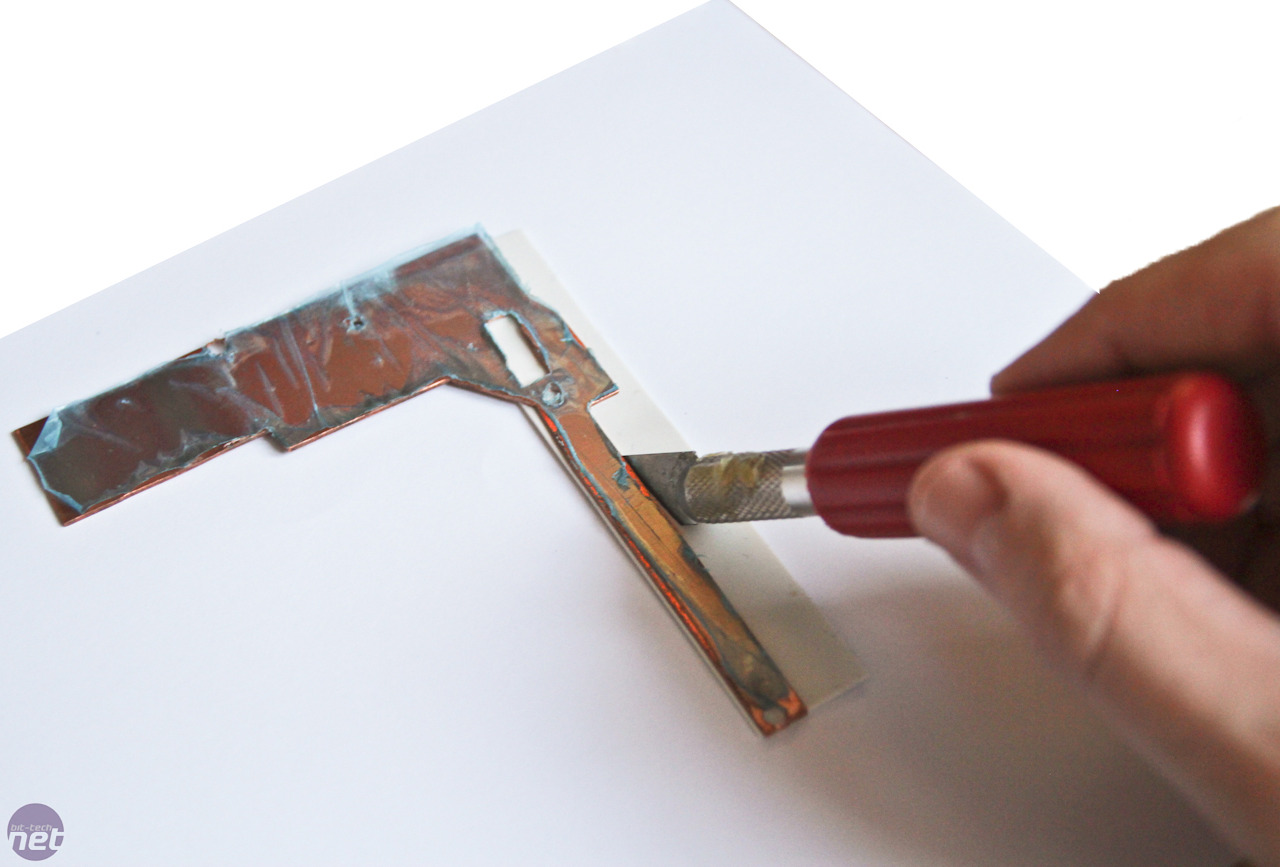
Before that though, we also had to invest in some thermal pads - also from Phobya. While we're fairly certain our contact plate won't short anything out on the motherboard, a thermal pad will put those nagging fears to rest, as it will sit between the copper and PCB. All we needed to do was to cut around our contact plate onto the thermal pad. A quick test fit and we were done.
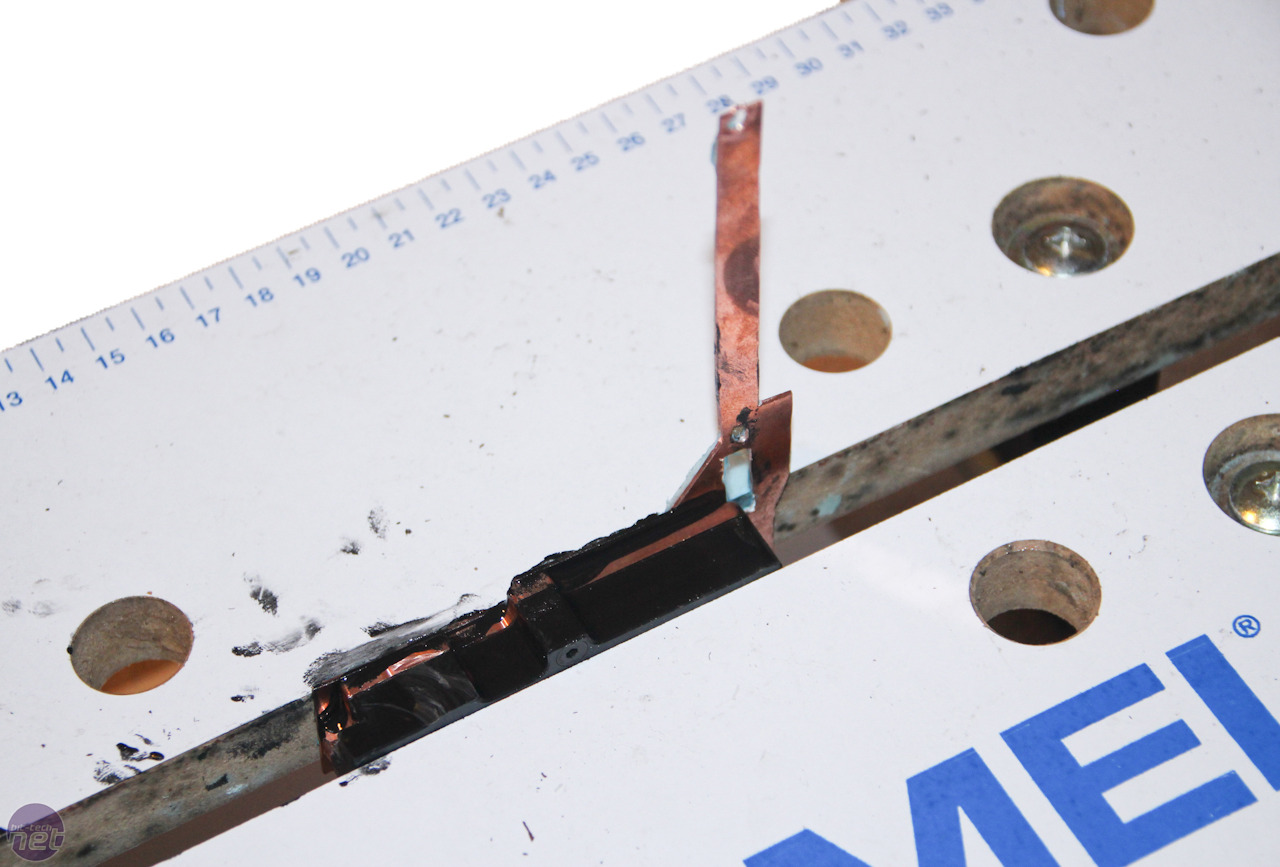
Now to mount the EK waterblock onto our contact plate. We mixed a generous amount of thermal adhesive together, spread it neatly over the bottom of the waterblock, and used a workbench (you can also use a vice or clamp) to hold it together, mopping up any excess. Once dry (normally in 24hrs or so) we finally had a single-piece motherboard waterblock that was ready to fit.


MSI MPG Velox 100R Chassis Review
October 14 2021 | 15:04

Want to comment? Please log in.