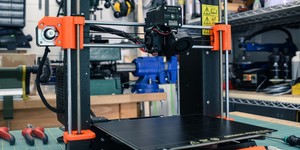
Not only has 3D printing seemingly taken the world by storm, it's become an essential part of my own modding workflow. If you've seen our Call of Duty: Modern Warfare Wheelson and Corsair Bloodlines 2 build then you'll have seen how both of these relied quite heavily on 3D printed pieces for some of the complex components. Wheelson in particular used 3D printing in a huge way, with the wheels being entirely 3D printed along with all the internal support brackets and exterior details. Bloodlines and to an extent AORUS-KS used 3D printing in perhaps a more subdued manner, mainly for pieces that would be very tricky or time consuming to machine. Both builds feature 3D printed GPU brackets, which allowed for the brackets themselves to be sunk into the machined panels, leaving things smooth and neat.
That said, you don't need to have a full on project in mind to be able to make use of 3D printing at home, certainly I've been using it all over my workshop to create fixtures and efficiency boosting tidbits. One use case that struck my mind was making a GPU support bracket. Cards have been getting so big and cumbersome recently and GPU sag has become quite the annoyance. The issue is that a few things contribute to GPU sag, one innate cause is the room within the PCIe slot, meaning cards don't receive a whole lot of support from the slot on the board. That means even if you tighten the PCIe bracket thumbscrews fully, the cards can still wiggle a little from the other side. Even with rigid cooling setups like custom loop waterblocks, sag can still strike.

There are a few solutions for this that range in complexity and expense. First up you have very simple things like tying up the end of the card with fishing line, or placing a regular object under the card, these work fine but honestly, I'll judge you. The next option up is going with an off-the-shelf solution such as the SAGE or MNPCTech's billet supports, going with a vertical GPU bracket can also work too. However, with 3D printers being so much more affordable now than they used to be, it's a perfect little project opportunity!
I've got three designs to share with you today, the idea being just to get the creative juices flowing, I'd be really excited to see what solutions you all can come up with. If you like the look of any of the supports listed below, the models are up on GrabCAD for download.
The Classic
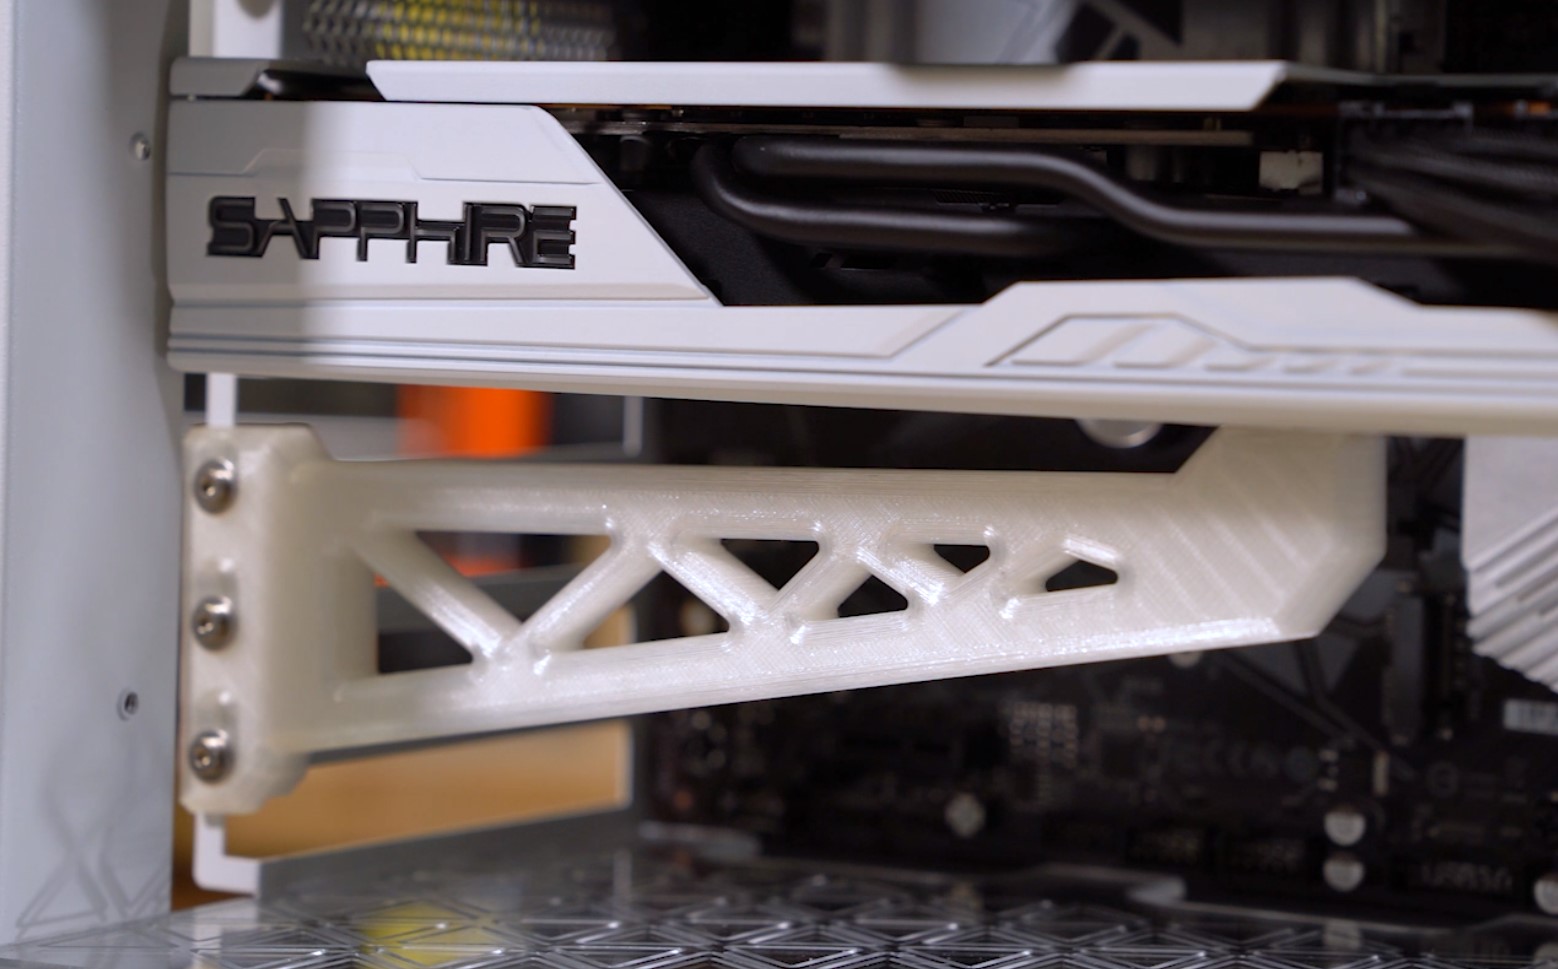
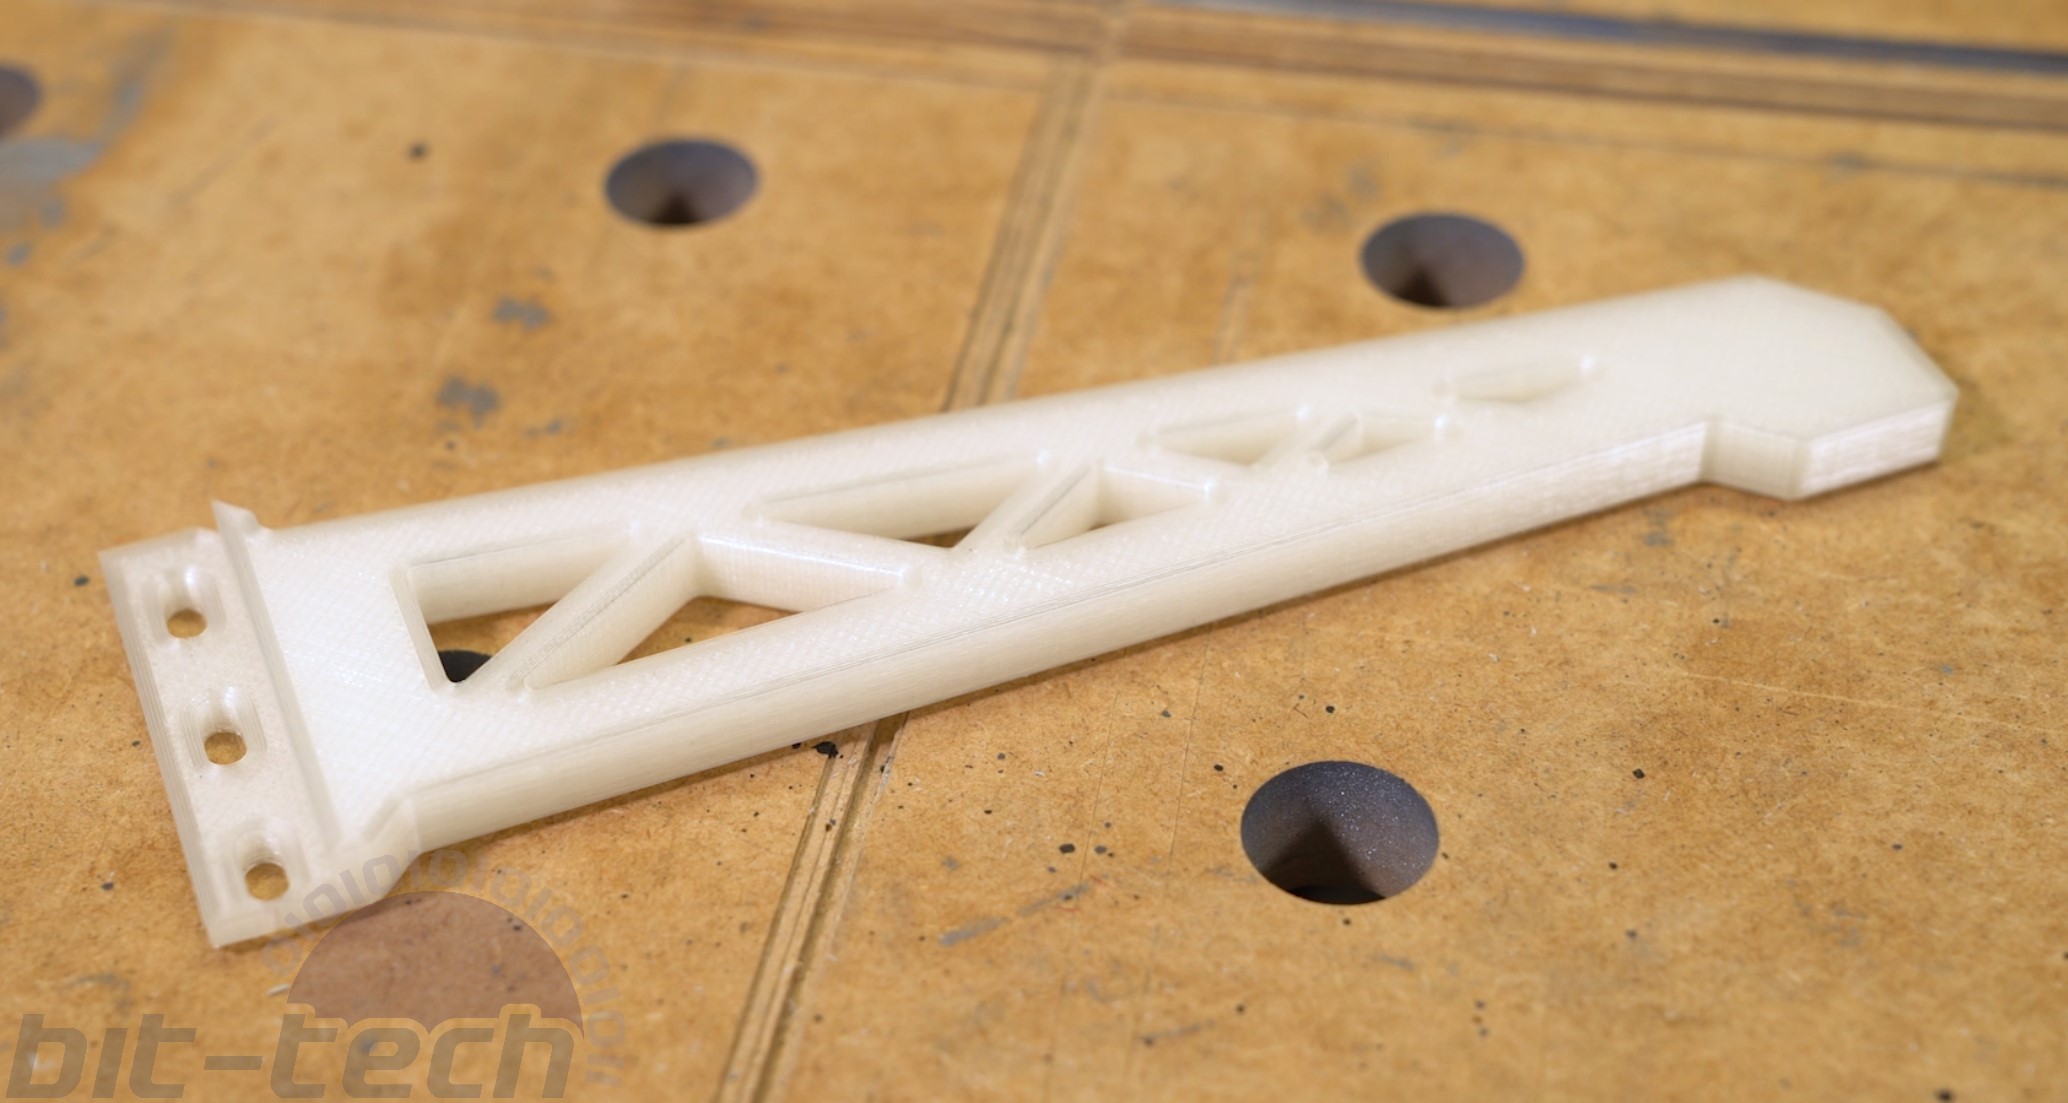
Okay this is the simplest of the three in terms of printing, it's essentially a take on the basic design used frequently for CNC and laser cut supports. This bracket design attaches directly to the remaining PCIe slots on the case to add a bit more structure to the end of the card. The one I have here is 200mm long or so in order to fit the Prusa i3 MKS bed in one go, but you could edit it to change the dimensions however you wish. I found this bracket prints particularly easily thanks to all the flat sides, you can get a really fantastic finish with the right filaments and settings. I would, however, make sure to use a more durable filament than PLA (such as PETG or one of the higher temperature polycarbonate-based ones) as proximity to a hot gpu blowing air on it could cause it to warp over time.
The Adjustable
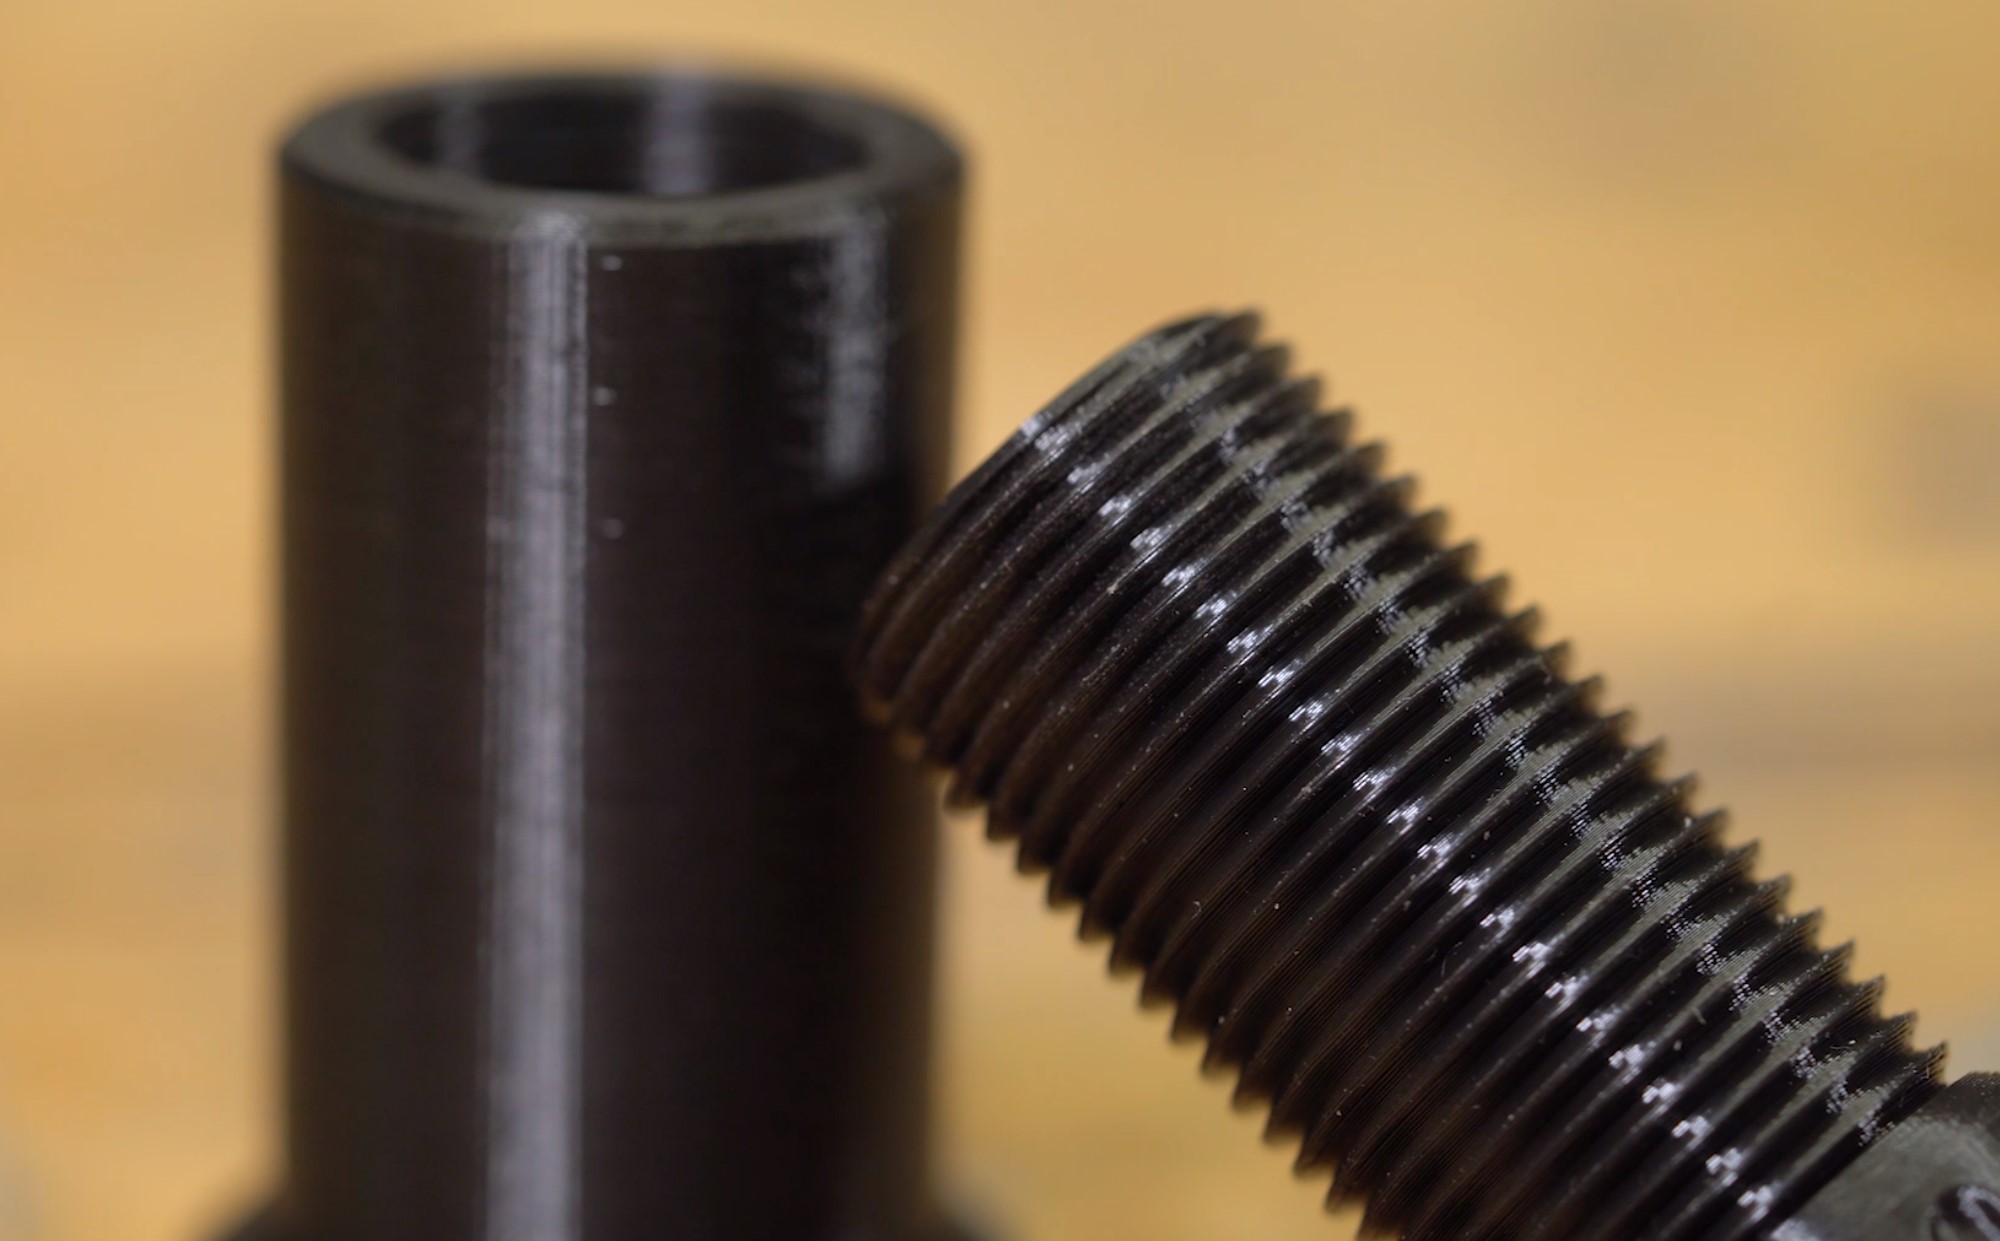
Taking a different approach, this model is a bit harder to print but is very simple in concept still. It's basically just a column with two screw threads, it's not very difficult to make by hand actually with more traditional tools either. I find it fascinating that budget FDM printers are able to print threads clean enough that they can be used straight off the machine. These ones took about 3 hours or so to print at 0.15mm layer height on the Prusa i3 MK3S. The advantage to a design like this is you have a lot of control over the height without having to do much. Naturally if you require a longer/shorter one then one can simply change the extrusion height in Fusion using the native file found in the GrabCAD link.
The ATLAS
For the uncompromising enthusiast, there truly is but one suitable option and that is having the mighty, mythical titan Atlas himself support your GPU!

Joking aside, I wanted to use this one as an experiment to test out my new Elegoo Mars resin printer. The advantage to resin is that you can print unbelievably high resolution models, just ask the miniature and tabletop scene, which is currently undergoing a bit of a revolution thanks to budget resin printers. The cost, however, is that resin printers have small bed sizes, the resin is pretty toxic so one must print in a ventilated space away from them and that the prints require further curing and alcohol washing to make them usable. That said, the resolution makes some objects viable to print that otherwise would have been essentially impossible on other systems.

Case in point, at 80mm tall, Atlas is actually rather small. The Elegoo Mars was able to capture the most incredible details, even down to the curls on his beard and even the eyebrow textures. Massive credit has to go the original model here though as it's fantastic. Whilst I'm able to distribute an edited, low poly-version on GrabCAD as per the license, if you want a high res full sculpt, head to the CGTrader link to support the artist.
I can't wait to discover new uses for the resin printer, a number of fascinating prospects have already been brewing up in my head so things could get rather interesting I think.


MSI MPG Velox 100R Chassis Review
October 14 2021 | 15:04

Want to comment? Please log in.