A few weeks ago, Antec approached us looking for a PC to be built featuring a selection of its new and upcoming products, namely its new line of RGB '5 Series' DDR4 memory and Mercury RGB 240 AIO liquid-cooler. We decided that it would be a good opportunity to show what can be done with a more modest hardware configuration than perhaps some of the other builds we've modded before, and it also made sense to show a progression from a stock build to a "modded masterpiece", so to speak. There are three distinct parts to this mini-series; the first is a stock build, the second involves taking the same parts and installing a hardline water loop for the CPU, and the third part will involve turning this build into a more advanced modding project. In this article, we'll be covering the first two sections.
Start with Stock
Befitting the brief, we began by assembling the components into the stock build - see the video above. The aim here was to create a simple and classy build in the Antec DF500 RGB chassis, without modding any of the components. Hardware-wise we were provided the following:
- CPU Intel Core i5-8600K
- Motherboard ASRock Z370 Taichi
- Cooler Antec Mercury RGB 240
- Memory 32GB (4 x 8GB) Antec 5 Series RGB Gaming DDR4
- Graphics Galax GeForce GTX 1060
- Storage Galax 120GB 2.5" SSD
- Power supply Antec High Current Gamer 750W Gold
- Case Antec DF500 RGB
We also decided it would be an interesting opportunity to try out a device we were sent by renowned modder Ali Abbas (who now resides at Caseking) that aims to counter infamous 'GPU sag'. Dubbed 'The Sage', it hooks onto the PCB of the graphics card and connects it to the top of the motherboard, a simple yet effective mechanism.
Building into the case was a fairly straightforward affair. The DF500 RGB isn't a huge chassis, so managing cables can be a little tough, but there was still ample room around to stow any excess lengths to keep things neat. Since the only flavour anybody seems to care about nowadays is RGB, it made sense to try and make the most of it with the parts that we had. Unfortunately we ran into a little snag in that the motherboard only had one RGB header. Often enough this is fine, but we found that with the fans there wasn't quite enough oomph from the board to make the colours stand out across all five and the pump housing. Instead, we chose to run the front case fans off the header and use the manual colour controller for the fans and pump on the AIO. This proved to be a good move, as the extra power from the controller definitely brightened the cooler up a notch or two.
The memory is very bright, but in all honesty that's a good thing; it certainly wouldn't make sense for the key feature to be hardly visible. We left it on aRGie-Bargie rainbow and set the other fans to a cool blue/white combination. Our graphics card wasn't really large enough to warrant needing a dedicated anti-sag device, but we used it anyway, and it definitely helped a little.
End with... Slightly Less Stock
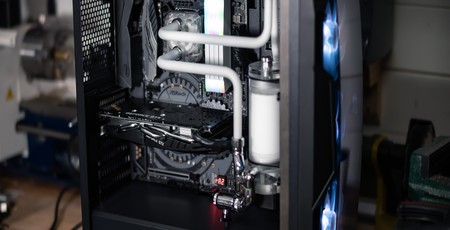
Building on from the stock build, we have a modest water loop using hardline tubing to cool the CPU. The DF500 RGB chassis sports a number of radiator mounting points, and it seemed like a fun idea to water-cool in a genuine mid-tower for a change. We turned to Alphacool for the parts for this stage; we're using the following:
- CPU block Alphacool Eisblock XPX Clear
- Radiator Alphacool NexXxos XT45 Nickel Plated 360mm
- Pump/Reservoir Alphacool Eisbecher DDC 150mm
- Fittings Alphacool Eiszapfen 13mm Rigid Compressions
- Fittings Alphacool Eiszapfen Rotary 90° Adapters, Drain Valve, and Dual 45° Rotary Adapters
- Coolant Alphacool Eiswasser Pastel White
- Tubing Alphacool Eisrohr 13/10mm Satin Acrylic
As with the stock build, installation was for the most part very simple. The only difficulty we did have was that the fans didn't fit the radiator easily; the rims around the screw holes were a touch thick meaning when you lined them up on the radiator they didn't line up with the screw holes. These, however, are airflow fans that came with the case, so there's a decent chance that it wasn't considered since they're not really supposed to be used on radiators. We probably should have used the fans from the AIO, but we only had two to hand, meaning there would have been an empty spot on the radiator. To fix this, I 'adjusted' the fans slightly on the belt sander, just to take off some of the top and bottom edges.
The radiator slotted into the front nicely. We then attached the reservoir to it directly. Using a DDC pump really helped here thanks to the much smaller footprint compared with a D5. From there it was just a matter of bending some tubes to connect the components in a clean manner. Of course, don't forget to check out our articles on both Bending Acrylic Tubes and also Planning a Hardline Loop.
Leak testing was a simple affair too, given this is only a CPU loop with minimal fitting use and a single radiator. Since I had the device to hand, we quickly pressure-tested it, then used 'ye olde paper towel' method to fill the loop up. The satin tubing really looks great with the white pastel coolant; the rougher surface almost makes the tubes look soft and pliable I think. We debated using the frosted CPU block for the loop to match, but decided against it since the frosting is very heavy and we didn't ask for the RGB collar that would have made the most of it.
Next on the to do list is taking this rig to the cleaners. I reckon there's a lot to be had with it: Maybe throw some custom panel work at it, creative tubing runs, or maybe even some fabricated parts? Who knows, but it certainly sounds exciting!
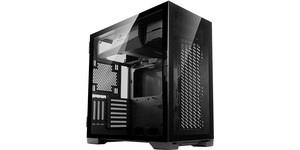


MSI MPG Velox 100R Chassis Review
October 14 2021 | 15:04

Want to comment? Please log in.