Installing CPU Coolers: The good, The Bad and The Ugly
December 2, 2009 | 11:24
Companies: #thermalright #zalman

The first CPU cooler I ever installed was an AMD reference HSF when I upgraded my Athlon XP processor to a superior model. It was in fact my first ever PC upgrade. I remember carefully (and perhaps a little nervously) placing the blocky aluminium heatsink in position, hooking both sides around the socket, pushing the retention arm down and thinking, "hmph - that wasn’t so hard."
[break]
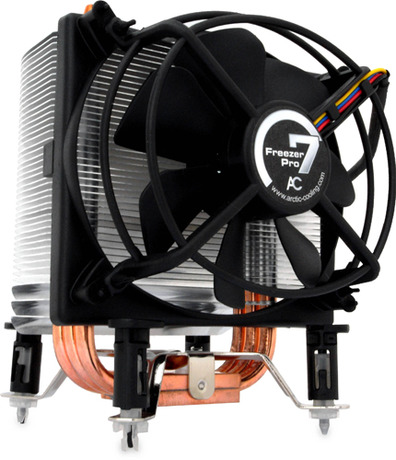
A couple of years later and I was building my first PC from scratch. Being an avid reader of Custom PC, the Elite List was my inspiration for component selection. The Arctic Cooling Freezer 7 Pro was the only choice. This was the first time I’d encountered push-pin system used on Intel’s reference cooler. While the principle seemed simple enough, my lack of PC experience and impatience to finish the build ensured that it was considerably more difficult than it needed to be. Nowadays however, being familiar with the nuances of the simple system, installing a cooler that uses it takes about eight seconds.
But there are some CPU coolers that use installation methods that utterly baffle the mind. I often liken these mounting systems to Meccano sets; such is the ridiculousness of the components list. If these coolers provided a CPU contact that akin to elephant sitting on the heatsink and awesome performance to boot then I’d understand. But many of them don’t. Even if they did, surely CPU contact could be achieved in a simple manner?
One that springs to mind is the Zalman CNPS 10X Extreme. It requires a back-plate to sit behind the motherboard, a mounting bracket which sits on top of the motherboard, a hold-down to secure the cooler to the mounting bracket and, to hold the caboodle together, a tool shed’s worth of screws and bolts. What’s more, you really need to remove the fan to assemble theMeccano set HSF as otherwise you wont be able to reach the screws. Because of the way a fan controller has been incorporated into the fan mount, reattaching the fan is a nightmare. What’s more, the performance numbers are pants.
Let’s take a look at the Thermalright Ultra 120 eXtreme for some comparison. A back-plate and a hold down are required. Four spring-loaded screws clamp the base-plate in between and the fan clips on in a second. Job done. What’s more, the cooling is awesome.
Why make it more complicated? Is it because some manufacturers are concerned people will feel gypped if it doesn’t take 30 minutes to install? Have they employed ex-Meccano engineers who are desperately trying to re-instate their skills in the world of HSF installation? Feel free to share your thoughts and experiences below.
[break]
A couple of years later and I was building my first PC from scratch. Being an avid reader of Custom PC, the Elite List was my inspiration for component selection. The Arctic Cooling Freezer 7 Pro was the only choice. This was the first time I’d encountered push-pin system used on Intel’s reference cooler. While the principle seemed simple enough, my lack of PC experience and impatience to finish the build ensured that it was considerably more difficult than it needed to be. Nowadays however, being familiar with the nuances of the simple system, installing a cooler that uses it takes about eight seconds.
The push-pin system - you either love it or hate it
But there are some CPU coolers that use installation methods that utterly baffle the mind. I often liken these mounting systems to Meccano sets; such is the ridiculousness of the components list. If these coolers provided a CPU contact that akin to elephant sitting on the heatsink and awesome performance to boot then I’d understand. But many of them don’t. Even if they did, surely CPU contact could be achieved in a simple manner?
One that springs to mind is the Zalman CNPS 10X Extreme. It requires a back-plate to sit behind the motherboard, a mounting bracket which sits on top of the motherboard, a hold-down to secure the cooler to the mounting bracket and, to hold the caboodle together, a tool shed’s worth of screws and bolts. What’s more, you really need to remove the fan to assemble the
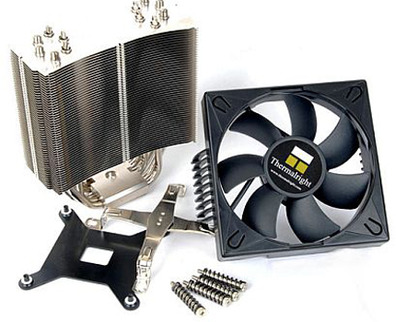
The Thermalright Ultra 120 eXtreme - mounting an HSF doesn't need to be any more complicated
Let’s take a look at the Thermalright Ultra 120 eXtreme for some comparison. A back-plate and a hold down are required. Four spring-loaded screws clamp the base-plate in between and the fan clips on in a second. Job done. What’s more, the cooling is awesome.
Why make it more complicated? Is it because some manufacturers are concerned people will feel gypped if it doesn’t take 30 minutes to install? Have they employed ex-Meccano engineers who are desperately trying to re-instate their skills in the world of HSF installation? Feel free to share your thoughts and experiences below.


MSI MPG Velox 100R Chassis Review
October 14 2021 | 15:04

Want to comment? Please log in.