Installation
I found that the documentation was a bit lacking. They certainly provide enough of it at first glance until you realize that they accommodated seemingly every language known to man. Between the large graphic quick-start poster and the actual manual, most users will manage their way through it. The images in the manual were very small and in black and white which caused a bit of frustration and head scratching on this reviewer’s part.Anyone who knows anything about liquid cooling will tell you once you have your equipment set up, you should run it for at least 24 hours to make sure there are no leaks. Because half of this kit is external (the radiator) and the other half is internal. There is no really good way to test for leaks. You pretty much have to fully assemble it before running it for testing. If you were to assemble the kit completely externally in a big tub like most people recommend, you would just have to take it back apart to re-feed the tubing thus, nullifying your efforts. There are no cut-off clamps included to prevent liquid loss even if you wanted to anyway. This kit is triggered by tying into your power switch header on your motherboard which is great because it starts as soon as your system does, but it also makes it difficult to test without your motherboard very near the cooling system.
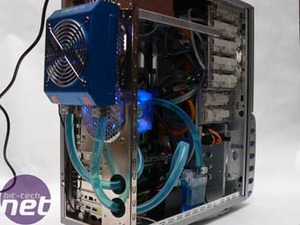
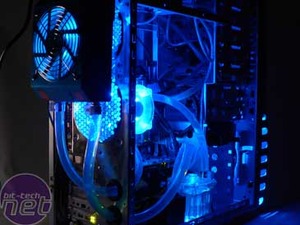
Eventually, I surrendered to just trusting Gigabyte, and my understanding of their documentation and connected the kit inside the case with just my motherboard installed, not my precious CPU or RAM to reduce my possible losses. Fortunately, there were zero leaks either initially or 24 hours later so I then installed my CPU and the block.
The last remaining steps is to mount the radiator to the chassis which is accomplished with a mounting bracket that utilizes the lower two mounting holes of your power supply and to fasten the pump/radiator to the inside of the case. Because the 3D Galaxy kit was designed to work with the 3D Aurora, there were two threaded mounting holes in the bottom of the case. Once installed, the pump assmebly is very secure although, it would've been nice if Gigabyte had added a foam base to minimize vibration. I didn't notice any vibration sounds but those tend to creep up over time. If you decide to use this kit and you don’t have the 3D Aurora case, you’re drilling your own holes… I guess.


MSI MPG Velox 100R Chassis Review
October 14 2021 | 15:04


Want to comment? Please log in.