
Installation
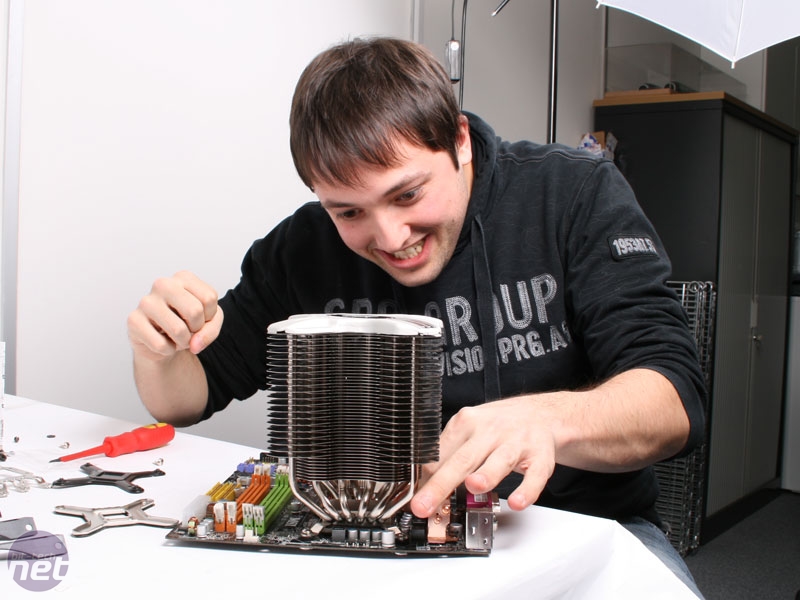
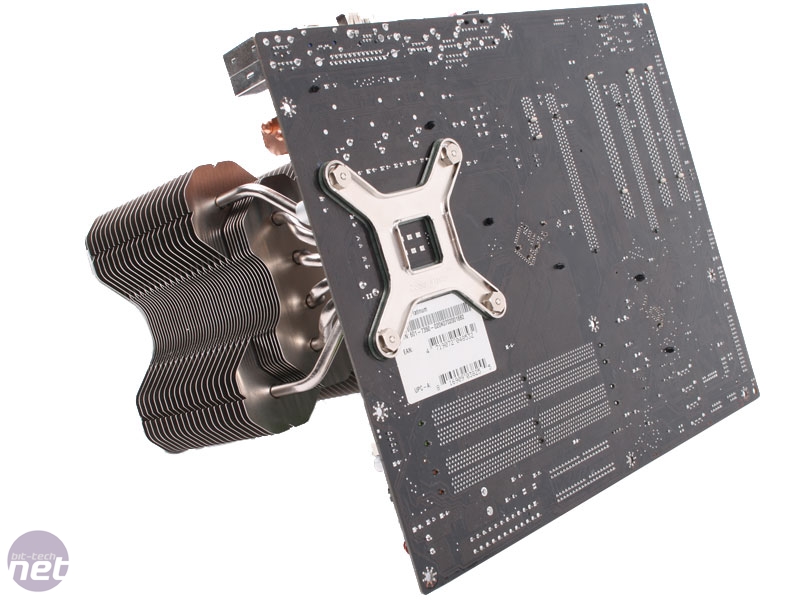
I’m sorry to say that fitting the Cooler Master Hyper Z600 for the first time was not a fun experience. Not even in the slightest. In fact, I was getting so frustrated with it that Tim, being the kind and compassionate Editor that he is, decided to grab his camera and photograph my misery while blinding me with the studio flash – thanks Tim.Due to the size and weight of the Z600, we were at first pleased to see that Cooler Master had elected to use a very beefy looking back plate mounting system for both AM2 and LGA775 motherboards. The problem lies in actually fitting the cooler to said back plate.
Because the cooler is so physically large, there’s no way Cooler Master could have used a mounting system that sufficiently fastens screws from the top side down into the back plate, so instead has had to include a bolt based mount system, tightened from the underside of the board.
With the correct bracket attached to the cooler and the thermal interface material applied to the CPU, you place the Hyper Z600 onto the CPU and then flip the whole assembly upside down, allowing access to the screws onto which bolts can be fastened to secure the cooler.
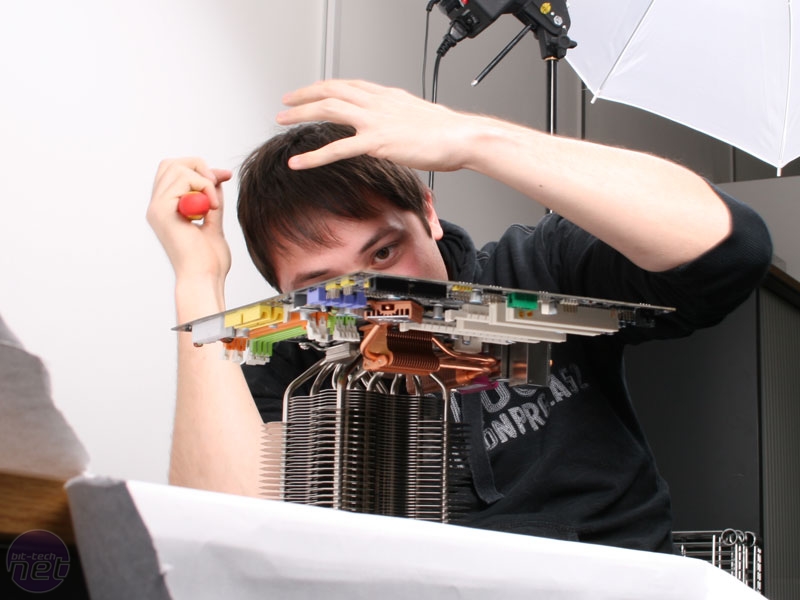
Click to enlarge - Fitting the Cooler Master Hyper Z600 caused a great deal of frustration
Thankfully Cooler Master includes a bolt fastening adapter for your standard Phillips head screw driver but the whole process is still a real pain, especially when you realise you haven’t fastened the screws enough to reach the bolts on the other side and have to reach underneath your upside down motherboard to tighten them.
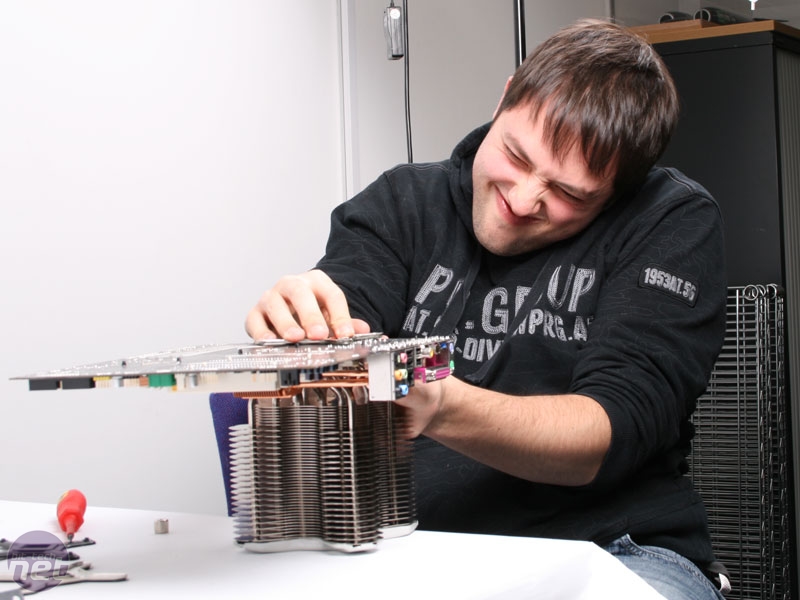
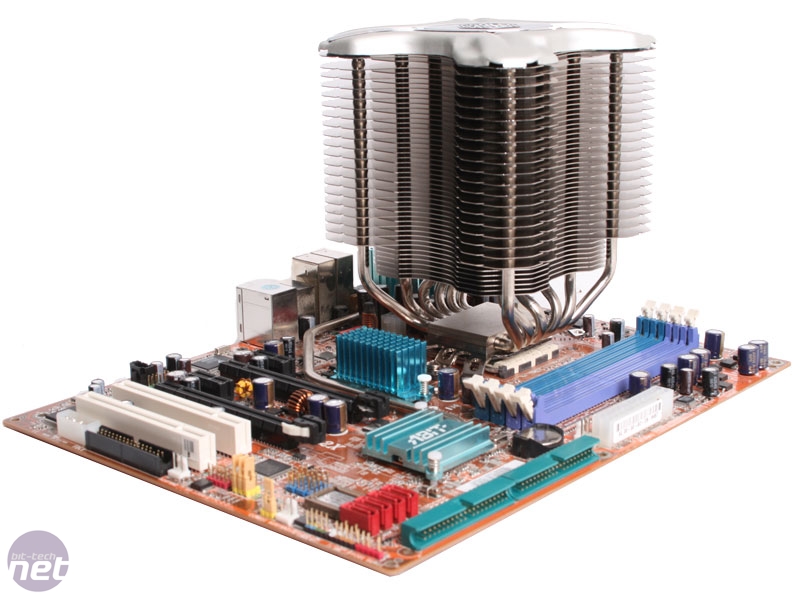
Click to enlarge - But eventually, man overcame machine -VICTORY!
The Z600 has basically became a victim of its own size - it's just too big to fit using conventional methods or even a top down back plate, so Cooler Master has been forced to use this dreadfully awkward and tricky mounting system that, as you can see, can cause a great deal of frustration.
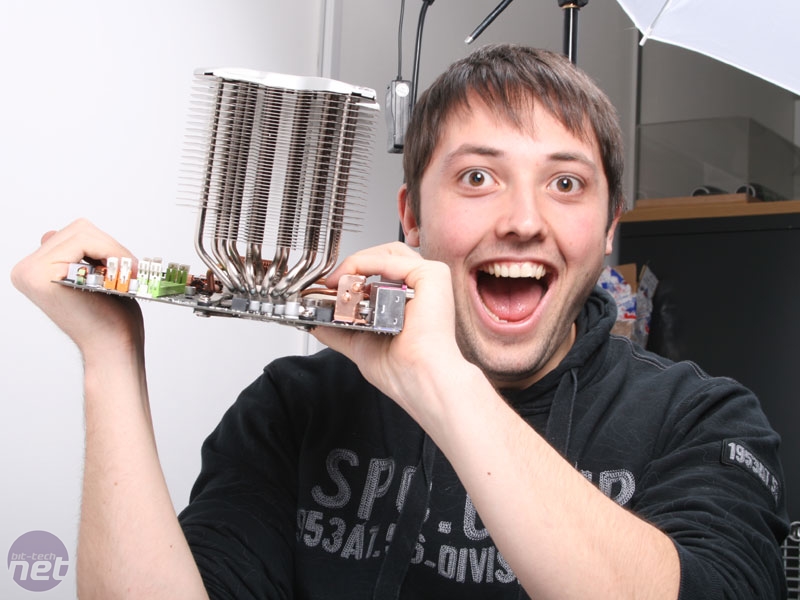
Needless to say fitting the Hyper Z600 will mean the total removal of your motherboard and the same goes for any future CPU replacements or to reapply TIM. Having said that, once it's in place and fully secured to the board, the Hyper Z600 is extremely sound and secure, placing very little pressure on the motherboard itself.

Click to enlarge - The backplate might be tricky to fit, but is very secure
Fitting the cooler to an AM2 or S939 board is very similar to the LGA775 mount, although you’ll need to remove the default AMD mounting plate and clip before fitting the Hyper Z600. We fitted it to a 939 board and even though mounted using just two bolts, the well designed mounting plate made sure the heatsink was safely secured, although we still had to undergo the bizarre upside down motherboard mounting procedure.
Thankfully fitting a fan onto the Hyper Z600 was a whole lot easier, with the process involving just a few screws and then firmly clipping the fan into place. Because of the cooler’s symmetrical design, you can mount a fan onto any side allowing for the Z600 to be adapted for any case’s cooling layout; if you’ve got an exhaust fan in the roof of the case, you can fit the fan on the lower side blowing upwards.

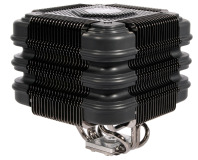
Click to enlarge - fitting to an AMD motherboard is a similar experience, and adding two 120mm fans makes for a very large cooler indeed!
It’s even possible to use all four fan mounts and double up on 120mm cooling fans to produce a push/pull airflow through the Z600’s cooling fins and maximise the cooler’s potential. However, despite looking very impressive, fitting the Z600 back into our test chassis with two 120mm cooling fans fitted onto it proved to be a tight squeeze, and although it did fit, those with smaller or more cramped cases would be ill advised to try and fit in a similar set up.


MSI MPG Velox 100R Chassis Review
October 14 2021 | 15:04


Want to comment? Please log in.