Cooler Master AquaGate Viva
January 31, 2007 | 14:17
Companies: #amd #ati #cooler-master #intel #nvidia

Further Installation Pictures
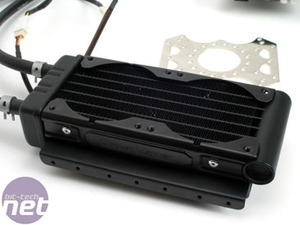
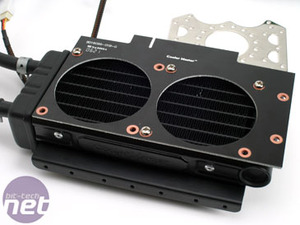
The radiator includes threaded holes that allow it to be installed in a 3.5” or 5.25” bay built in long as there is some space for airflow above and below. The size of unit and space needed above and below means that it takes up the space of three hard disks or two 5.25” drives. In the confined space of a small case this obviously provides a serious issue, but an average sized ATX case will have space for at least half a dozen hard disks and three or four 5.25” drives. A more efficient method of installation would have been to use an axial fan to push air through the depth of a radiator, but since pushing cooler air across a larger flatter area produces better cooling, and the radiator included is by far the more traditional and cheaper method of production.If the drive bays are unavailable, the radiator can also be installed in a PCI slot with the provided adapter. You lose three PCI slots even when installing it in the bottom PCI slot (providing you have one spare), but including the cooling block you lose a total of four. Overall, the drive bays seem a better option, although by modding a hole in the bottom of your case you can remove the heat from the radiator and your system when installed in a PCI slot. The advantage other (usually more expensive) watercooling kits have is that they expel the heat from the system by placing the radiator at the back or top of the case. Since the AquaGate Viva circulates the hot air back into the system it doesn’t have that distinct advantage over air cooling.
Installation in the optical bay is reasonably simple, and the radiator is light enough to be held in by simply two screws. Installation in a hard drive bay is more problematic: we found the Gigabyte case we used with side facing hard drive slots caused the tubing to poke out the case side, but because the internal facing hard drive slots had "toolless" plastic rails, this made it impossible to install the radiator there either.
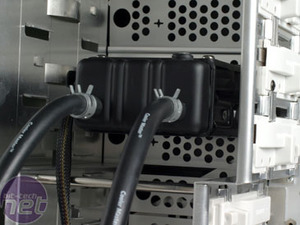
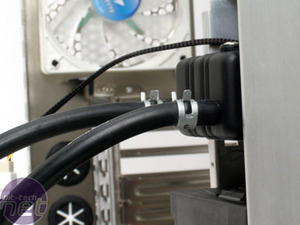
Flipping the radiator over to attach the PCI plate requires knowing specifically which way around the PCI slot is, and what orientation the plate needs to be screwed down as the tubing needs to face inwards.
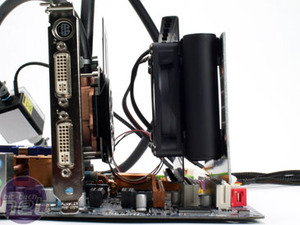
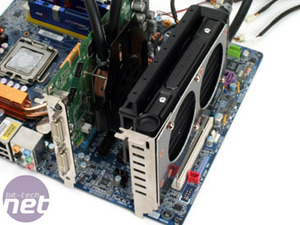
The cooling block takes up an extra slot, and the radiator takes up a total of three slots.
Using the AquaGate Viva
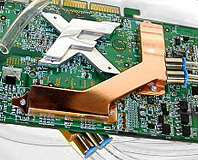
The coolant is pre-installed, which means you don’t have to worry about getting liquid everywhere, but it also means you can’t adjust the length of the tubing. You aren’t provided with extra coolant either, but there is a fill port on the radiator that you can unscrew and top it up using the provided syringe. However, taking apart any of the tubing will void the warranty.Despite the fans being low profile they are generally very quiet, with only the pump making a slight humming noise. Once the case door is closed it should indefinitely seal in any noticeable noise to the outside. However, using the cooling block facing down causes the integrated pump to rattle loudly. This could be a problem if you use a desktop style case where the motherboard is mounted in the same plane as the floor. In any other situation though, the cooling block will be facing upwards (on a graphics card) or 90 degrees to the floor (CPU in a tower case, or graphics card in a desktop case) and in both of these situations the cooling block pump goes back to working quietly.
Installed, it looks like a mess of cables. The excess tubing needs to be routed around without being kinked, and the several power cables need to be routed so as they don’t interfere with the radiator (and other) fans as well as other cables. We've never had it where installing just one cooling solution seems to exponentially add to the clutter.
Installing it on a CPU can present more issues. With recent boards having heatpipes and heatsinks surround the CPU area this means trying to navigate the tubes around these. If they end up leaning on them at best it’ll adversely heat the water, at worst it could possibly melt the tubing. Virtually every single enthusiast water cooling CPU block has the inlet and outlets on the top, avoiding this problem, however due to the universal nature of the Cooler Master cooling block it couldn't be designed like that.
RELATED ARTICLES


MSI MPG Velox 100R Chassis Review
October 14 2021 | 15:04

Want to comment? Please log in.