
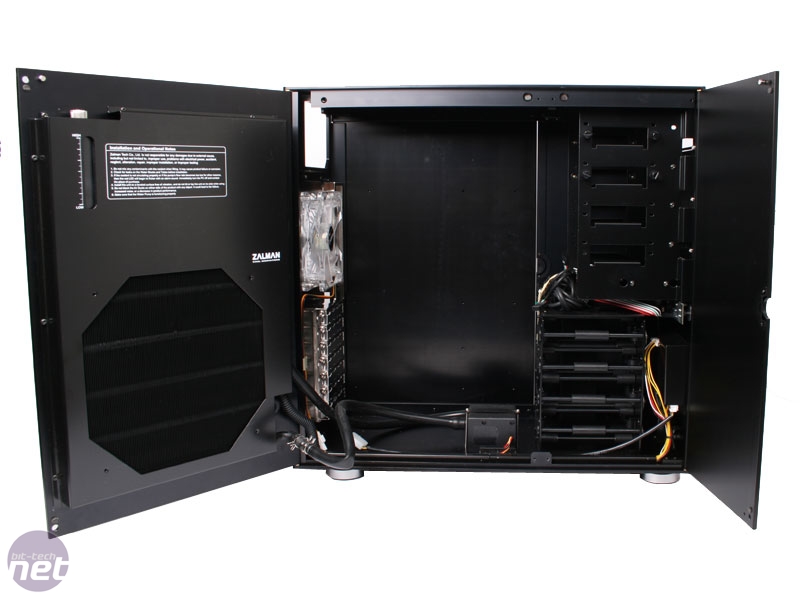
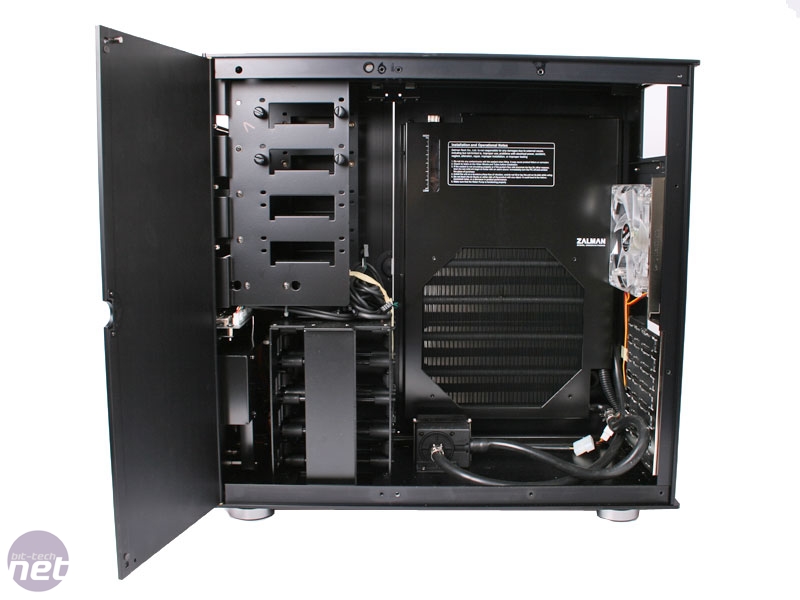
Interior
Opening up the LQ1000 reveals much the same as the exterior as there’s no internal chassis here – the other side of the exterior panelling is the interior. This means more beautiful aluminium panelling and brilliant build quality. As we’ve already covered, the whole rear case panel acts as a removable motherboard tray allowing hardware changes without the disassembly of the watercooling loop, but there are plenty of other well thought out design decisions inside the LQ1000.The hard drive rack in particular is unique in our experience, involving a screwless design that all but eliminates hard drive vibration. At first the simple bars appears almost shoddy and cheap compared to the rest of it, but when we came to use it we found the drives slide into a completely rubber roller based mount, and are then secured by another rubber roller mounted onto a rod that slides down behind the fitted drive.
The mounting process is effortless and drives can be swapped in seconds whilst being completely secure once fitted (although Zalman recommends an additional small screw fixing if you plan on transporting the case). The only drawback is that the large amount of room required for all the rubber rollers means that you’ll only be able to fit four 3.5” drives into the LQ1000, although with today’s drive capacities that should comfortably allow four terabytes of storage (or soon more) – more than most will ever need.
Sadly the attention to detail that shone so brightly doesn’t completely translate into the interior though, and while all the fan and pump power cables have been hidden away well enough, there doesn’t seem to be much provision for cable management – Zalman doesn’t even include any cable ties or clips for you to tidy those excess PSU cables away, resulting in somewhat of a messy build. However, as we’re watercooling here, messy cables won’t really effect the LQ1000’s cooling, and there's no window to detract from the internal look. Then again, what good is a £400 dual doored, watercooled behemoth if you're not going to show it off now and then?
Click to enlarge - the LQ1000 opened up from both sides
On the subject of cooling, the LQ1000, as an integrated water-cooled case, has, unsurprisingly, rather a limited cooling structure, with one 120mm fan mounted in the rear and a huge 240mm cooling fan mounted over behind the radiator pulling cool air over the radiator’s fins and into the case. There aren’t any other fan mounts in the case at all, which means your hard drives will miss out on any cooling, and thanks to the 5mm think armour plate of the LQ1000, you’ll be hard pressed to cut any extra ventilation holes. Even then, why on earth would you want to spoil the wonderfully crafted exterior with a home cut blow hole? It'd be like taking a blow torch to an Aston Martin.
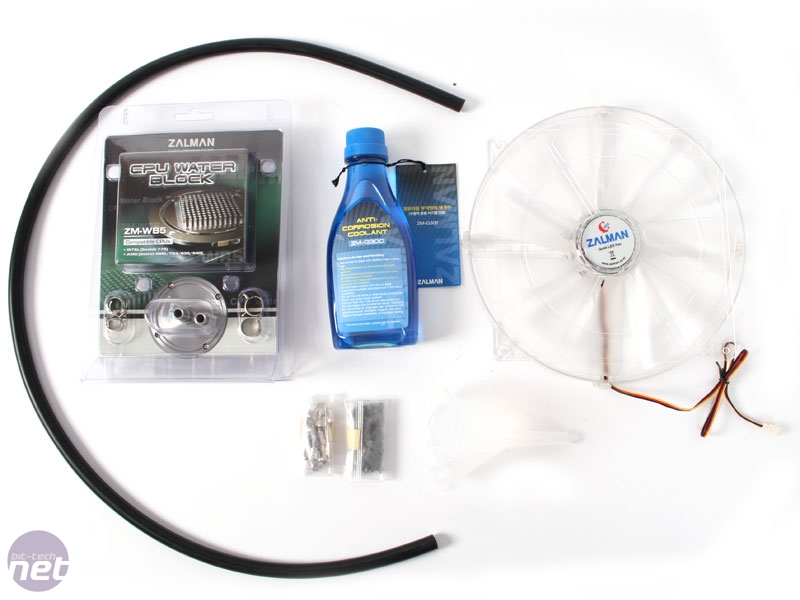
However, the centre piece of this case is always going to be the integrated watercooling system, and we’re happy to say it delivers on being fantastically easy to fit. The case arrived with the combination radiator/reservoir and pump pre-fitted and plumbed together, and fitting the system was as easy as mounting the included back plate based Zalman ZM-WB5 CPU water block to the motherboard, re-plumbing one hose and cutting and fitting a second. That really was all that was required to finish building the loop, and it took less than fifteen minutes to accomplish. The only real gripe was that the clips to hold the tube on the barbs have to be installed with needle nose pliers to avoid mincing your pinkies because the ends you compress together are too small and too sharp, although the manual did at least warn us about this.
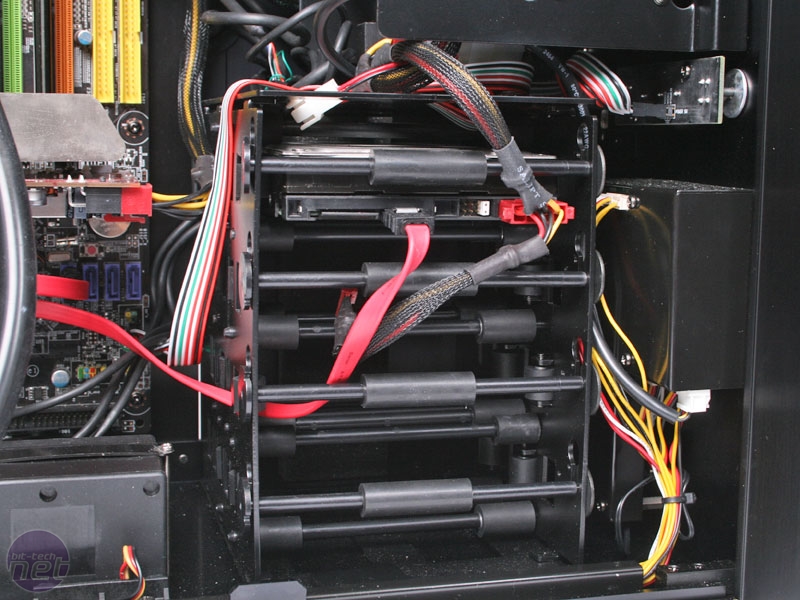
Click to enlarge - the unique HHD mount system, and everything you get with the LQ1000
Filling the loop was just as simple, with Zalman including a handy funnel as well as a bottle of its own ZM-G300 anti corrosion coolant. The coolant itself is mixed in 1:4 concentrations with distilled water to make up the coolant, and there’s a small window into the reservoir to show you when the loop’s filled. You even get a handy jumper cable to jump start your PSU when first filling the system – Zalman really has taken a great deal of the stress out of running a watercooled setup, although we can’t but ponder that they’ve taken some of the fun out too. Although having said that, please note that when it says "it takes 500ml" it really means 250ml, then turn it on to get the water in the pipes, then add the rest. We managed to get a few hundred millilitres over the floor because we over filled the reservoir the first time.
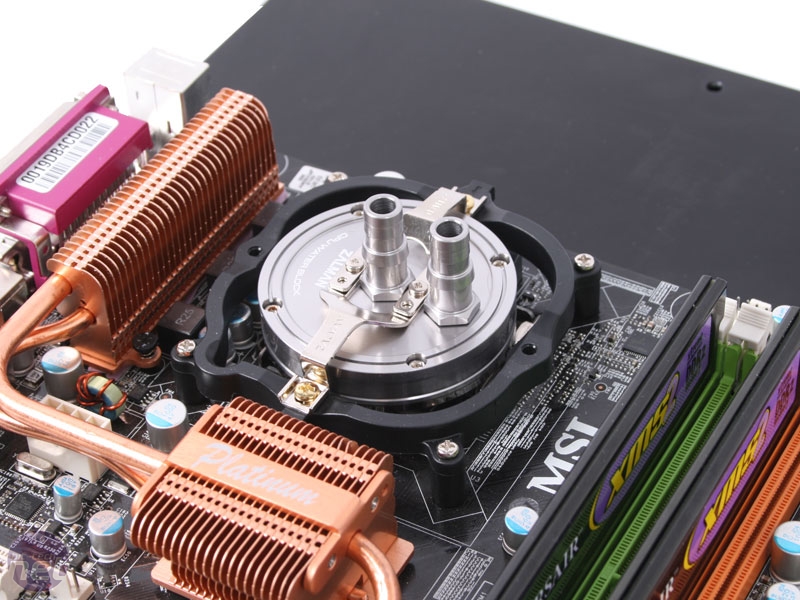
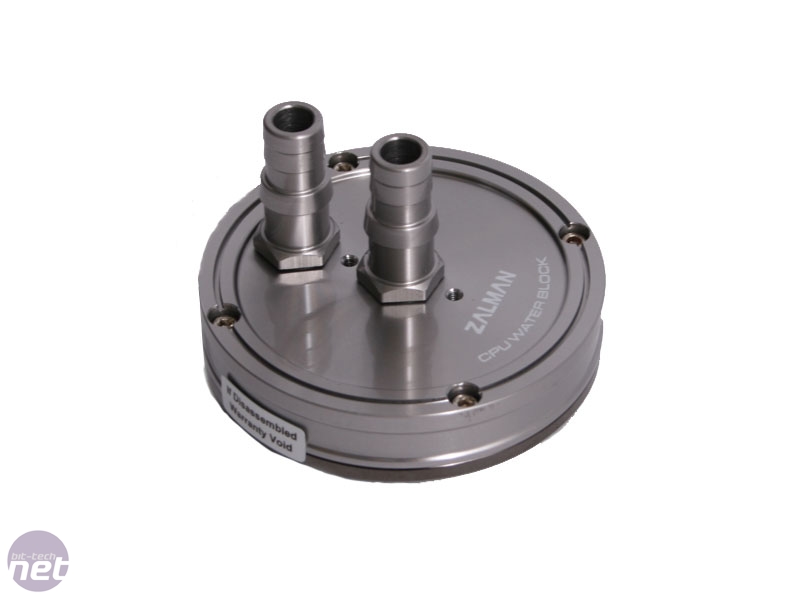
Click to enlarge - the water block mounting process is a simple back plate mounting
To me part of the appeal of watercooling was that it wasn’t a trivial thing to setup; things could (and usually do) go wrong. In much the same way that the older case modders will remember home cut case windows being quickly replaced by the pre-modded windowed cases that now dominate the market, could we see similar pre-fitted watercooling loops rise in popularity? Probably not due to the cost premium, but it does remove some of the fun of building your own loop.
With generally fantastic quality inside and out and its water loop filled and ready to cool, it's time to check out the LQ1000’s performance and see if it can continue to justify its price tag.
RELATED ARTICLES


MSI MPG Velox 100R Chassis Review
October 14 2021 | 15:04


Want to comment? Please log in.