Nanoxia Deep Silence 1 - Interior
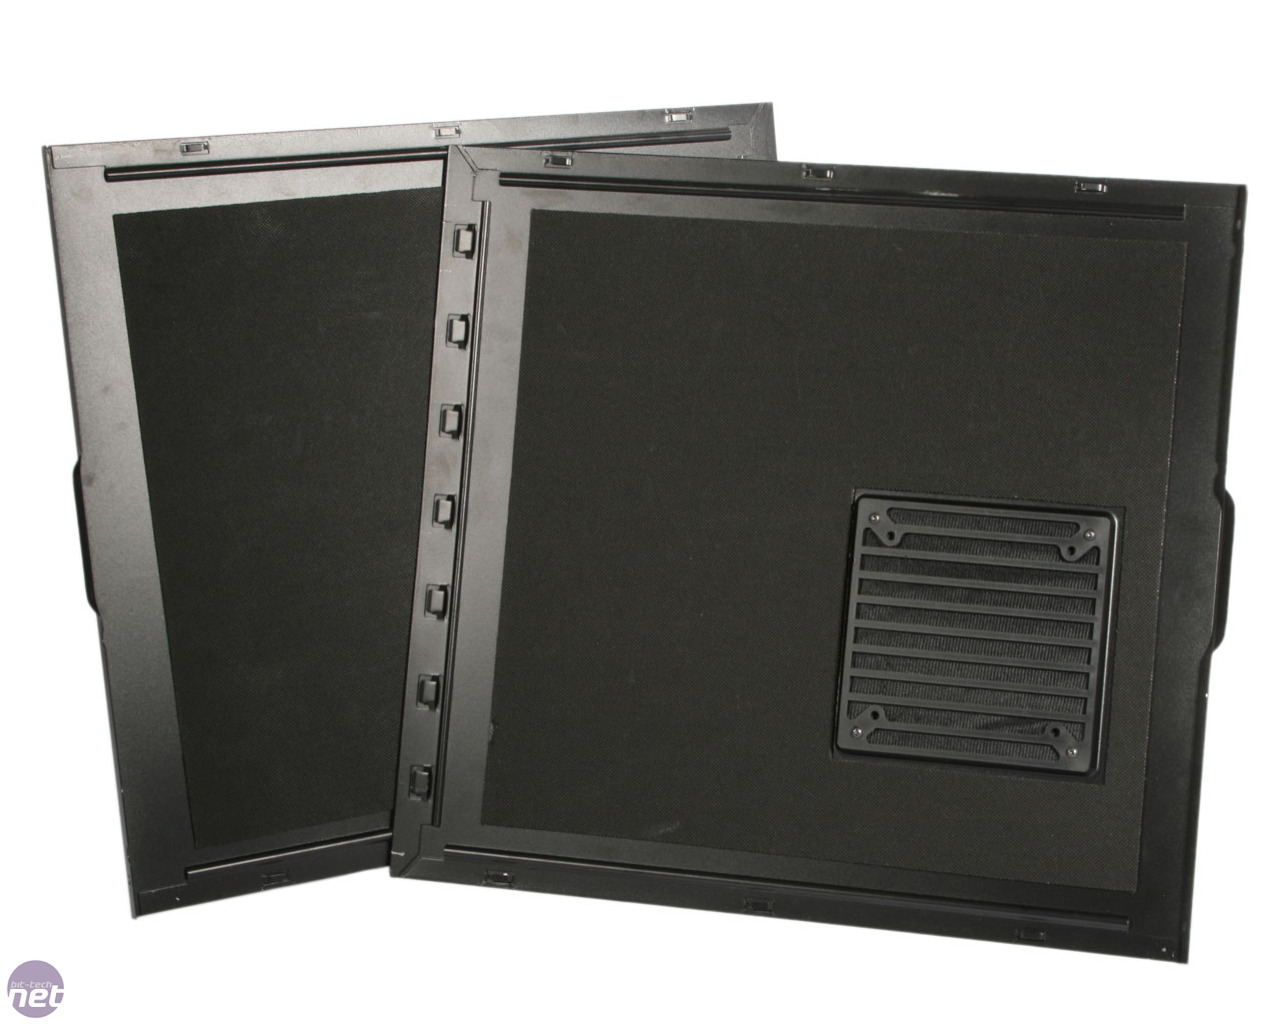
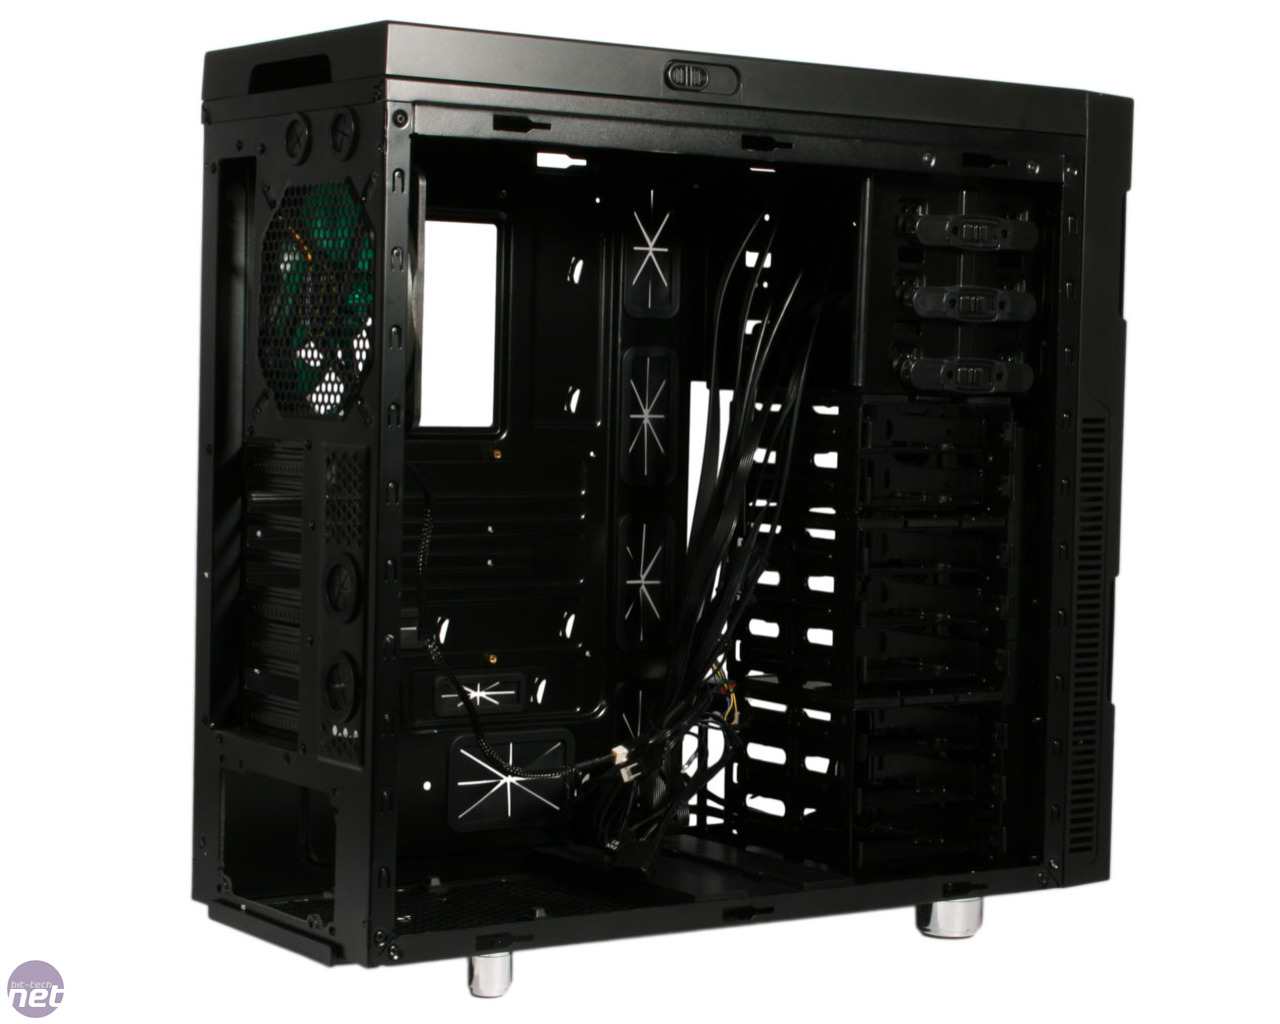
Once you've undone the thumbscrews and taken off the side panels, it's immediately apparent how well constructed they are. They're wonderfully solid and sturdy, with only the tiniest hint of flex. Like well treated hair, the noise dampening foam is thick and bountiful, and it's good to see that unlike those of some manufacturers, the left panel's blanking plate comes with its own dust filter by default.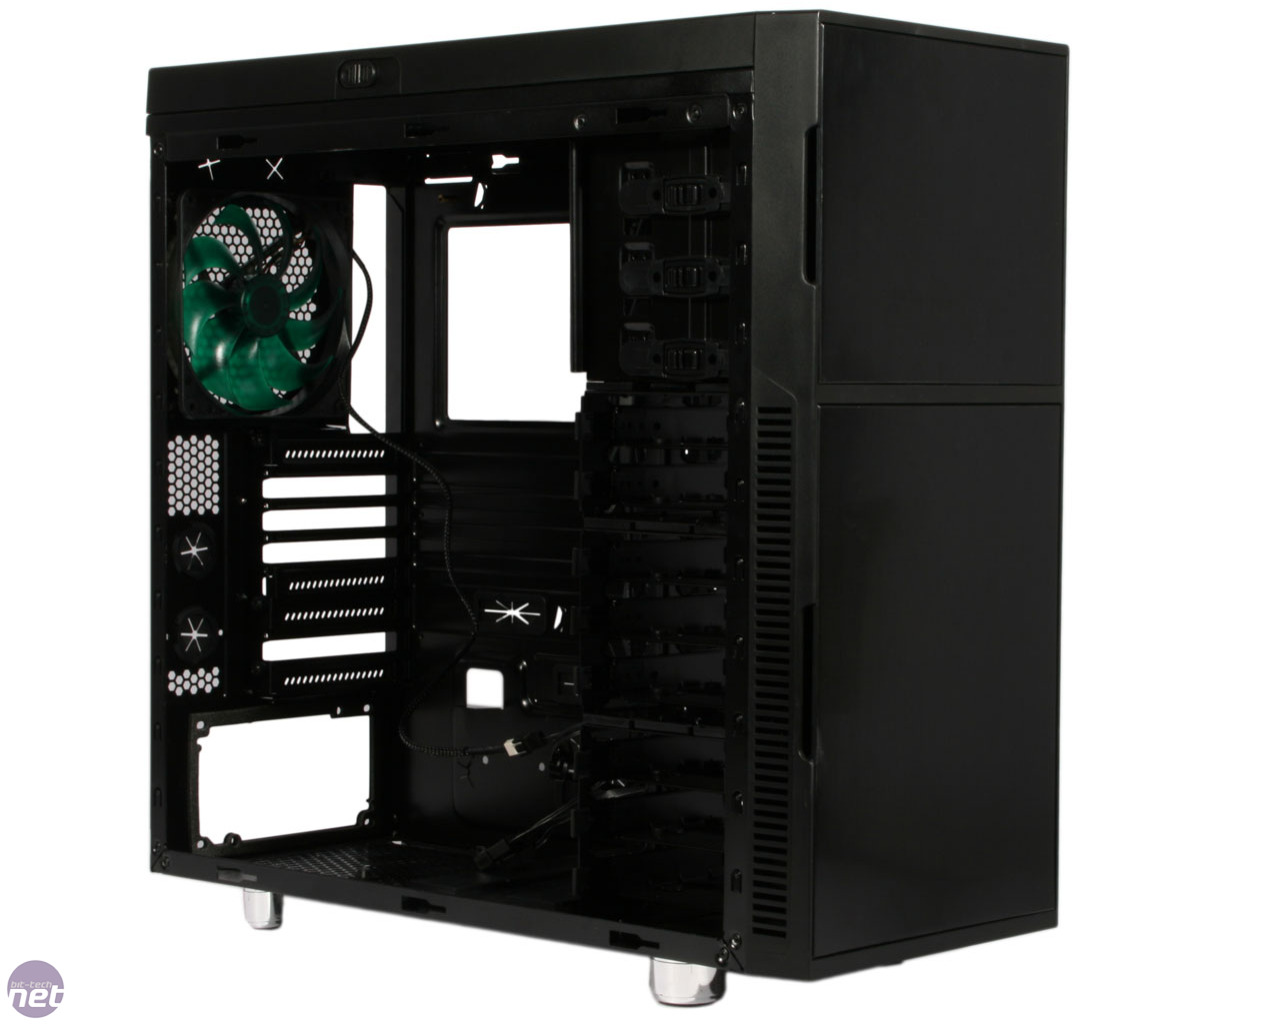
Click to enlarge - The interior of the DS1 (left) and its side panels (right)
Plenty of sensibly placed cable routeing holes surround the motherboard tray, behind which there's a healthy amount of room for stashing cables despite the flat side panel. The holes themselves are shielded with rubber grommets that are firmly fixed in place but allow cables through easily. As the case is relatively tall, an EPS extension cable is supplied in case your PSU's one isn't quite long enough. Zip ties and hooks for them to latch on to ensure that keeping your system tidy and free from airflow hindering cables is a breeze, which is even more important in low noise, low airflow cases.
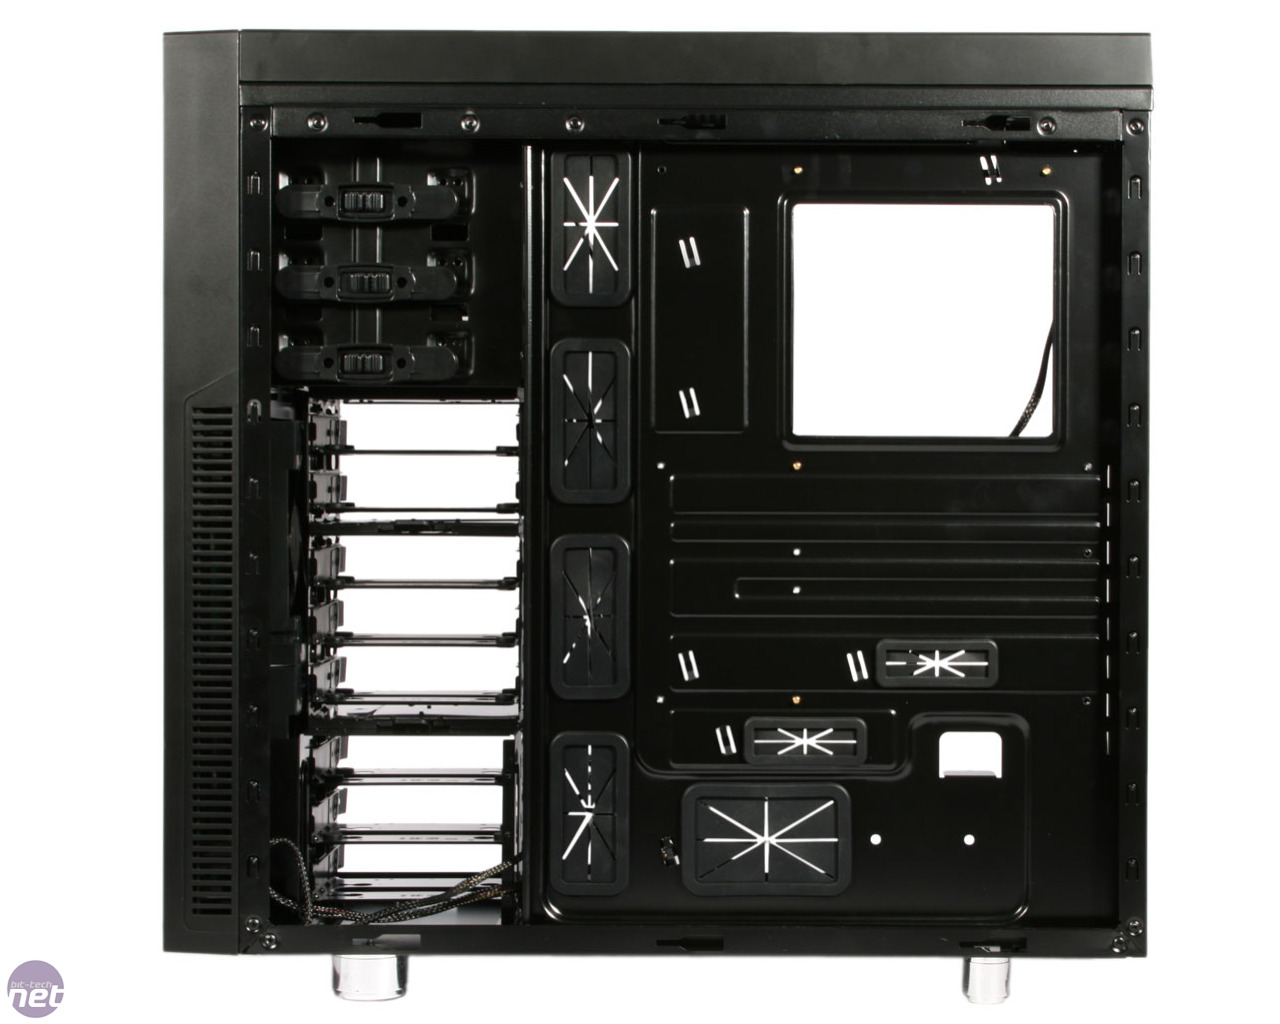
Click to enlarge - The DS1 has plenty of cable routeing holes and black sleeved internal cables
Wiring up the fan controller is a simple process as the plugs corresponding to the separate channels are clearly labelled A or B. Nanoxia produce a variety of pre-sleeved cables for modders and those looking for colour consistency, and it's nice to see that they've carried this expertise over to the DS1 and taken the chance to sleeve all of its internal wires in black. This is again indicative of its attention to detail, especially given that without some modding the case's internals will remain invisible from the outside.
The spacious interior makes mounting your motherboard and installing your PSU nice and easy. The tool free optical drive mounting clips are simple to use and less rattly than we've seen elsewhere. With your drive aligned, you simply push the clips on either side of it in, and slide them to lock them in place. It's not the most secure of mounts, but it's acceptable, and screw holes mean you can tighten the fitting should you wish. A 3.5-inch bay adaptor and drive holder is also provided.

Click to enlarge - The lower dust filter stops dust indvading from below
The eight metal internal drive mounts all support both 3.5-inch and 2.5-inch drives for maximum flexibility. You'll need to whip out a screwdriver regardless of what drive you choose to install, but each tray slides in and out of its bay with ease, and locks securely. Rubber grommets ensure that vibrations from hard drives are a non-issue, and likewise rubber feet beneath the PSU and foam padding where it meets the edge of your case are further evidence of the focus on stopping sound in its tracks.
The hard drive cages are modular in design, as seen in the R4. The top five bays are split into cages of two and three, which use rails to slide in and out of the case. You could therefore hang one of these cages on the rails beneath the optical drive bay, leaving a gap between it and the lower drive cage (which can also be removed with screws). Thanks to some rails just in front of the PSU, you can also install a cage there, as shown below, meaning the DS1 affords users with a great deal of customisation to suit the needs of different setups.
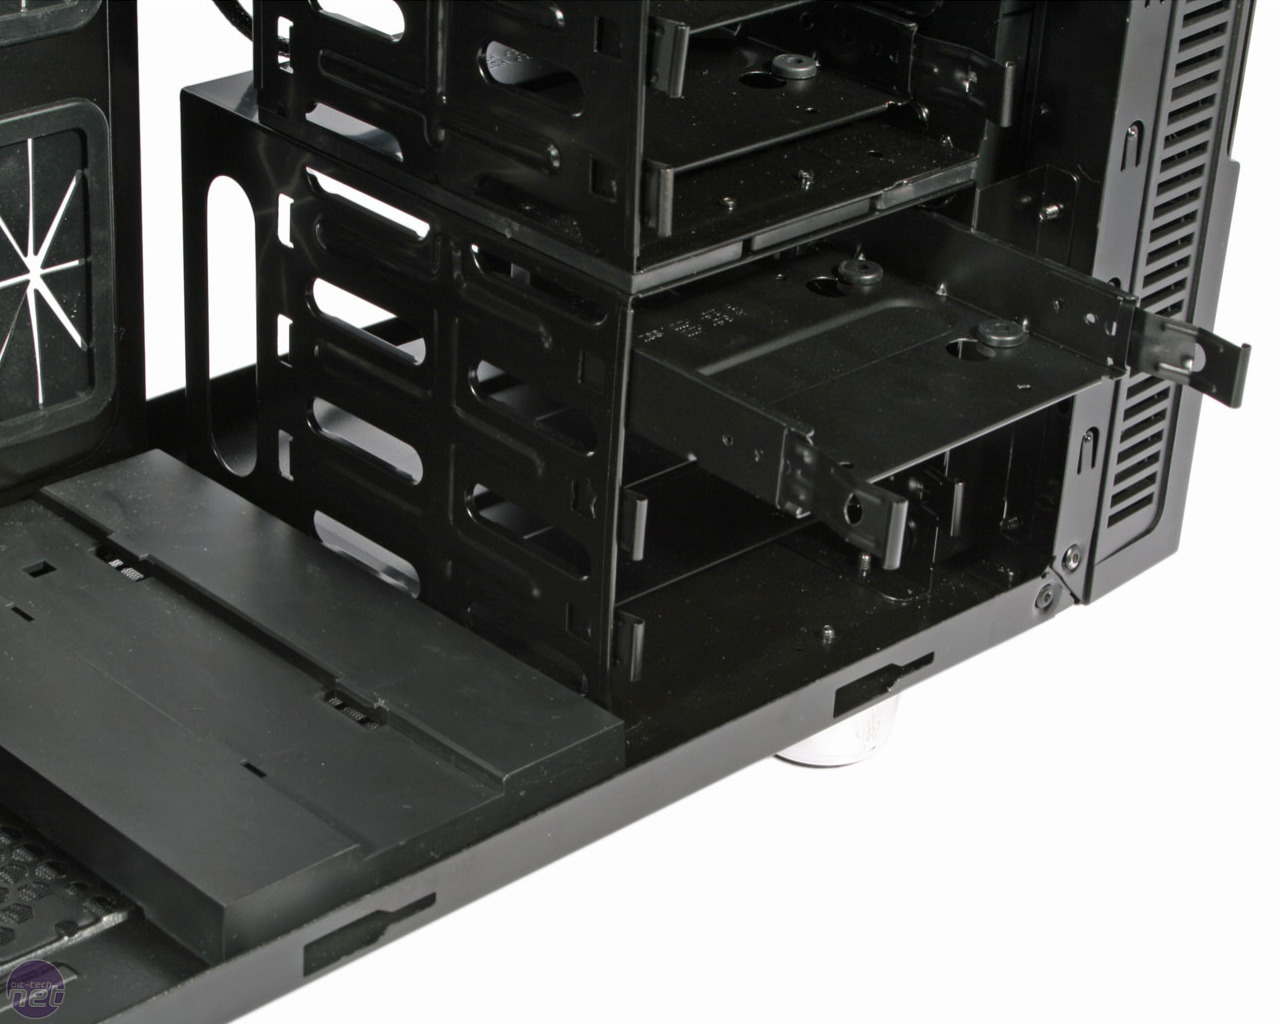

Click to enlarge - The drive bays (left) slide out easily, and the modular cages can be installed in the middle of the case (right)
Those looking to build a water-cooled rig can install a full height double radiator with fans in the roof fan mounts, thanks to the offset mounting holes which ensure it can be fitted closer to the case's side panel. Once you've taken out all the drive cages from the front of the case, the front fan mounts can also house such a radiator, which would benefit from being cooled by the intake fans. As such, water-cooling support exceeds that of the Fractal R4, and the front mount is more secure than that of the R4 too, relying on screws rather than plastic, tool free fan mounts. Anyone wishing to install a fan on the DS1's floor mount will need to remove the set of rails that covers it by default.


MSI MPG Velox 100R Chassis Review
October 14 2021 | 15:04

Want to comment? Please log in.