
While shopping this weekend at my local Target store (a national discount chain store for those of you outside the US) I noticed they were selling Halloween decorations for half off. And amid the plastic pumpkins and reflective child safety vests and cheap costumes I found a shelf full of lighting effects. Most were pretty typical blacklights or just oddly-shaped bulbs, or otherwise pretty pedestrian items. But one item jumped out at me--a small plasma globe. It had a plastic witch attached to it, or there were some with a skull instead. But in a fraction of a second, I had formulated a plan. I decided it was worth ten bucks to see if this idea was really too crazy to work. The item came with an instruction sheet that warned against using it in the vicinity of any microchips. Hmmm, intriguing. I've never been one to put much stock in warnings after all.

time to mod this witch
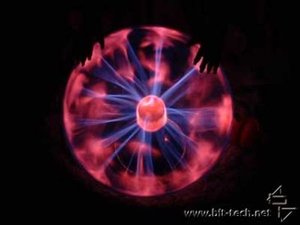
here's a dark shot of the unmodded item, just in case you haven't seen this effect
I already had a 3-inch hole in my bezel from installing my clear fan duct a while ago. So part of what made this attractive was that I knew I already had a hole in place sized just about perfectly for this stunt.
Once I got it home, I was very pleased to see that the power was provided by a wall wart (that's an inline transformer) rated 500 mA at 12VDC. So powering this from inside the PC was going to be a slam dunk. I've seen some of these that have sound-sensitive settings, this one didn't. No problem, I wanted it to run all the time anyhow.
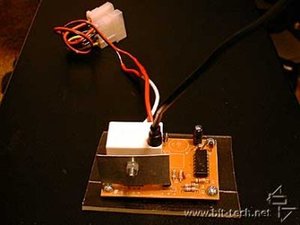
Alright, so it was down to the serious business of disassembling this thing to see what was inside. I was hoping to find a nice little inverter board inside the housing, something I could repackage nicely. Luckily the unit disassembled quite nicely. The inverter was a 2x3 inch board attached only to a switch and a barrel connector for the power adapter. The globe was hot glued into the base of the sculpture, and a single wire ran from a transformer on the inverter board up into the center electrode of the plasma globe. A small wad of metal inside the tip of the electrode made contact with the wire, and a plastic sleeve in the glass tube concealed the wire for a nicer look.
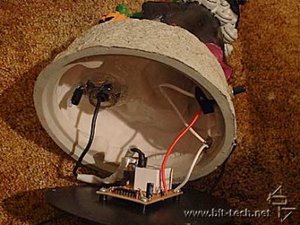
the globe is glued securely in place

here's our board with simple connections
A few minutes with a utility knife took care of the plasma globe, and four self tapping screws held the inverter to the plastic base plate. I guess it should be pointed out here, don't fool with the inverter when the power's on.
Let's take a minute and look at the globe itself. It's just a glass envelope, but there's an electrode in the center of the sphere, a neck to fit the sphere into a case, and a small nipple where the envelope was evacuated and sealed. The wire from the inverter fits up into the electrode in the center, but there's no fastener--it just shoves into the tip. I left everything like that rather than fastening it together securely, so I had a way to remove everything (after all, I didn't know whether my computer would start sparking like R2D2 after he got shot by that Jawa on Tatooine).
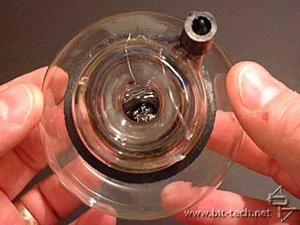
no comments on my hangnails please
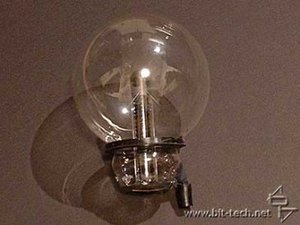
looks like some antique quack medical device, doesn't it?
I wanted a nice finished install, but I was too lazy to really build a proper enclosure for the inverter board. So I just grabbed a piece of acrylic sheet scrap and made a mounting bracket. I drilled small holes and used the self tapping screws included with the unit, then used velcro to hold the bracket in place in my case. I soldered a Molex passthrough onto the power leads, and put a bit of heatshrink tubing on for a tidy install.
a project box would have been better
The globe itself is around 80mm diameter, which is what made mew buy it in the first place. I didn't have to drill a hole, but using a 3 inch holesaw in your bezel would give you a hole that is just slightly smaller than the diameter. I wanted to mount mine so that the equator of the globe was in the gap between my plastic bezel and the metal front of my chassis. A quick test fit showed me that it would work, but the globe had some play. I wanted a nice tight install, so I went back to the scrap bin for a piece of 1/4 inch acrylic sheet. I drilled a 3 inch round hole into it with a holesaw, trimmed it to size, then drilled mounting holes so that it would mount in the slot for my 80mm fan. The globe will sit proud of the bracket, but not slide out the front bezel hole because its diameter is a little too large.
Well, the quarter inch thickness didn't get me a snug fit either, so I used nuts and a couple rubber washers to stand the bracket off the front chassis by another 3/16 inch or so.
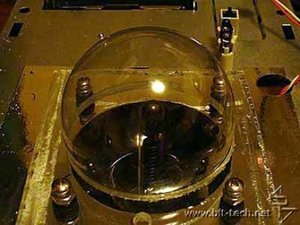
no contact between the globe and the chassis
Now every part of the globe and its inverter were mounted touching plastic only. You may have seen the effect of touching the globe--it sort of draws the sparks to your finger. I didn't want my chassis to attract the sparks at all. So a quick test fit with the bezel showed I had a nice snug fit, the globe was not under strain but it was not going anywhere.
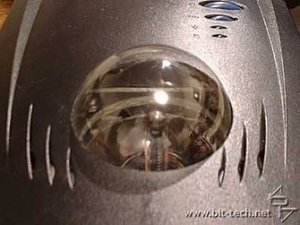
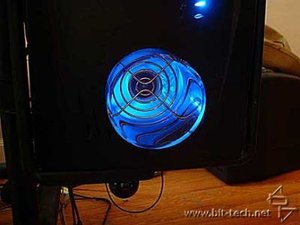
the globe is clear, so you can see into the case
time to mod this witch
here's a dark shot of the unmodded item, just in case you haven't seen this effect
I already had a 3-inch hole in my bezel from installing my clear fan duct a while ago. So part of what made this attractive was that I knew I already had a hole in place sized just about perfectly for this stunt.
Once I got it home, I was very pleased to see that the power was provided by a wall wart (that's an inline transformer) rated 500 mA at 12VDC. So powering this from inside the PC was going to be a slam dunk. I've seen some of these that have sound-sensitive settings, this one didn't. No problem, I wanted it to run all the time anyhow.
Alright, so it was down to the serious business of disassembling this thing to see what was inside. I was hoping to find a nice little inverter board inside the housing, something I could repackage nicely. Luckily the unit disassembled quite nicely. The inverter was a 2x3 inch board attached only to a switch and a barrel connector for the power adapter. The globe was hot glued into the base of the sculpture, and a single wire ran from a transformer on the inverter board up into the center electrode of the plasma globe. A small wad of metal inside the tip of the electrode made contact with the wire, and a plastic sleeve in the glass tube concealed the wire for a nicer look.
the globe is glued securely in place
here's our board with simple connections
A few minutes with a utility knife took care of the plasma globe, and four self tapping screws held the inverter to the plastic base plate. I guess it should be pointed out here, don't fool with the inverter when the power's on.
Let's take a minute and look at the globe itself. It's just a glass envelope, but there's an electrode in the center of the sphere, a neck to fit the sphere into a case, and a small nipple where the envelope was evacuated and sealed. The wire from the inverter fits up into the electrode in the center, but there's no fastener--it just shoves into the tip. I left everything like that rather than fastening it together securely, so I had a way to remove everything (after all, I didn't know whether my computer would start sparking like R2D2 after he got shot by that Jawa on Tatooine).
no comments on my hangnails please
looks like some antique quack medical device, doesn't it?
I wanted a nice finished install, but I was too lazy to really build a proper enclosure for the inverter board. So I just grabbed a piece of acrylic sheet scrap and made a mounting bracket. I drilled small holes and used the self tapping screws included with the unit, then used velcro to hold the bracket in place in my case. I soldered a Molex passthrough onto the power leads, and put a bit of heatshrink tubing on for a tidy install.
a project box would have been better
The globe itself is around 80mm diameter, which is what made mew buy it in the first place. I didn't have to drill a hole, but using a 3 inch holesaw in your bezel would give you a hole that is just slightly smaller than the diameter. I wanted to mount mine so that the equator of the globe was in the gap between my plastic bezel and the metal front of my chassis. A quick test fit showed me that it would work, but the globe had some play. I wanted a nice tight install, so I went back to the scrap bin for a piece of 1/4 inch acrylic sheet. I drilled a 3 inch round hole into it with a holesaw, trimmed it to size, then drilled mounting holes so that it would mount in the slot for my 80mm fan. The globe will sit proud of the bracket, but not slide out the front bezel hole because its diameter is a little too large.
Well, the quarter inch thickness didn't get me a snug fit either, so I used nuts and a couple rubber washers to stand the bracket off the front chassis by another 3/16 inch or so.
no contact between the globe and the chassis
Now every part of the globe and its inverter were mounted touching plastic only. You may have seen the effect of touching the globe--it sort of draws the sparks to your finger. I didn't want my chassis to attract the sparks at all. So a quick test fit with the bezel showed I had a nice snug fit, the globe was not under strain but it was not going anywhere.
the globe is clear, so you can see into the case


MSI MPG Velox 100R Chassis Review
October 14 2021 | 15:04

Want to comment? Please log in.