
Introduction
No matter how much we love the big hunks of metal that manufacturers press into service as computer cases, there's always room for another great scratch build. This is especially true when the creator designs something in an unusual shape - such as a cube.I know, cubes aren't exactly 100 percent original - but they're still one of the most popular and yet least done builds - and the smaller they get, the less of them you see. I'm sure a part of that is due to the difficulties inherent in fitting everything, as the cube shape almost requires the motherboard to be in only one of two places - flat on one of the faces (and facing inwards), or dissecting the middle.
The first idea is fairly boring and straight-forward. Take a normal case and give it a little extra width, and you're done! All the goods go on one side, the motherboard's back faces out and that's it.
Dissecting the case with the motherboard to put it on display is another thing entirely, though. Suddenly, there's a challenge in how small you can get the cube and still fit everything you need - a DVD drive, HDD and PSU get to be harder to fit. By the time you add multiple hard drives, card readers, LCD display and watercooling components, you get quite a challenge indeed.
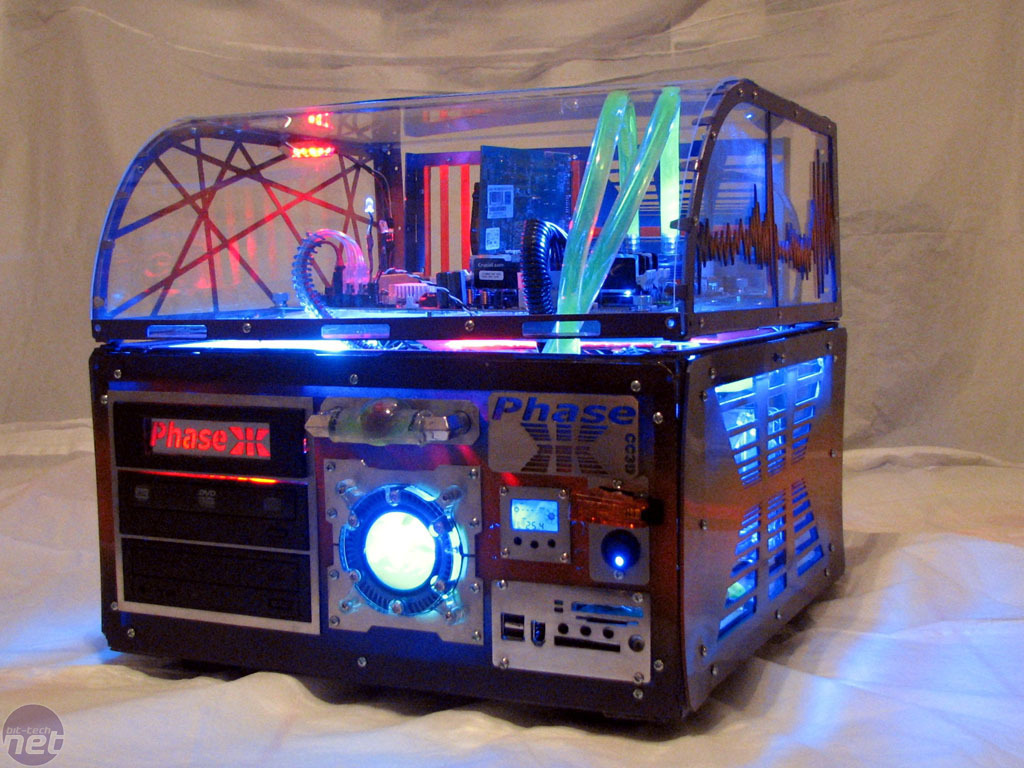
It's this challenge that initially attracted Chris Cook (aka cc3d on our forums) to design and build "Phase III". First there was the cube, then the hinging lid, then hinged motherboard...the list just kept growing. What started as a cube ended up as a test bench on crack, and we're excited to bring you the worklog.
The Planning Process
Initially, Phase III was nothing more than a basic 14-inch cube. Of course, how we get from the simple cube to what is below is a bit of a different story....
From plan to reality - The completed Phase III looks like a spitting image of its initial mock-ups.

Phase III went through several revisions before it was finalised.
After adding feature after feature, Chris began to see the design take shape. The motherboard rotated to desktop-style, and the top was hinged. The 14-inch cube got a slight growth spurt to 16 inches, which allowed for adequate airflow around the motherboard in all directions, as well as plenty of clearance for cables. The platform for the motherboard itself was given hinges, allowing it to flip up to easily access the components below it.
The flipping motherboard and lid idea were courtesy of a layout feature much like is seen in modern test-bench setups like my personal favourite, the Danger Den Torture Rack (the setup I use for bit-tech's watercooling test bench is built on this, in fact). Chris saw the strength of having that layout, but wanted it closed enough to provide airflow and temperature regulation. By hinging the motherboard, he was able to create a similar layout without sacrificing usability when the sides were inevitably closed up.
Let's get building!
So, we had a plan. But a mod isn't very good if it remains just a plan, so it was time to get building! First up was the initial frame, which was made out of simple aluminium square tube and joined with braces and screws.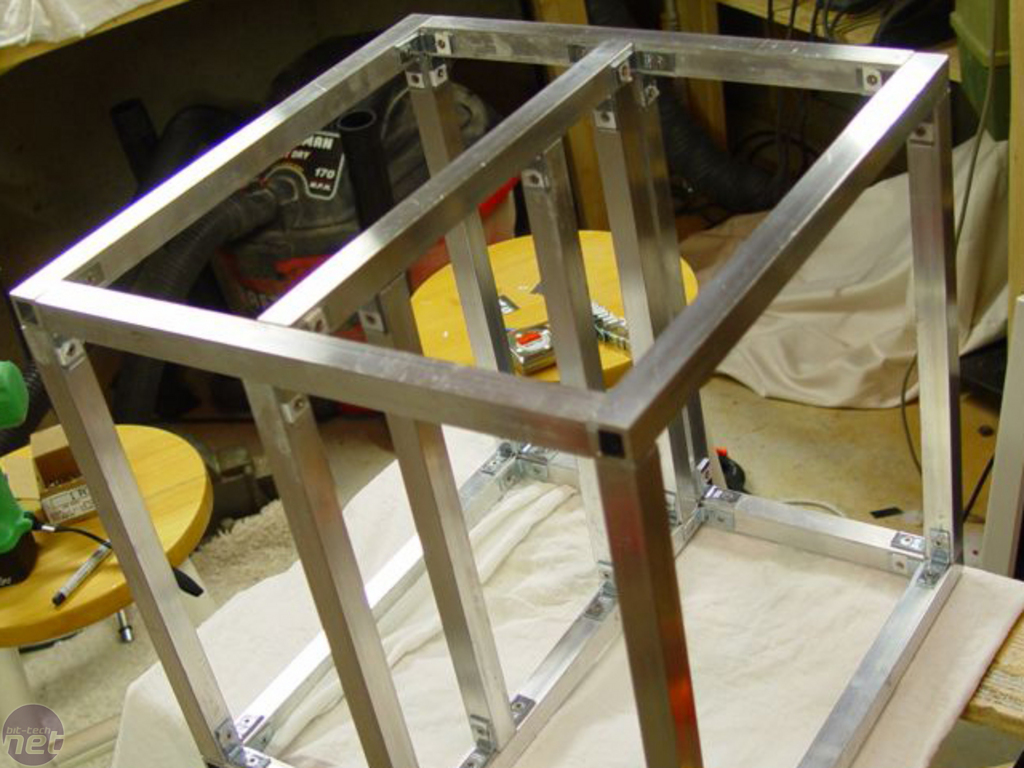

Once the frame was built, it was time to begin cutting the pieces. Chris opted to cut the pieces with the water jet that he had access to (lucky duck), which made that portion of life much easier. That being said, doing this creates its own problems - with nearly limitless possibility, it was up to Chris and his software design skills!

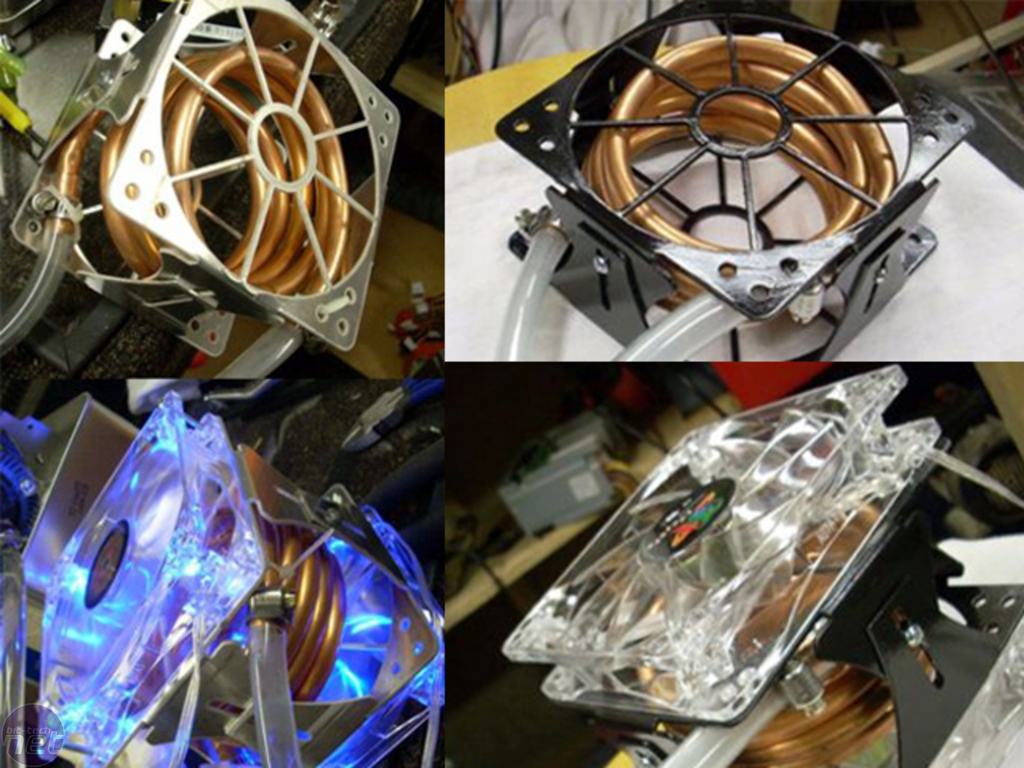
Though Phase III ended up with fairly "stock" watercooling, Chris made sure to give this setup a test and even try some of his own designs. One of these was a custom radiator of coiled copper tube and fans on either end - surprisingly effective at cooling, but a flop at pressure control in his loop. Unfortunately, the idea had to be shelved and replaced with more traditional methods, but the ingenuity is excellent! If anyone would like to revisit the project with his help, I know that I'd personally be quite interested in the result...
RELATED ARTICLES


MSI MPG Velox 100R Chassis Review
October 14 2021 | 15:04

Want to comment? Please log in.