DVD drives
I had always planned on modding every internal component to make the case stand out. As I mentioned before in previous articles, I believe most clear cases rely simply on the fact that they are a clear case. My personal belief is that filling them with normal, un-modded components really just turns a clear case into a way to see messy wiring, ugly info stickers all over stuff and mismatched PCI cards etc. (but hey, look at me, I\'m a clear case!). Unfortunately the sight of a Radeon 9800 Pro through the side of a case doesn\'t quite send me into a state of rapturous ecstasy...(well, not quite...)
However, on a positive note it seems that more and more people are now doing a fine job with tidying up their case interiors and adding those touches to the internals that really take them beyond this. Things appear to be moving in the right direction and I hoped to kick things along a bit more with this mod.
With this in mind, both the Pioneer 120s slot-load DVD and the Pioneer DVD-R/RW were in for some serious attention...
Slot DVD Drive
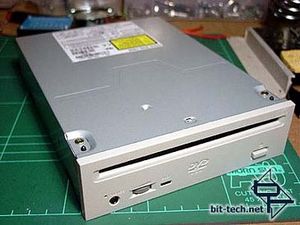
The victim - Pioneer 120s 16x slot-loading DVD Drive. Pretty beige and boring but plenty of modding potential.
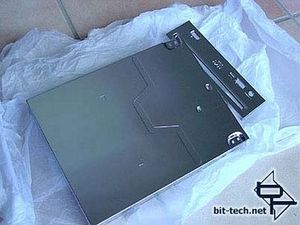
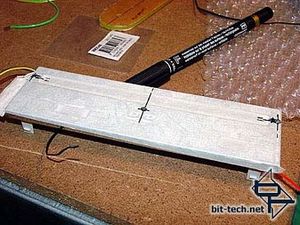
With all the stickers removed and the front bezel and top cover chromed. I didn\'t chrome the bottom cover because it won\'t be visible once the drive is installed. I was going to mod the front bezel of the drive and add a glowing panel to the top. I started on the front bezel with the plan being to re-position the front activity light and to add two indicator lights to highlight the position of the slot. I also decided to make new (backlit) eject buttons.
The front panel was ruled up and drilled for three 3mm LEDs.
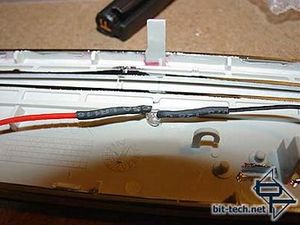
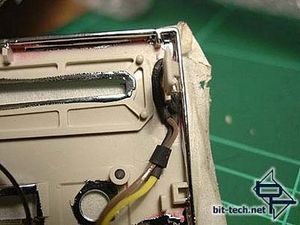
A new, white, activity light was wired up centrally and held in place with 5min epoxy. Two more indicator LEDs were wired up at the ends of the slot. This required some very tricky fitting and bending of wires/soldering etc including some serious re-shaping of the LEDs themselves with a needle file! As the front edges of the top cover recess into the front bezel I had to make room for the LEDs. I did this by...
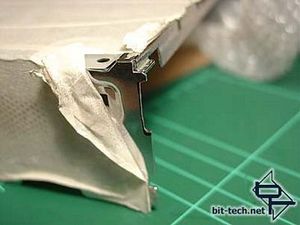
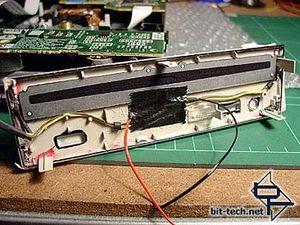
...grinding away a section of the top cover using a dremel with narrow grindstone. Here is the front bezel all wired up and ready to go. First I needed to attend to other things (like marking and drilling the top cover for LEDs and bolts).
I also...
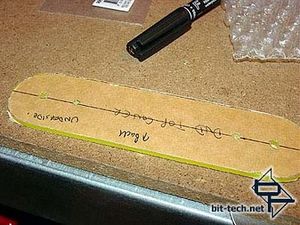

...made a panel out of neon green plexi. It was cut out with a hacksaw and filed to size (incl the rounded ends).
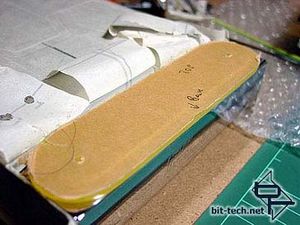
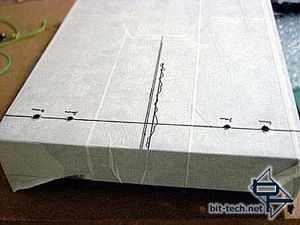
I drilled matching holes in this after using the top cover as a template. I then had to wire up the lights which led to my first setback.
The first time I wired up the LEDs and fitted the top panel I hadn\'t been aware just how little clearance there is between the top of the internal sliding disk tray and the top cover itself. The drive wouldn\'t accept a disk as the tray would just bounce off the LEDs and bolt heads and eject automatically.
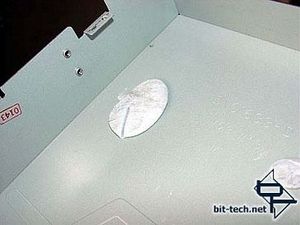
When I realized what was happening I used some Blutack to create an impression of the drive tray when the cover was on. It turns out I only had about 2-3mm clearance to safely operate in. After thinking awhile...
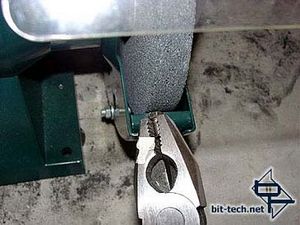
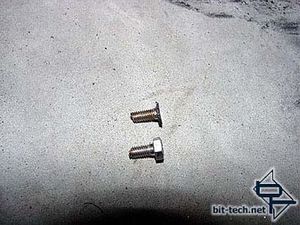
...I took to the bolt heads with my bench grinder and ground them to about 1mm. Now what to do with the LEDs...?
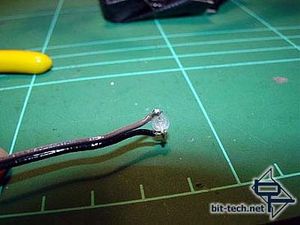
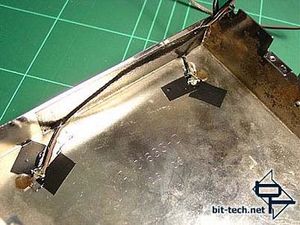
Re-wire and fit them of course. I bent the legs out extra flat and soldered the wires perpendicular to the legs so they would sit flat. I then stuck some insulation tape down to insulate (duh) the legs from the top cover and epoxy glued them in place with a small dollop. I have started using 5-minute epoxy a lot now as it is stronger than hot-glue and less messy (though not as quick drying). I couldn\'t afford a thick layer of glue here. Some epoxy held down the wires and duct tape finished securing. I ended up with about 1mm clearance when finished so it was one tight fit!
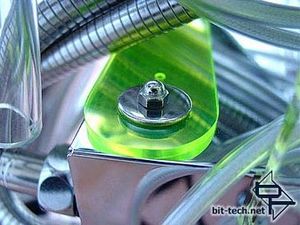
I also had to reposition the LEDs further towards the sides of the drive to avoid a high spot on the disk tray that would have caught on even my low-profile wiring. This actually turned out better in the end as the LEDs now sit under the washer on top and light up the panel without being directly visible. Bit like this really...
I had always planned on modding every internal component to make the case stand out. As I mentioned before in previous articles, I believe most clear cases rely simply on the fact that they are a clear case. My personal belief is that filling them with normal, un-modded components really just turns a clear case into a way to see messy wiring, ugly info stickers all over stuff and mismatched PCI cards etc. (but hey, look at me, I\'m a clear case!). Unfortunately the sight of a Radeon 9800 Pro through the side of a case doesn\'t quite send me into a state of rapturous ecstasy...(well, not quite...)
However, on a positive note it seems that more and more people are now doing a fine job with tidying up their case interiors and adding those touches to the internals that really take them beyond this. Things appear to be moving in the right direction and I hoped to kick things along a bit more with this mod.
With this in mind, both the Pioneer 120s slot-load DVD and the Pioneer DVD-R/RW were in for some serious attention...
Slot DVD Drive

The victim - Pioneer 120s 16x slot-loading DVD Drive. Pretty beige and boring but plenty of modding potential.


With all the stickers removed and the front bezel and top cover chromed. I didn\'t chrome the bottom cover because it won\'t be visible once the drive is installed. I was going to mod the front bezel of the drive and add a glowing panel to the top. I started on the front bezel with the plan being to re-position the front activity light and to add two indicator lights to highlight the position of the slot. I also decided to make new (backlit) eject buttons.
The front panel was ruled up and drilled for three 3mm LEDs.


A new, white, activity light was wired up centrally and held in place with 5min epoxy. Two more indicator LEDs were wired up at the ends of the slot. This required some very tricky fitting and bending of wires/soldering etc including some serious re-shaping of the LEDs themselves with a needle file! As the front edges of the top cover recess into the front bezel I had to make room for the LEDs. I did this by...


...grinding away a section of the top cover using a dremel with narrow grindstone. Here is the front bezel all wired up and ready to go. First I needed to attend to other things (like marking and drilling the top cover for LEDs and bolts).
I also...


...made a panel out of neon green plexi. It was cut out with a hacksaw and filed to size (incl the rounded ends).


I drilled matching holes in this after using the top cover as a template. I then had to wire up the lights which led to my first setback.
The first time I wired up the LEDs and fitted the top panel I hadn\'t been aware just how little clearance there is between the top of the internal sliding disk tray and the top cover itself. The drive wouldn\'t accept a disk as the tray would just bounce off the LEDs and bolt heads and eject automatically.

When I realized what was happening I used some Blutack to create an impression of the drive tray when the cover was on. It turns out I only had about 2-3mm clearance to safely operate in. After thinking awhile...


...I took to the bolt heads with my bench grinder and ground them to about 1mm. Now what to do with the LEDs...?


Re-wire and fit them of course. I bent the legs out extra flat and soldered the wires perpendicular to the legs so they would sit flat. I then stuck some insulation tape down to insulate (duh) the legs from the top cover and epoxy glued them in place with a small dollop. I have started using 5-minute epoxy a lot now as it is stronger than hot-glue and less messy (though not as quick drying). I couldn\'t afford a thick layer of glue here. Some epoxy held down the wires and duct tape finished securing. I ended up with about 1mm clearance when finished so it was one tight fit!
I also had to reposition the LEDs further towards the sides of the drive to avoid a high spot on the disk tray that would have caught on even my low-profile wiring. This actually turned out better in the end as the LEDs now sit under the washer on top and light up the panel without being directly visible. Bit like this really...


MSI MPG Velox 100R Chassis Review
October 14 2021 | 15:04


Want to comment? Please log in.