
Yup, this is it boys and girls, part 2 of our exclusive look at Matrix Orbital LCDs. "Why has this part taken so long?" I hear you cry - well, its because I needed to polish up on my 1337 MS Visual Basic sk1llz for this bit...oh yes, hazer00ni gets down and dirty with some code! And why? Just read on Macdough...

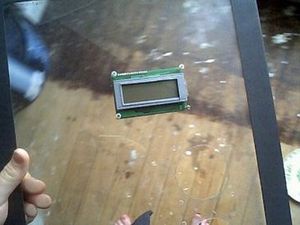
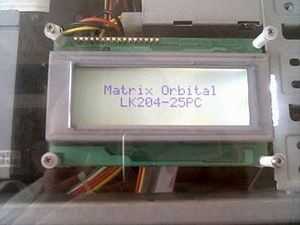
So, what's this LCD all about then? Well, it's a gorgeous 20x4 display, which means its much larger than your average display. Not only that, but no boring green and black colour scheme here, no siree, this baby comes with a white backlight and blue writing. Bloo? Mmmmmmm... This is the more advanced LCD, aimed at a more demanding user, and consequently has more features. The full technical name is LK-204-25-PC. I really would read the first article, since it outlines some general stuff I'm not going to look at here...That said, let's see what this baby can do!
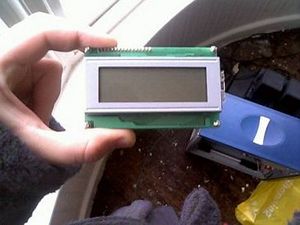
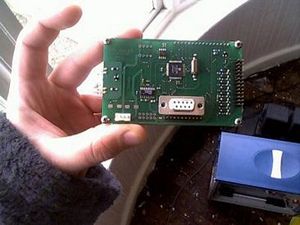
And there she is, ain't it pretty? It comes mounted on a dual PCB and is very sturdy in itself. The actual display is small enough to fit in a single drive bay, but you'd need a free bay above and below to accommodate the PCB bits. The back of the unit: note the power connector on the bottom left, the serial port in the middle, and the set of GPOs on the right.
If you've read the first part of this Article (and if not, why not?) you'll know that GPO stands for general purpose outputs. These little things are sets of positive and negative terminals that emit current when triggered by software controlling the unit. The difference between this and the lower end unit is that instead of 25mA at 5V, these babies output will do 750-1000mA at 12V!!! :D If you want even more power, all you gotta do is Overclock your LCD!
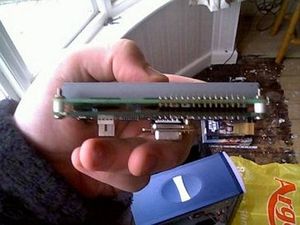
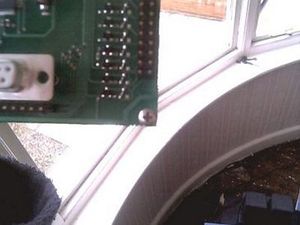
Here's a side on view of the unit, so you can get an idea of its depth. Note the screw fixings in each corner which hold the unit together. Ph34r my Star Wars book :p And a top-down view, for the sake of completeness.
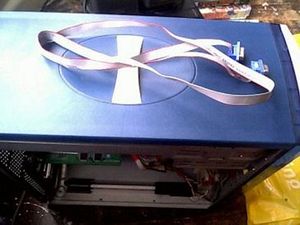
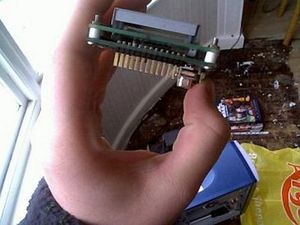
This is the basic serial cable. You will need to buy it separate from the unit, but it's dead cheap so don't worry :) Plug one end into the unit, the other into a serial port, simple. The cable is nice and long, so it's easy to run it around the case neatly to wherever you want to mount the unit.
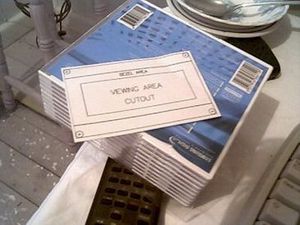
And here's the lovely template MO provide for you to cut-around. This is part of a separate mounting kit, the MK204. When mounting, you can stick this self-adhesive template on, drill and cut, then peel it off again. Which is, funnily enough, exactly what I did. Ahhh, but where did I put it?
These are the little doobries that you mount with. Unscrew the fixings in each corner of the PCB (which I showed you earlier) and screw these babies in the following order - Screw head, little white washer (to prevent the screw from falling through the hole you've drilled), plastic spacer (which is exactly the depth of the screen of the display, so your screen rests nicely up against the mounting surface, and then a nut on the back to hold the whole thing together.
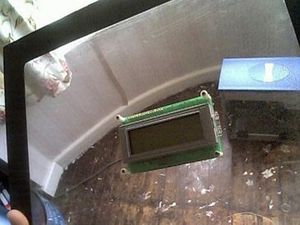
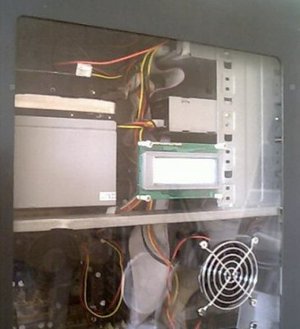
And this is what you get when you're finished. Yup, doesn't it look nice mounted in a case window? I think so :D This way, you can see the beautiful bit of PCB along with the rest of your gubbins!
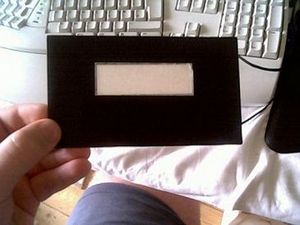
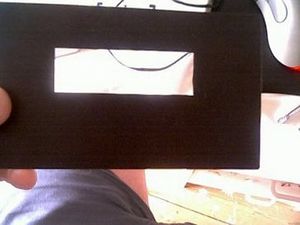
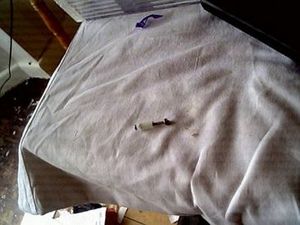
This is the faceplate MO provide for if you're mounting in a surface that's not clear :p If it's a bit chunky you can easily cut it down to size, and its self-adhesive. Peel off the paper, and there's a layer of transparent acetate in there to protect the screen of your display from any nasty scratches. A nice touch :)

And that's what it would look like!
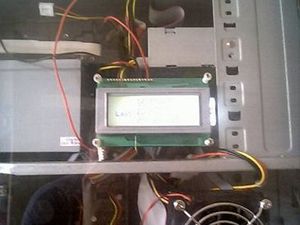
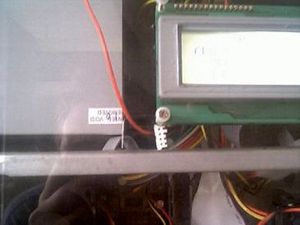
All powered on and installed :D Can I show you some gratuitous installation shots? You might as well say yes, as I'm going to anyway, and if you don't, I'll show 'em to you twice :p Close-up of the screw installation.
Looks neat eh?? Gotta love that bright-white-back-light! Yum, PCBs just get me so hot :p 8-)
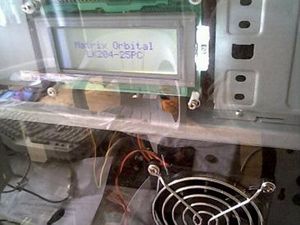
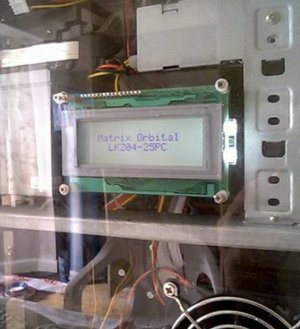
Up close and personal. Doesn't the lettering look nice??! Rarrr! And here you see the joys of trying to take photographs of a clear, reflective surface!
As with its little brother, all the preferences of the display can be set in software, and MO provides some neat little utilities for this purpose. Baud rate, backlight switching, its all there in software, as well as a contrast level which is savable. As with the other unit, you can change your startup/splash screen, which is pretty darned neat :) No keypad on this one, but you can buy one and connect it up for the ultra-kewlie Winamp control we've seen before. If you're feeling smart, you can actually use push-button or momentary switches to act as a keypad, but I haven't tried it.
So, what's this LCD all about then? Well, it's a gorgeous 20x4 display, which means its much larger than your average display. Not only that, but no boring green and black colour scheme here, no siree, this baby comes with a white backlight and blue writing. Bloo? Mmmmmmm... This is the more advanced LCD, aimed at a more demanding user, and consequently has more features. The full technical name is LK-204-25-PC. I really would read the first article, since it outlines some general stuff I'm not going to look at here...That said, let's see what this baby can do!
And there she is, ain't it pretty? It comes mounted on a dual PCB and is very sturdy in itself. The actual display is small enough to fit in a single drive bay, but you'd need a free bay above and below to accommodate the PCB bits. The back of the unit: note the power connector on the bottom left, the serial port in the middle, and the set of GPOs on the right.
If you've read the first part of this Article (and if not, why not?) you'll know that GPO stands for general purpose outputs. These little things are sets of positive and negative terminals that emit current when triggered by software controlling the unit. The difference between this and the lower end unit is that instead of 25mA at 5V, these babies output will do 750-1000mA at 12V!!! :D If you want even more power, all you gotta do is Overclock your LCD!
Here's a side on view of the unit, so you can get an idea of its depth. Note the screw fixings in each corner which hold the unit together. Ph34r my Star Wars book :p And a top-down view, for the sake of completeness.
This is the basic serial cable. You will need to buy it separate from the unit, but it's dead cheap so don't worry :) Plug one end into the unit, the other into a serial port, simple. The cable is nice and long, so it's easy to run it around the case neatly to wherever you want to mount the unit.
And here's the lovely template MO provide for you to cut-around. This is part of a separate mounting kit, the MK204. When mounting, you can stick this self-adhesive template on, drill and cut, then peel it off again. Which is, funnily enough, exactly what I did. Ahhh, but where did I put it?
These are the little doobries that you mount with. Unscrew the fixings in each corner of the PCB (which I showed you earlier) and screw these babies in the following order - Screw head, little white washer (to prevent the screw from falling through the hole you've drilled), plastic spacer (which is exactly the depth of the screen of the display, so your screen rests nicely up against the mounting surface, and then a nut on the back to hold the whole thing together.
And this is what you get when you're finished. Yup, doesn't it look nice mounted in a case window? I think so :D This way, you can see the beautiful bit of PCB along with the rest of your gubbins!
This is the faceplate MO provide for if you're mounting in a surface that's not clear :p If it's a bit chunky you can easily cut it down to size, and its self-adhesive. Peel off the paper, and there's a layer of transparent acetate in there to protect the screen of your display from any nasty scratches. A nice touch :)
And that's what it would look like!
All powered on and installed :D Can I show you some gratuitous installation shots? You might as well say yes, as I'm going to anyway, and if you don't, I'll show 'em to you twice :p Close-up of the screw installation.
Looks neat eh?? Gotta love that bright-white-back-light! Yum, PCBs just get me so hot :p 8-)
Up close and personal. Doesn't the lettering look nice??! Rarrr! And here you see the joys of trying to take photographs of a clear, reflective surface!
As with its little brother, all the preferences of the display can be set in software, and MO provides some neat little utilities for this purpose. Baud rate, backlight switching, its all there in software, as well as a contrast level which is savable. As with the other unit, you can change your startup/splash screen, which is pretty darned neat :) No keypad on this one, but you can buy one and connect it up for the ultra-kewlie Winamp control we've seen before. If you're feeling smart, you can actually use push-button or momentary switches to act as a keypad, but I haven't tried it.


MSI MPG Velox 100R Chassis Review
October 14 2021 | 15:04

Want to comment? Please log in.