
Installation
One of the most difficult parts of any peripheral seems to be the initial installation. After all, it seems like the more flexible a product can be, the more of a pain it is to get it working in the first place.For its first several incarnations way back in 2006 (of which I still have one around here), the GX Typhoon shared a very similar issue. Installation was not just a pain, it was downright vexing. I can't even say that it was in any part a good experience, in fact.
However, that was then and this is now.
The display as it is today is a breeze to install, especially at the hardware level. The retail version comes mounted on a black bay insert, and connects via the included USB cable.
We've been urging the guys at Matrix Orbital for a little more order customisation, as in discussion there are USB to internal header connectors that can be shipped with the display. I have one of these for testing and must say it's probably one of the handiest things on earth for wire routing. After all... how many people have used every one of the internal headers on their motherboards?
It would also be nice to see a silver bay insert, as was originally going to be on offer... however, demand has quite largely stayed toward black so we may be out of luck there.
Once the unit is connected via USB, you're done. Despite the four-pin floppy drive power header, the device draws all of its necessary power from the 5v supplied via the mini-USB connection. The extra port at this time is there for future expansion should power needs change.
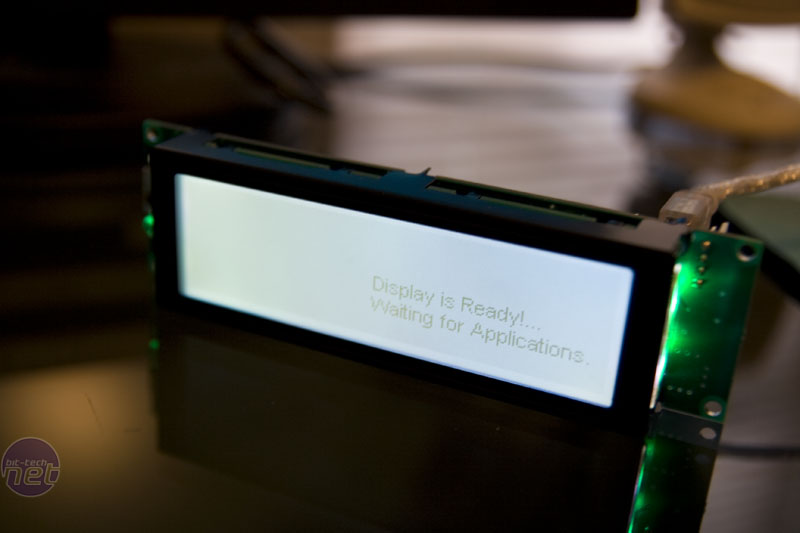
At this point, Windows will already begin bugging you about a new device, which it should immediately recognise as a Matrix Orbital GX display. After Windows has figured its rear end from a hole in the ground, the display image will change to say "Display is ready!... Waiting for applications."
It will also notice the Matrix Orbital IR receiver, which will install automatically. Should you really be so utterly impatient, you could begin pressing buttons on your included (or separately acquired) Windows MCE remote and be greeted with the MCE interface on either Windows Vista Home editions or Windows XP MCE edition.
At this point, it's probably time to start installing software. I can assure you that, for during the period that this display is still under its "testing" phase (which it is right now), you're best off just pitching any CD that comes with the device – either that, or use it as a coaster. In the time it takes to ship the order to you, there will already undoubtedly be a new build of the drivers, software and possibly even firmware. You can grab them on the LCD Forums directly.
Installation of the software is fairly straightforward as well, though I do hope that the eventual goal is an installer package that does most of what's coming up for you.
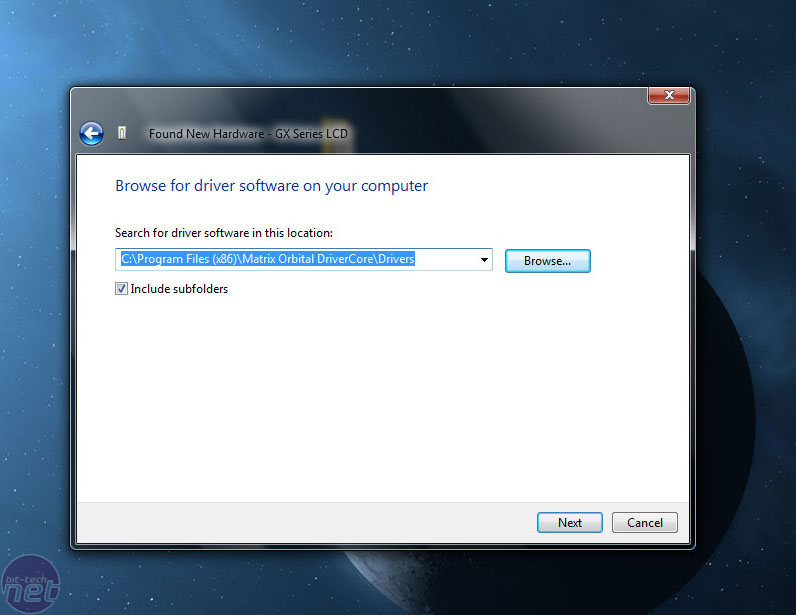
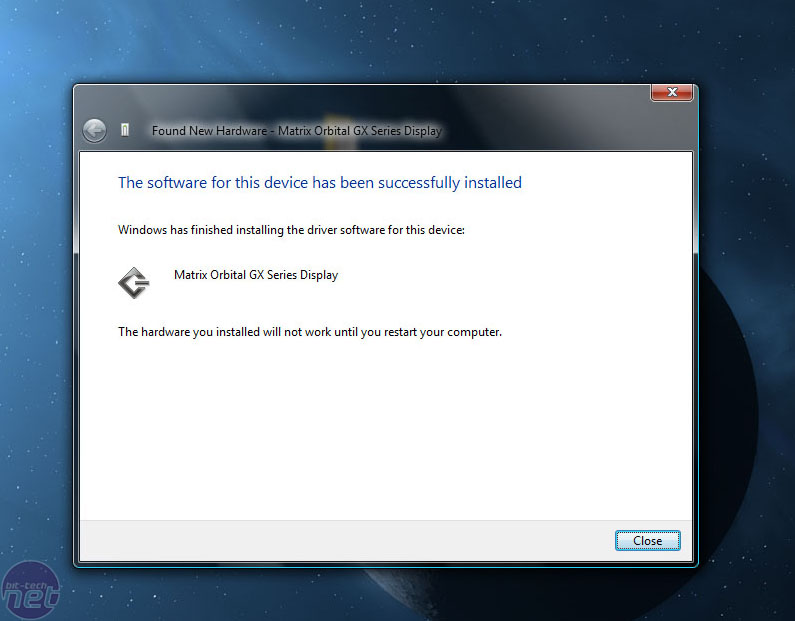
We start off by installing the DriverCore files, which provide Windows the proper drivers to control the display through software (our eventual goal). At this point, the connection to the display resets and Windows asks us for drivers again – which you need to point to the install directory.
Next up is a firmware upgrade, which is actually incredibly easy. For safety's sake, the firmware chip is disabled and enabled via a special command programmed only into the firmware update programs, to prevent any accidental erasure. Yet again, Windows will bug for drivers and you must point them to the ...Program Files\Matrix Orbital DriverCore\Drivers (or wherever you installed it to) directory. Is it a silly little nuisance? Yes, but it's also on the fix block for the next revision or so.
 At this time, it's a good idea to install the latest and greatest build of the sleeper surprise for the GX Typhoon – LCD Studio 2.0 or higher (we're currently at some subversion of 2.1). Again, you can grab this from the forums with support for only MO displays, though installation will be fairly straightforward on other displays.
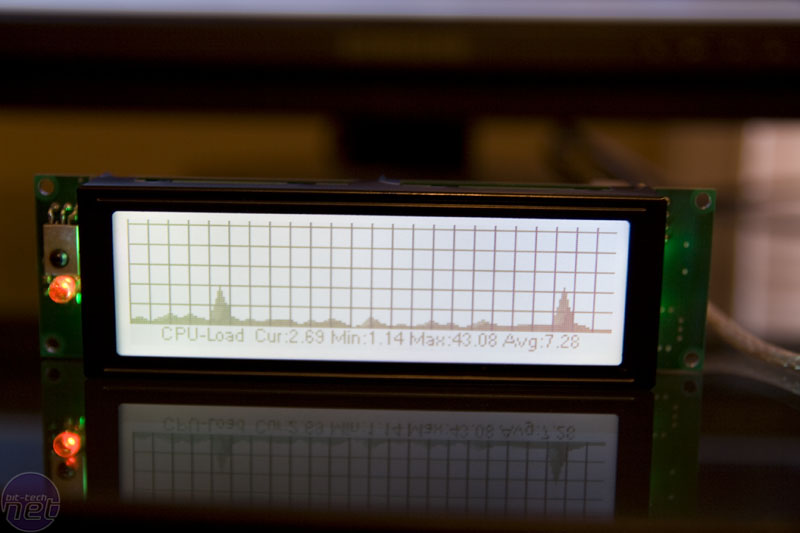
When the drivers are handled, firmware is upgraded and LCD studio is installed, a quick reset is all you need to be greeted with a cheerful display showing all sorts of information. The default screen includes a large digital clock (with a random background colour), a white CPU meter with a bunch of usage facts, and one or two other displays illustrating a few of the cool things you can do with the display.
Of course, as useful as these screens are, they're hardly why anyone would pay £65. No, it's time to look at what has always been both the promise and the curse of these displays – the software.
RELATED ARTICLES


MSI MPG Velox 100R Chassis Review
October 14 2021 | 15:04

Want to comment? Please log in.