
"A shadowy flight into the dangerous world of a man who does not exist..."
Knight Rider, a cult TV series from the 80's, starred a gallant crime fighting hero who didn't exist, (!), and a talking car with a mind of it's own called KITT. The car, a black Trans Am, had one cool visual feature, it's front sensor, a red scanning light panning back and forth. This effect has proven so popular, it appears in various guises in numerous TV shows and films. Of course, if it looks cool then it doesn't take long before the PC modding community starts to add it to their repertoire of eye candy. So without more ado let's move on to my version of the "Knight Rider" effect.
This circuit has proven to be so versatile that I decided to make several variations of it and hopefully you should find one that takes your fancy. Due to the numerous permutations of the circuit, I have stuck to building it on a PCB. Of course you can build it on stripboard if you prefer but I will leave the design of that layout up to you. If you have never made a PCB before or find the prospect too daunting, I will be producing a beginners guide to making PCBs soon. It is really easy and generally quicker than using stripboard. It took me less than 1 hour to produce all the PCBs in this article. Read on...
The different versions are:
1. The basic or classic effect. This uses 10 LEDs for the display.
2. The "gated" version. This is the the same thing but the LEDs only light when there is a control input. Intended for use with the motherboards HDD LED. The idea being that the display only operates during HDD activity. This uses the 10 LED display.
3. The basic circuit using 20 LEDs. This produces a dramatic visual variation by having the LEDs scanning in opposite directions simultaneously.
4. The "gated" version with 20 LEDs producing the same effect as number 3.
5. HDD activity meter. This produces an indication of the actual amount of HDD activity. I have produced this as a separate article to make it easier for web crawlers to find. This circuit also comes in four variations.
Reading through the article you will notice there are several circuit board designs. The reason being, I decided to use ready made LED arrays as well as individual LEDs, plus there are 10 and 20 LED versions of each. The ready made LED arrays allow for a more compact display and produce a slightly different visual effect. Using individual LEDs allows total freedom for choice of colour whereas the arrays are only available in red, green or yellow. (At the moment).
Each of the circuit boards have been designed to accommodate all of the circuit variations, classic, gated or HDD meter, the only differences between them being to accommodate which LED display and number of LEDs you choose to use. Don't be alarmed by the number of circuit designs and boards. You only have to make three easy choices to know which one to use. Firstly, decide if you want to use individual LEDs or the bargraph arrays, then choose either the 10 LED version or the 20 LED version. This will determine which of the four possible board designs to use. Once the choice of display is decided, then pick which circuit to use, the standard or the gated version. This will tell you which component layout to use. It may sound complicated, it's not. You will see how easy it is as you read the article.
One final note before I move on to the construction, I have repeated the circuit layouts on each page. I felt it was less confusing to see the board designs whilst reading the construction notes. To keep the tedium to a minimum I have not repeated construction notes throughout the article. Most of the detail is at the beginning, thinning out as the article progresses. Only comments relevant to each version will be made, so read the entire article carefully before starting any work. Components which are unique to each variation are shown in red on each layout diagram. At the end of the article is the setting up procedure and comments about some of the components used.
I intend to add real videos of each version when I can, but until then here are some digi-cam movies to keep you going...
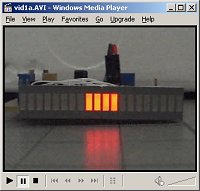
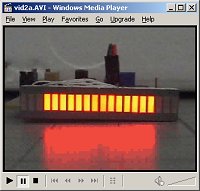
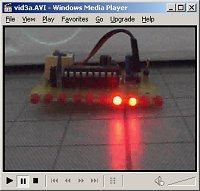
Bargraph - DOT mode / Bargraph - BAR mode / Classic Knight Rider
Knight Rider, a cult TV series from the 80's, starred a gallant crime fighting hero who didn't exist, (!), and a talking car with a mind of it's own called KITT. The car, a black Trans Am, had one cool visual feature, it's front sensor, a red scanning light panning back and forth. This effect has proven so popular, it appears in various guises in numerous TV shows and films. Of course, if it looks cool then it doesn't take long before the PC modding community starts to add it to their repertoire of eye candy. So without more ado let's move on to my version of the "Knight Rider" effect.
This circuit has proven to be so versatile that I decided to make several variations of it and hopefully you should find one that takes your fancy. Due to the numerous permutations of the circuit, I have stuck to building it on a PCB. Of course you can build it on stripboard if you prefer but I will leave the design of that layout up to you. If you have never made a PCB before or find the prospect too daunting, I will be producing a beginners guide to making PCBs soon. It is really easy and generally quicker than using stripboard. It took me less than 1 hour to produce all the PCBs in this article. Read on...
The different versions are:
1. The basic or classic effect. This uses 10 LEDs for the display.
2. The "gated" version. This is the the same thing but the LEDs only light when there is a control input. Intended for use with the motherboards HDD LED. The idea being that the display only operates during HDD activity. This uses the 10 LED display.
3. The basic circuit using 20 LEDs. This produces a dramatic visual variation by having the LEDs scanning in opposite directions simultaneously.
4. The "gated" version with 20 LEDs producing the same effect as number 3.
5. HDD activity meter. This produces an indication of the actual amount of HDD activity. I have produced this as a separate article to make it easier for web crawlers to find. This circuit also comes in four variations.
Reading through the article you will notice there are several circuit board designs. The reason being, I decided to use ready made LED arrays as well as individual LEDs, plus there are 10 and 20 LED versions of each. The ready made LED arrays allow for a more compact display and produce a slightly different visual effect. Using individual LEDs allows total freedom for choice of colour whereas the arrays are only available in red, green or yellow. (At the moment).
Each of the circuit boards have been designed to accommodate all of the circuit variations, classic, gated or HDD meter, the only differences between them being to accommodate which LED display and number of LEDs you choose to use. Don't be alarmed by the number of circuit designs and boards. You only have to make three easy choices to know which one to use. Firstly, decide if you want to use individual LEDs or the bargraph arrays, then choose either the 10 LED version or the 20 LED version. This will determine which of the four possible board designs to use. Once the choice of display is decided, then pick which circuit to use, the standard or the gated version. This will tell you which component layout to use. It may sound complicated, it's not. You will see how easy it is as you read the article.
One final note before I move on to the construction, I have repeated the circuit layouts on each page. I felt it was less confusing to see the board designs whilst reading the construction notes. To keep the tedium to a minimum I have not repeated construction notes throughout the article. Most of the detail is at the beginning, thinning out as the article progresses. Only comments relevant to each version will be made, so read the entire article carefully before starting any work. Components which are unique to each variation are shown in red on each layout diagram. At the end of the article is the setting up procedure and comments about some of the components used.
I intend to add real videos of each version when I can, but until then here are some digi-cam movies to keep you going...
Bargraph - DOT mode / Bargraph - BAR mode / Classic Knight Rider
RELATED ARTICLES


MSI MPG Velox 100R Chassis Review
October 14 2021 | 15:04

Want to comment? Please log in.