
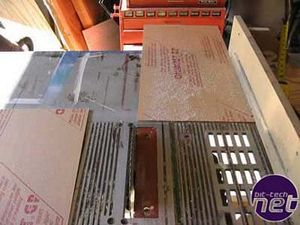
Next, I cut the clear acrylic that will be formed and create the top and bottom panels of the case. I cut the dimensions larger than I need. I stand by this practice as told in my fabricating acrylic guide. It allows for some forgiving error recovery. Plus, you need to account for the material shrinking when heated so it's nearly impossible to calculate perfect cuts at this point.
I centered the acrylic and proceeded to get started. Another note, not only is my acrylic that I'm starting out with larger than what I need in the end but I purposely made the form with plenty of room, width-wise.
In planning this project I ordered a new toy, an acrylic strip heater. It is a simple yet effective tool that heats the acrylic to bending temperature and all you have to do is plug it in. This model is 4' long and I had the brainy idea to lap it back and forth creating a zone of hot acrylic. Turns out it was not that brainy and, although, it is a great tool for doing straight bends it's not so hot (get it) at doing large areas like this. No, I needed to gently and consistently heat a large area to create the gentle/large/round bends I sought.
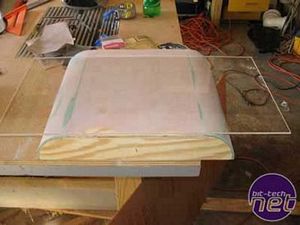
So I move to plan B. I clamp the acrylic firmly to the form. Then I clamp a strip of heavy but smooth steel on the underside of one end of the acrylic and a pine 2x4 on the other held in place by my third hand... quick clamps.
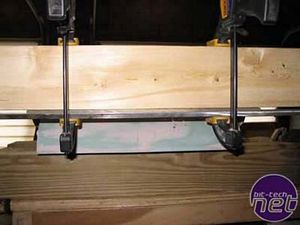
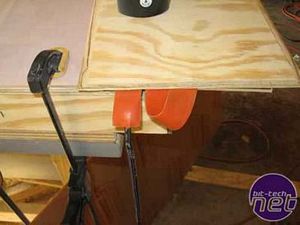
Here is a better picture of the setup... later on, I actually added two more quick clamps to the end so the pressure was more evenly distributed.
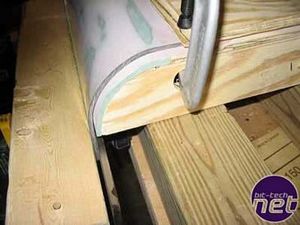
Here's the short and skinny. You need to heat the acrylic to 280 degrees F for it to be pliable enough to bend. Get it too hot and it blisters, we don't like blisters. The key is even heat and patience, lots and lots of patience. Moving back and forth with the heat gun set at 1100 degrees F about 6" from the acrylic, I started at the top of the curve, moving the gun in a straight line from left to right and moving progressively down the curved area. In the beginning, when the acrylic is straight, it helps to heat the underside as well (with thinner acrylic, say 1/8" thick, it's not so important). But as the acrylic begins to bend, you can only work on the outside. Letting gravity do it's thing, as the material softens, it slowly bends toward the floor. DON'T TOUCH IT YOU IDIOT. Don't be lured into the security that it is at a malleable temperature and you can go playing with it. Get it perfectly heated, nice and slow and when it is soft enough, I began to apply more pressure on the 2x4 bringing it snug to the form. When it cools, it tends to want to creep back up, you have to hold it down until it cools.
Safety note: While I was doing this, I started out actually wearing oven mitts. I felt stupid and looked the part too. Later, I ended up using a dual layer glove solution that worked out great. My favorite work gloves are these gray nylon stretchy gloves that have been dipped in rubber on the palm area. I put those on and then put some cheap/clean cotton canvas work gloves over those. The two layers provided protection from the heat and the outside canvas layer was a nice, safe clean material to touch and rub the acrylic without scratching it. I used my hands to smooth out any "ridges" or bumps. As different zones cool, they tend to want to rise from the form. Using my hands provided some defense from this happening. Make no mistake, this stuff is hot and stays hot much longer than you think. We are talking temperatures many degrees higher than boiling water.
The only negative to using a pair of highly insulating gloves while working around very hot material for hours at a stretch - <b>My wife:</b> Why do your hands smell like that? You're smelly.
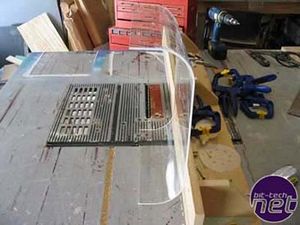
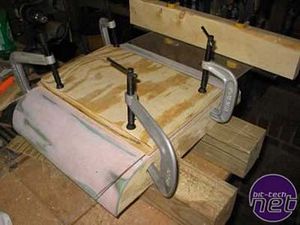
Ok, now we have our basic shapes but they are too big. Each piece needs to be 3 3/16" in overall height (when put together, the inside dimensions will be 6"). I set my table saw to those dimensions plus an eighth of an inch or so for insurance and ripped the excess off. This could be done with a jigsaw or even a dremel but this gives me nice straight and square cuts.
With the pieces shortened, it was now safe to cut the depth dimensions. I cut a little from each side since the ends shrunk a little to give me an overall depth of 12"
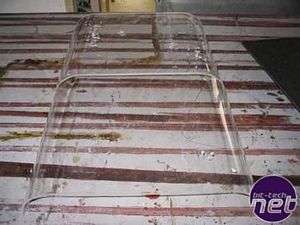
Now I have two relatively identical pieces.
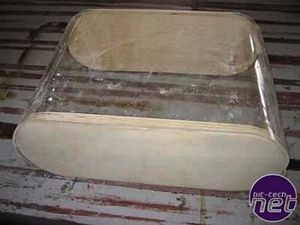
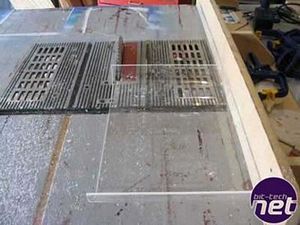
I quickly cut out of scrap plywood some front and back braces to see how everything fit together. This is the shape I was looking for.
RELATED ARTICLES


MSI MPG Velox 100R Chassis Review
October 14 2021 | 15:04

Want to comment? Please log in.