
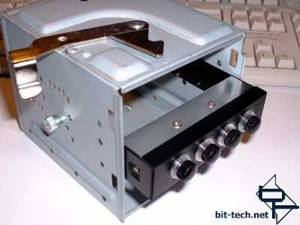
Installation is as simple as installing a floppy drive. They simply mount in any available 3.5" bay. Here I've used the cradle from my 710 to show you (you'll notice I'm using thumbscrews, a luxury if you can get spares!).
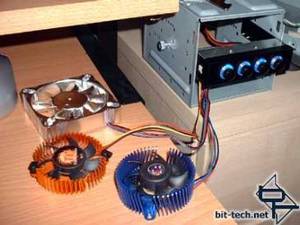
Powering up the unit, the blue glow is quite bright, even apparent here through the glare of the flash. As you can see, I've had to hook this up to two Thermaltake fans, and an aluminium Evercool to test it works, which it does.
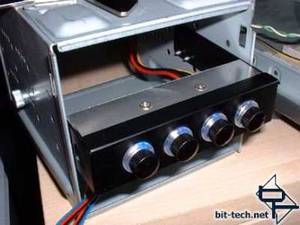
Finally, it was just a simple matter of mounting the cage back into the case. Obviously the black looks a little daft against the silver, however when this finally ends up in the PC-71, it will look a lot better.. although those blue lights may need to come out and be replaced.
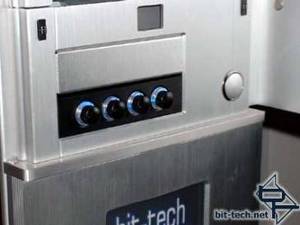
Talking of lights, another minor point is that the changing brightness of the LEDs is hardly what you would call dramatic. The following pictures show all the knobs set to their lowest setting, and then the two on the right brought up to full pelt. Also bear in mind the camera exaggerates the brightness somewhat.
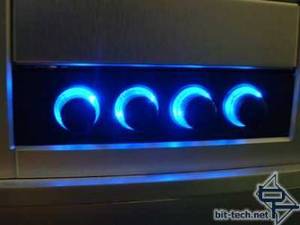
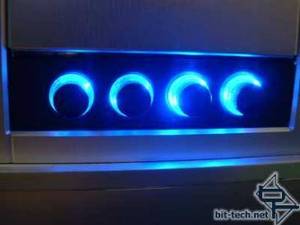
It would have been nice to see the LEDs power supplies offset so that they maybe went from very dim, to very bright, making it more apparent where they were; generally you can only tell if a fan is at 7V or full 12V if you read the lighting.
This unit is designed for constant speed fans only, in the assumption that if you're only feeding a variable speed fan 7V on power-up the resistor will limit that feed even more so and prevent it from starting up (or something..).
Running a Multimeter over the contacts, the outputs actually give a range from 6.6V to 12.1V (Based on a supply feeding 11.92V on the 12V line.. so electronics experts, you tell me, I'm just reading the figures..) . This varies slightly depending on the header you're using, and having a full load on the headers pulls the 12V on the last to 12.03V. If you plan on using the rheobus to drive things other than fans, make sure your devices can handle the voltage spread.
In conclusion, it's a nice little piece of kit. Sure, whateverbuses have been done to death, however in the world of convenience, having a pre-constructed unit is certainly going to appeal to a healthy percentage of the case owning populace, especially as you can choose the style of plate to match your case. If you still want to keep that modding bug, pull the thing apart, change the LEDs, install it in a new plate.. the centrepiece of what you're paying for is still there which is a well made, compact electrobus.
The Eksitdata 3.5 Rheobus Fan Controller is available from their website. Twenty quid may seem a little expensive, however could you make a compariable electrobus for much less? Granted a simpler construction without the electronics is easy to make but if you consider component cost, construction and the professional finish, handing over that crisp note doesn't seem so bad.
Powering up the unit, the blue glow is quite bright, even apparent here through the glare of the flash. As you can see, I've had to hook this up to two Thermaltake fans, and an aluminium Evercool to test it works, which it does.
Finally, it was just a simple matter of mounting the cage back into the case. Obviously the black looks a little daft against the silver, however when this finally ends up in the PC-71, it will look a lot better.. although those blue lights may need to come out and be replaced.
Talking of lights, another minor point is that the changing brightness of the LEDs is hardly what you would call dramatic. The following pictures show all the knobs set to their lowest setting, and then the two on the right brought up to full pelt. Also bear in mind the camera exaggerates the brightness somewhat.
It would have been nice to see the LEDs power supplies offset so that they maybe went from very dim, to very bright, making it more apparent where they were; generally you can only tell if a fan is at 7V or full 12V if you read the lighting.
This unit is designed for constant speed fans only, in the assumption that if you're only feeding a variable speed fan 7V on power-up the resistor will limit that feed even more so and prevent it from starting up (or something..).
Running a Multimeter over the contacts, the outputs actually give a range from 6.6V to 12.1V (Based on a supply feeding 11.92V on the 12V line.. so electronics experts, you tell me, I'm just reading the figures..) . This varies slightly depending on the header you're using, and having a full load on the headers pulls the 12V on the last to 12.03V. If you plan on using the rheobus to drive things other than fans, make sure your devices can handle the voltage spread.
In conclusion, it's a nice little piece of kit. Sure, whateverbuses have been done to death, however in the world of convenience, having a pre-constructed unit is certainly going to appeal to a healthy percentage of the case owning populace, especially as you can choose the style of plate to match your case. If you still want to keep that modding bug, pull the thing apart, change the LEDs, install it in a new plate.. the centrepiece of what you're paying for is still there which is a well made, compact electrobus.
The Eksitdata 3.5 Rheobus Fan Controller is available from their website. Twenty quid may seem a little expensive, however could you make a compariable electrobus for much less? Granted a simpler construction without the electronics is easy to make but if you consider component cost, construction and the professional finish, handing over that crisp note doesn't seem so bad.


MSI MPG Velox 100R Chassis Review
October 14 2021 | 15:04

Want to comment? Please log in.