Water-Cooling with Hardline Tubing Guide: PETG and Acrylic
January 26, 2018 | 18:30
Companies: #alphacool #thermaltake
Hardline Tubing: Acrylic
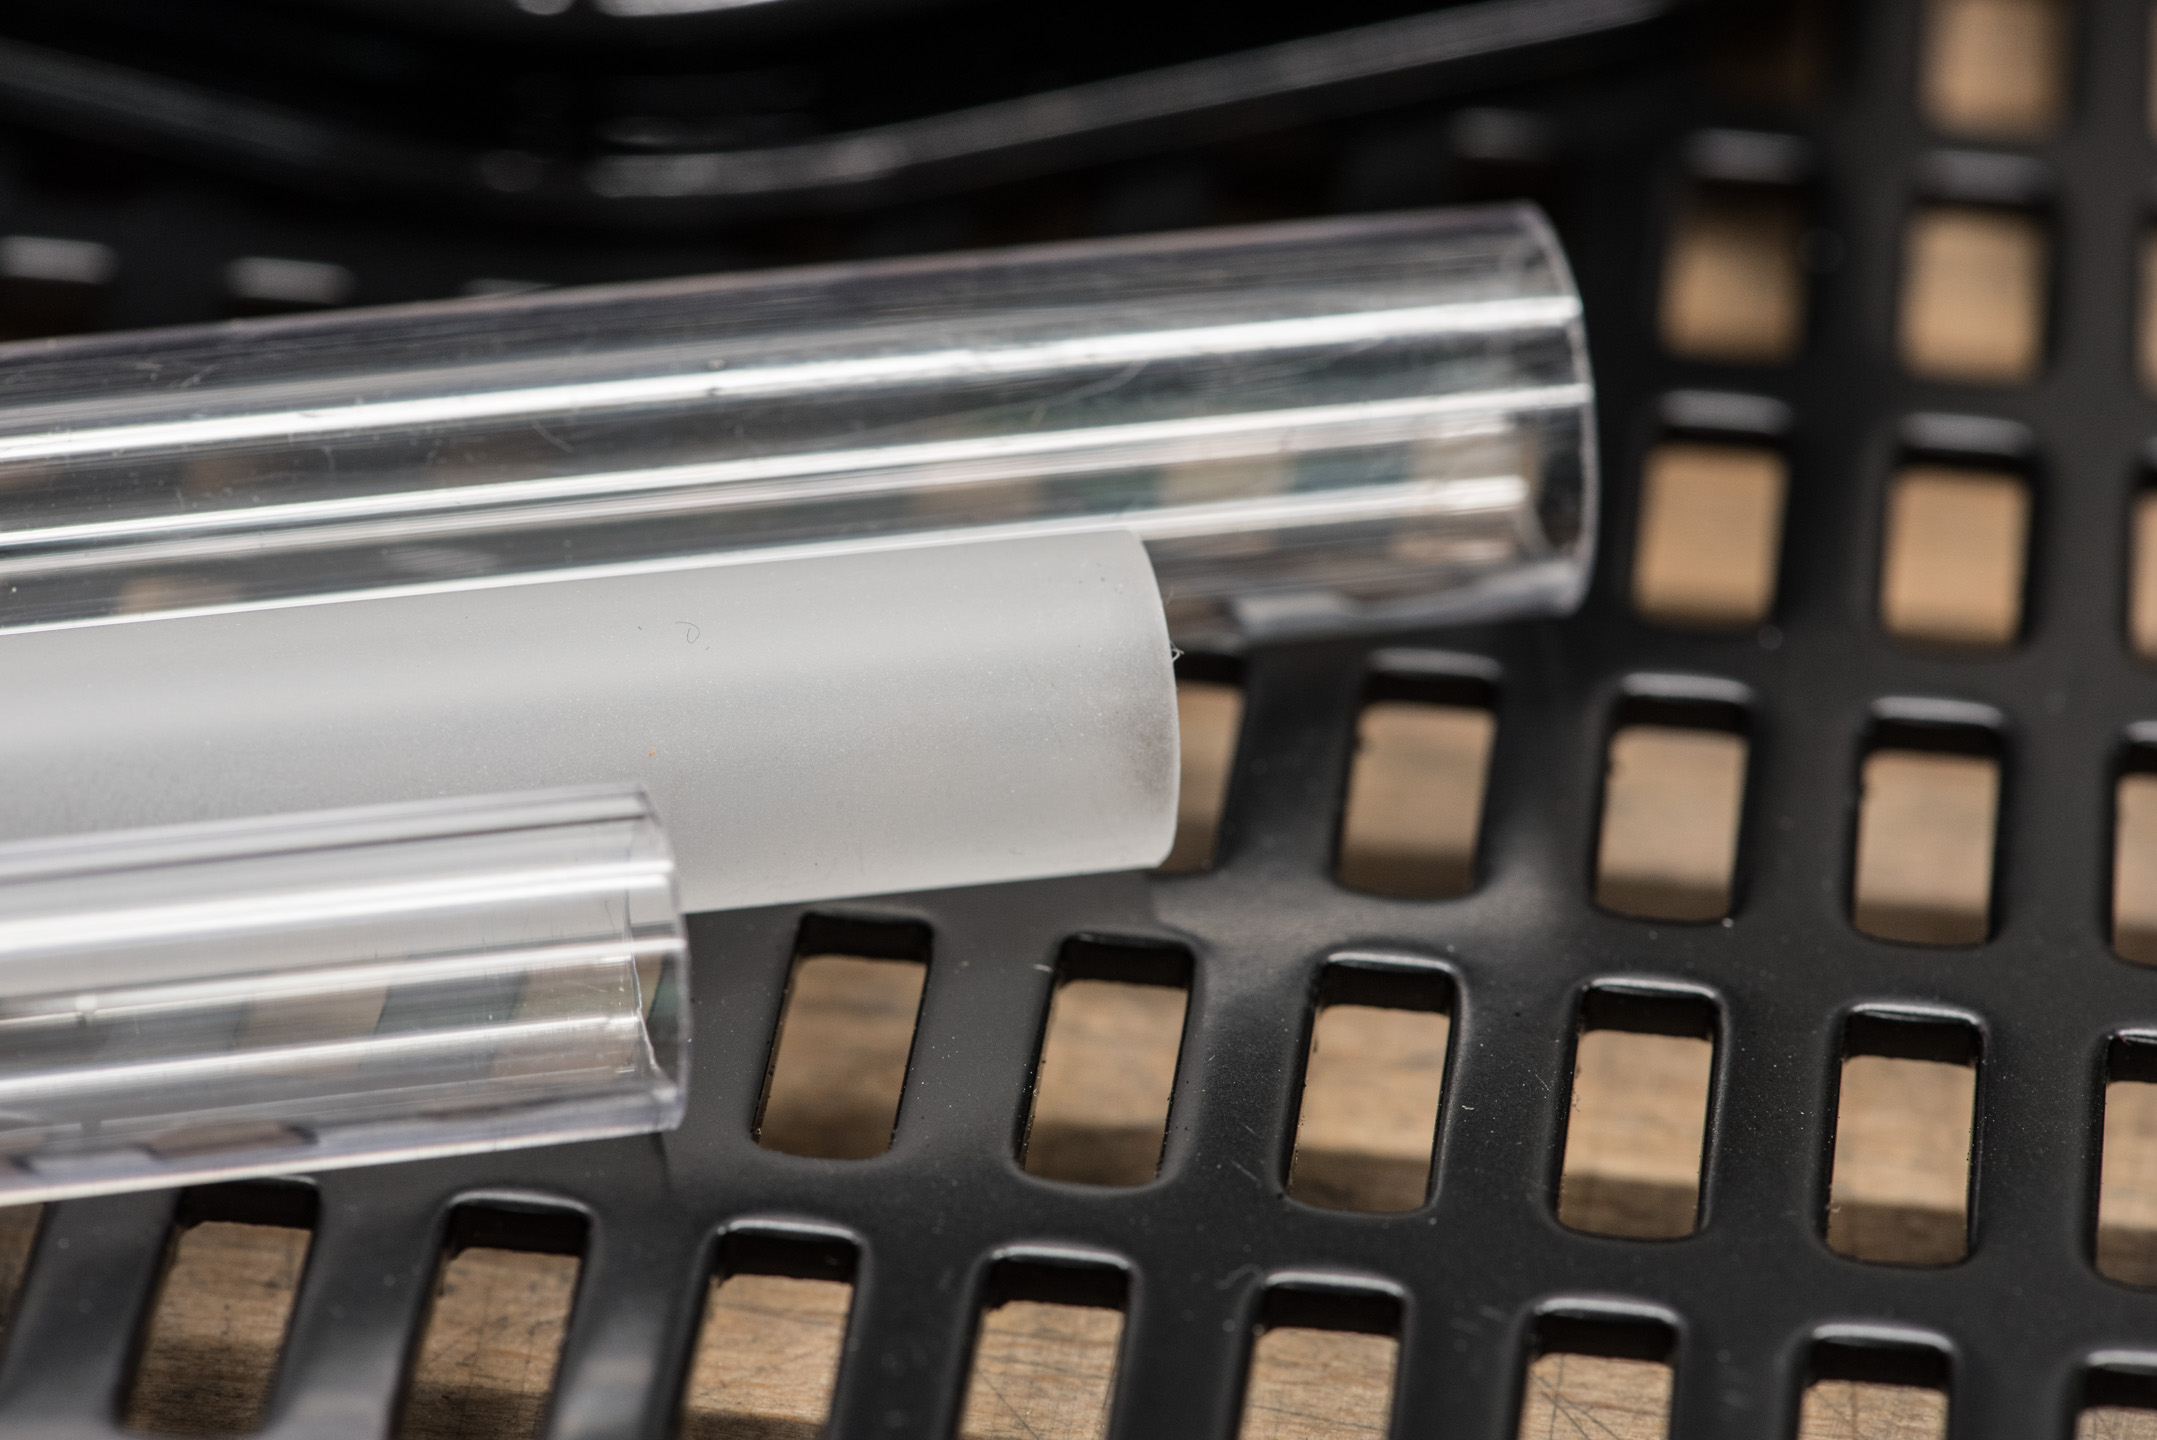
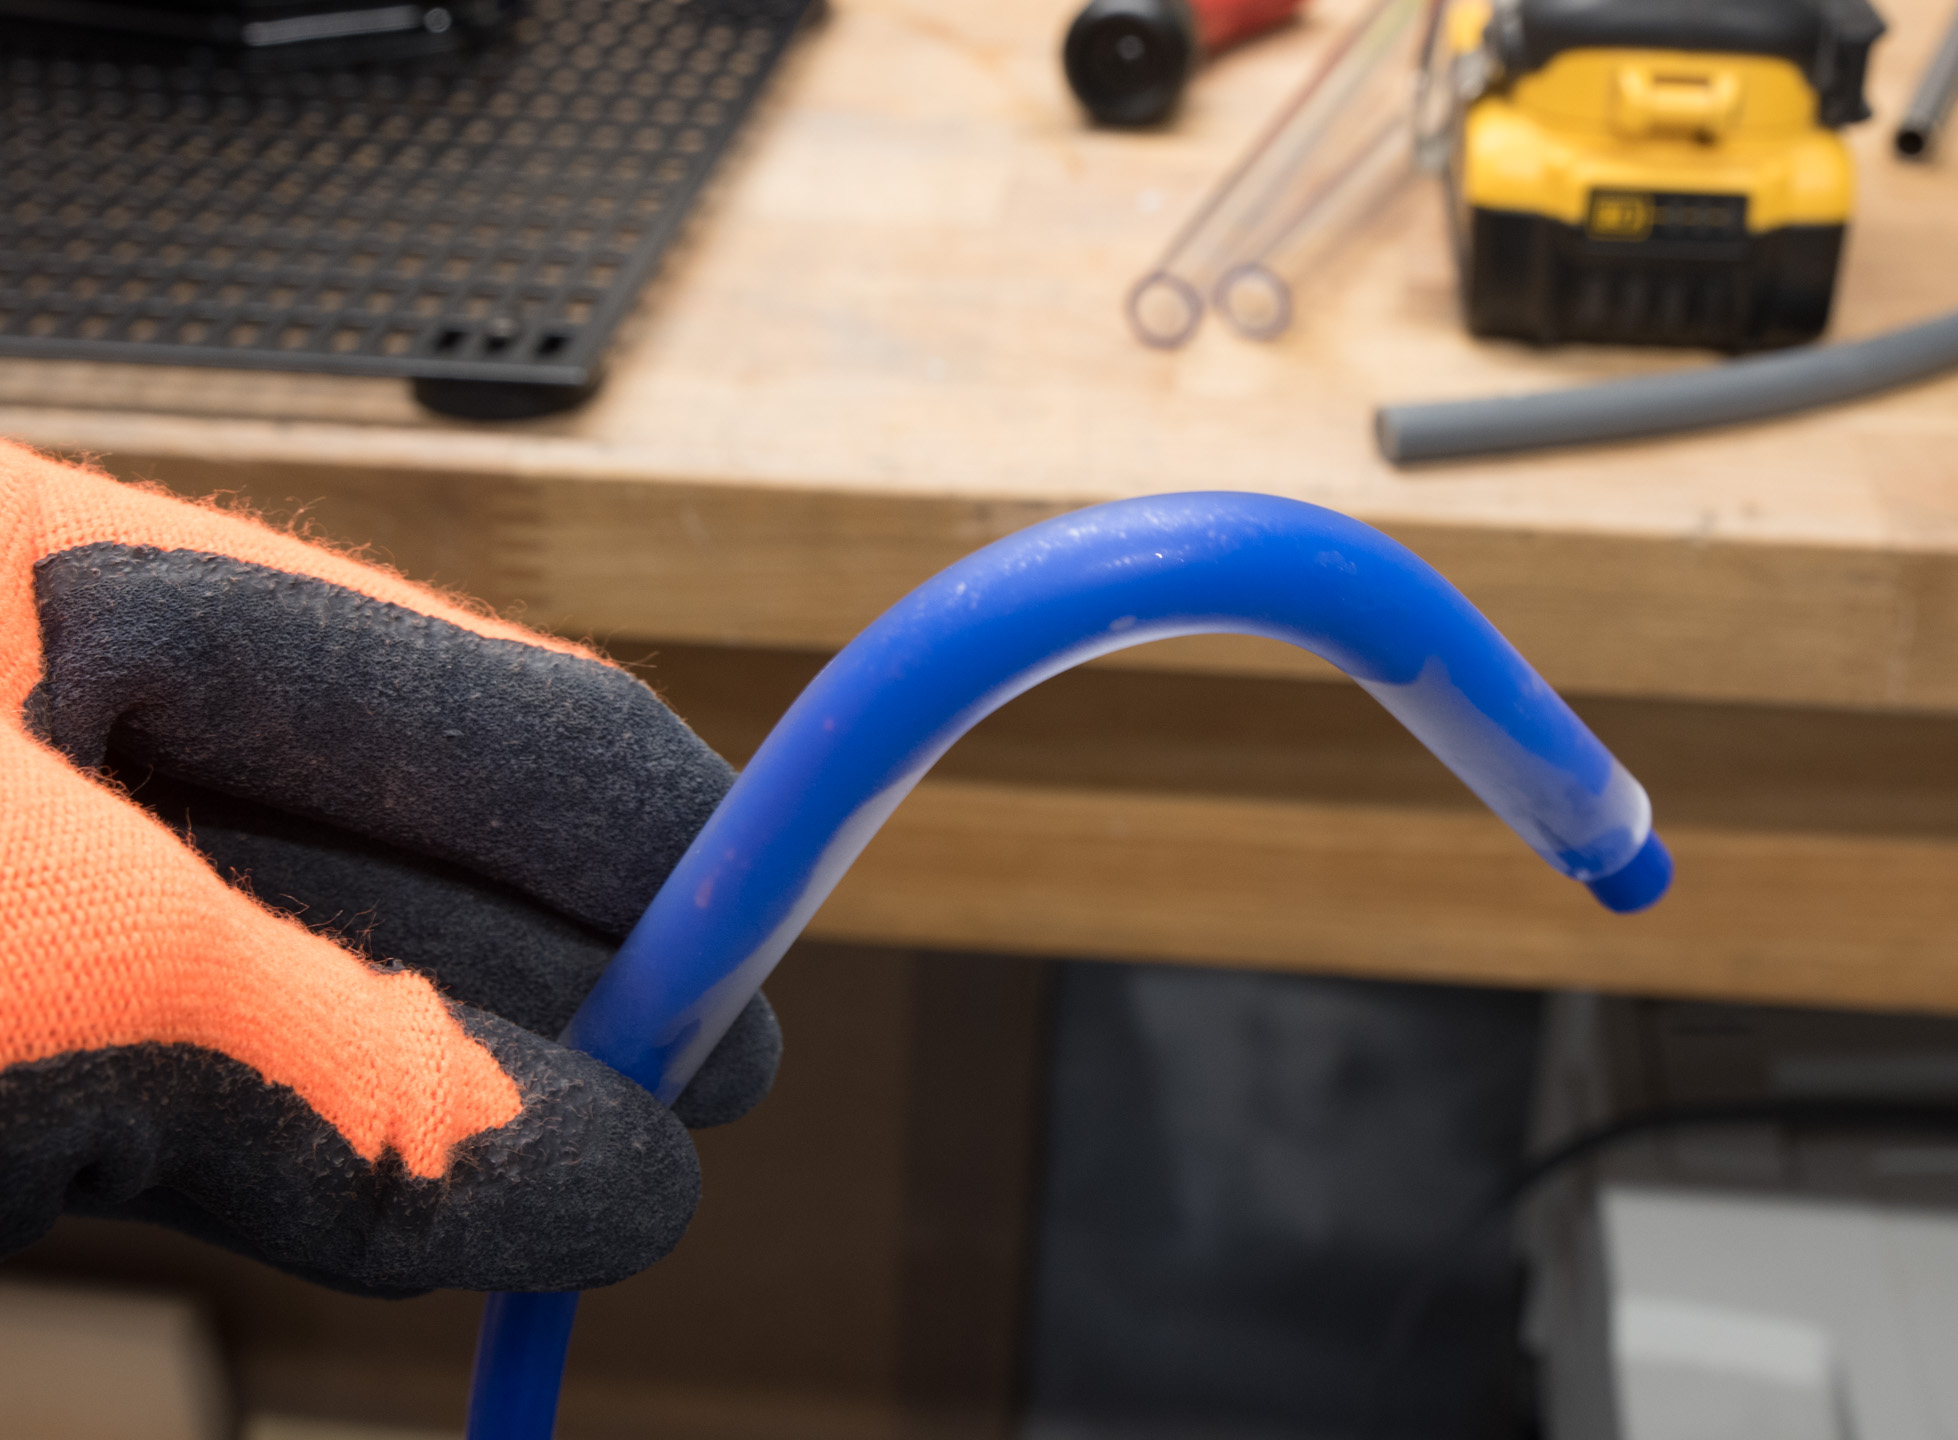
Now let's turn our attention to acrylic tubing. Acrylic has the advantage of being readily available in many different finishes and colours. I'm going to be using some 13mm satin tubing so that it can be more easily identified from the PETG in the previous pages. It's worth noting that while acrylic is clearer than PETG, it's most noticeable up close in real life, so I didn't do any comparison shots.
The process is largely the same albeit with a couple of crucial differences. The big consideration is that acrylic shatters, meaning you can't use a tubing cutter like the one I used for PETG. This means you have to use either a hand saw, jigsaw, or a Dremel/rotary tool. Personally, I like to use a jigsaw with a metal cutting blade, but a coping saw works very well too actually, and I used that in the demo here.
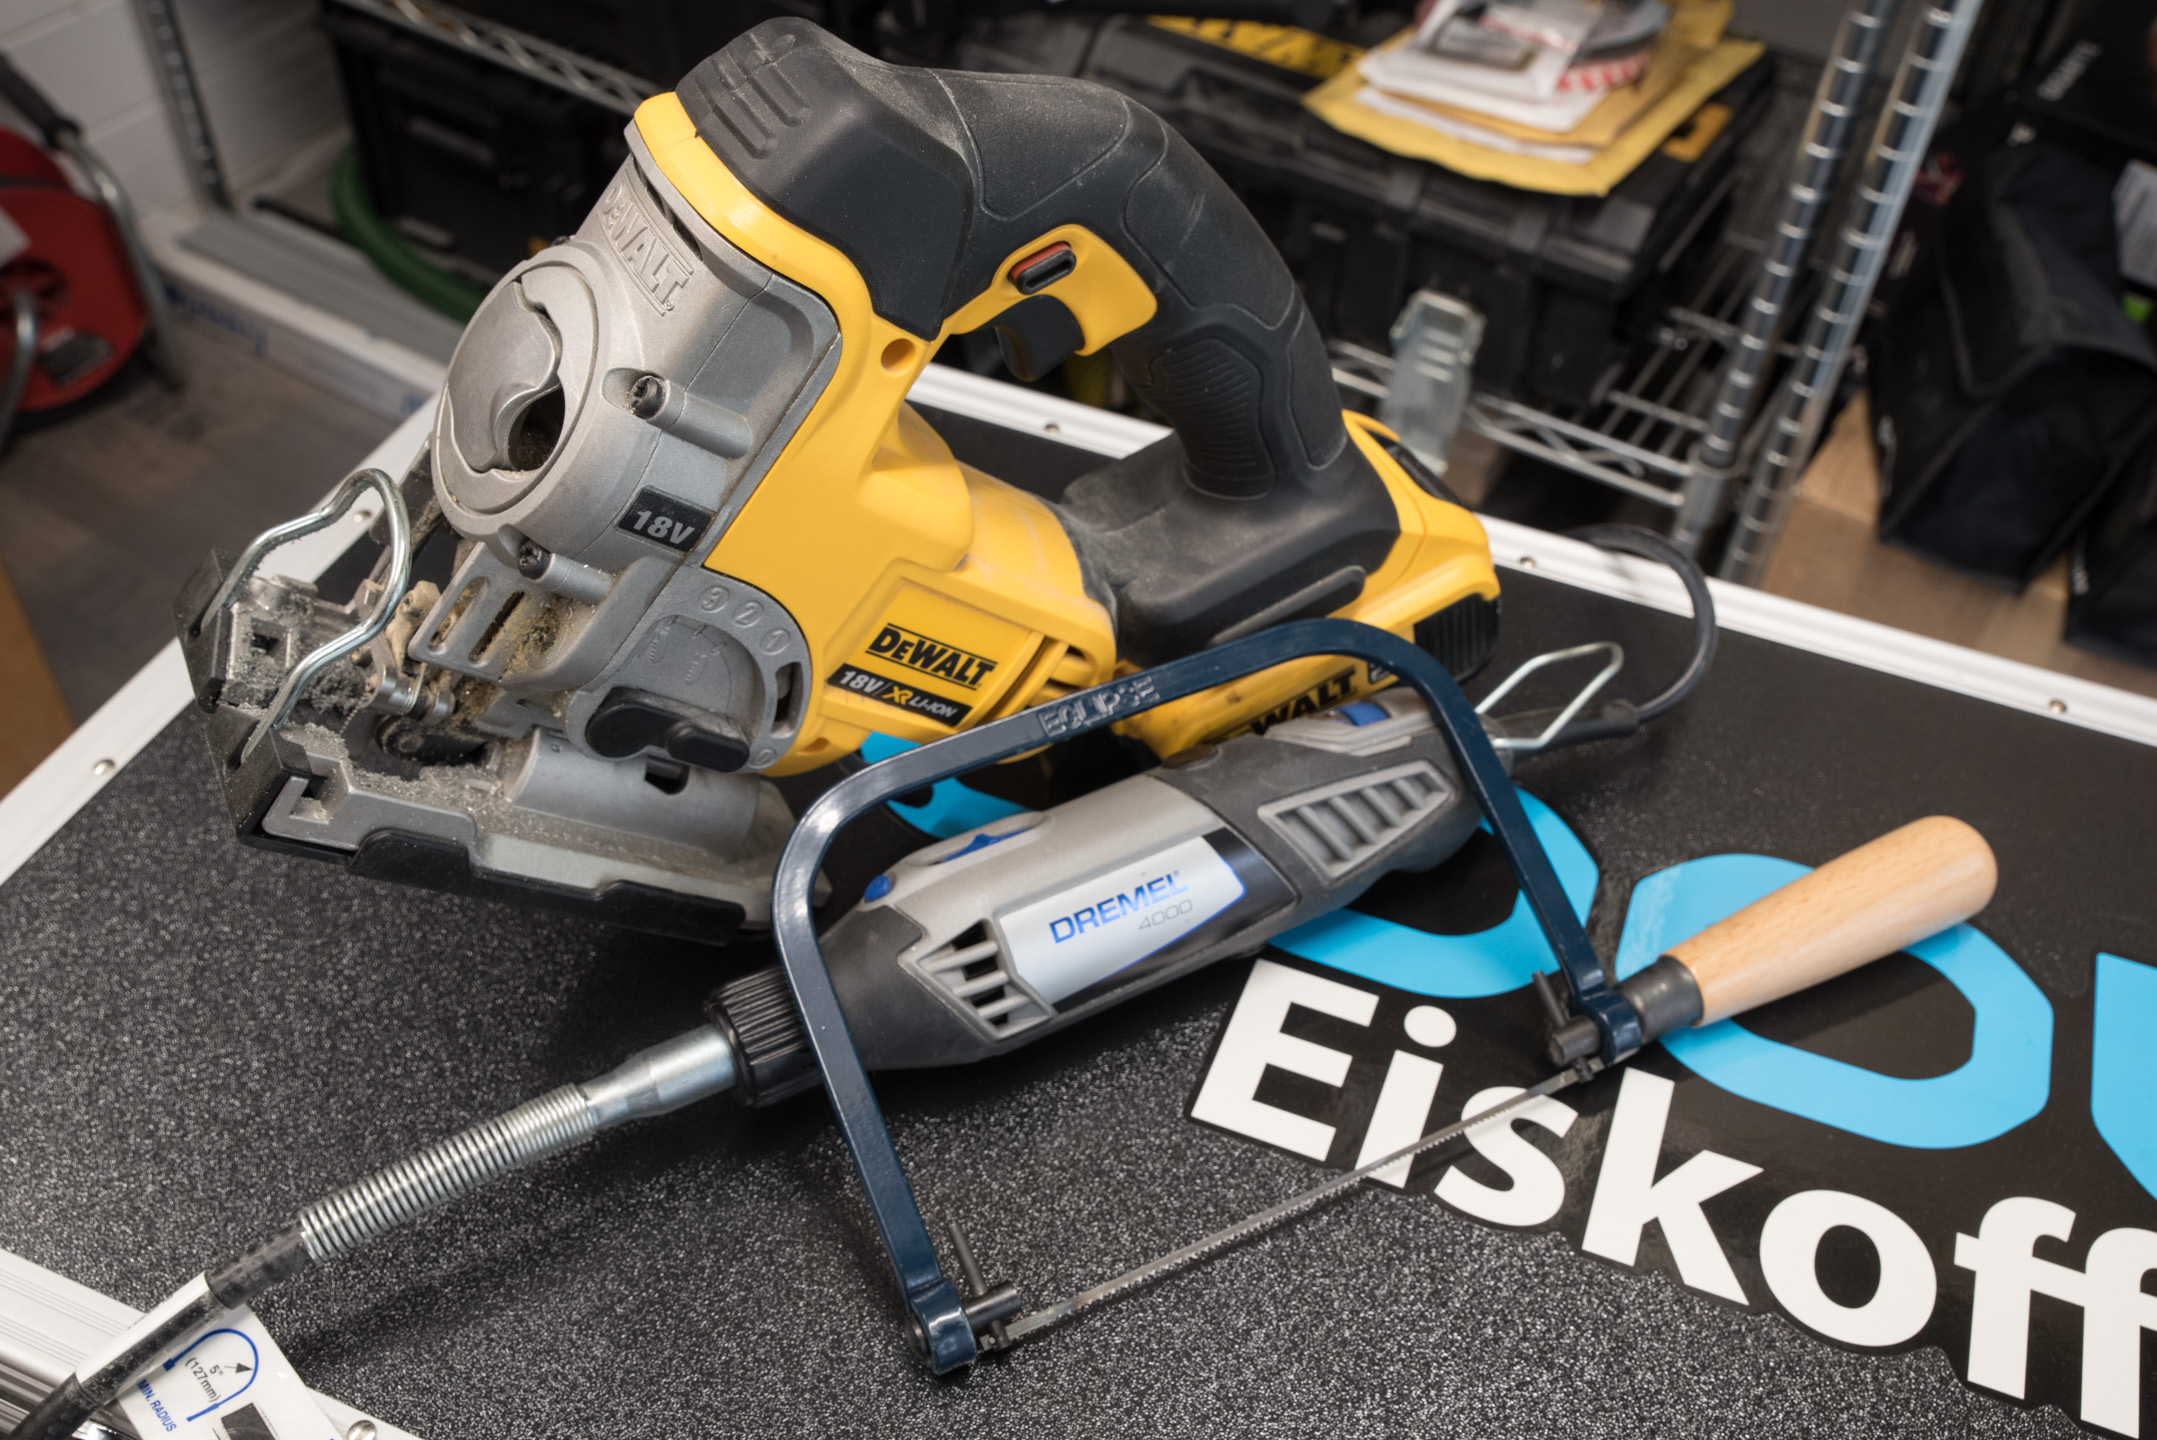
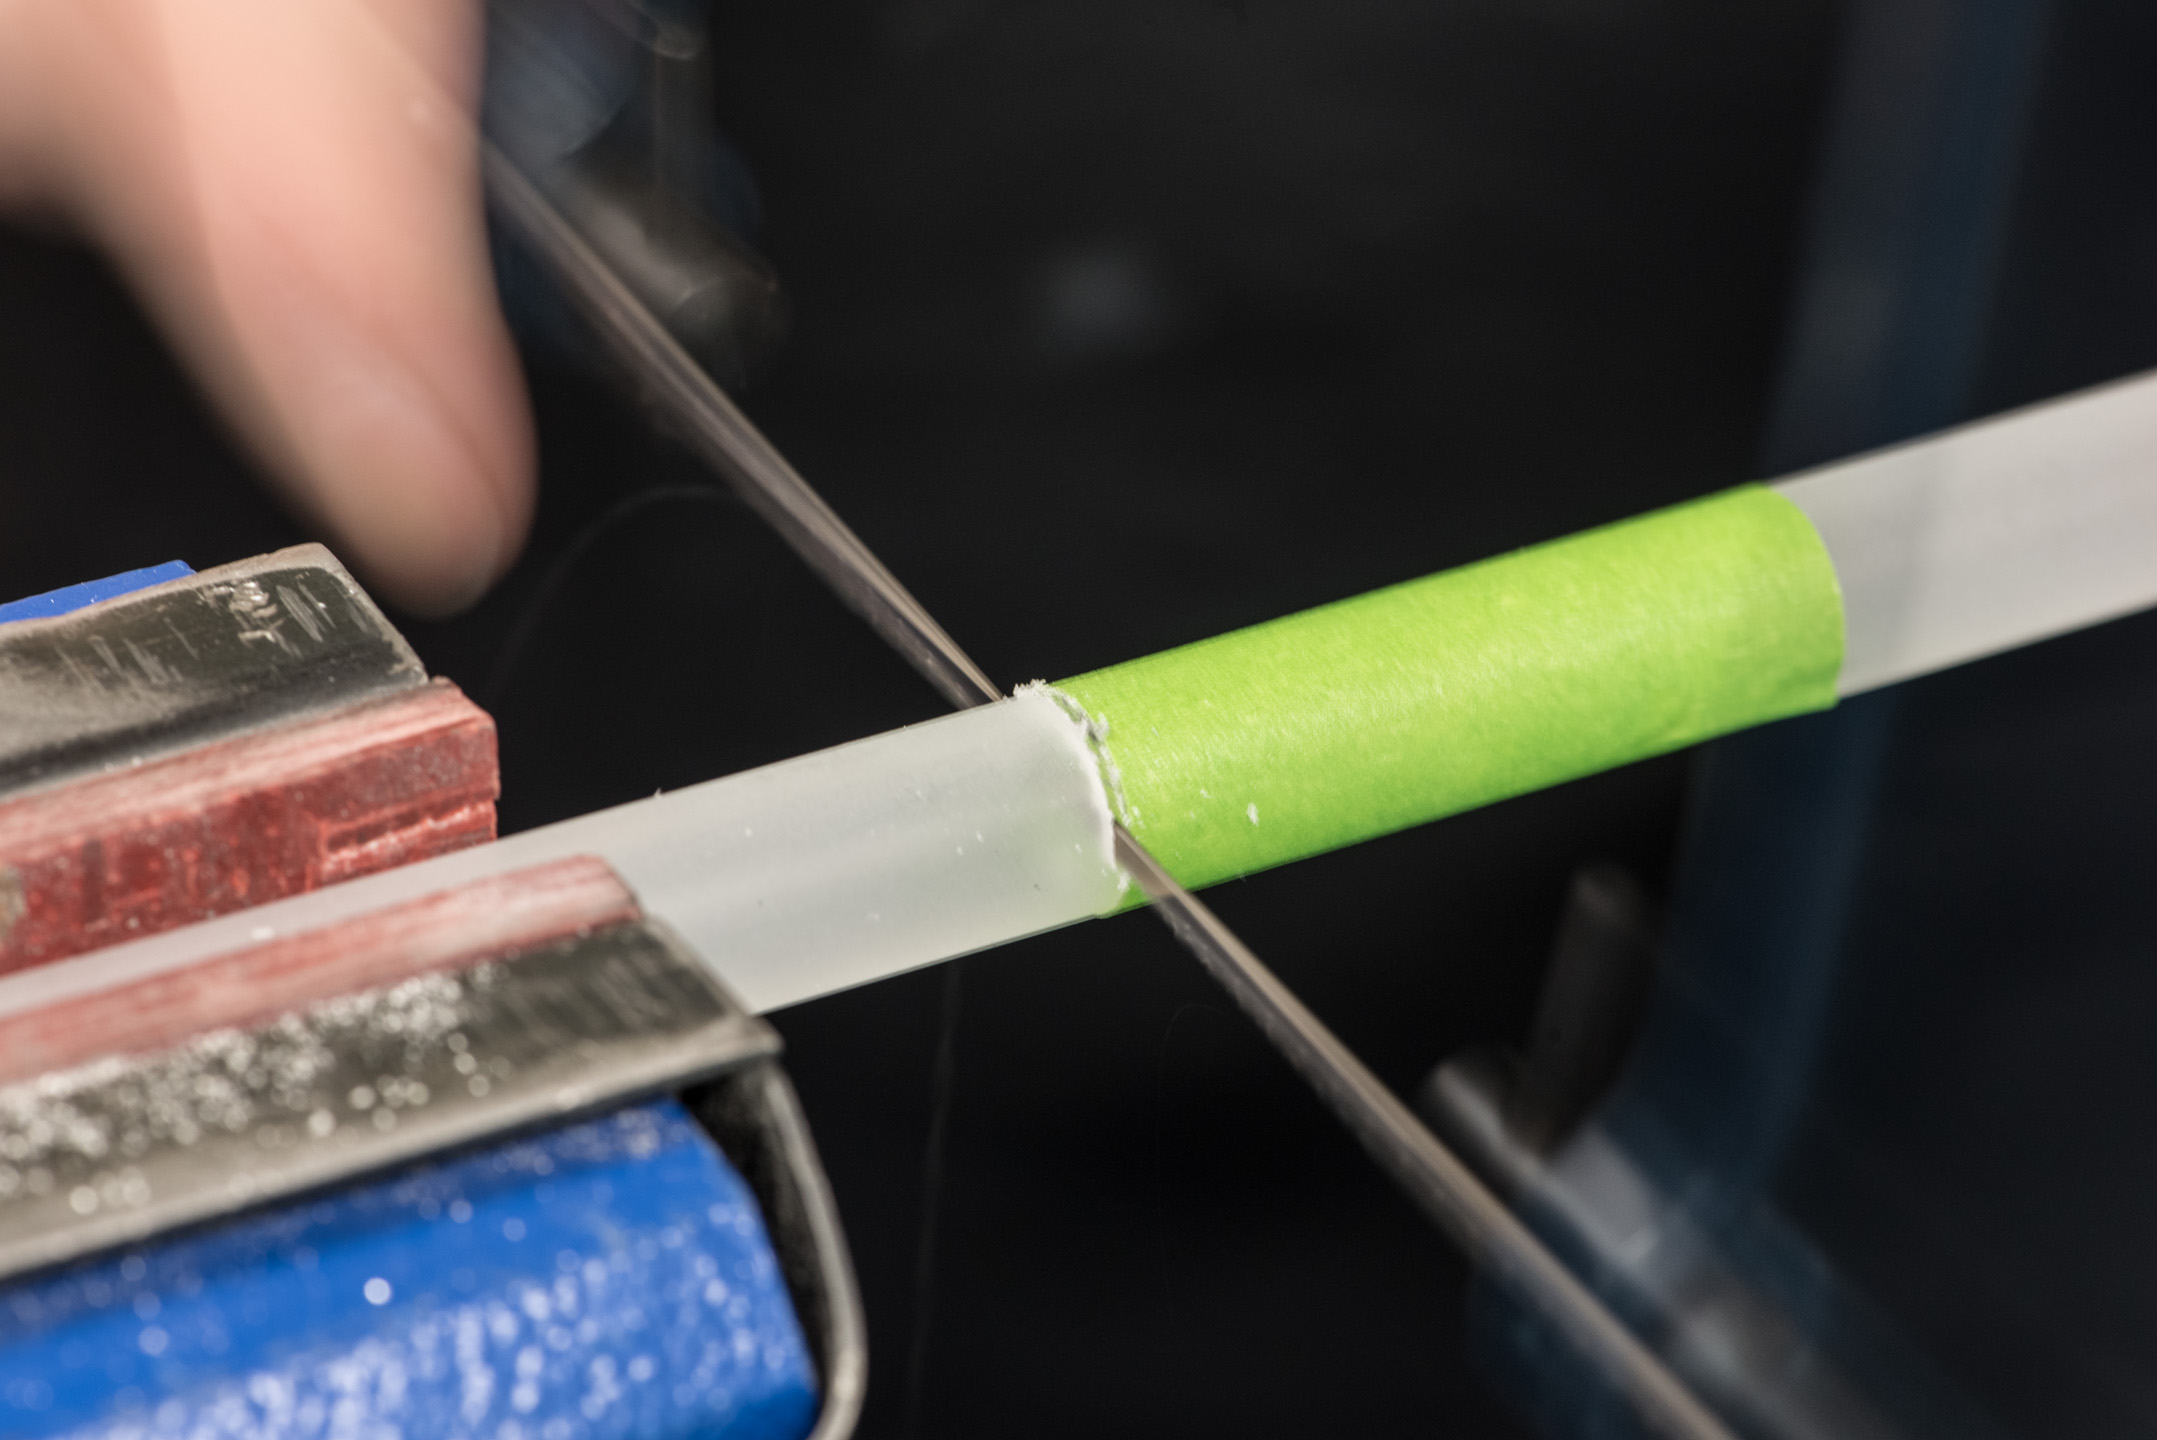
A coping saw goes through this tubing like butter and is an all round useful tool to have; I would definitely recommend one. Some bending kits come with a mitre-saw block, which can be handy for keeping the cut perpendicular. I used the tape as a guide instead, and this helps prevent any errant saw movements damaging the surface.
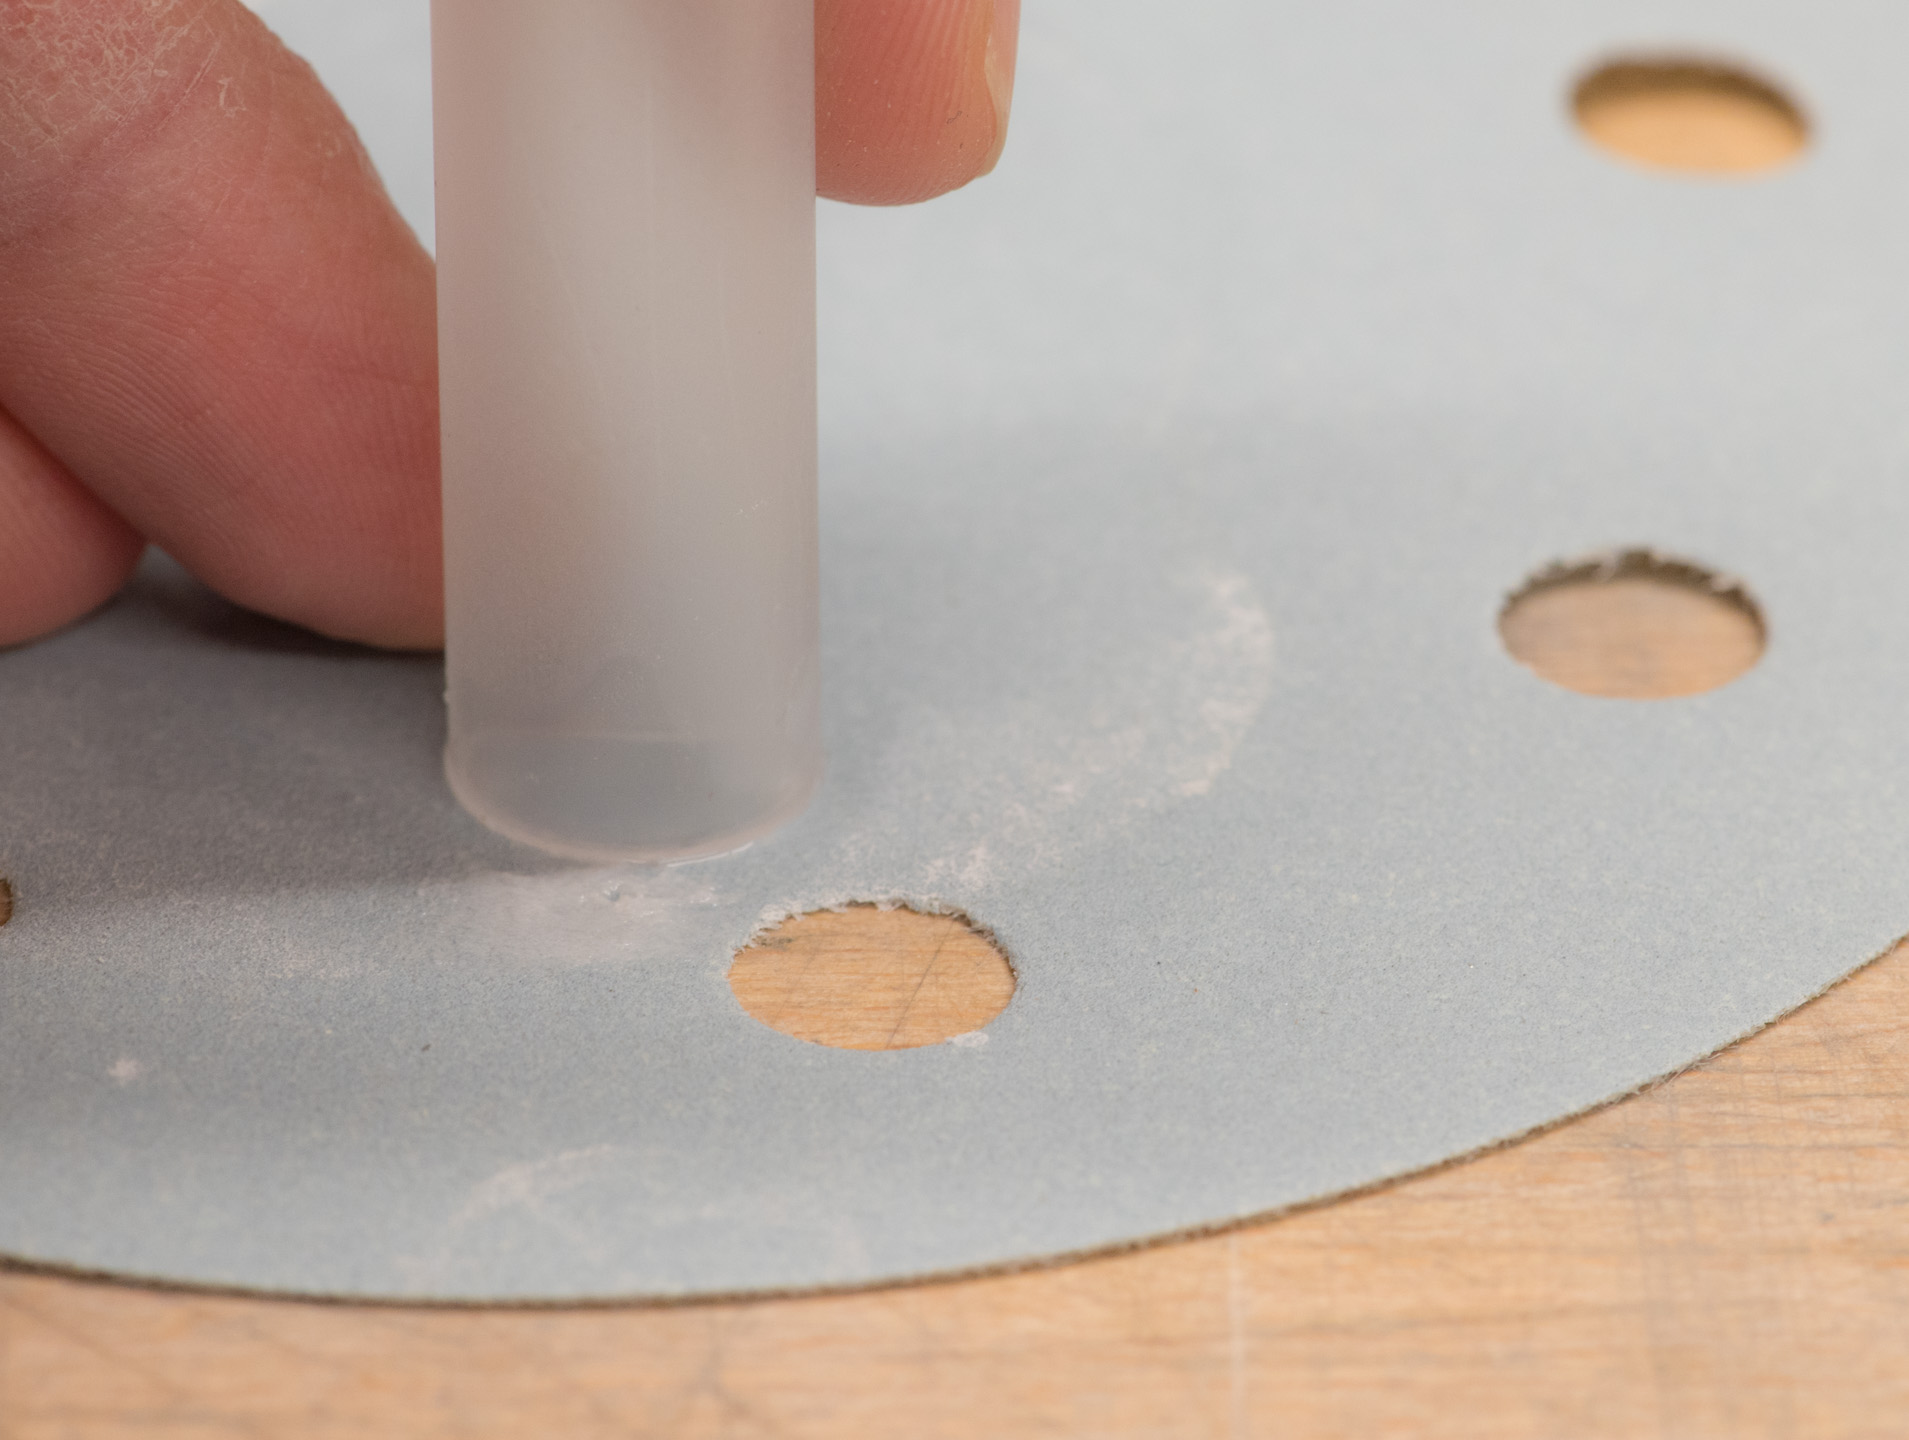
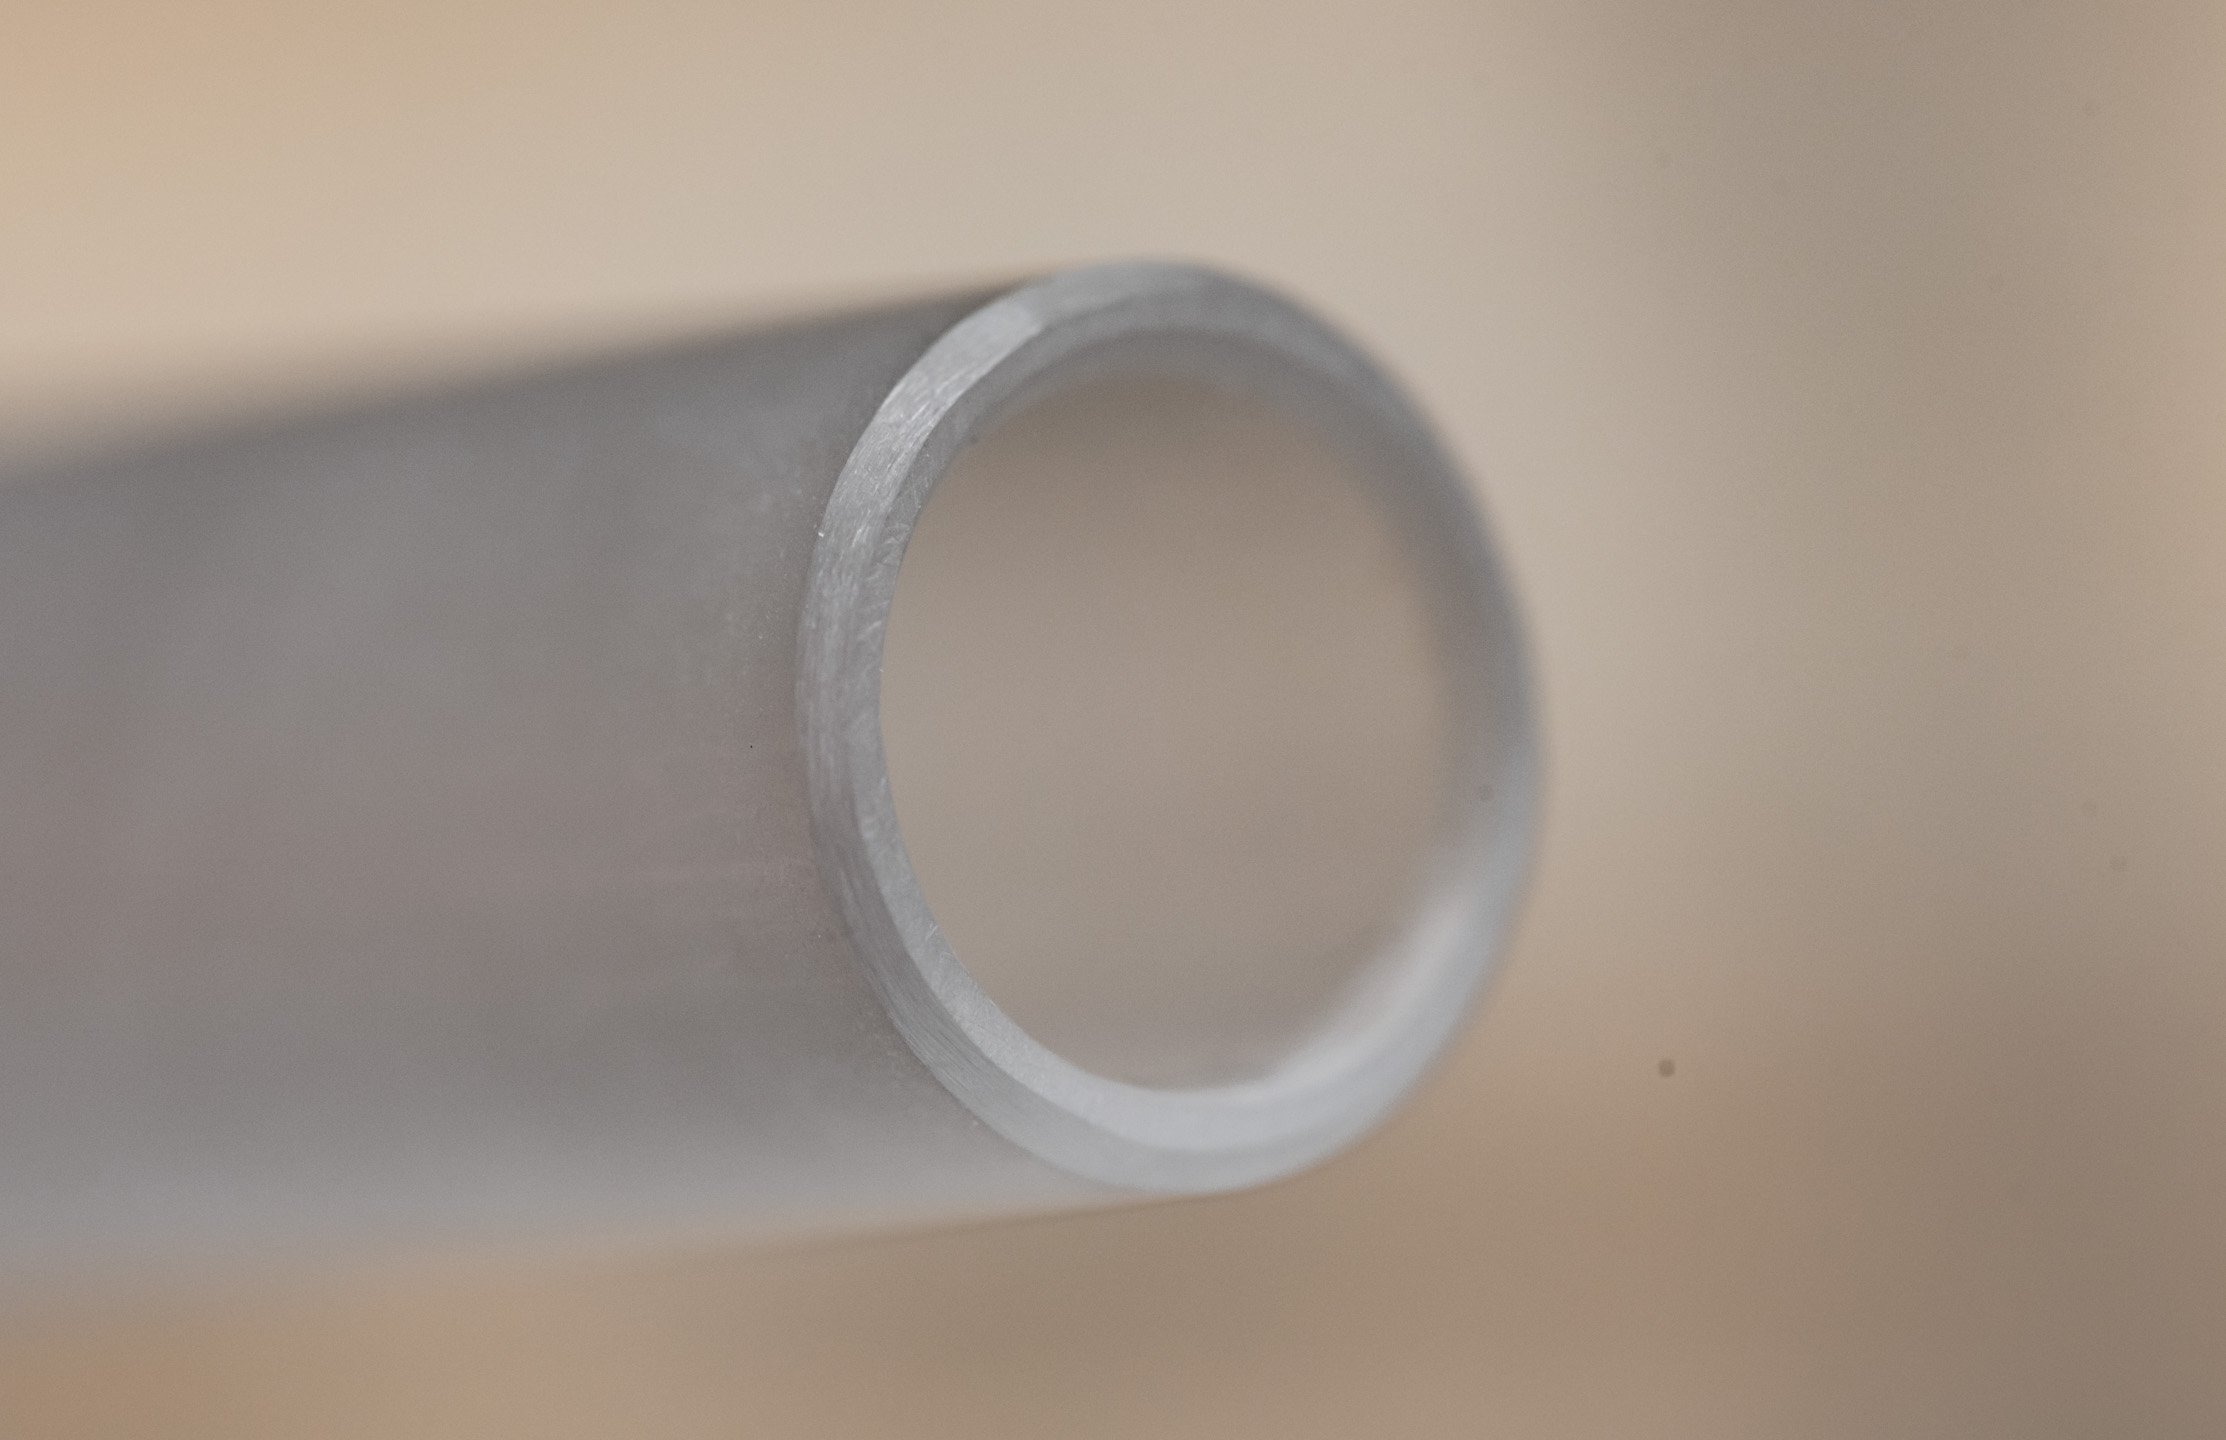
As with the PETG, the acrylic will be rough from the cutting, and since it's harder than PETG it's even more important to smooth the ends well to keep your fittings happy as Larry. Acrylic sands very easily, so I like to use this method. Simply go over the ends with 320-grit paper on top of a hard surface, then do the same around the outside to make a neat chamfer. A chamfer tool will also do this task well, but once again it can occasionally leave a rough finish. For the interior, I used a deburring tool, as the sharp blade leaves a very neat edge and it only takes seconds. The chamfer tool would work, too, as would a large countersunk bit (see the Drill Bits Toolbox for more!). You should be aiming for a neat edge like the one below.
Bending
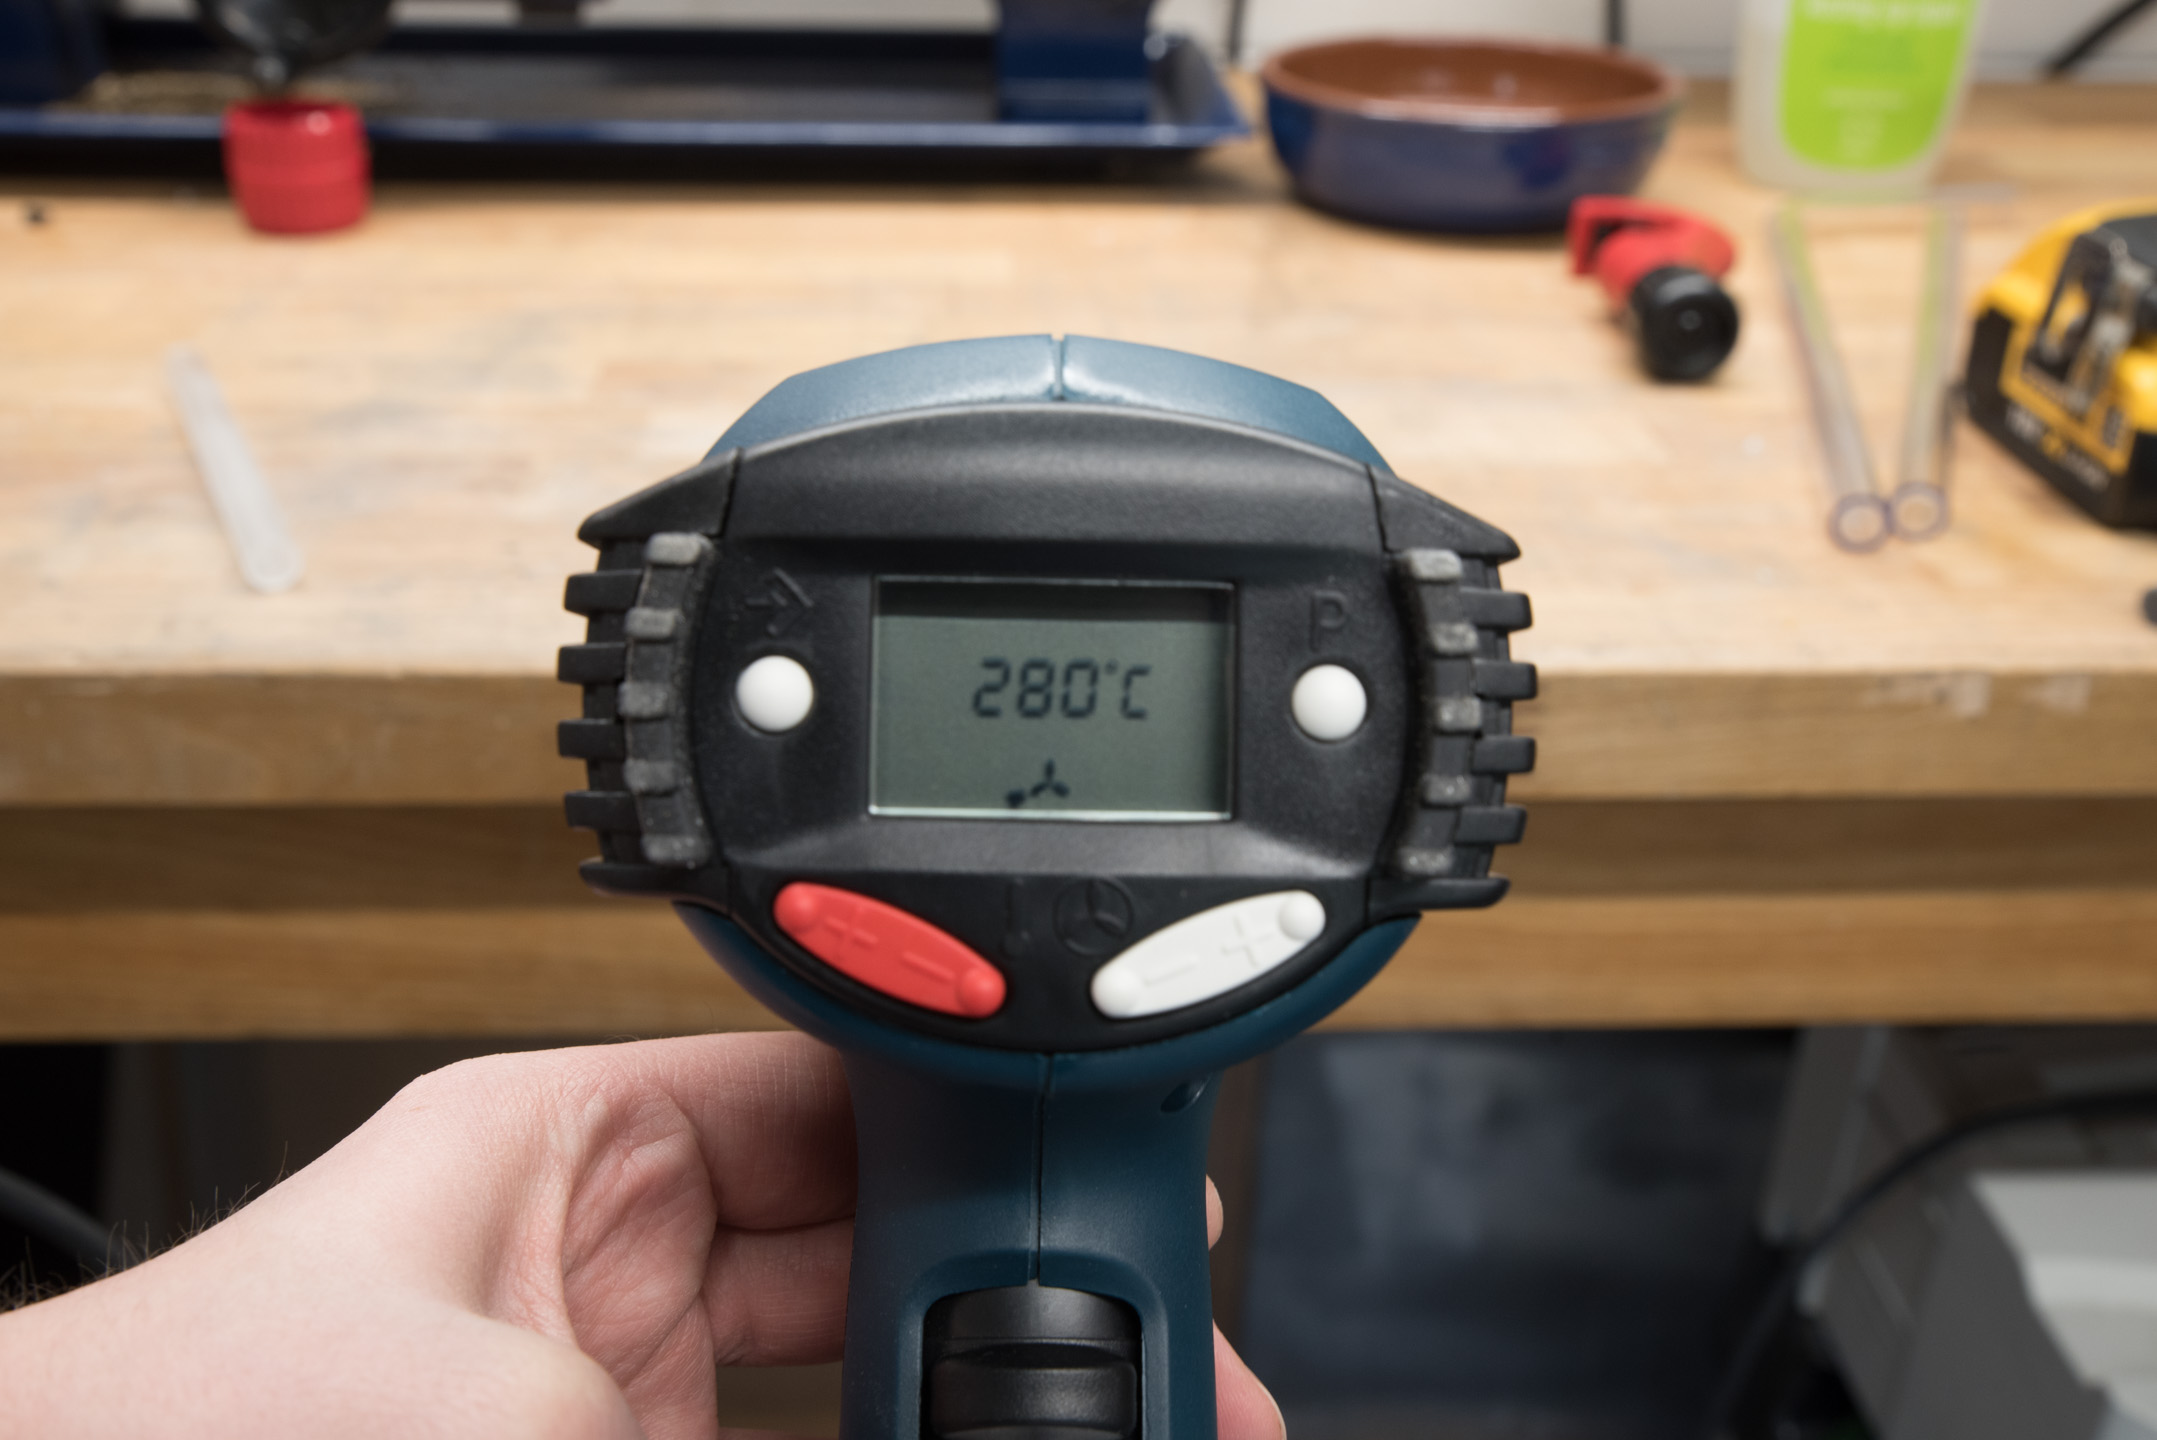
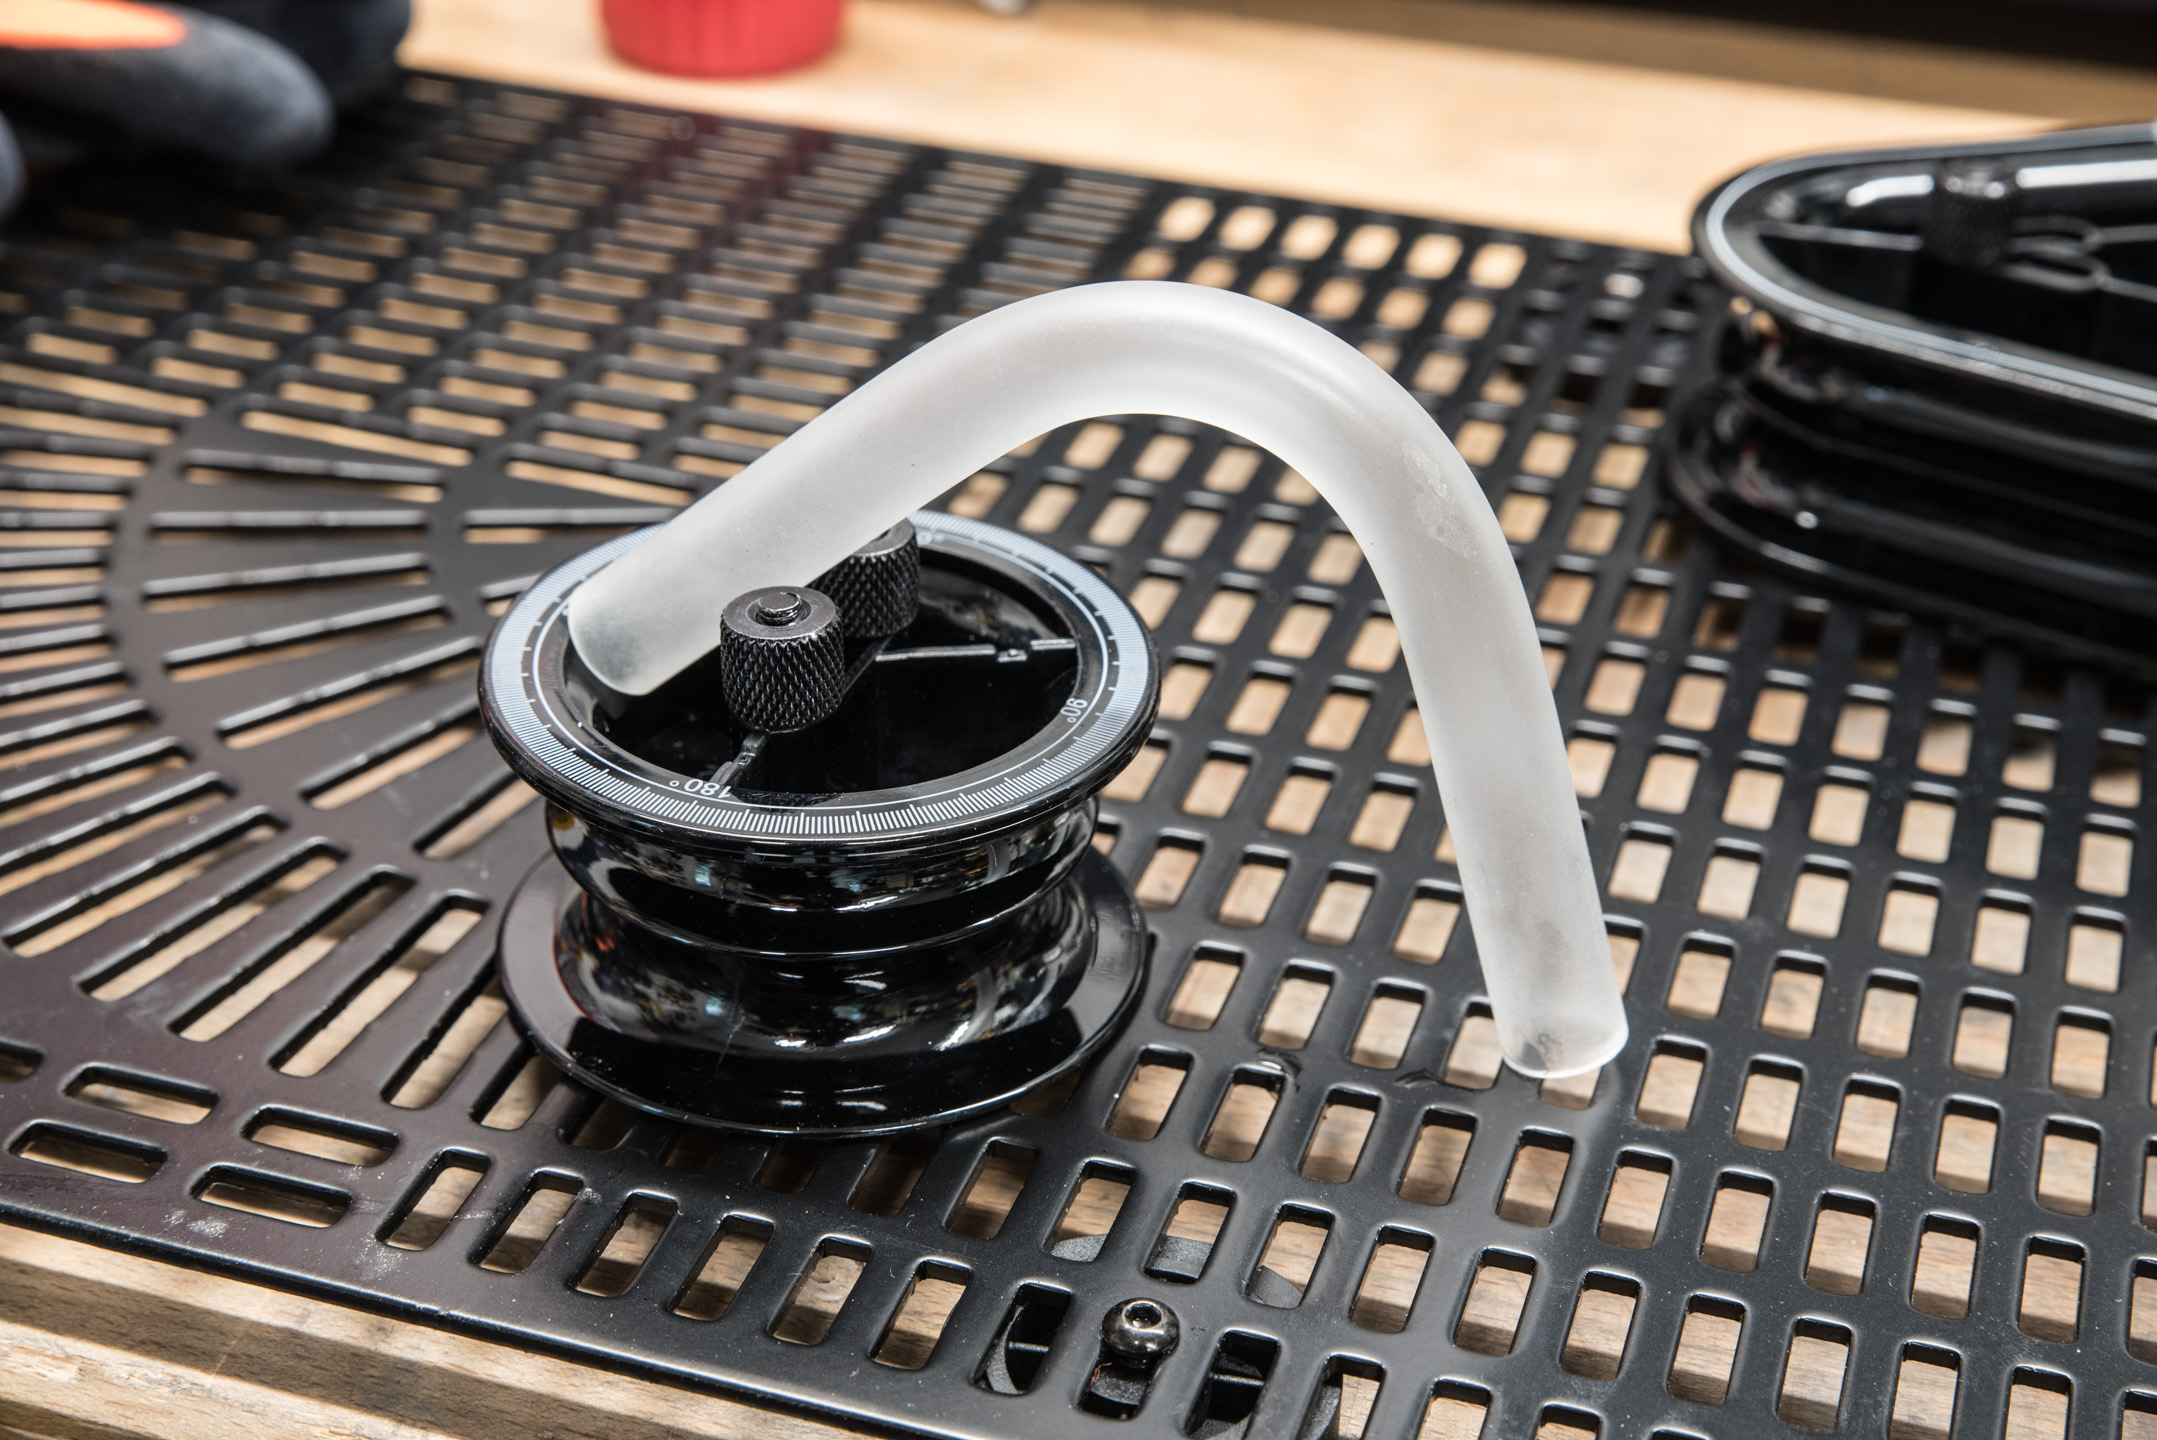
In much the same fashion as with PETG, we want to heat the tube evenly and carefully. I usually set the heat gun to 280°C or so this time. You need to heat the acrylic more, so this will make the process a bit easier. It's very important to keep a close eye on the tube, though, since acrylic can tip from usable to dead in a matter of seconds if you're not careful. Keep a close watch for any bubbles forming in the plastic. If you see those, chuck that piece and start over.
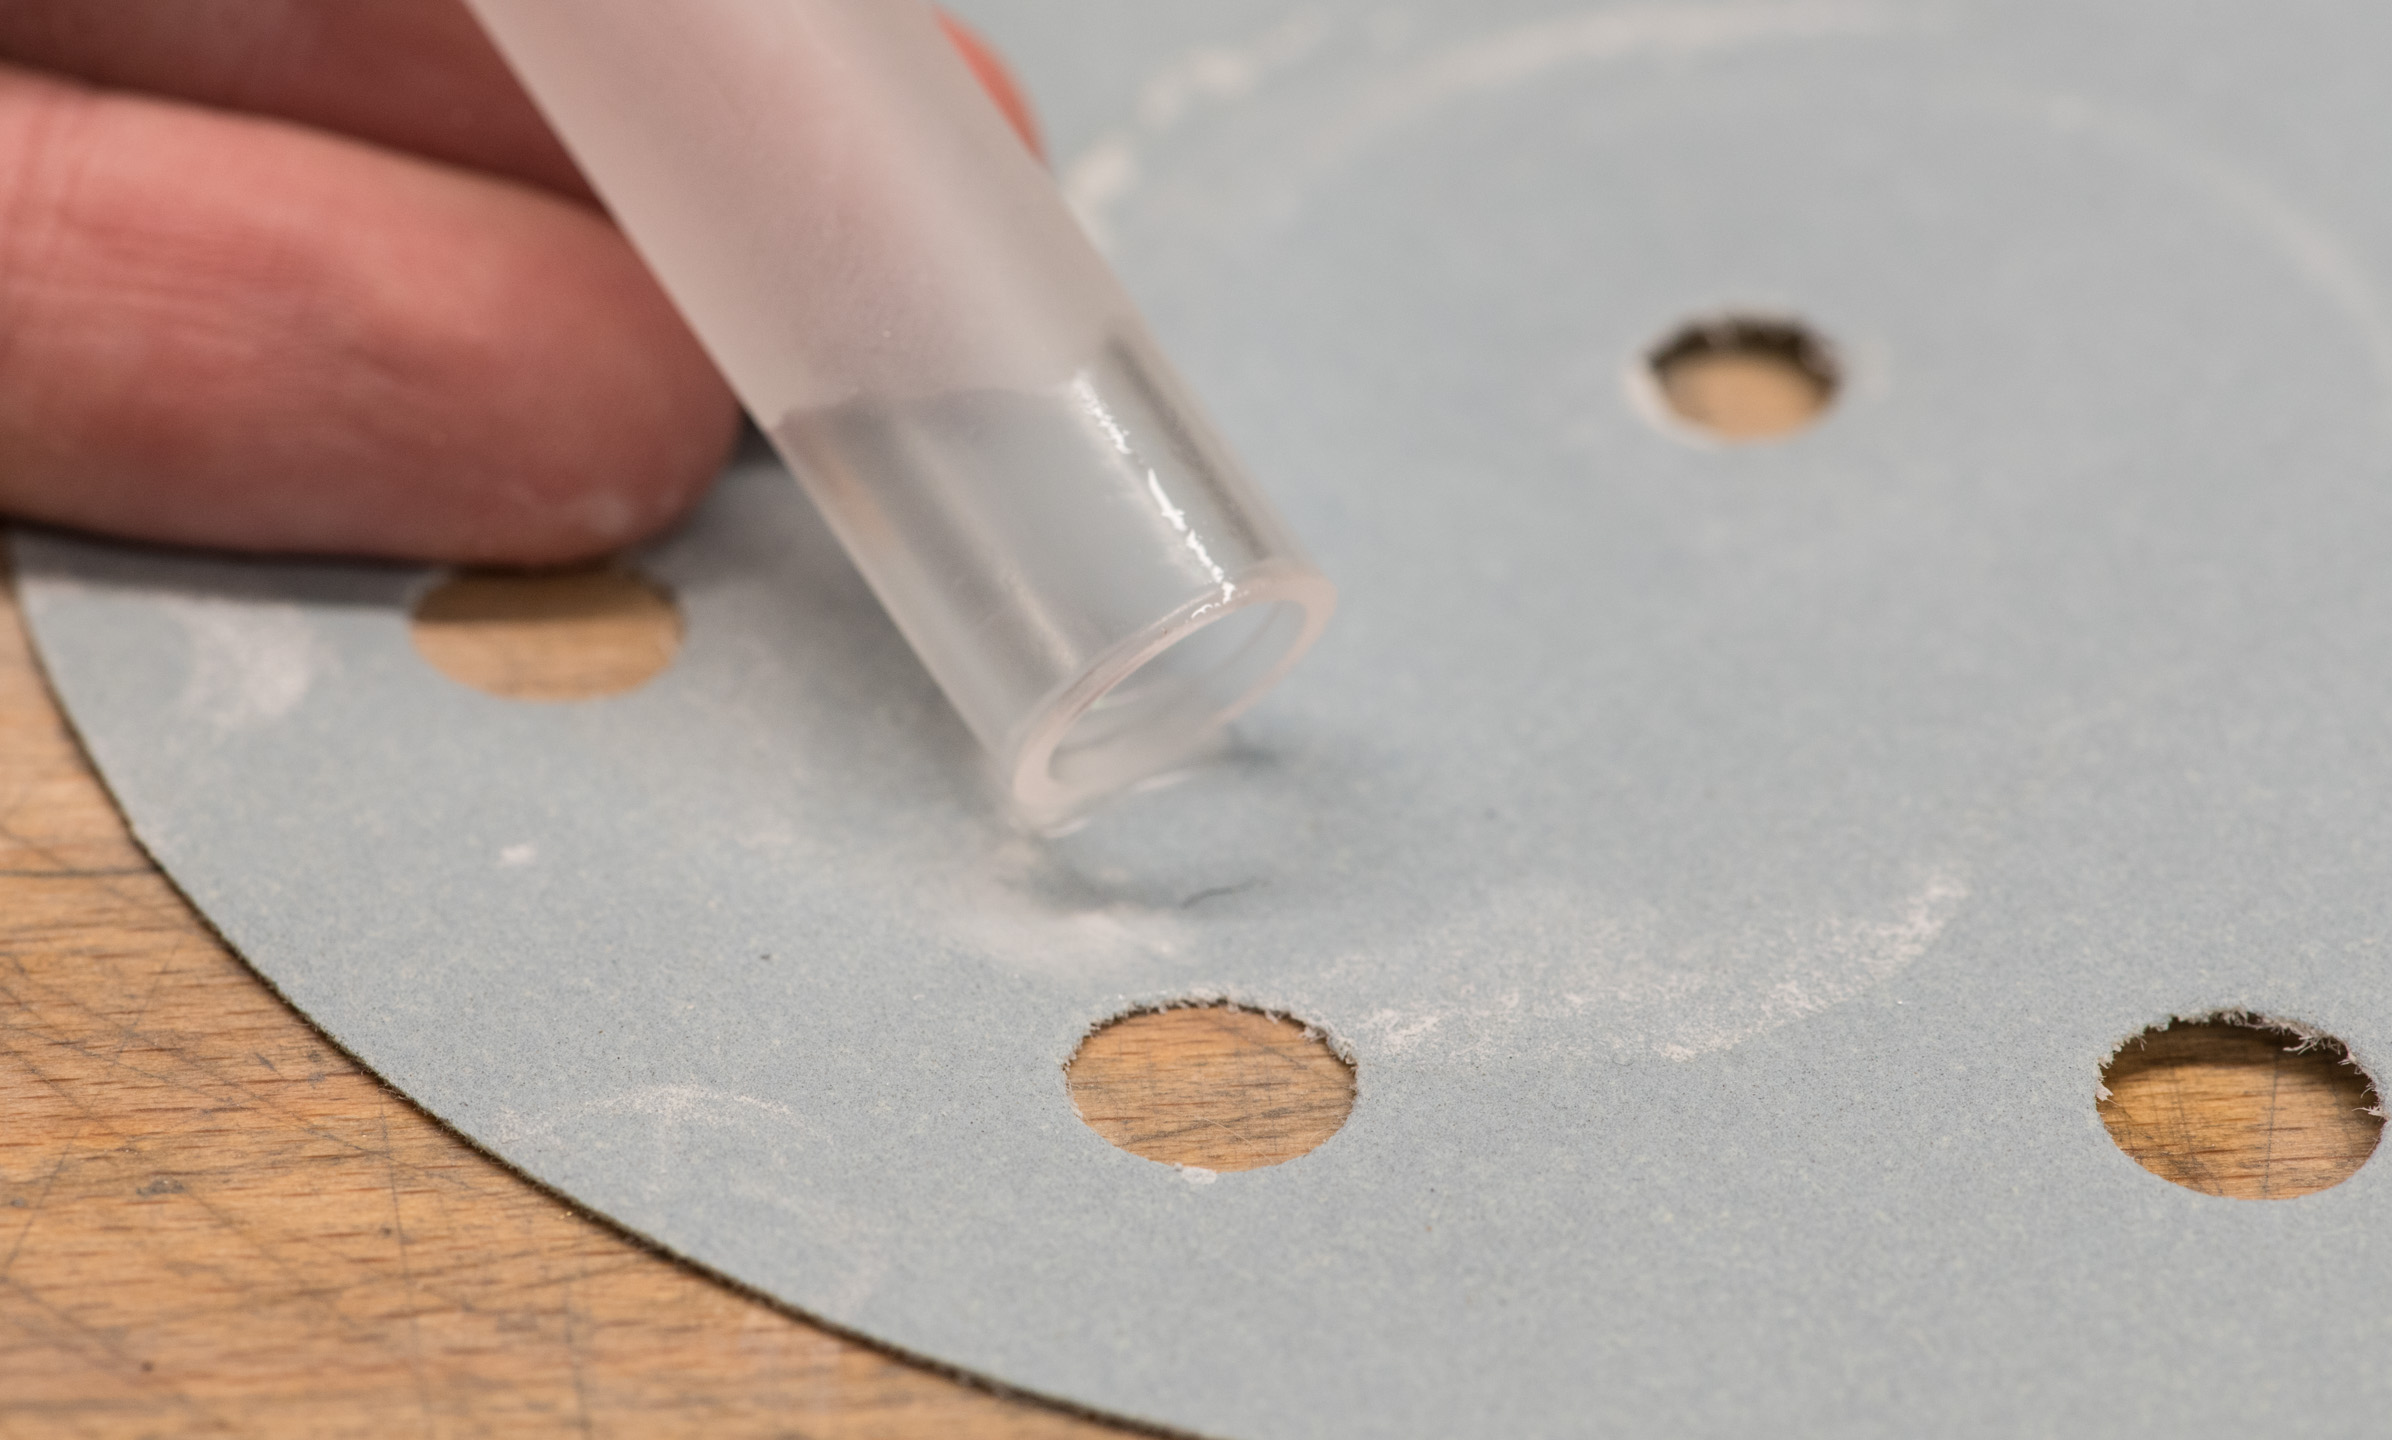
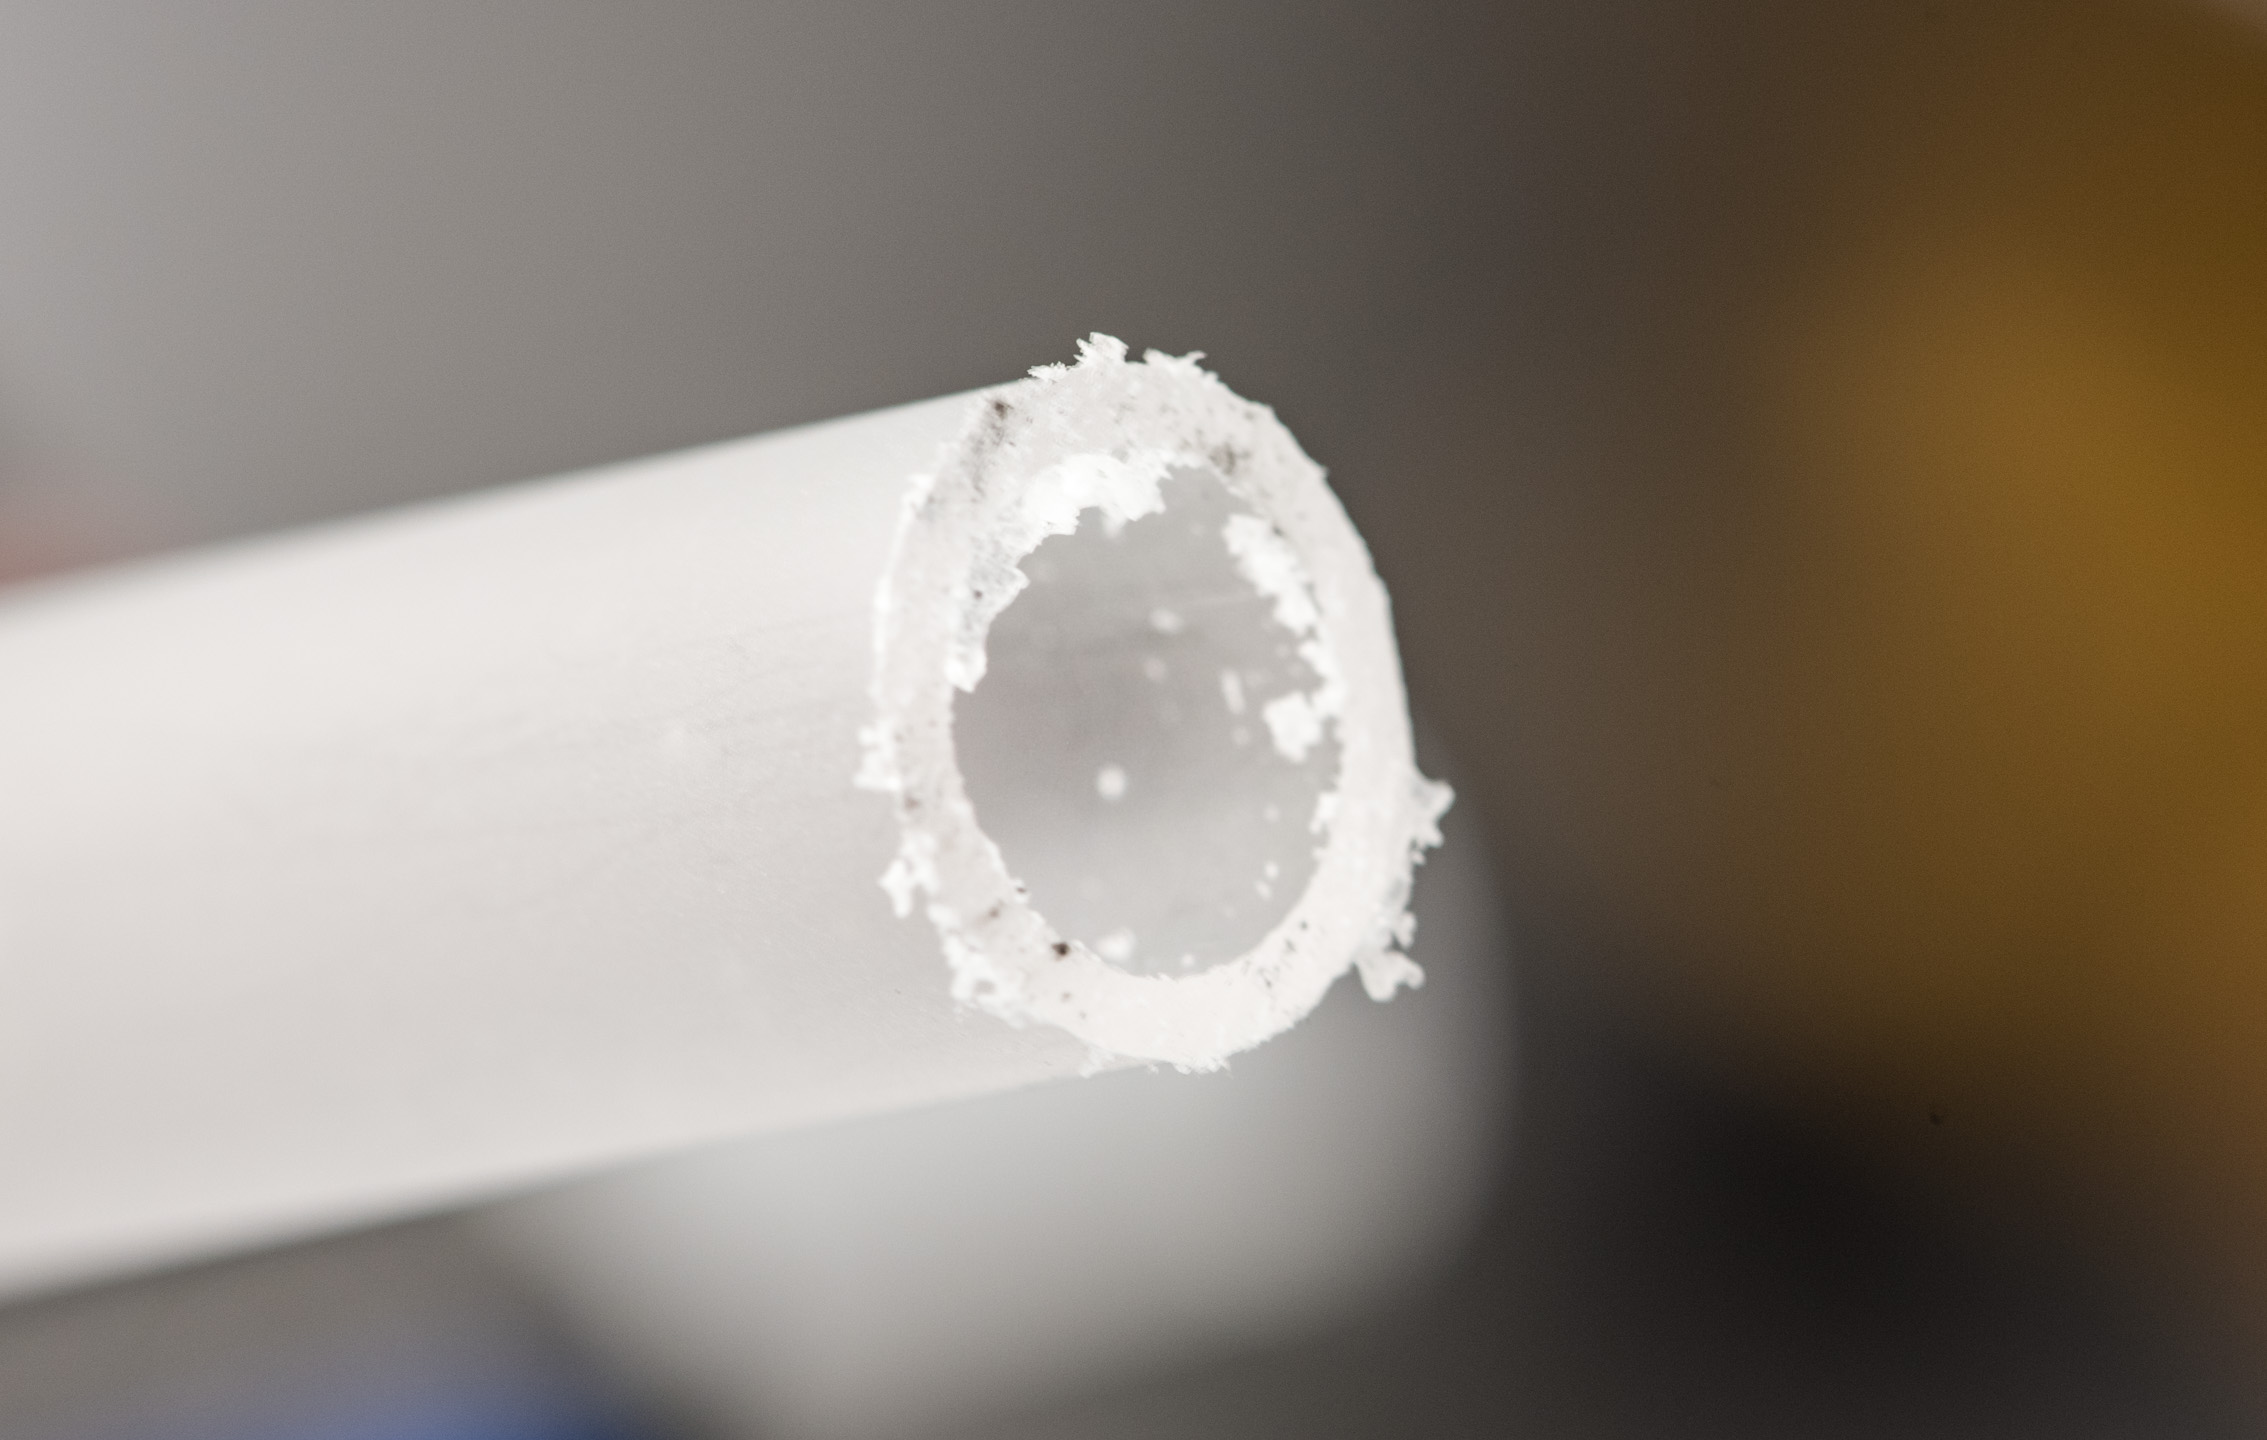
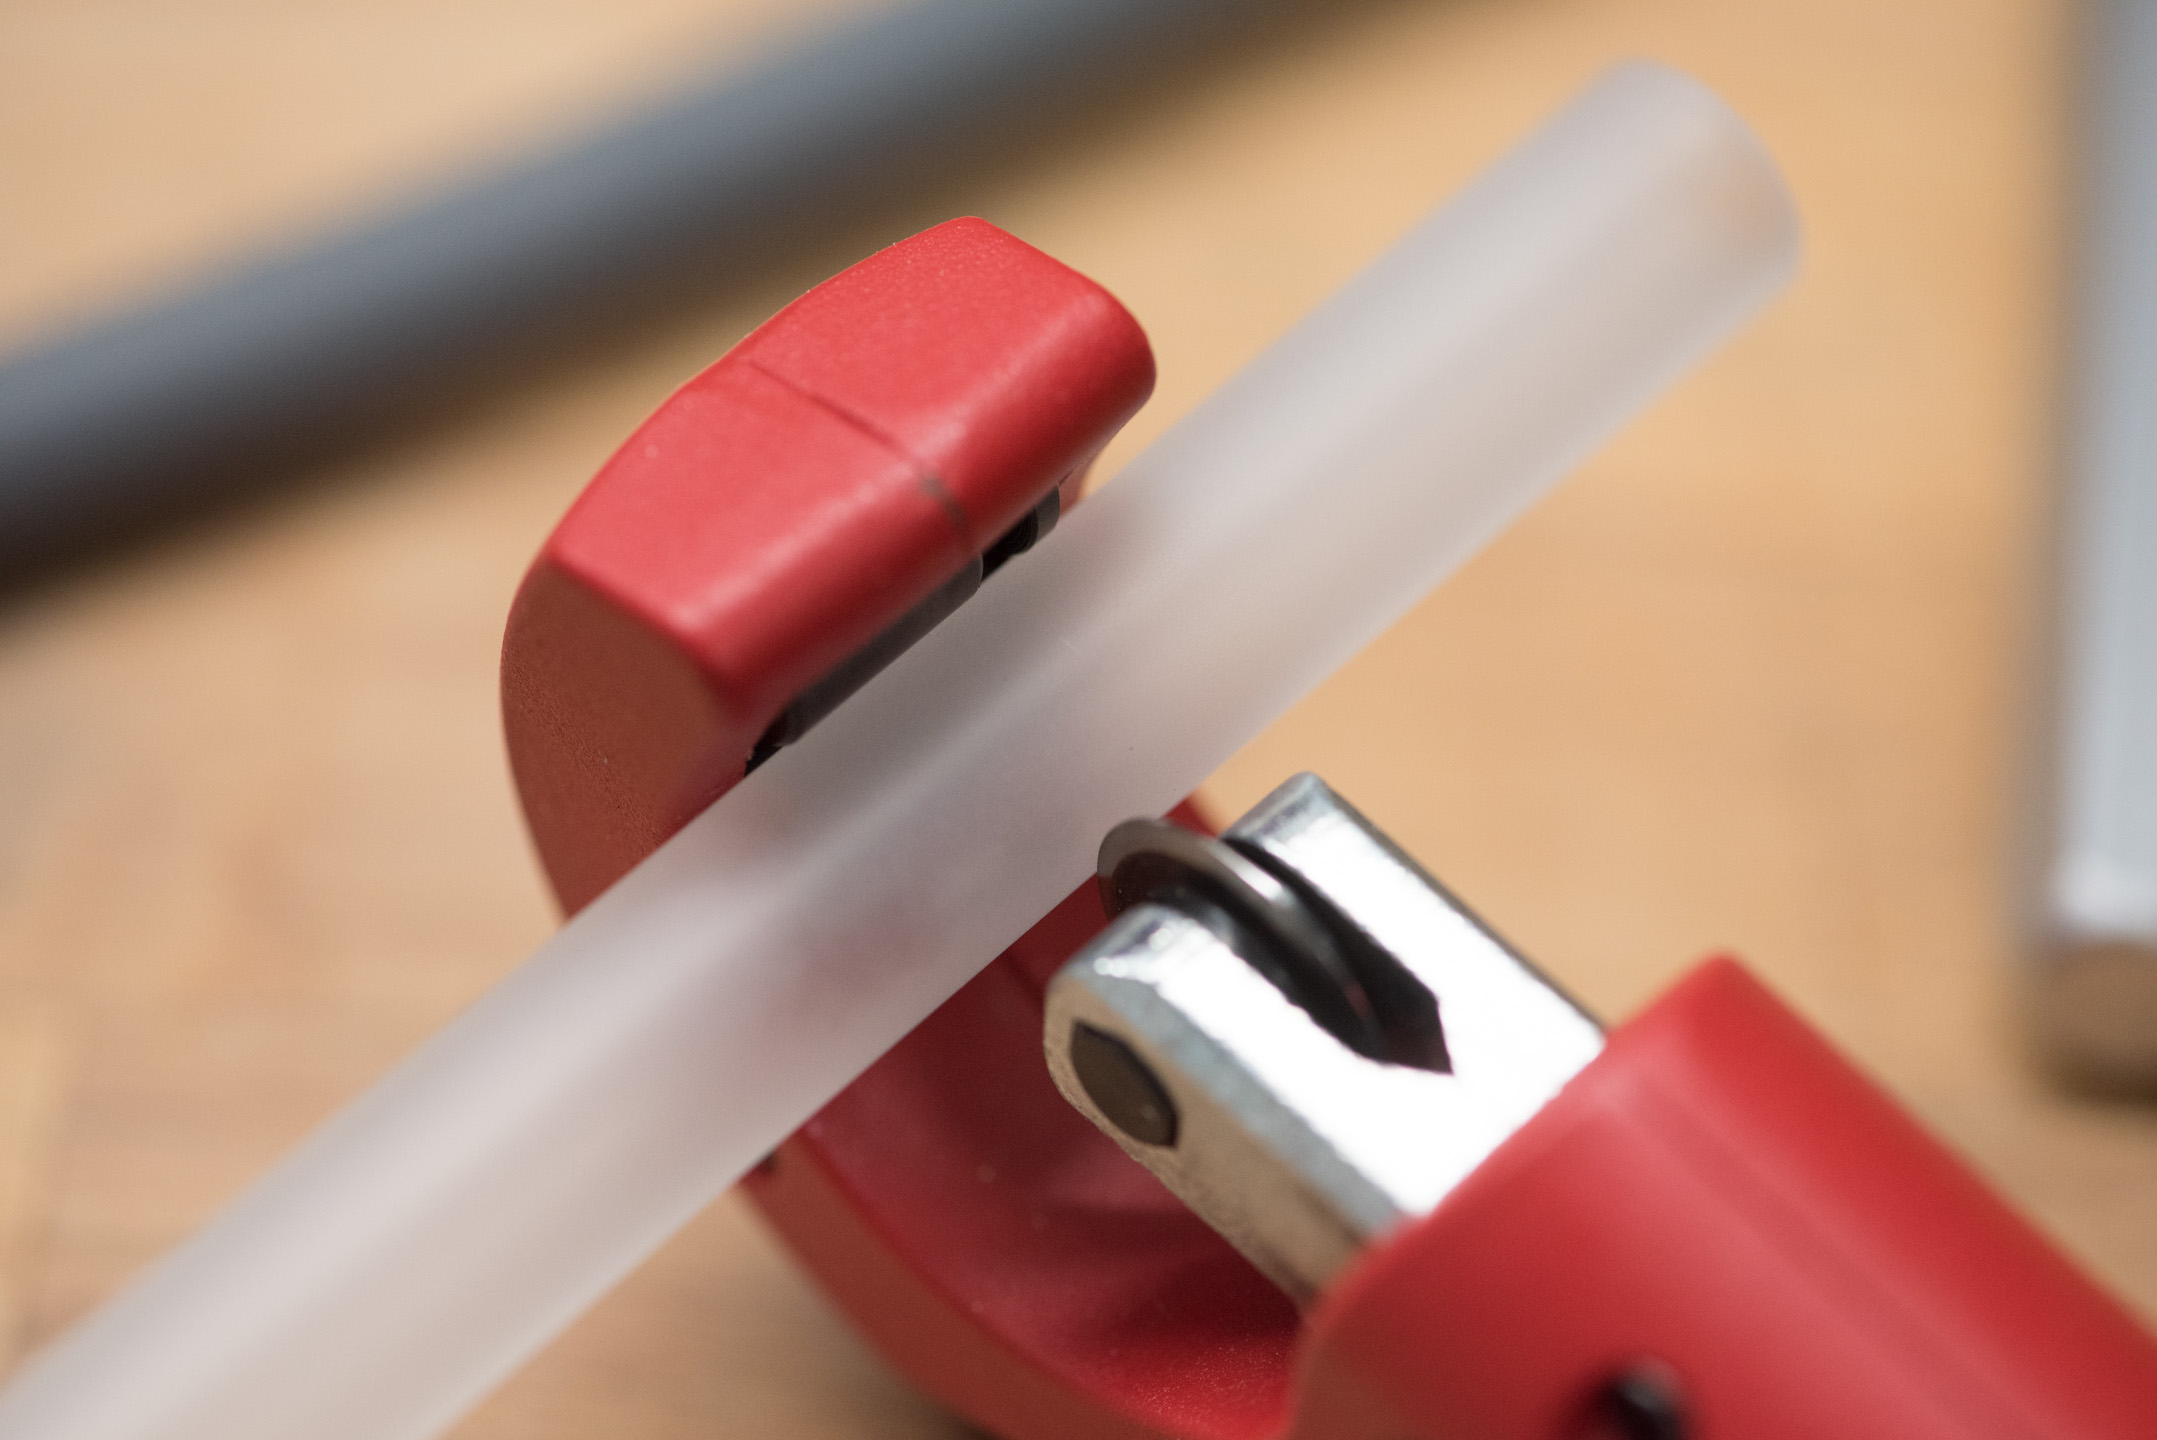
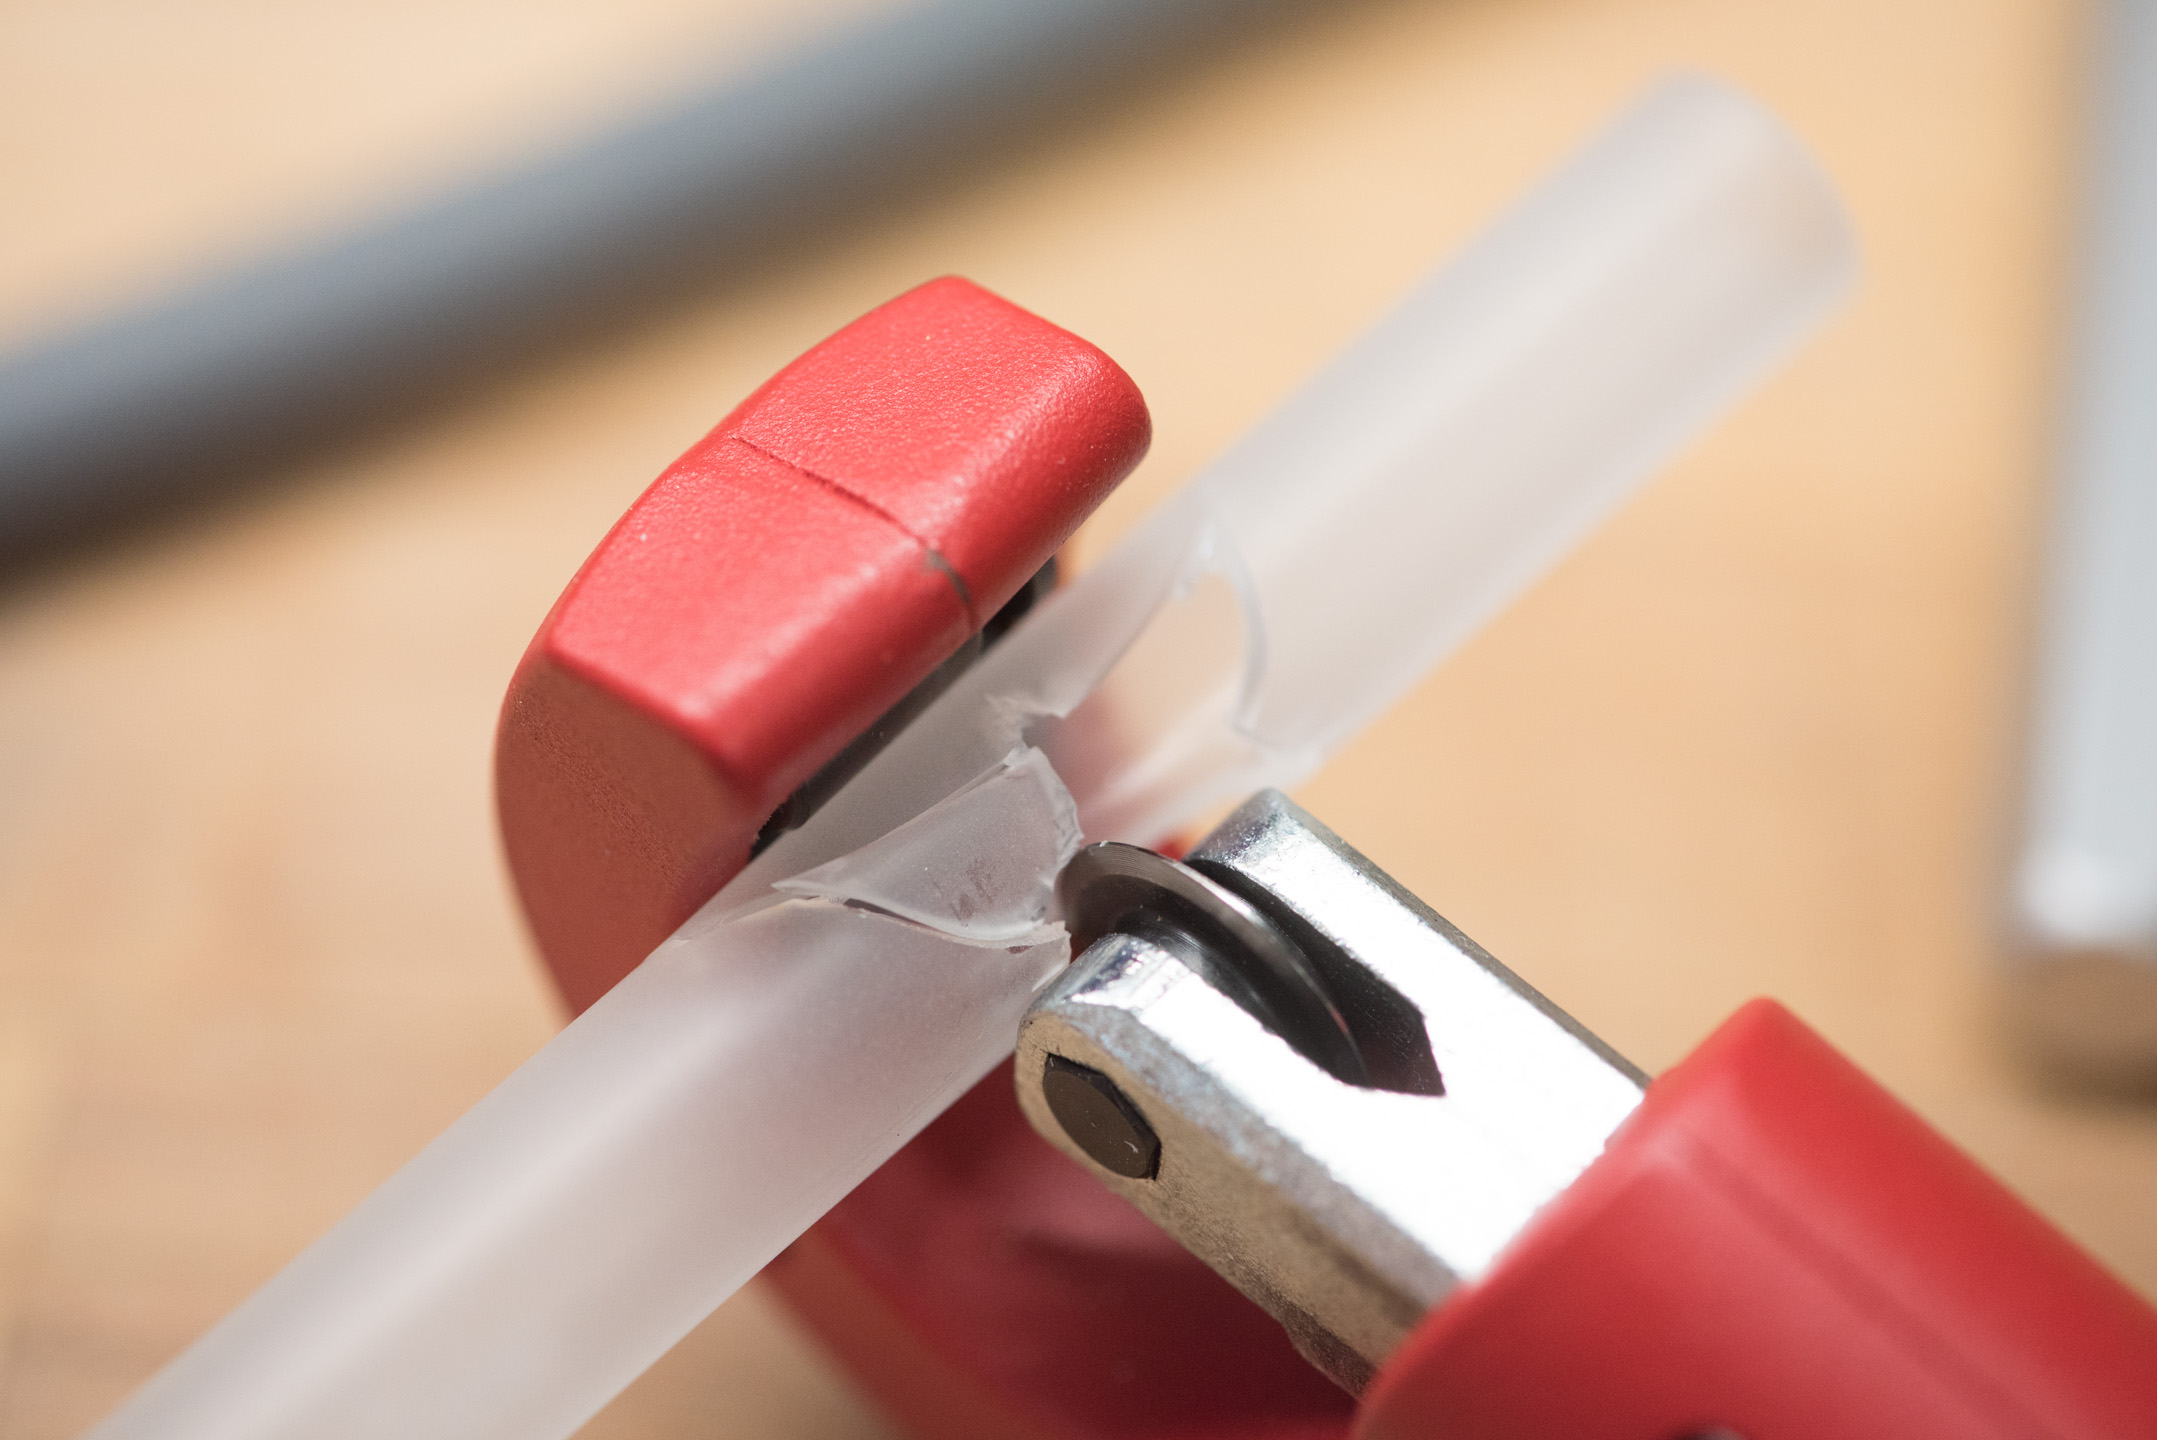
Don't use cutters designed for metal and PETG
Acrylic can and will shatter if you apply enough force to it, sometimes with explosive results. I think these two photos should show quite succinctly why you shouldn't use this sort of cutter with acrylic tubing.
What about other hardline types?
Fear not! We will be covering the likes of brass, copper, glass, and even carbon fibre in future instalments!
RELATED ARTICLES


MSI MPG Velox 100R Chassis Review
October 14 2021 | 15:04

Want to comment? Please log in.