Water-Cooling with Hardline Tubing Guide: Borosilicate Glass
February 14, 2018 | 13:30
Companies: #alphacool #bit-tech
Using a Tubing Cutter
The first method we'll be having a look at is using the 'score and snap' method and a glass tubing cutter. There are a few versions of this tool; the one I'm using in this tutorial is the super basic kind that you can find for a couple of quid online.
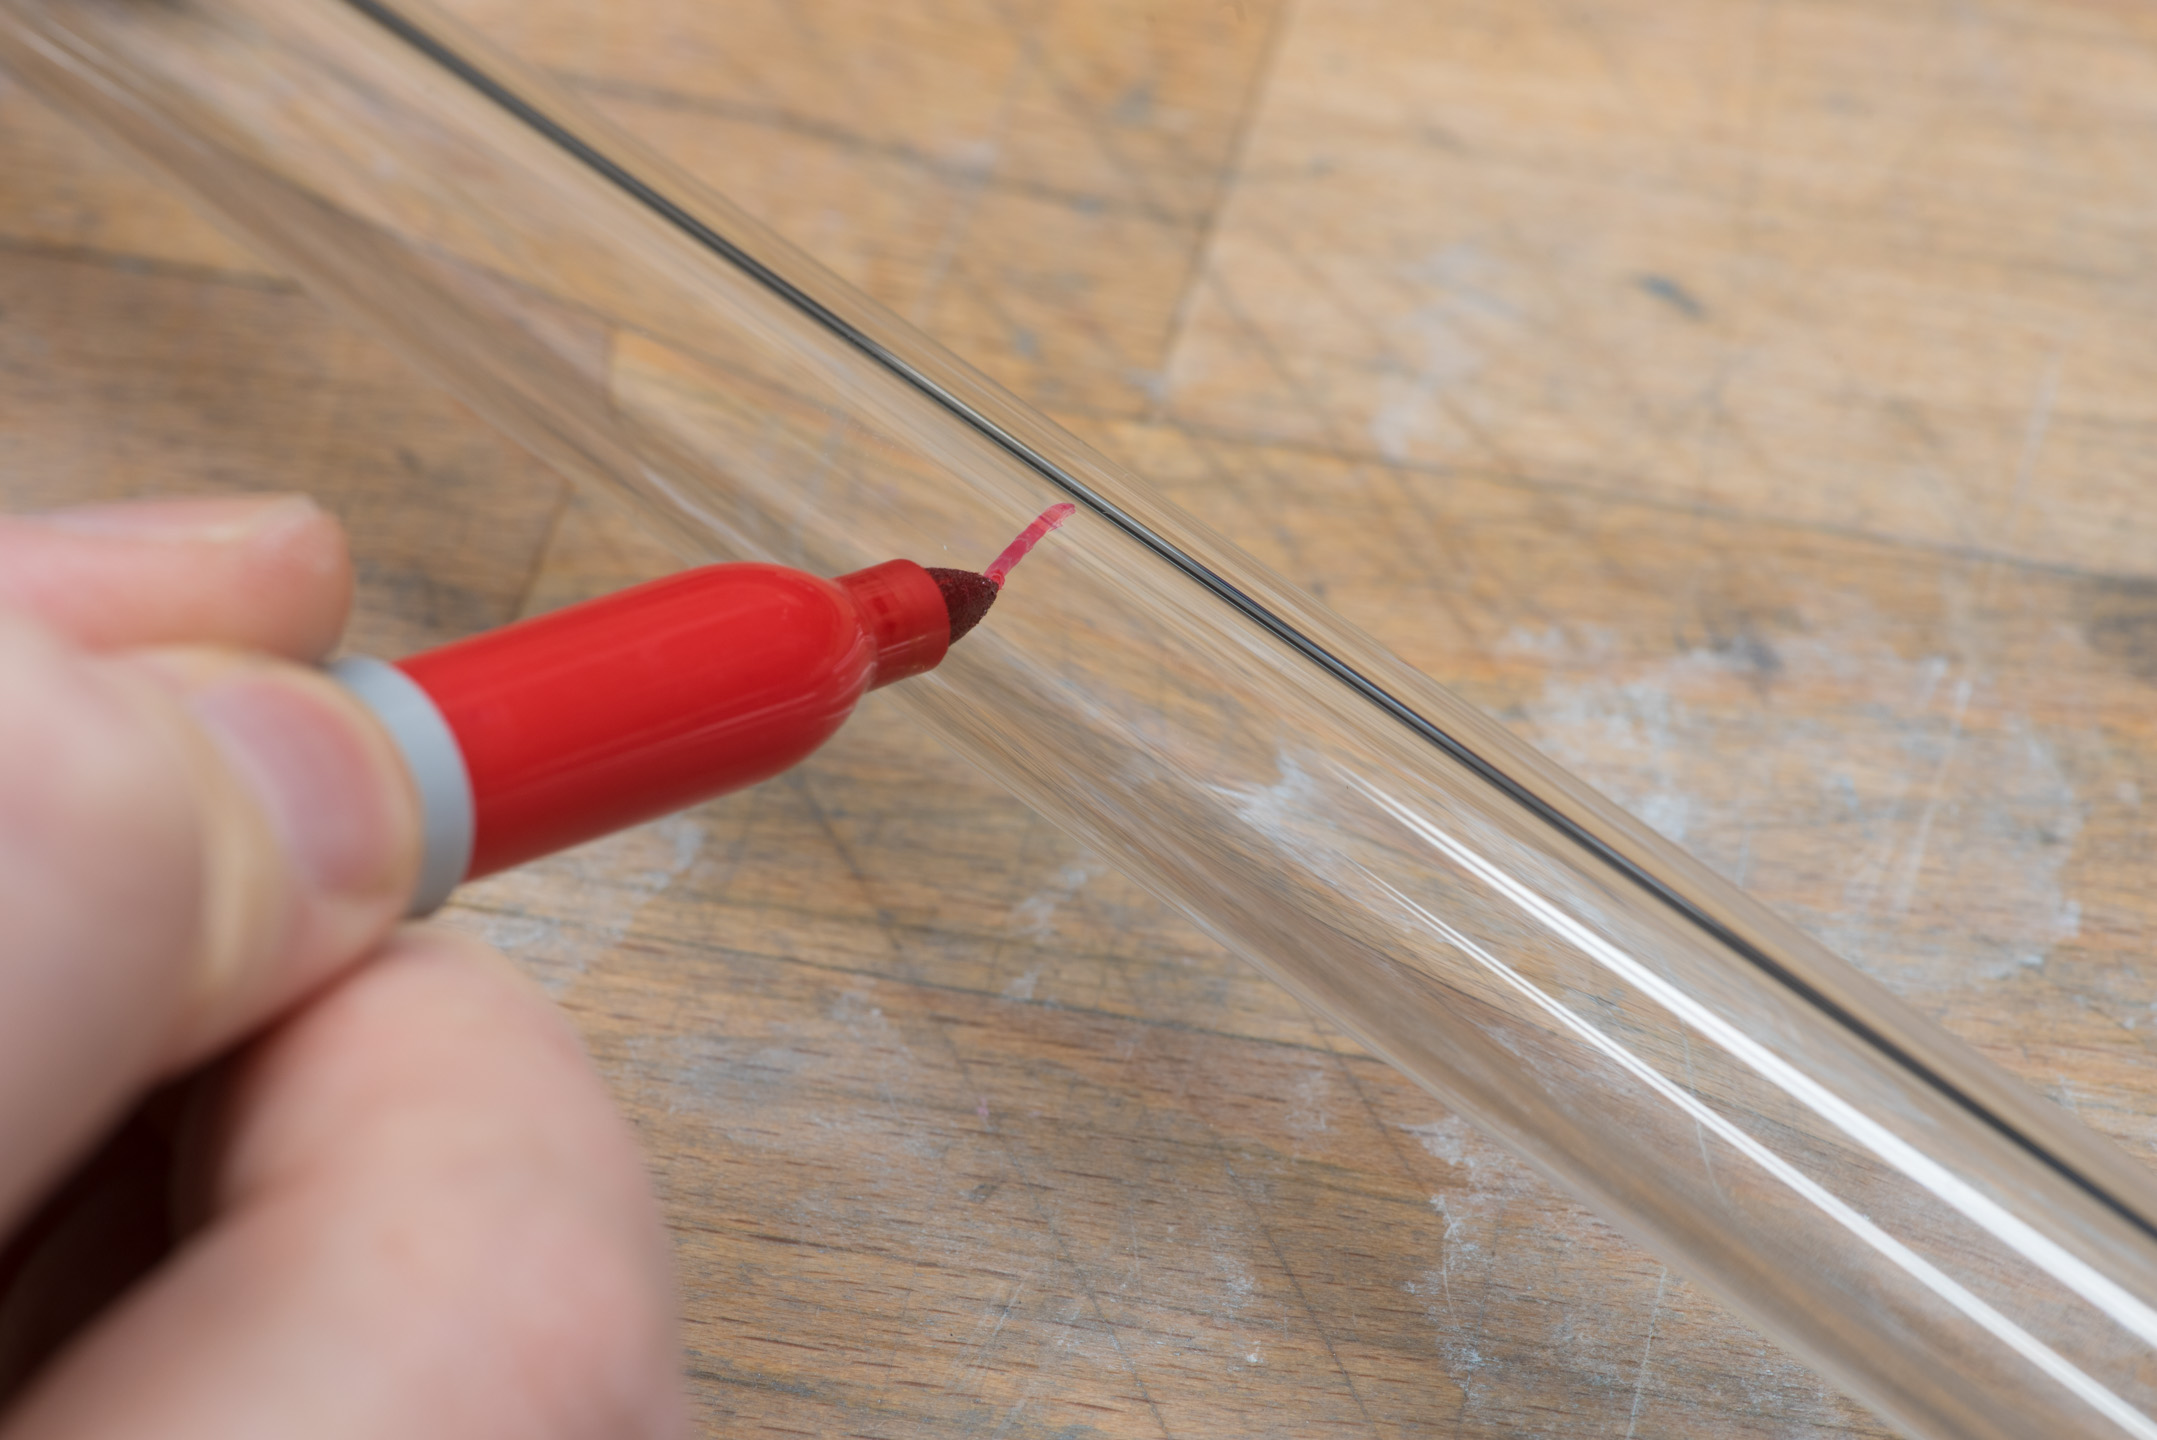
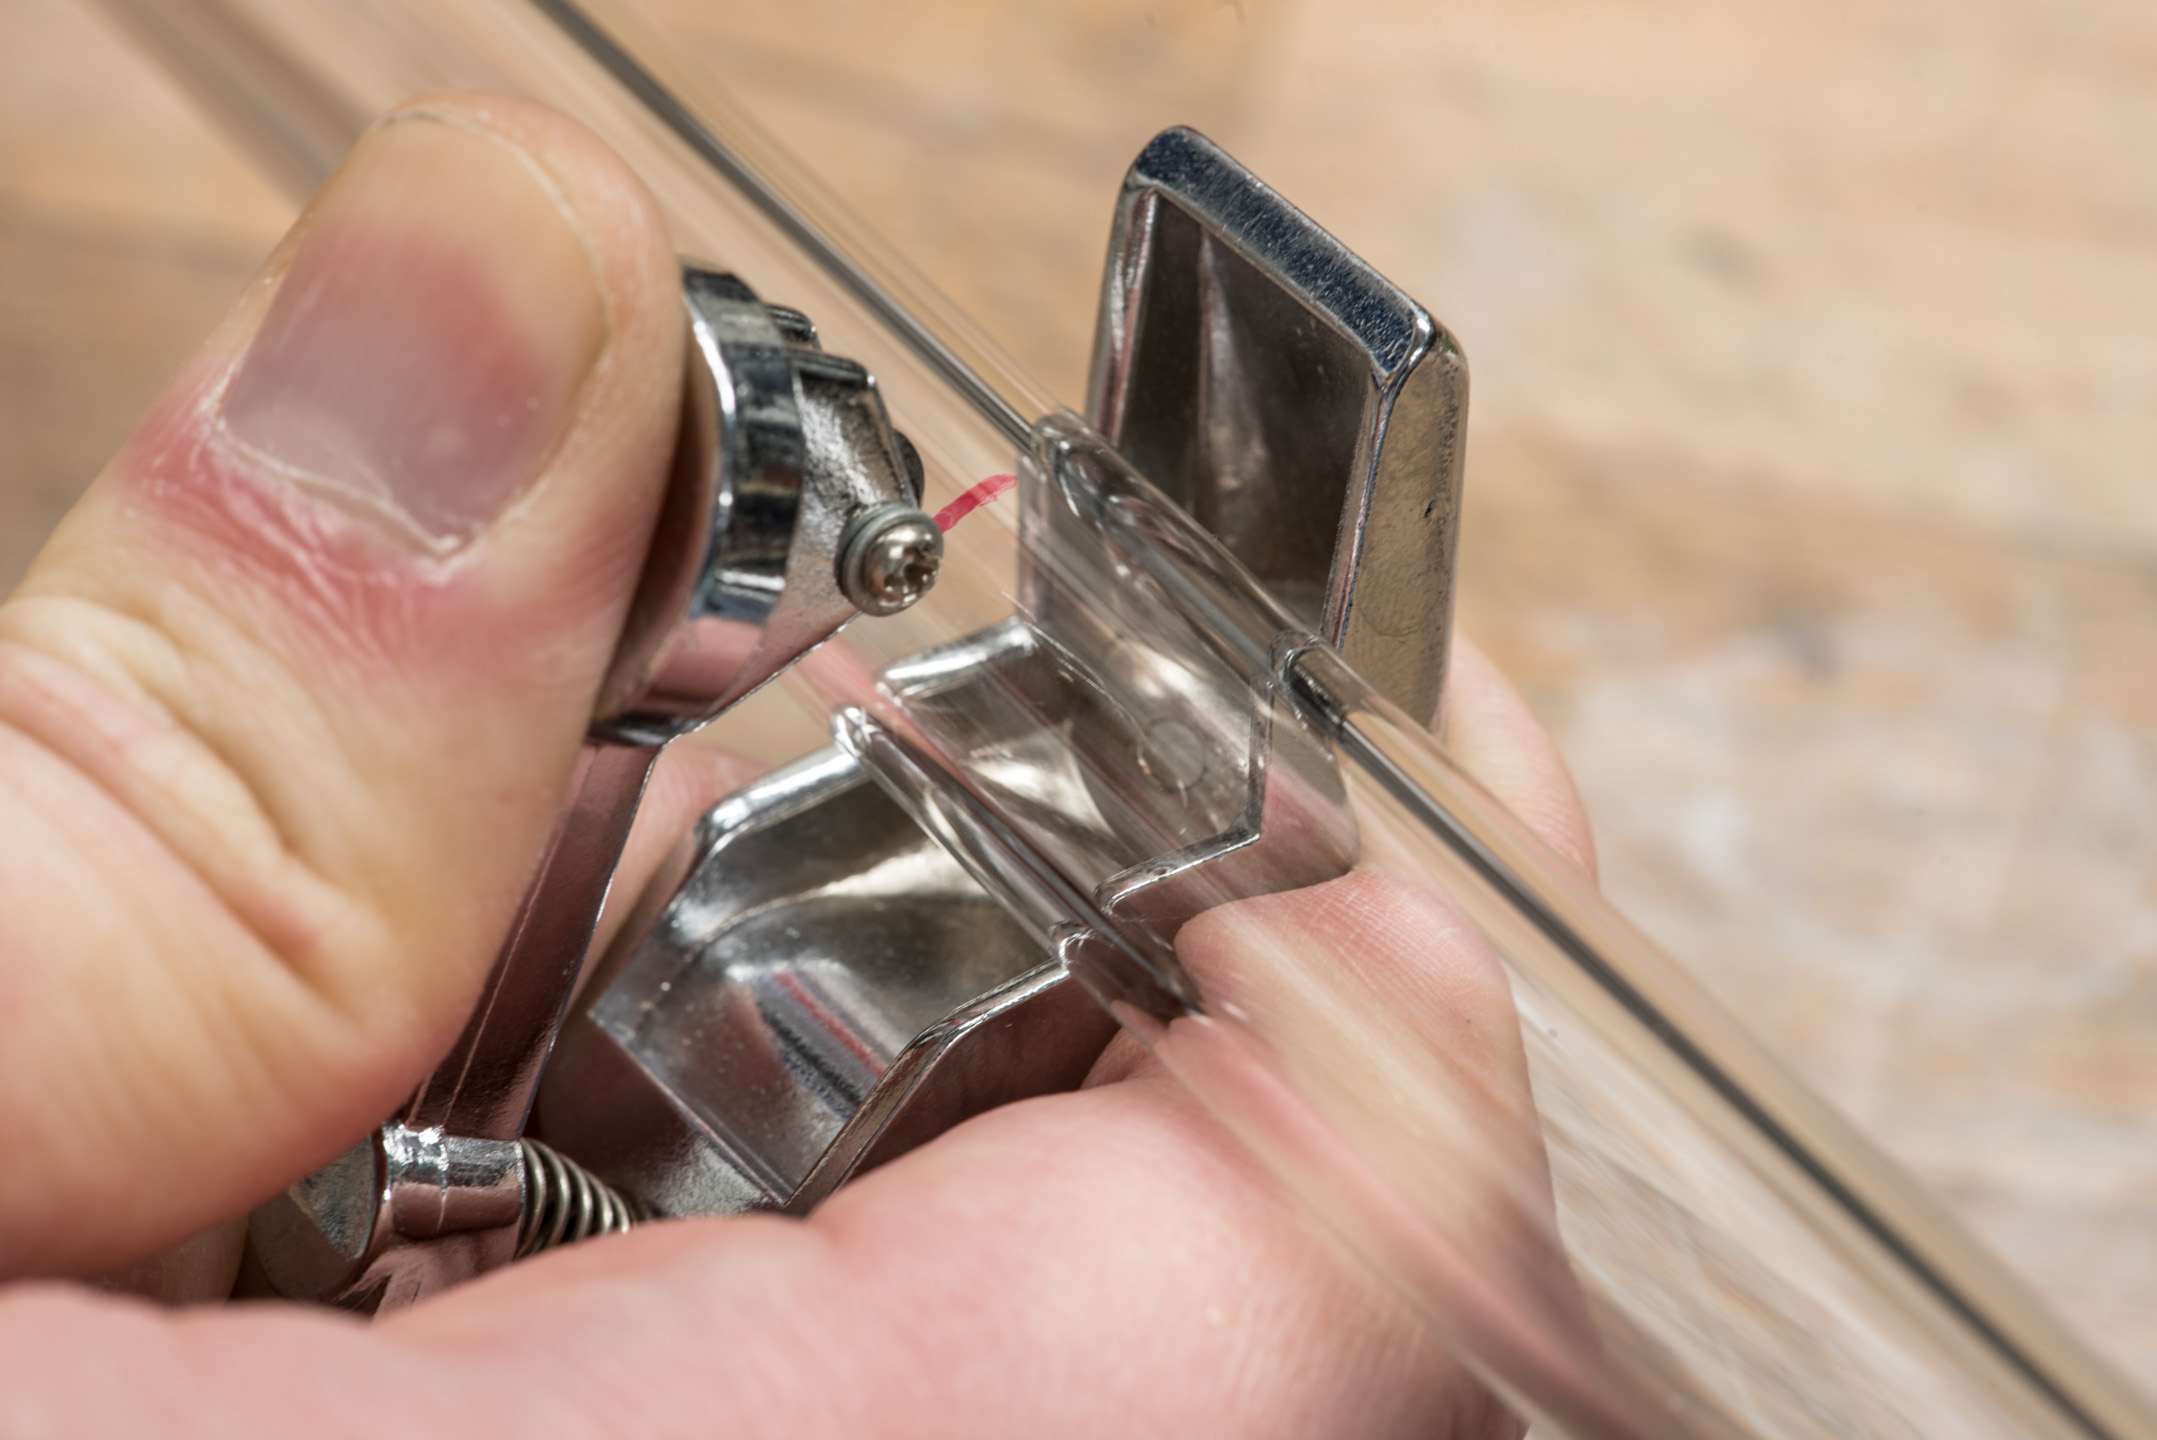
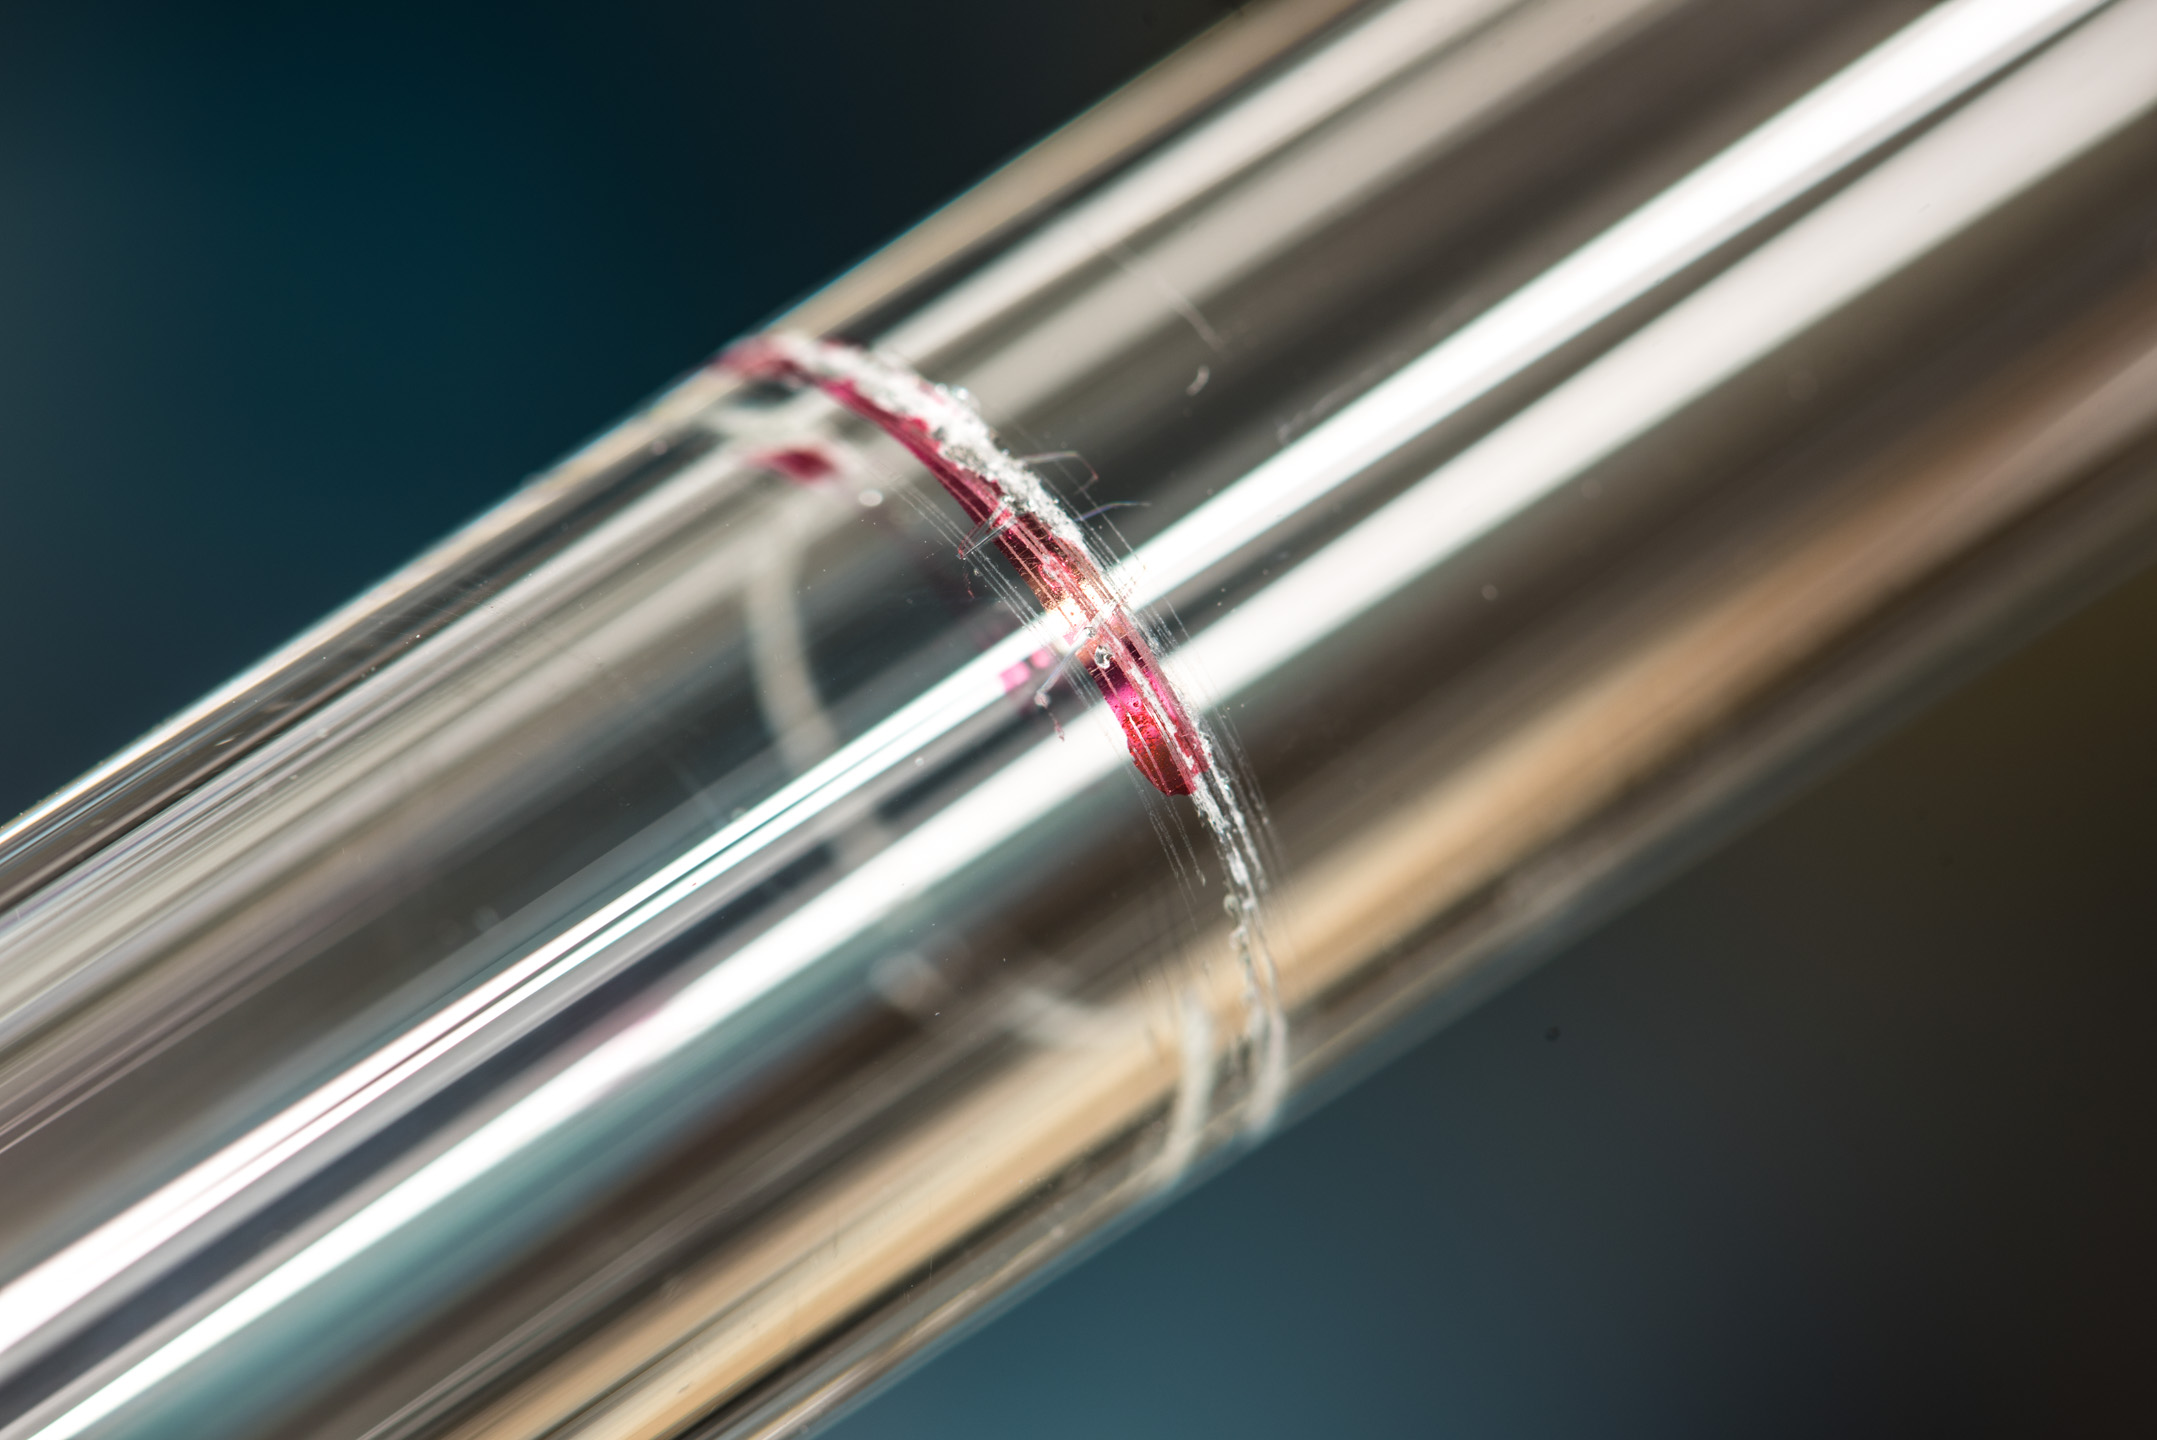
The premise is simple but effective: The cutter scores the outside face of the tube, then you exert force on the tube which causes it to crack along this score mark. The first step is to mark your cutting line on the tube; I just use a Sharpie for this. Any marks made will just wash off the tube later, so it's not a big deal. Next, you place the tube into the cutter and line up with your mark. Using moderate pressure, push the cutting wheel onto the tube and carefully rotate it. This part may require a bit of experimenting to find out how much pressure works for you, as different tubes and tools will work with varying levels of success. If done right, you should hear a nasty crunching sound coming from the tube.
Don't press very, very hard, however, as the tube can spontaneously shatter once a mark has been made and a flaw introduced, from which a crack can propagate. It's worth noting that you can only use this method for longer tubing segments, as scoring too close to the end of the tube can cause the whole piece to crack instead.
With the scoring done, it's time to make a break for it (hah), and this is where we test how thorough that score was. All you need to do is place your thumbs on either side of the line, then apply sharp pressure. It should hopefully snap pretty cleanly along the line, although occasionally the edges may chip too deeply. It's a good idea definitely to have a healthy amount of spare tubing in case of undesirable breaks.
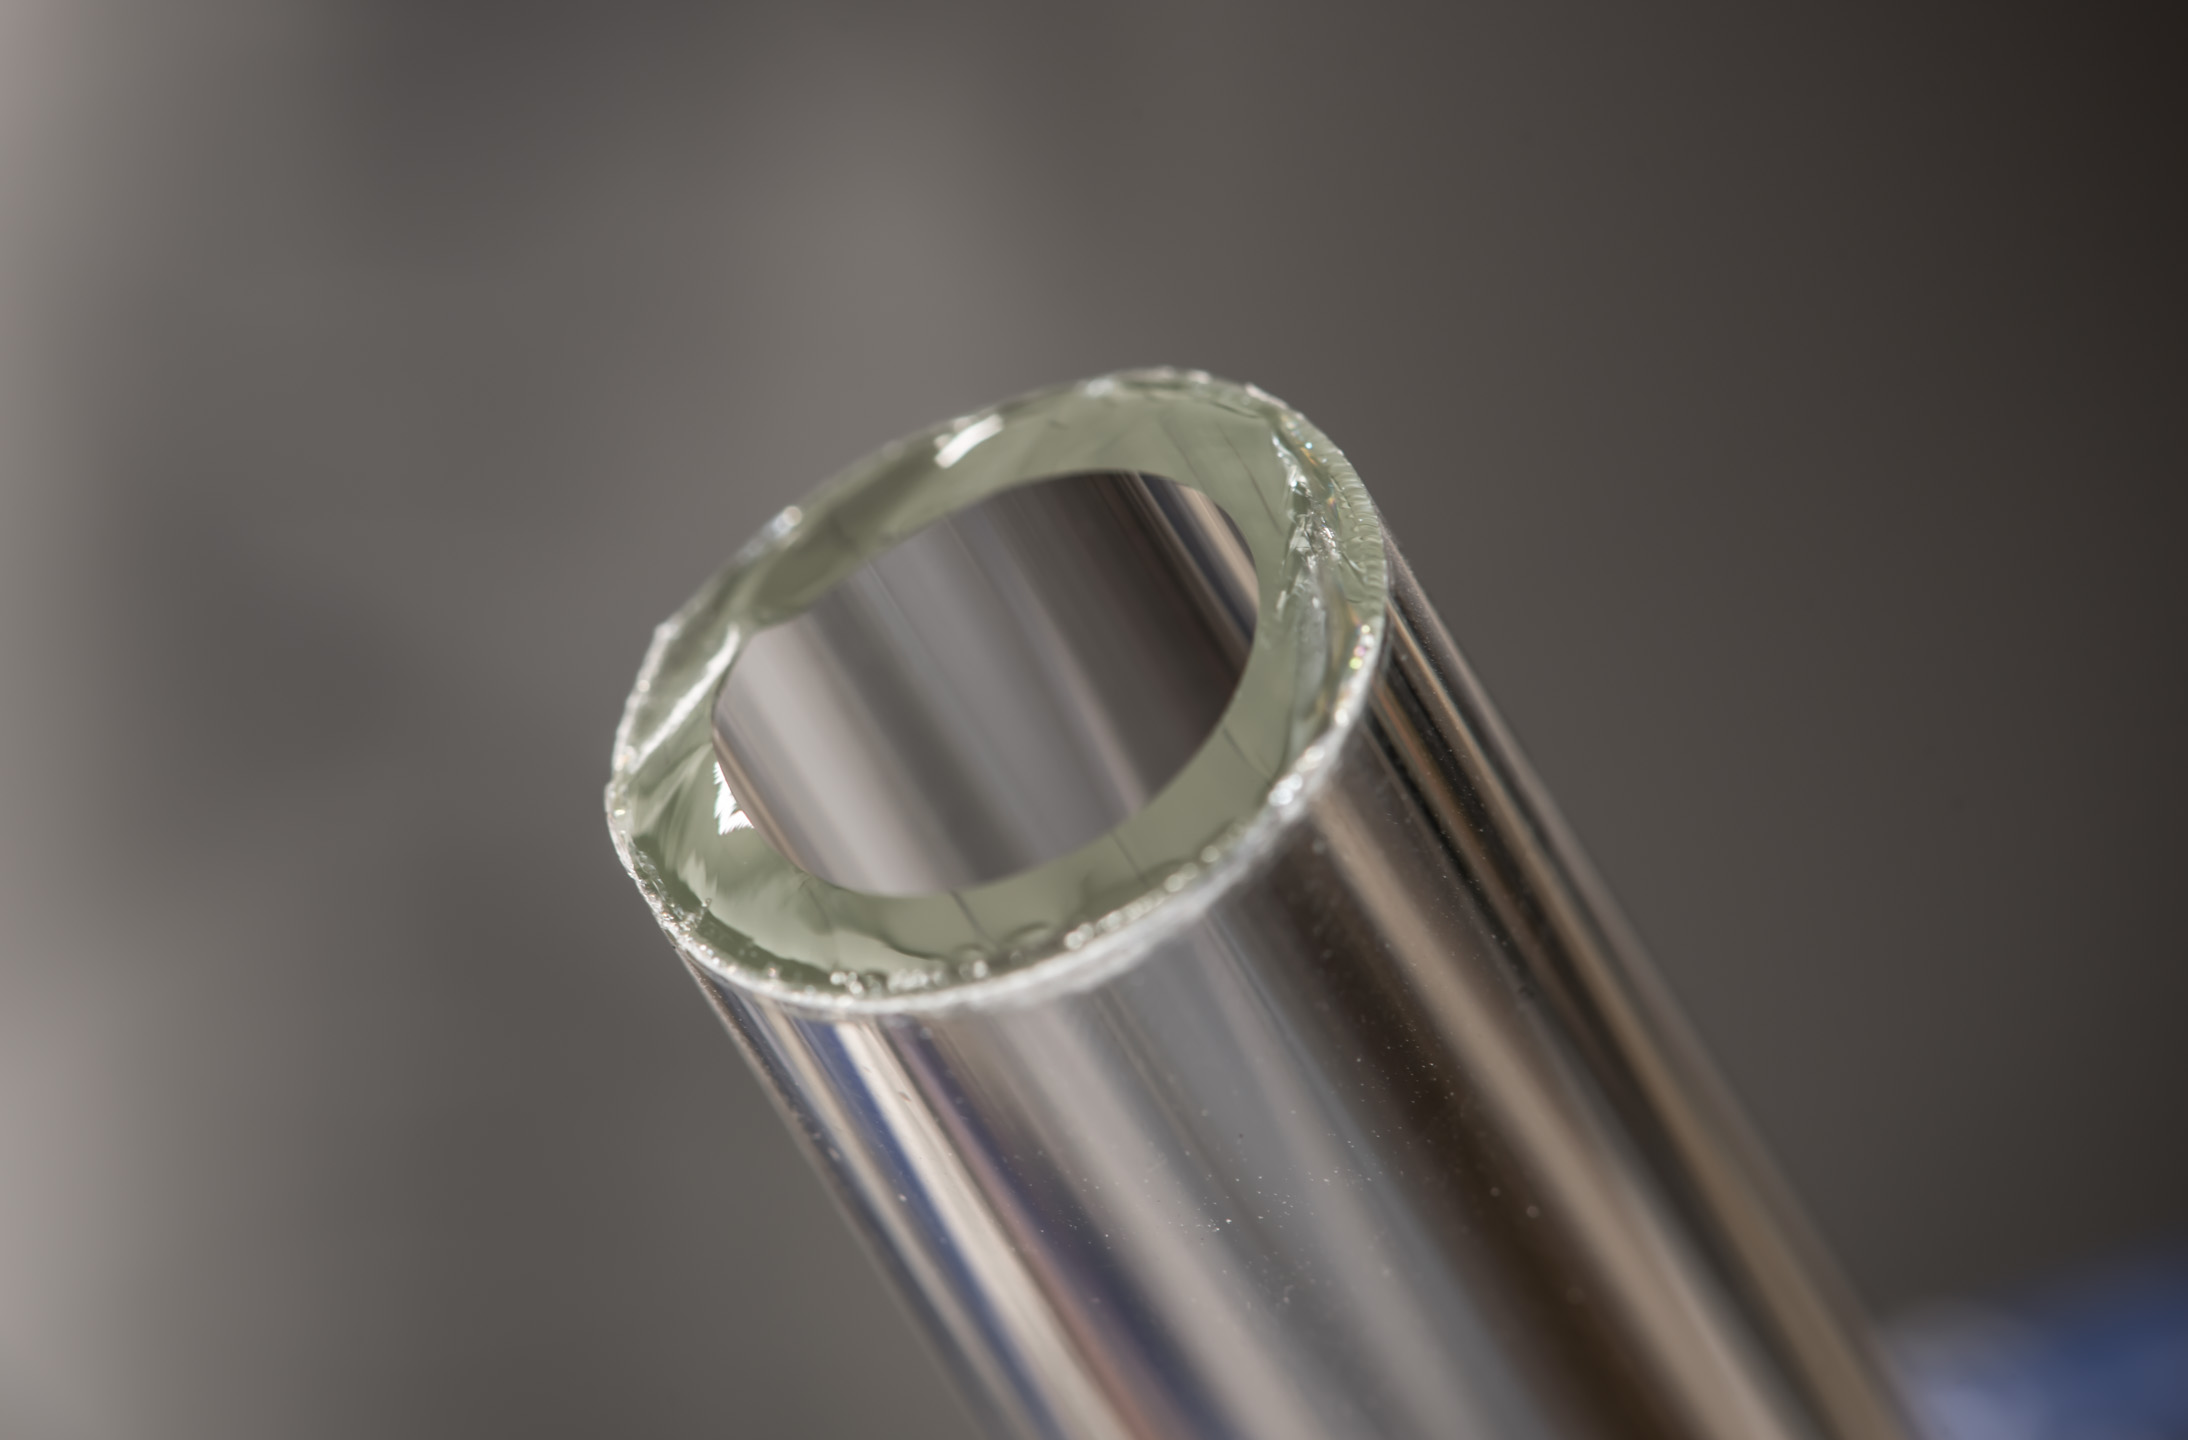
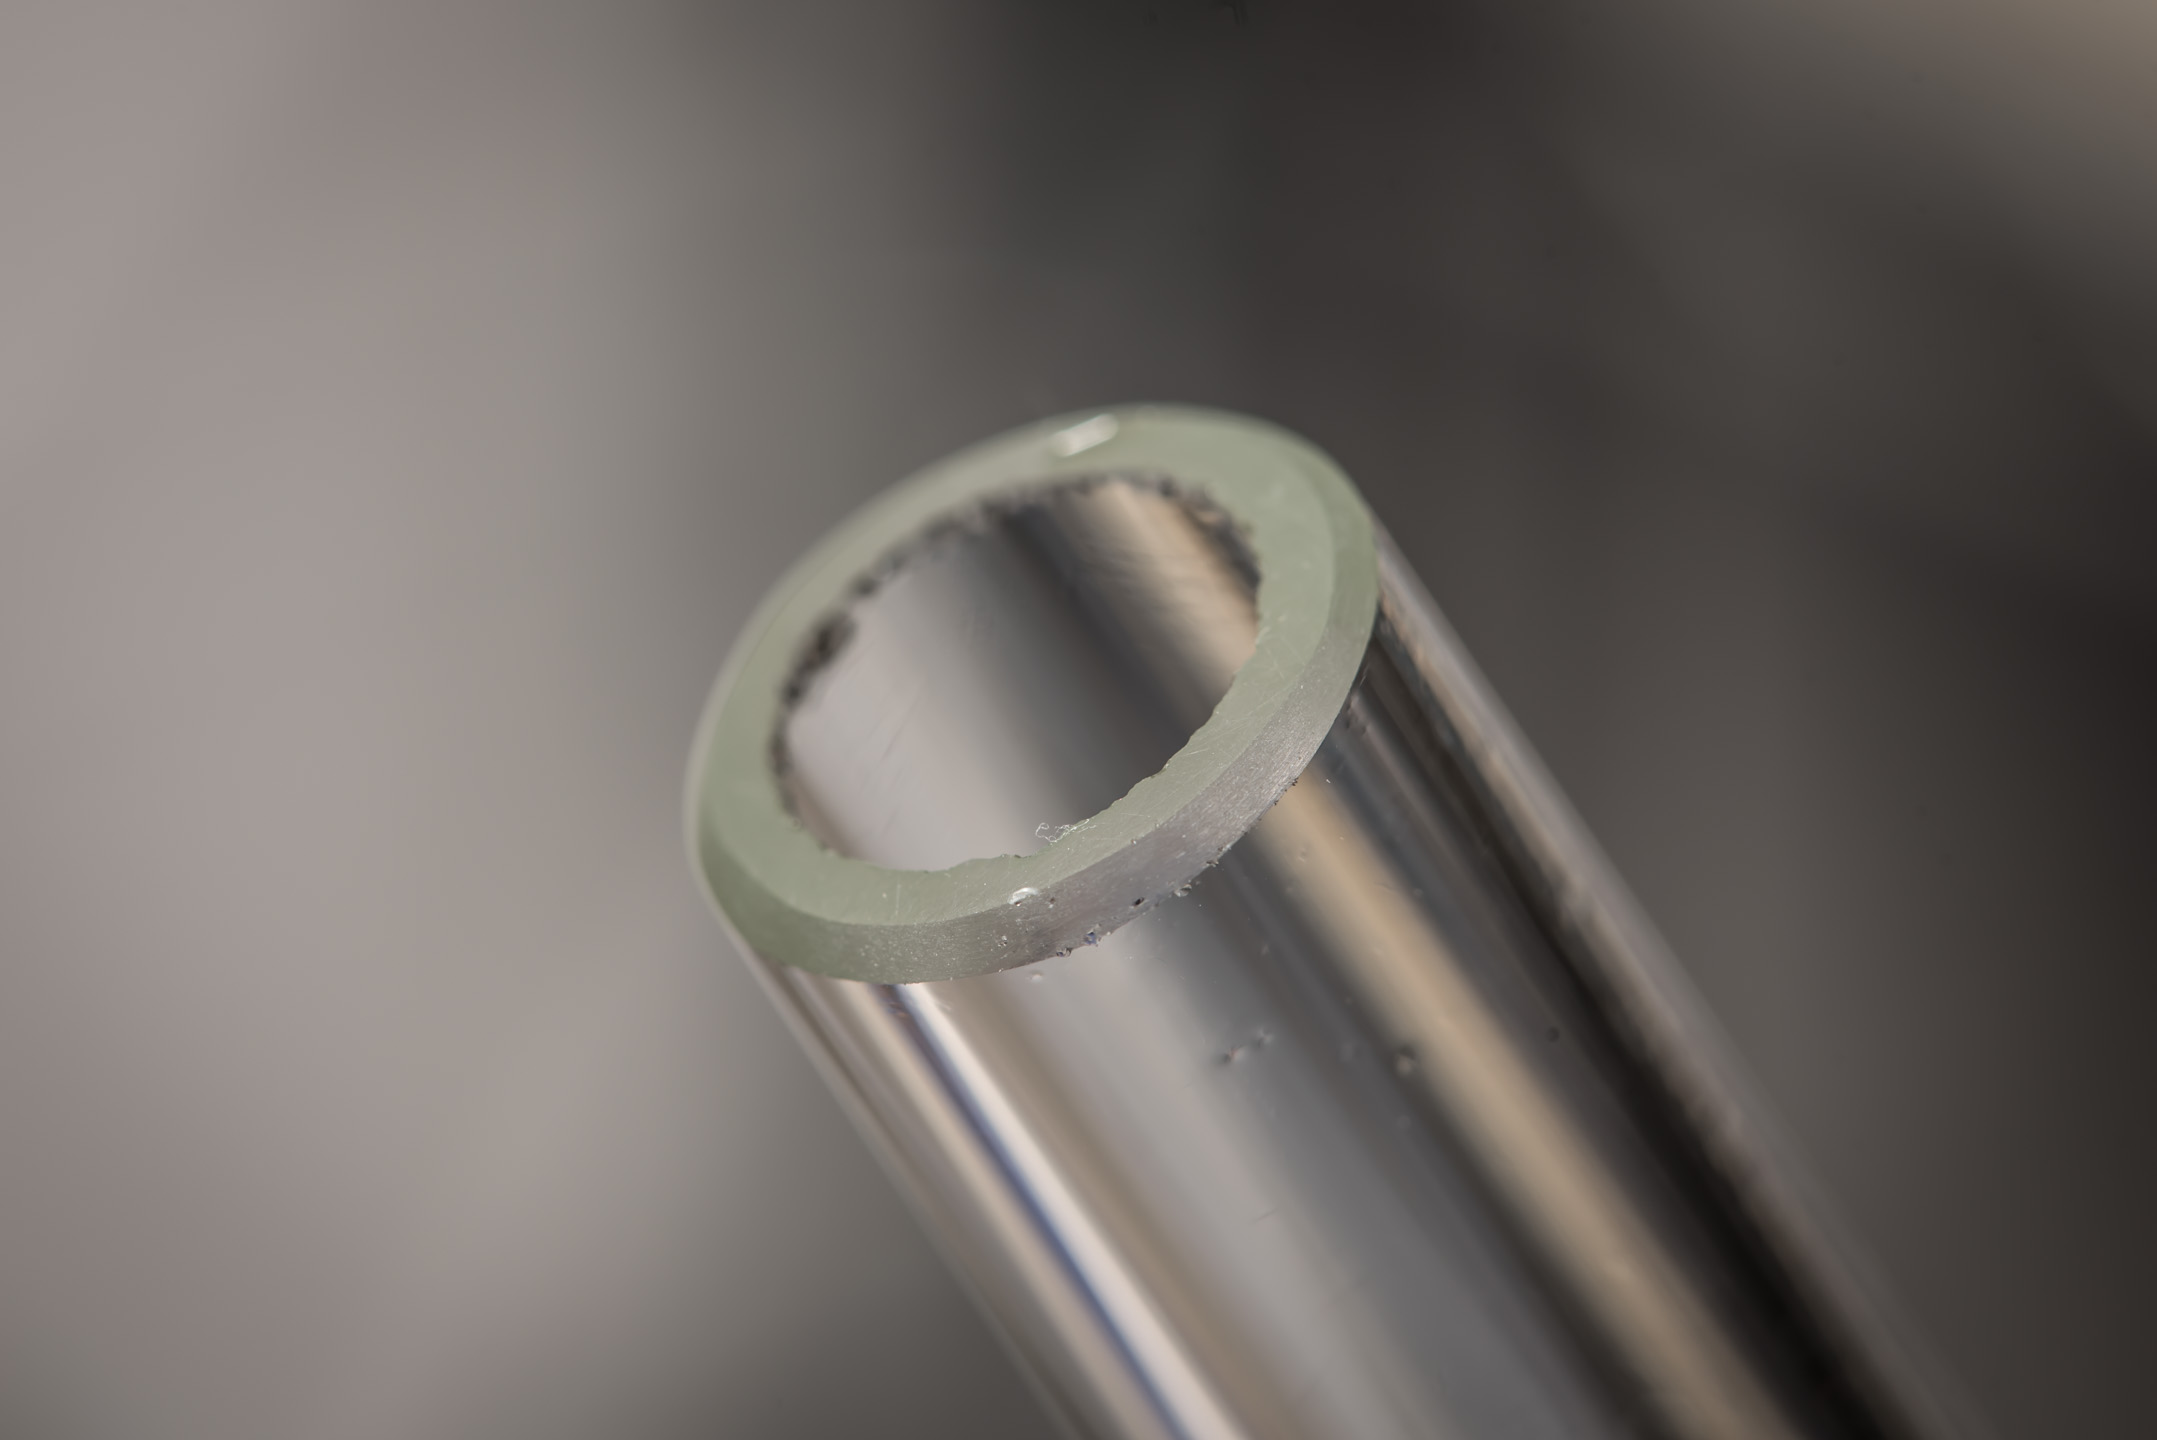
Straight after snapping, the edge will be very sharp and jagged. Naturally, this won't do at all for the fittings, so we need to sand this down. Thankfully, it's a straightforward job: Simply do a wet sand using some 180-grit sandpaper, then finish with 500-grit to smooth it further. It's possible to use this finish for the fittings, but we can go one step further by flame polishing the ends, which I'll show further down.
Using a Diamond Cutting Disc
The other common alternative to a score and snap cutter is a diamond disc. The advantage to this method is that you can trim tubes more easily, and you can also cut closer to the end of a tube. There are disadvantages, however, as the cutting discs create a lot of fine dust, aren't very accurate, and are a bit of a faff thanks to needing a power tool in addition to the cutter.
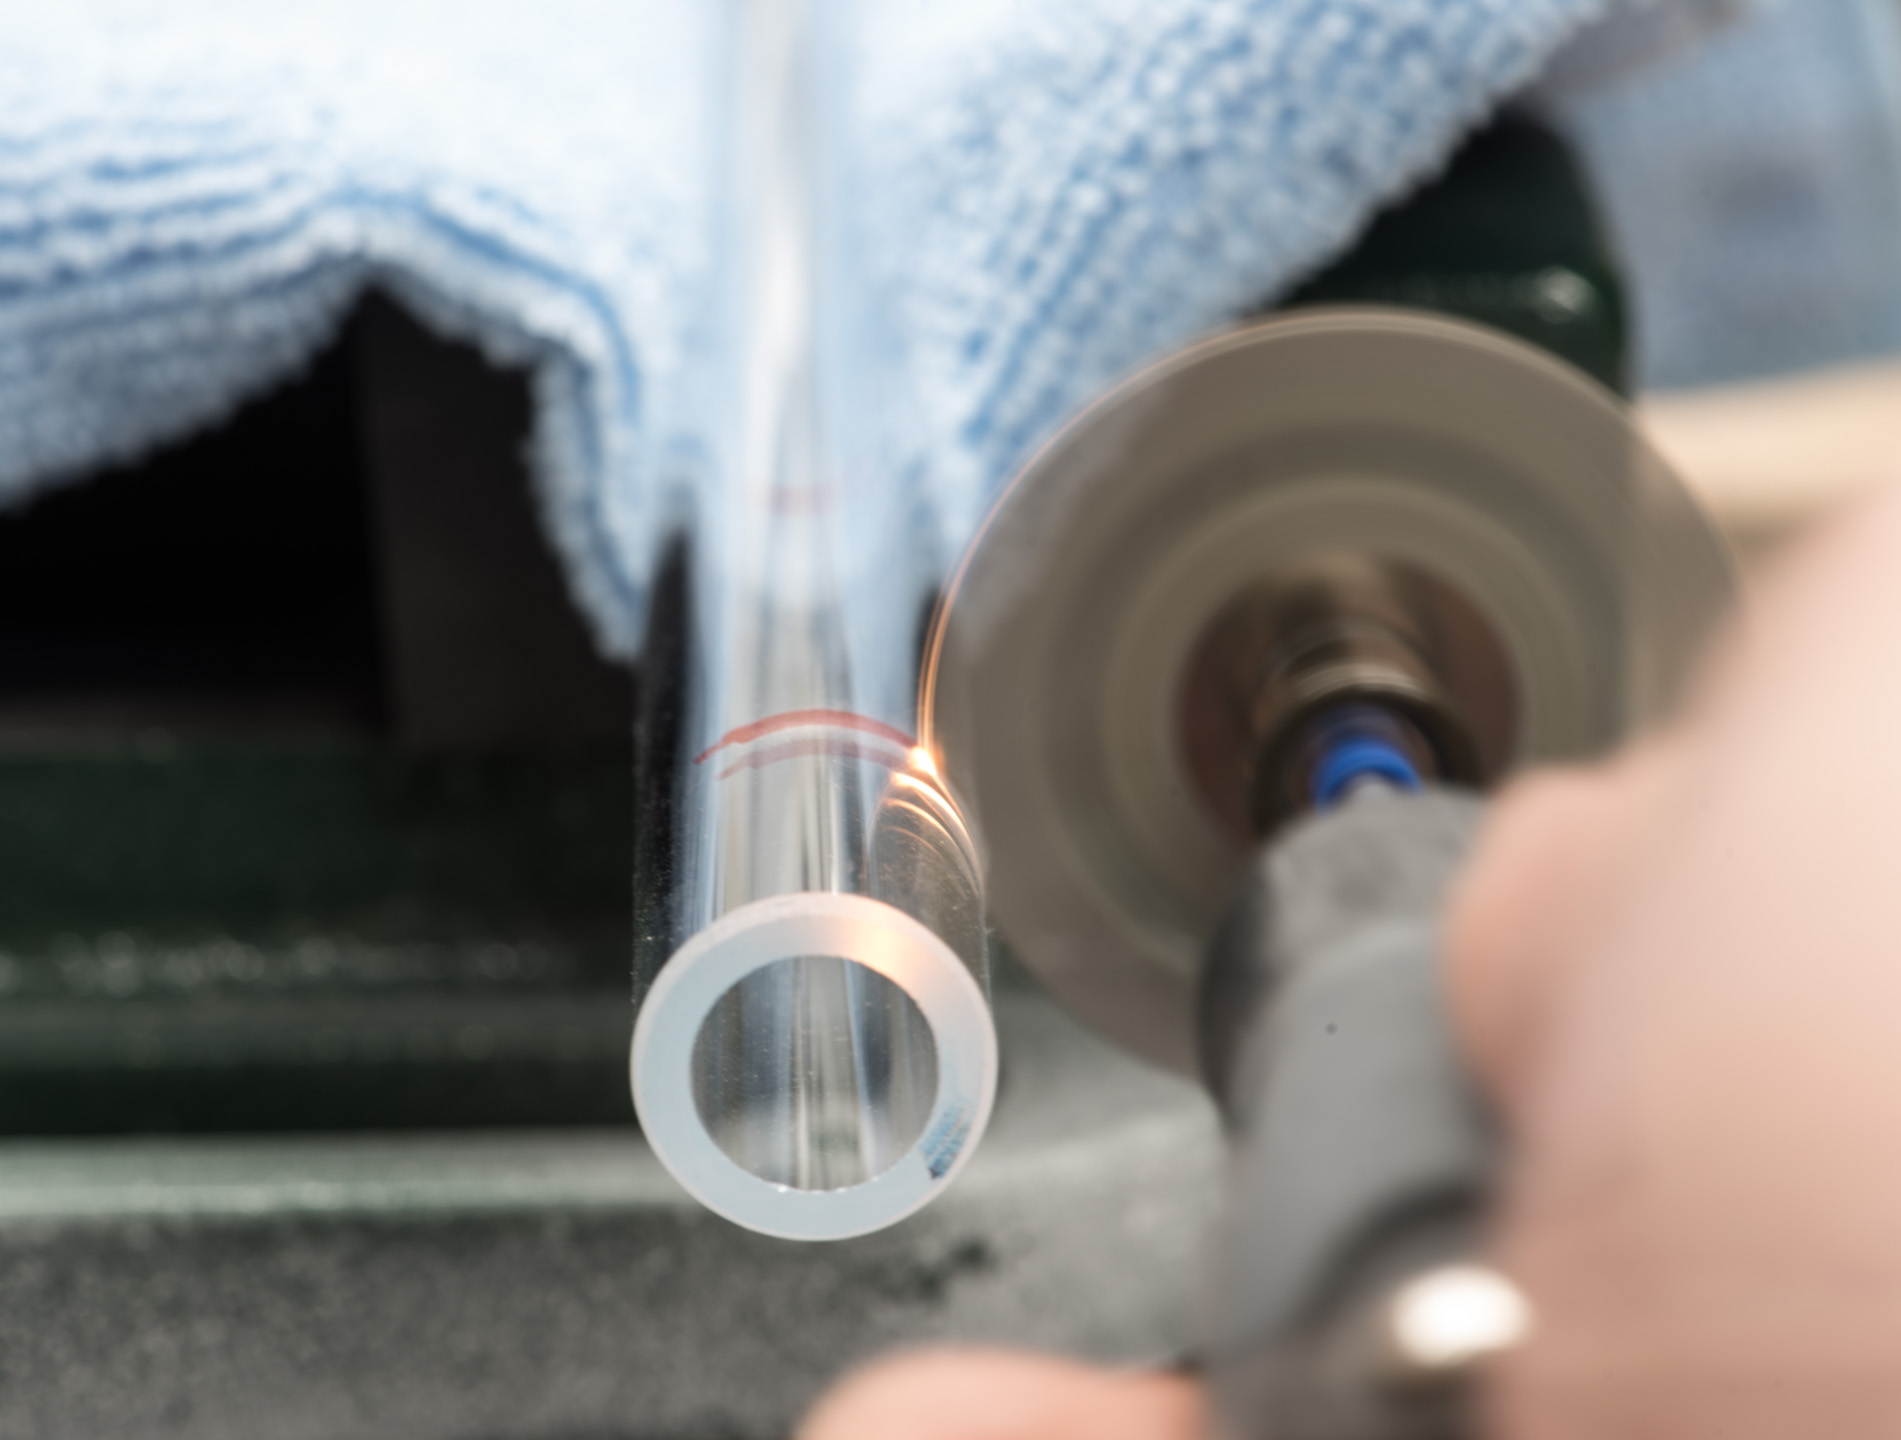
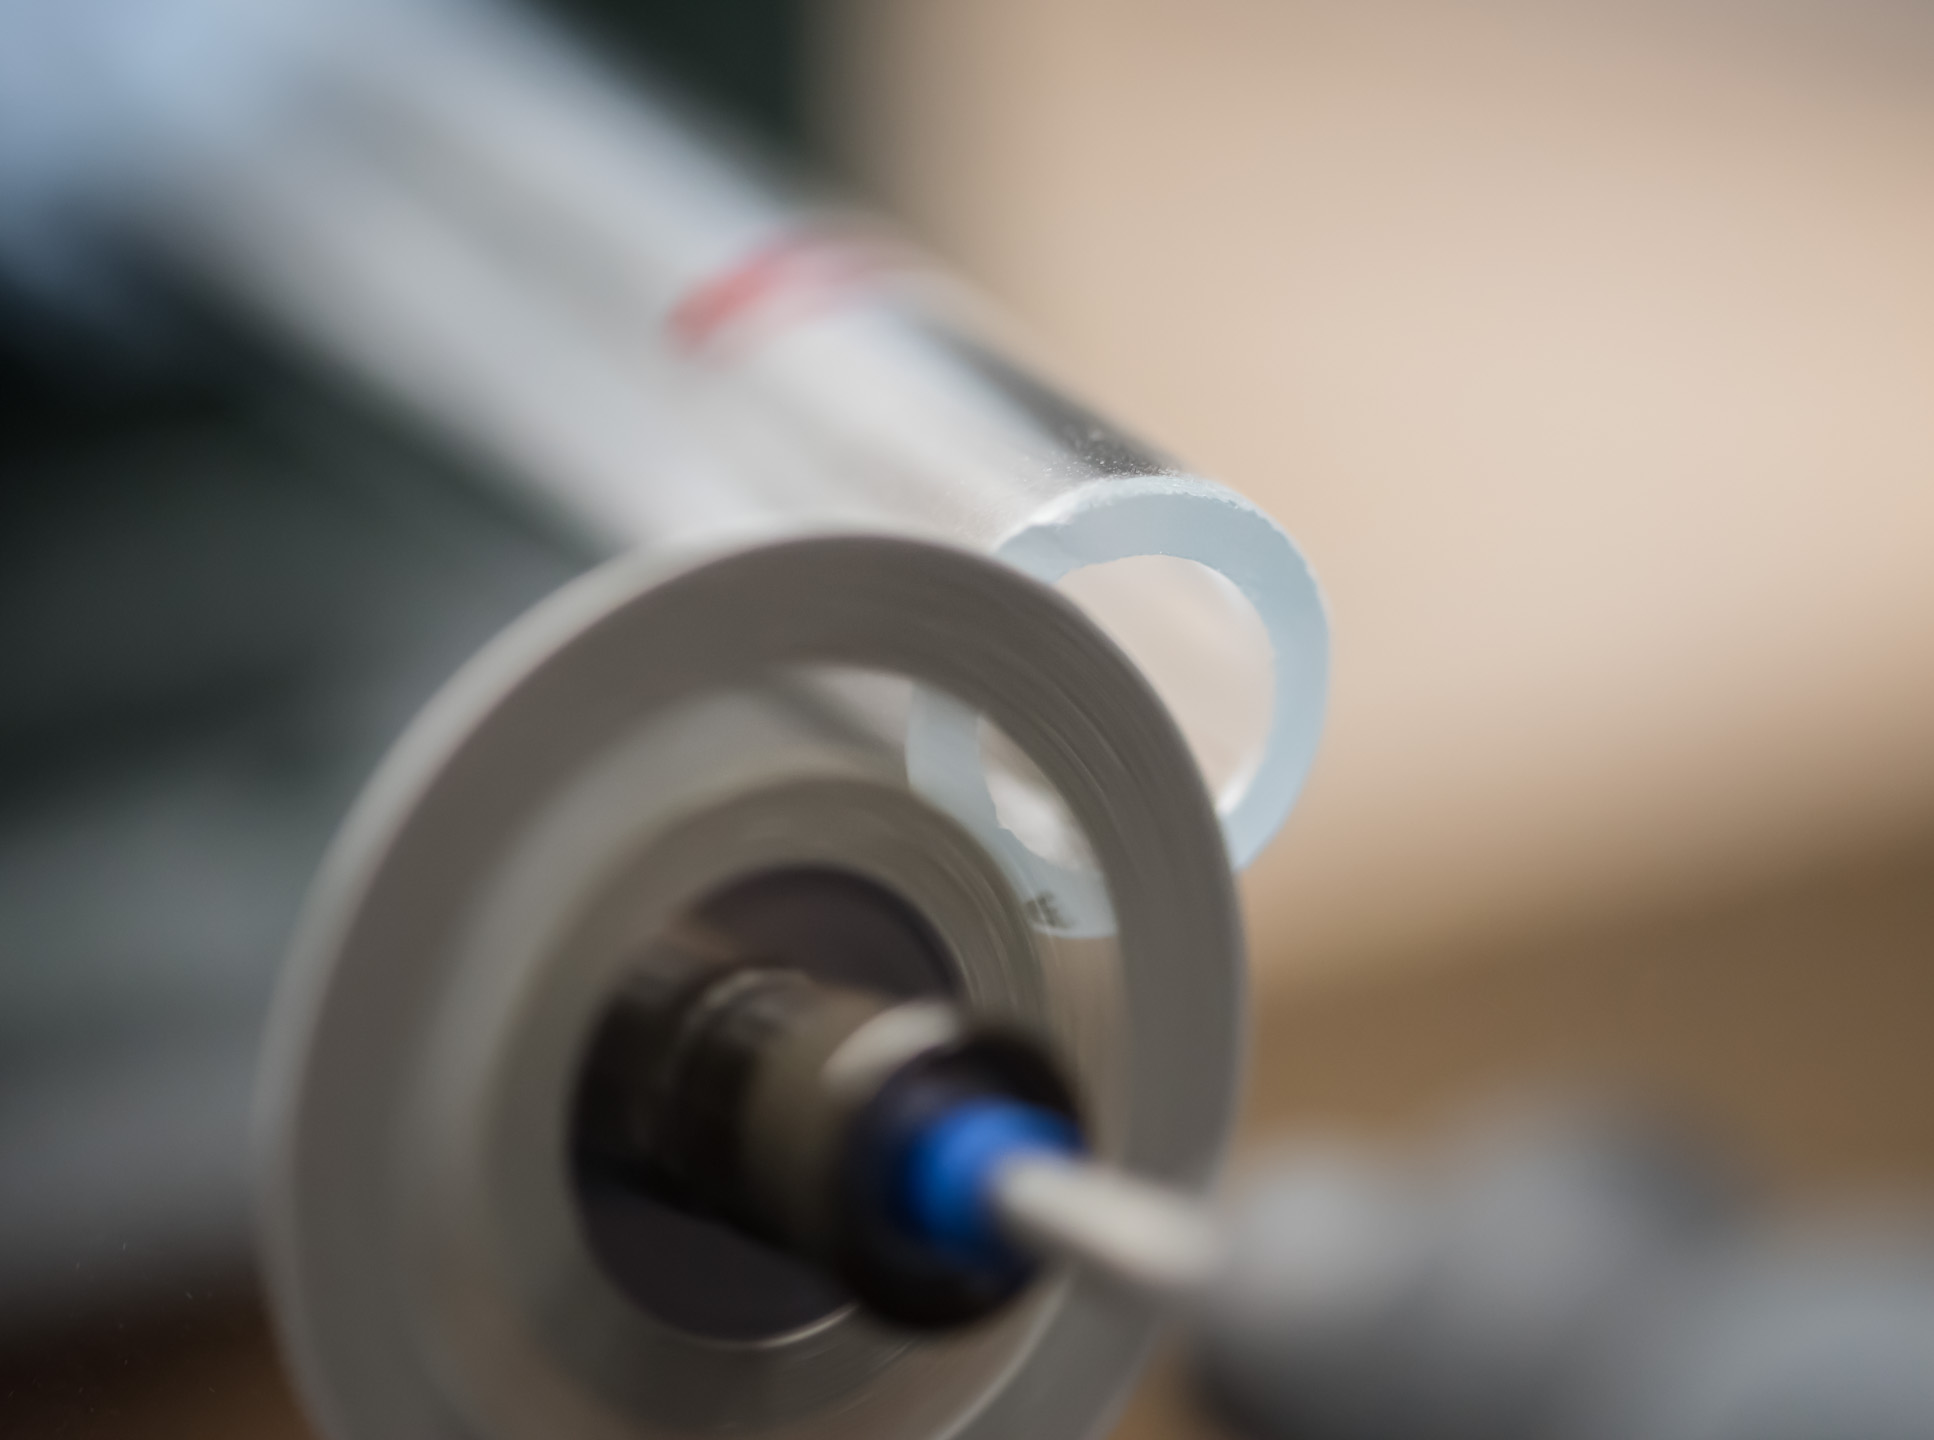
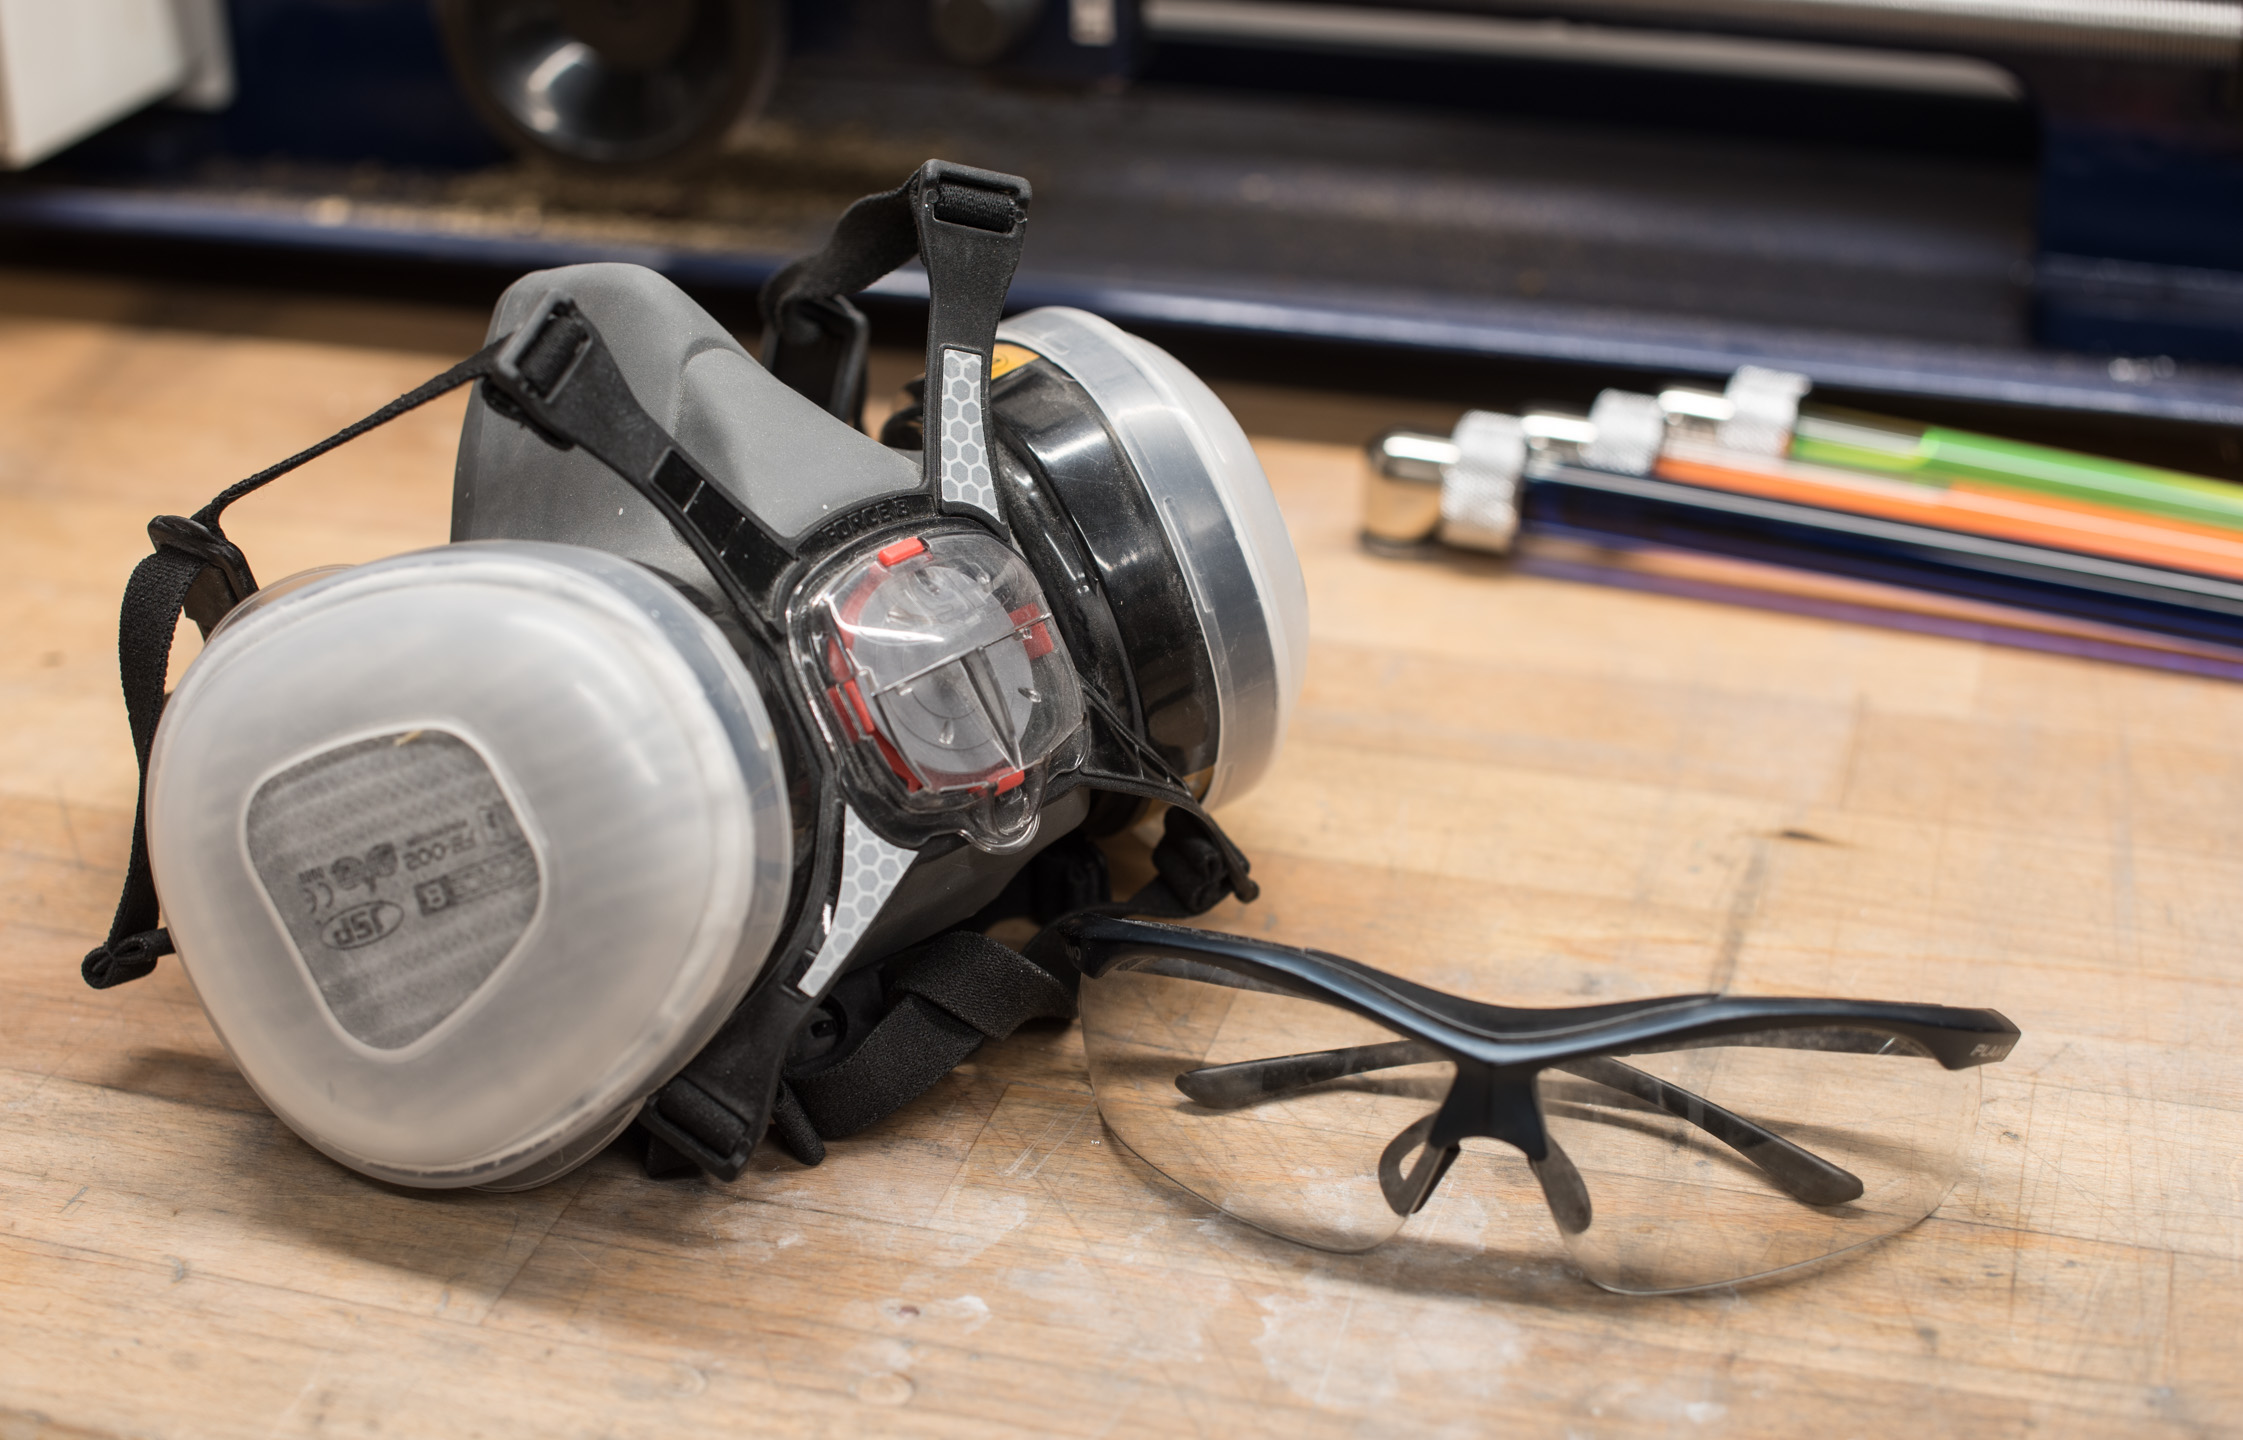
To use the diamond disc, simply clamp your tube to a surface and cut on a fairly low RPM. You don't want to use a high one else you'll melt the glass at the cutting edge, which can lead to heat shock and cracking. You can use the face of the disc to sand down the ends to reduce burrs and chips. Be very mindful of the dust, though, since it is very fine. I would 100 percent suggest using a mask and safety glasses when using this method, and you will still want to sand down the ends by hand after cutting for a smooth bevel and finish.
Flame Polishing
This last step I would very much recommend after you've finalised your lengths. It doesn't take all too long, but the difference is quite noticeable and rather impressive really. Much like with acrylic, glass can be flame polished by melting the surface, which means breaking out the blowtorch - yay!
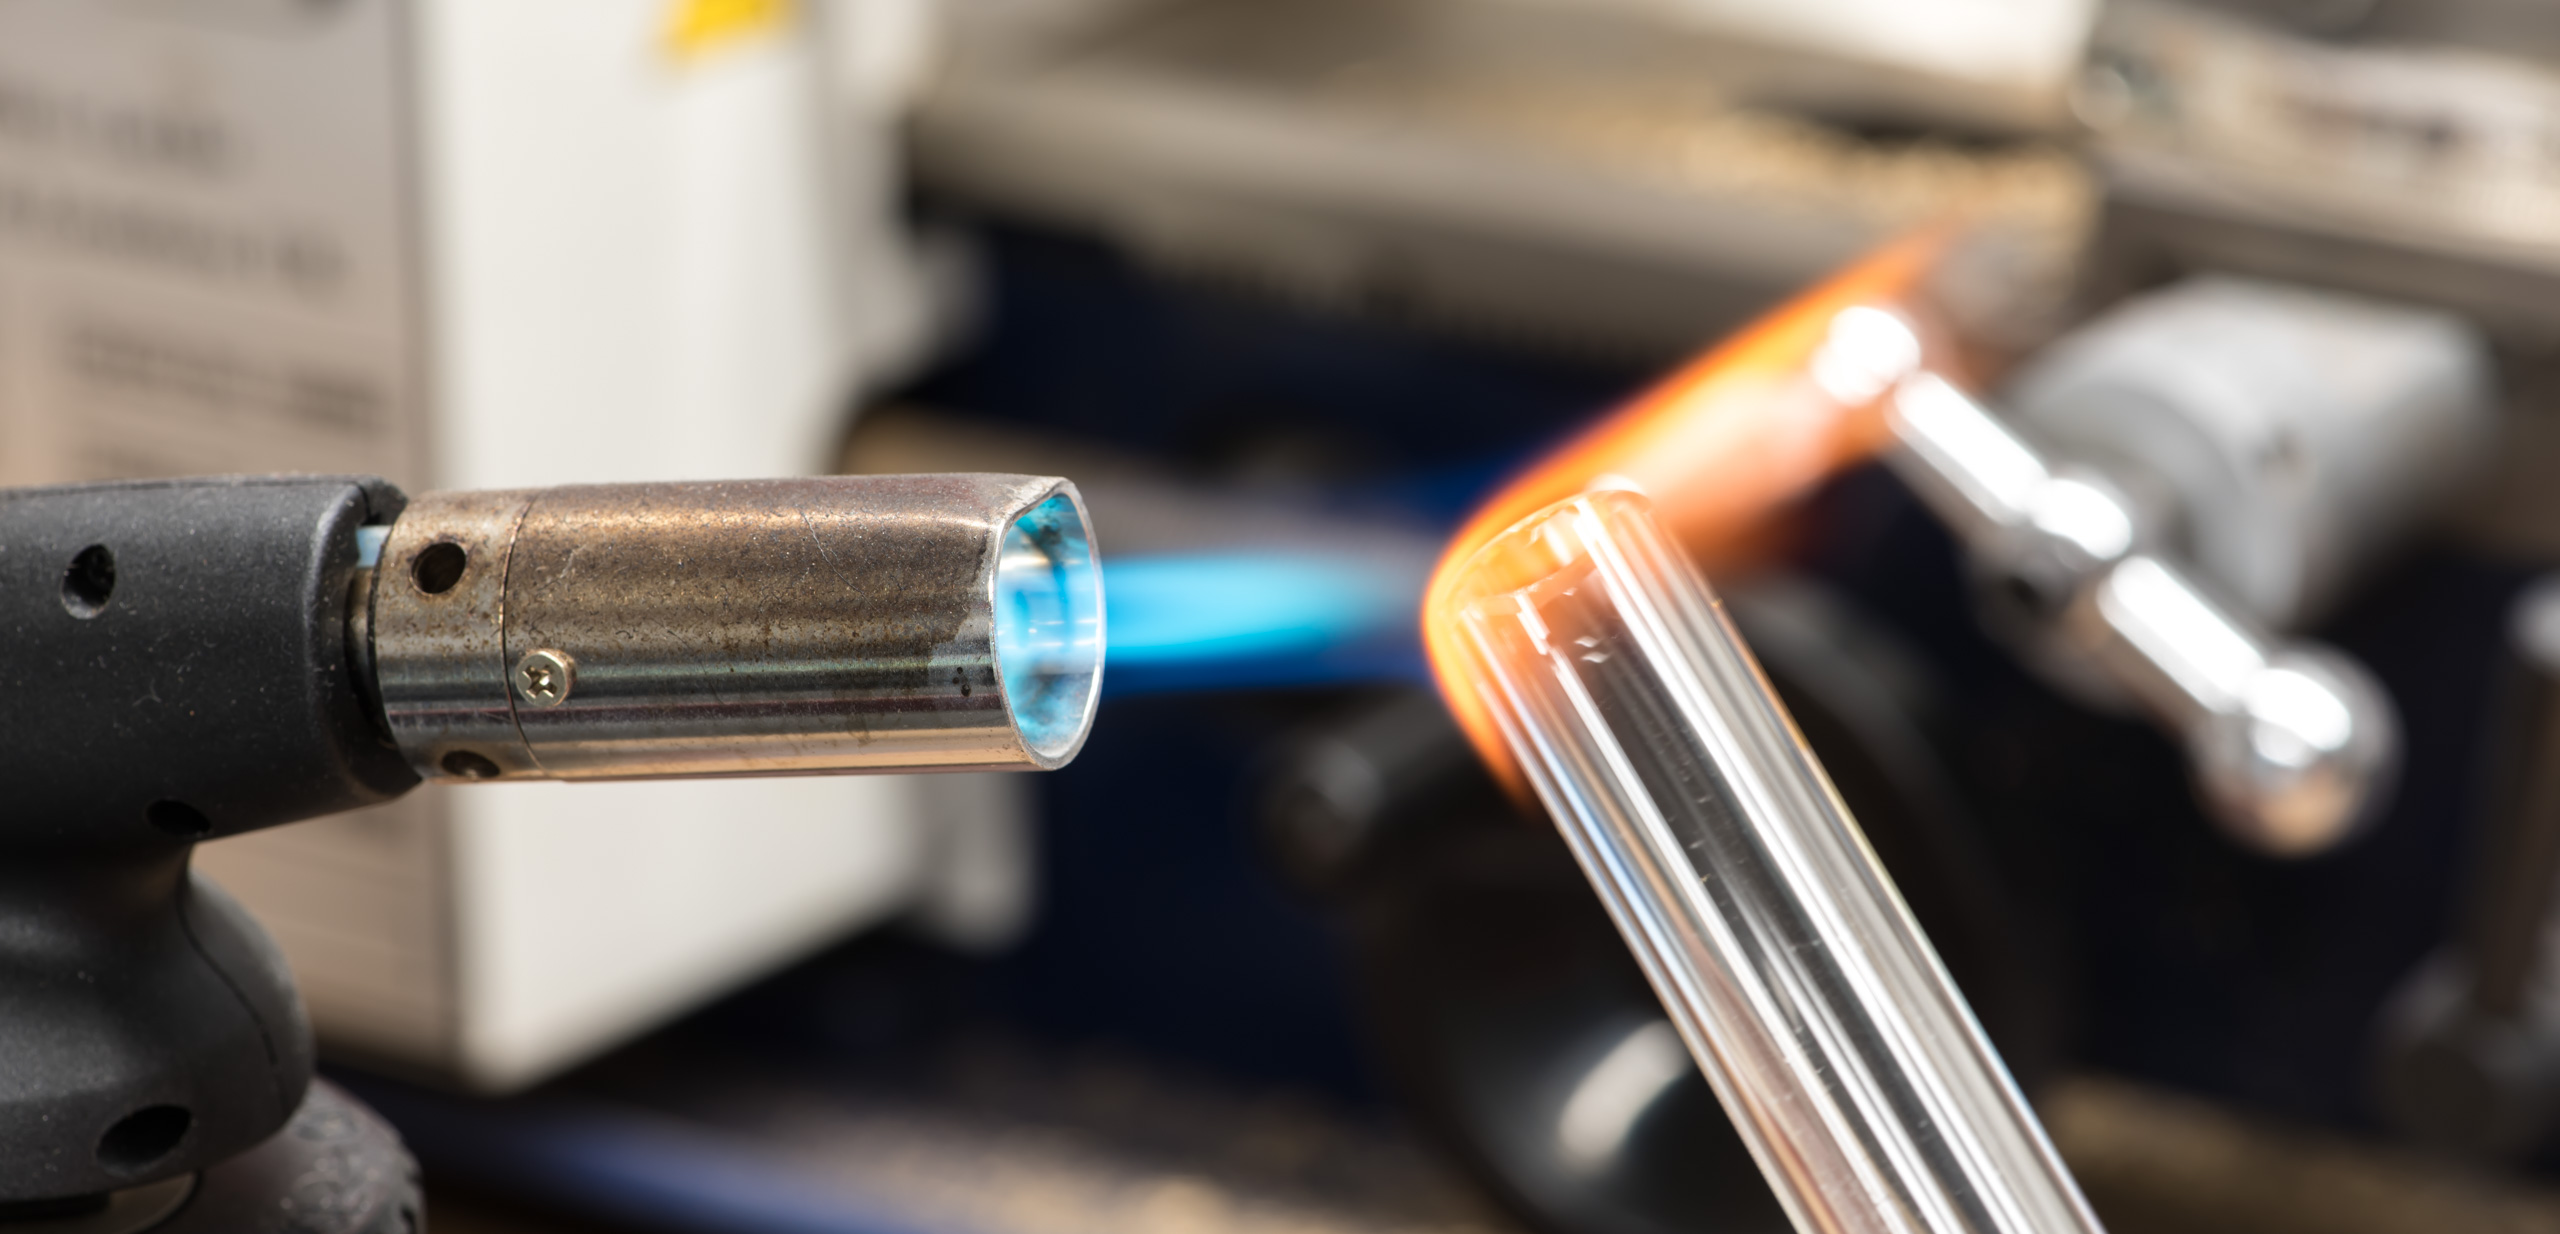
With the flame set to max, first gently warm up the tube so that you don't cause heat shock. Next, hold the tube so that the end is just past the blue cone, the hottest part of the flame. You want to keep rotating it to evenly heat the surface. After a few minutes, the glass will begin to melt, and the end will appear glossy; this is when you know the tube is ready. Remove from the heat and place on a safe, heat-resistant surface. The tube will be extremely hot, so make sure it doesn't touch anything that may melt and definitely don't touch it by accident. You need to let it cool down naturally, as trying to speed the process up with a splash of water or similar will result in the tube cracking spectacularly.
A handy tip is to wear heat-resistant gloves for this or use some pliers to hold the tube. Additionally, you can hold the tube with your grip below the flame like in the picture above, and that way the flame won't propagate along the tube so readily, making it safer.
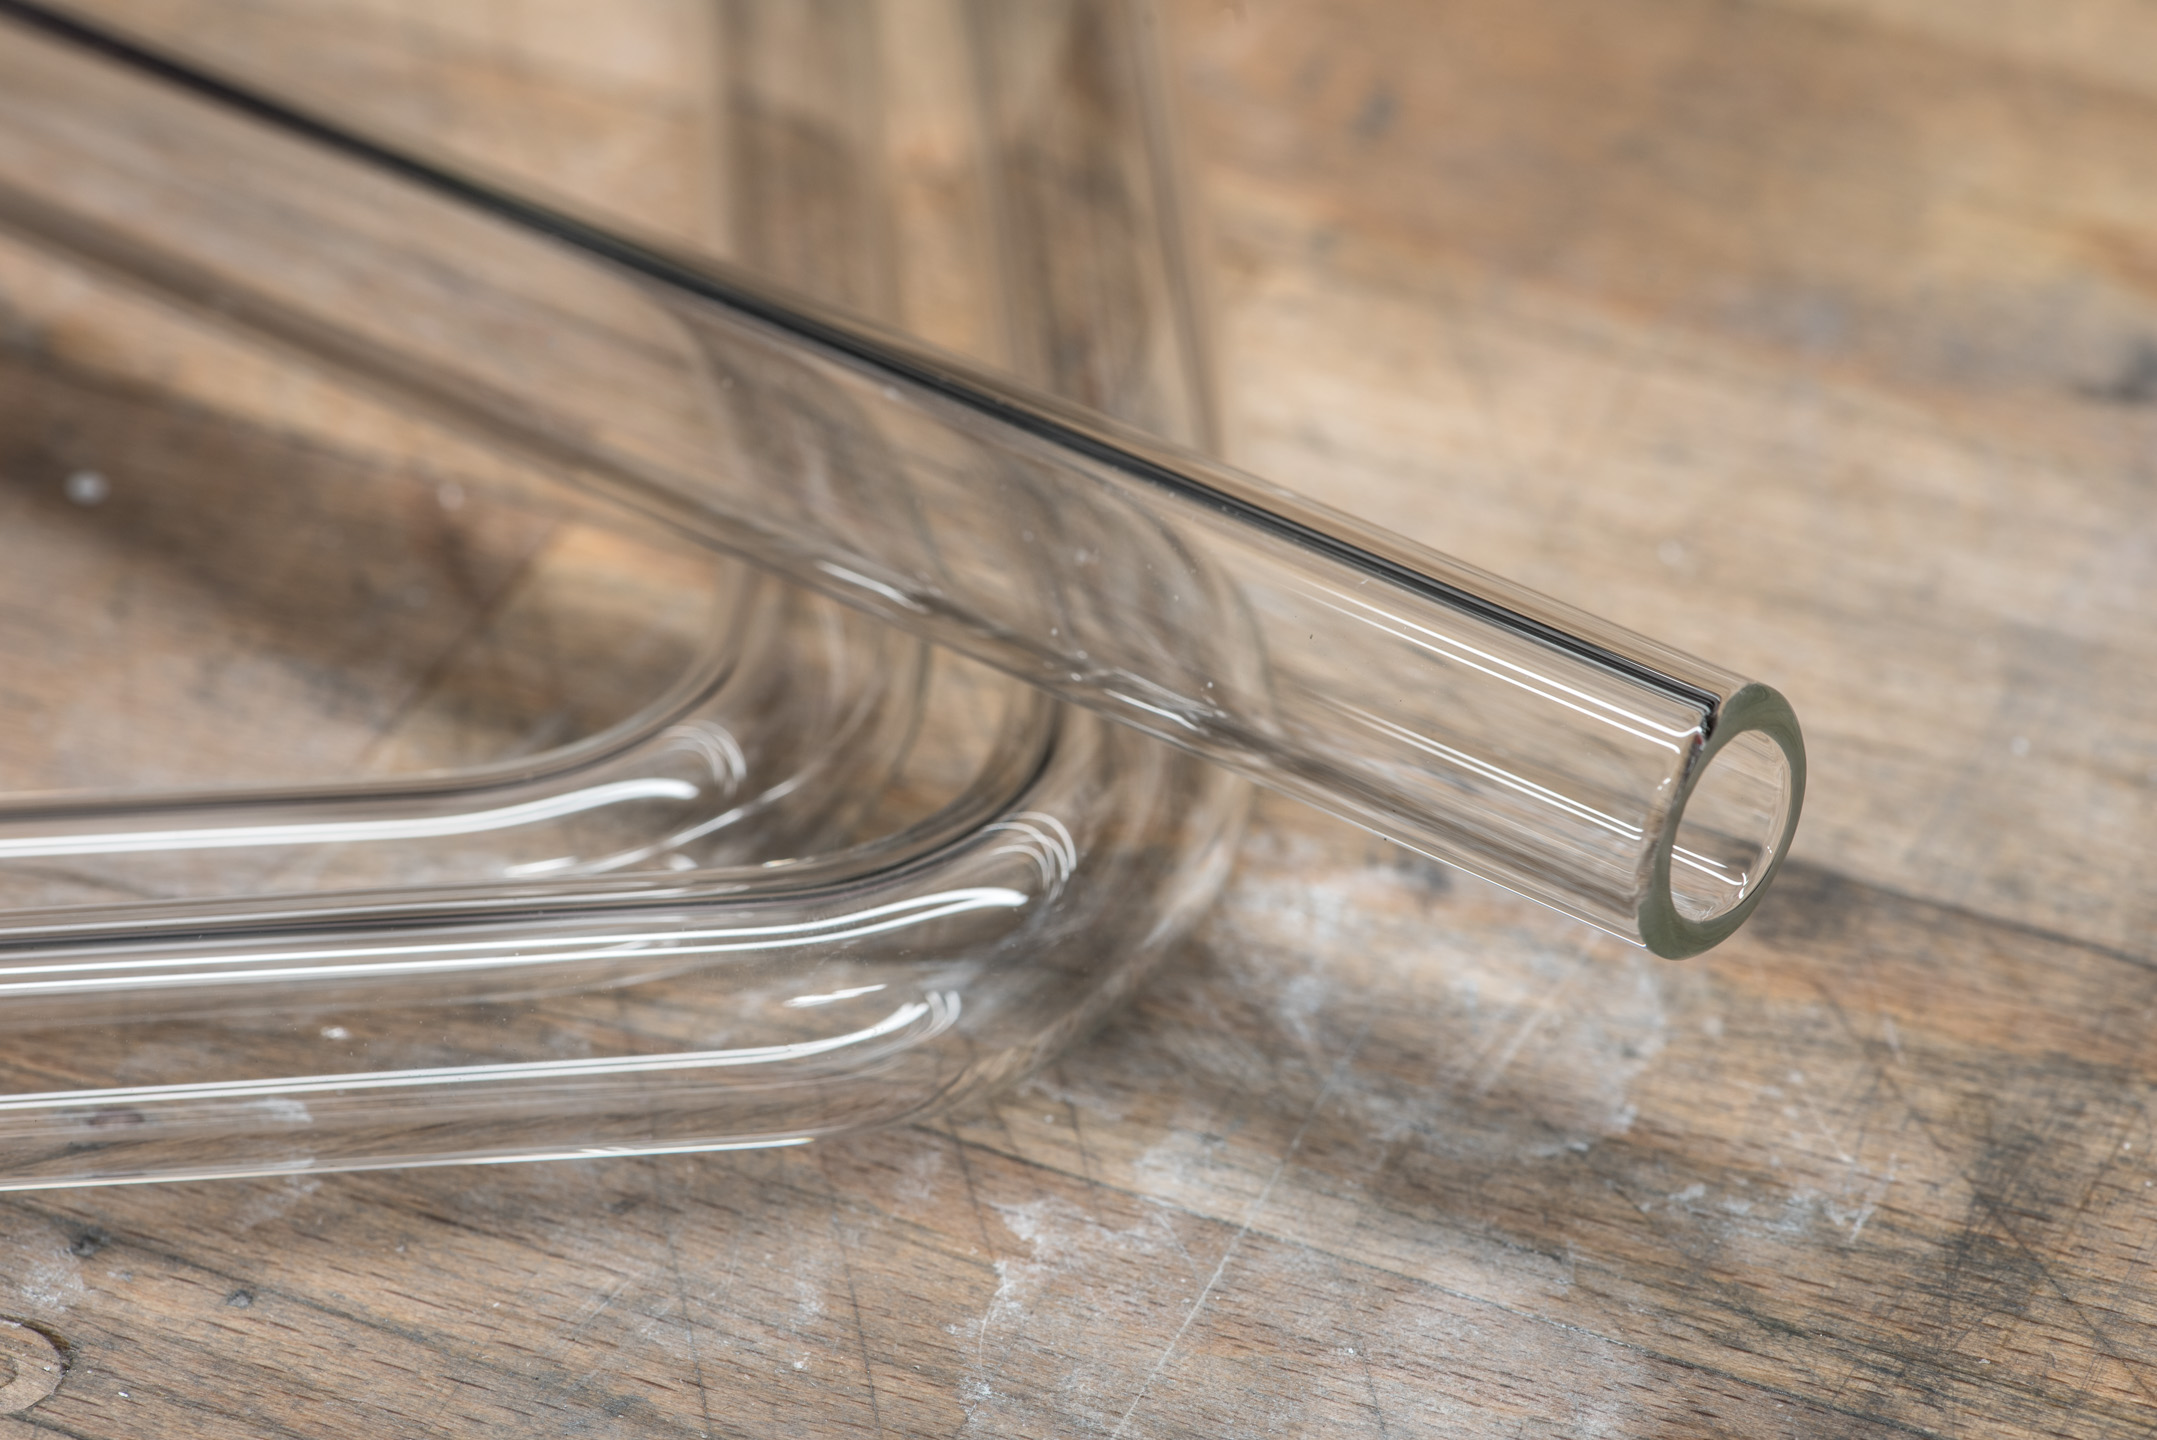
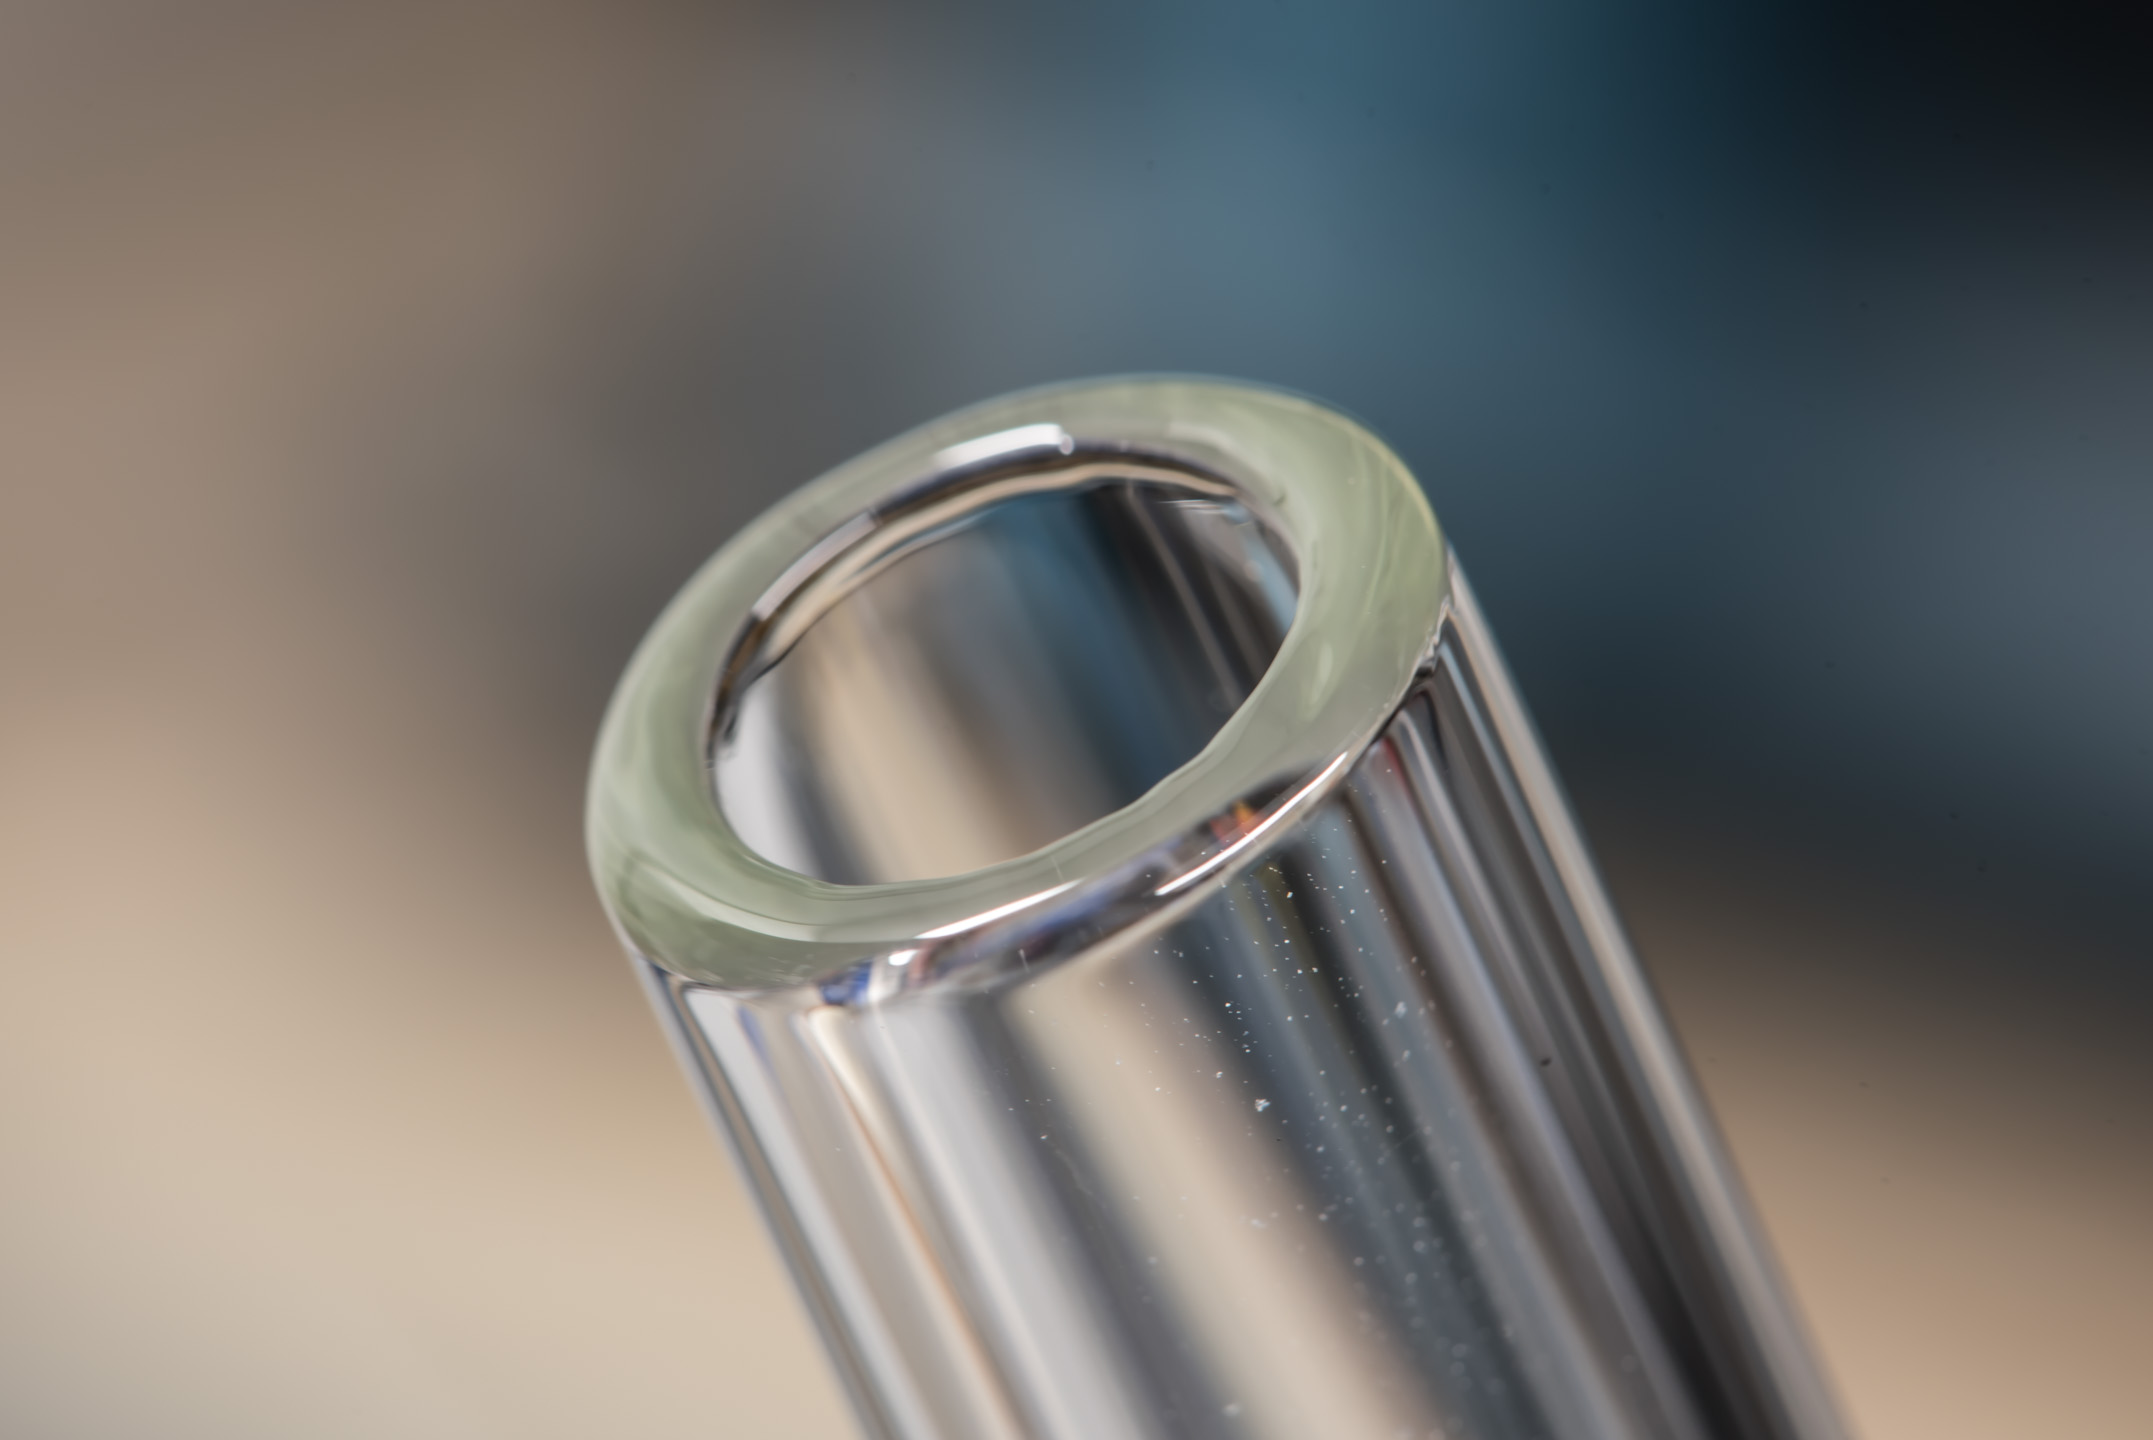
After about 10-15 minutes, the tube should be cool to handle, and if done correctly you will see why I recommend it. The finish is superb, with a beautifully rounded top that will be safe for any fitting.
RELATED ARTICLES


MSI MPG Velox 100R Chassis Review
October 14 2021 | 15:04

Want to comment? Please log in.