The excellent instruction sheet, and indeed, the videos available on the PolyGFX site call for a single, continuous print that wraps up one side of the case, over the top, and down the other side; cuts are made to free up any panel joins.
However, we have found in the past that this method can be a little unwieldy: the CaseSkin is much easier to handle when you are only dealing with one panel at a time. The other advantage of this three-piece approach is you can fully wrap each edge around the back, producing perfect seams and avoiding any of the underneath showing through, which you risk with the Incision method.
To that end, the first step was to cut the right length of CaseSkin for the first panel. The old addage suggests 'Measure twice, cut once' and I cannot stress this strongly enough. Call it paranoia, but I must have measured four or five times just to be sure - once you make a cut, there is no turning back.

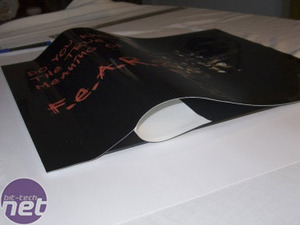
During the design process, I measured and allowed for specific overlaps in order to wrap the CaseSkin around each edge, as shown here. This does make applying the Skin somewhat more difficult, as you not only have to ensure you have adequate overlap on each side, but you therefore lose the edge as a guide to keep your design straight.
I found the best method was to lie on the floor and have someone help you position the Skin from above, while you adjusted the spacing left & right from underneath.


Having checked and double-checked the initial placement, applying the skin is a piece of cake: simply peel the backing paper off a few inches at a time, and smooth the Skin onto the panel, making sure to push any air bubbles to the edge.
Turn the panel over, and fold over your overlaps while pulling the skin tight to avoid any bubbling. Cut a small square out of each corner to ensure a smooth edge, and try to limit any overlap of CaseSkin to CaseSkin, and this extra thickness might make it hard to slot the panel back on the case.


Fast forward to the second panel, and voila: the gloss black looks great (though it makes photography a nightmare), and the detail is scary.
Time to move on to the top panel
However, we have found in the past that this method can be a little unwieldy: the CaseSkin is much easier to handle when you are only dealing with one panel at a time. The other advantage of this three-piece approach is you can fully wrap each edge around the back, producing perfect seams and avoiding any of the underneath showing through, which you risk with the Incision method.
To that end, the first step was to cut the right length of CaseSkin for the first panel. The old addage suggests 'Measure twice, cut once' and I cannot stress this strongly enough. Call it paranoia, but I must have measured four or five times just to be sure - once you make a cut, there is no turning back.

During the design process, I measured and allowed for specific overlaps in order to wrap the CaseSkin around each edge, as shown here. This does make applying the Skin somewhat more difficult, as you not only have to ensure you have adequate overlap on each side, but you therefore lose the edge as a guide to keep your design straight.
I found the best method was to lie on the floor and have someone help you position the Skin from above, while you adjusted the spacing left & right from underneath.


Having checked and double-checked the initial placement, applying the skin is a piece of cake: simply peel the backing paper off a few inches at a time, and smooth the Skin onto the panel, making sure to push any air bubbles to the edge.
Turn the panel over, and fold over your overlaps while pulling the skin tight to avoid any bubbling. Cut a small square out of each corner to ensure a smooth edge, and try to limit any overlap of CaseSkin to CaseSkin, and this extra thickness might make it hard to slot the panel back on the case.


Fast forward to the second panel, and voila: the gloss black looks great (though it makes photography a nightmare), and the detail is scary.
Time to move on to the top panel

MSI MPG Velox 100R Chassis Review
October 14 2021 | 15:04


Want to comment? Please log in.