One field that I've always wanted to involve in a mod has been leather craft. It's a very tactile, old-world activity that at an amateur level hasn't really changed all that much since antiquity (stop pretending you're an old-school modder, Alex - ed.). It's also an area that presents so many opportunities, as shown by the sheer variety of uses for leather in every day items. If you saw our part 2 for our Vampire the Masquerade: Bloodlines 2 mod then you will have had an early glimpse at the sort of aesthetic we're aiming for with this project.
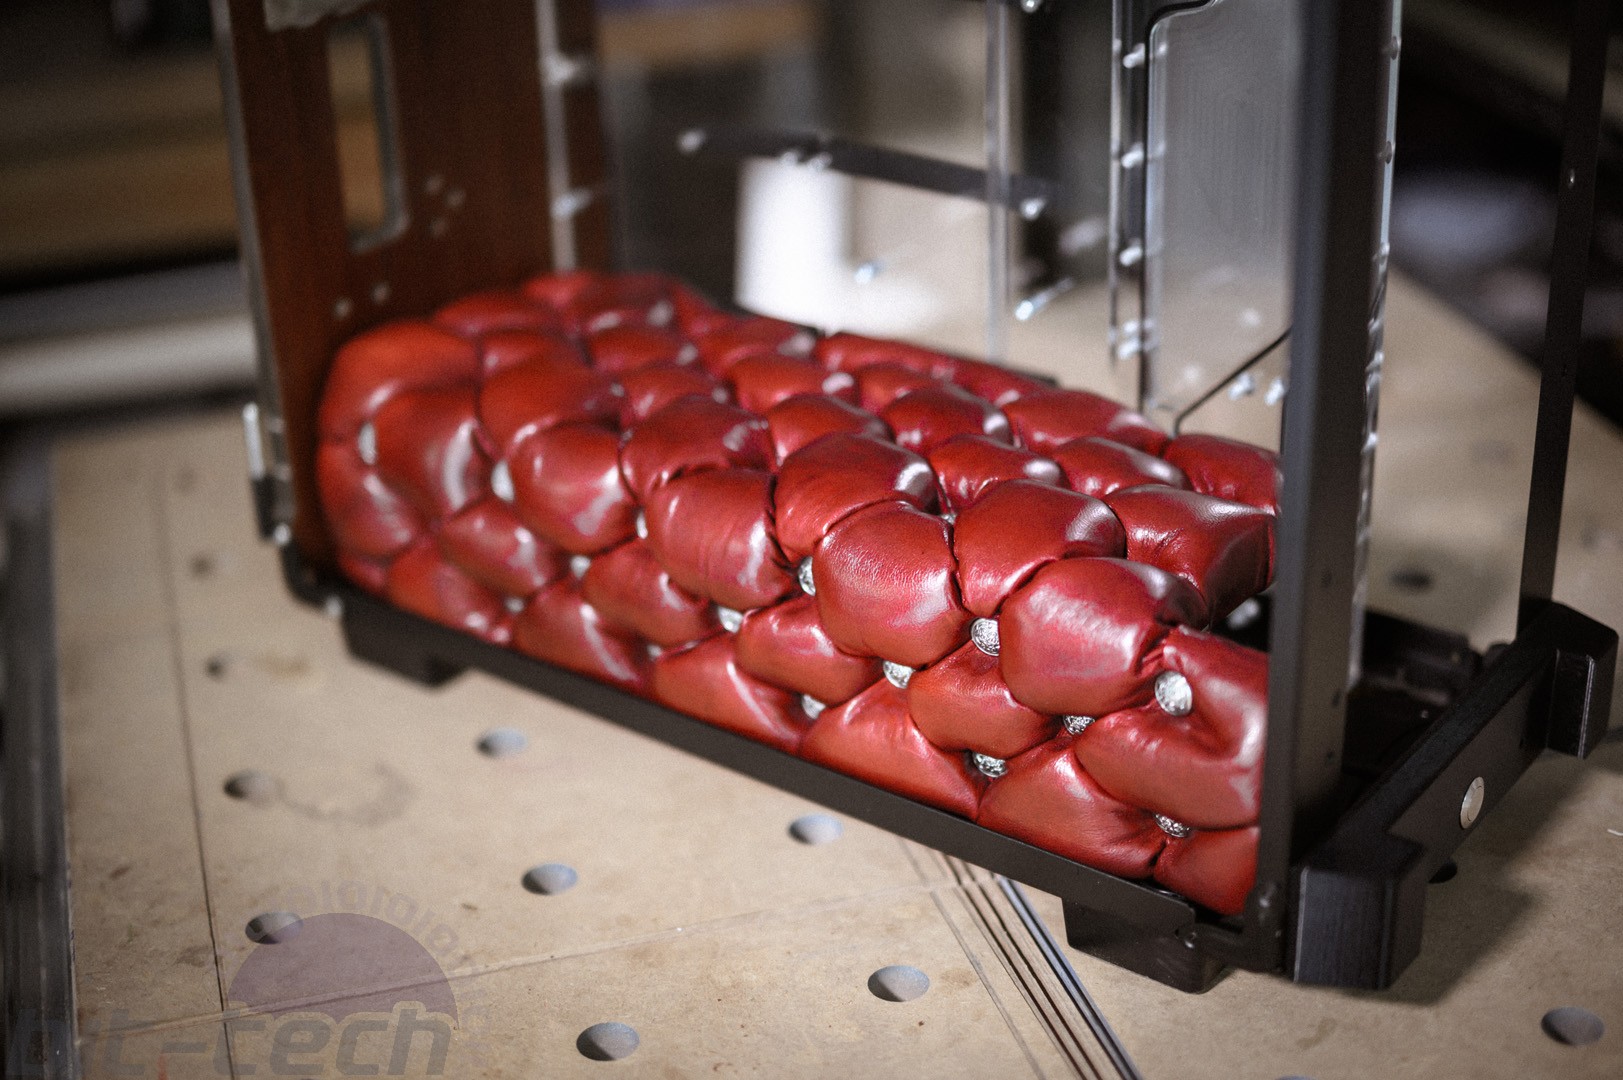
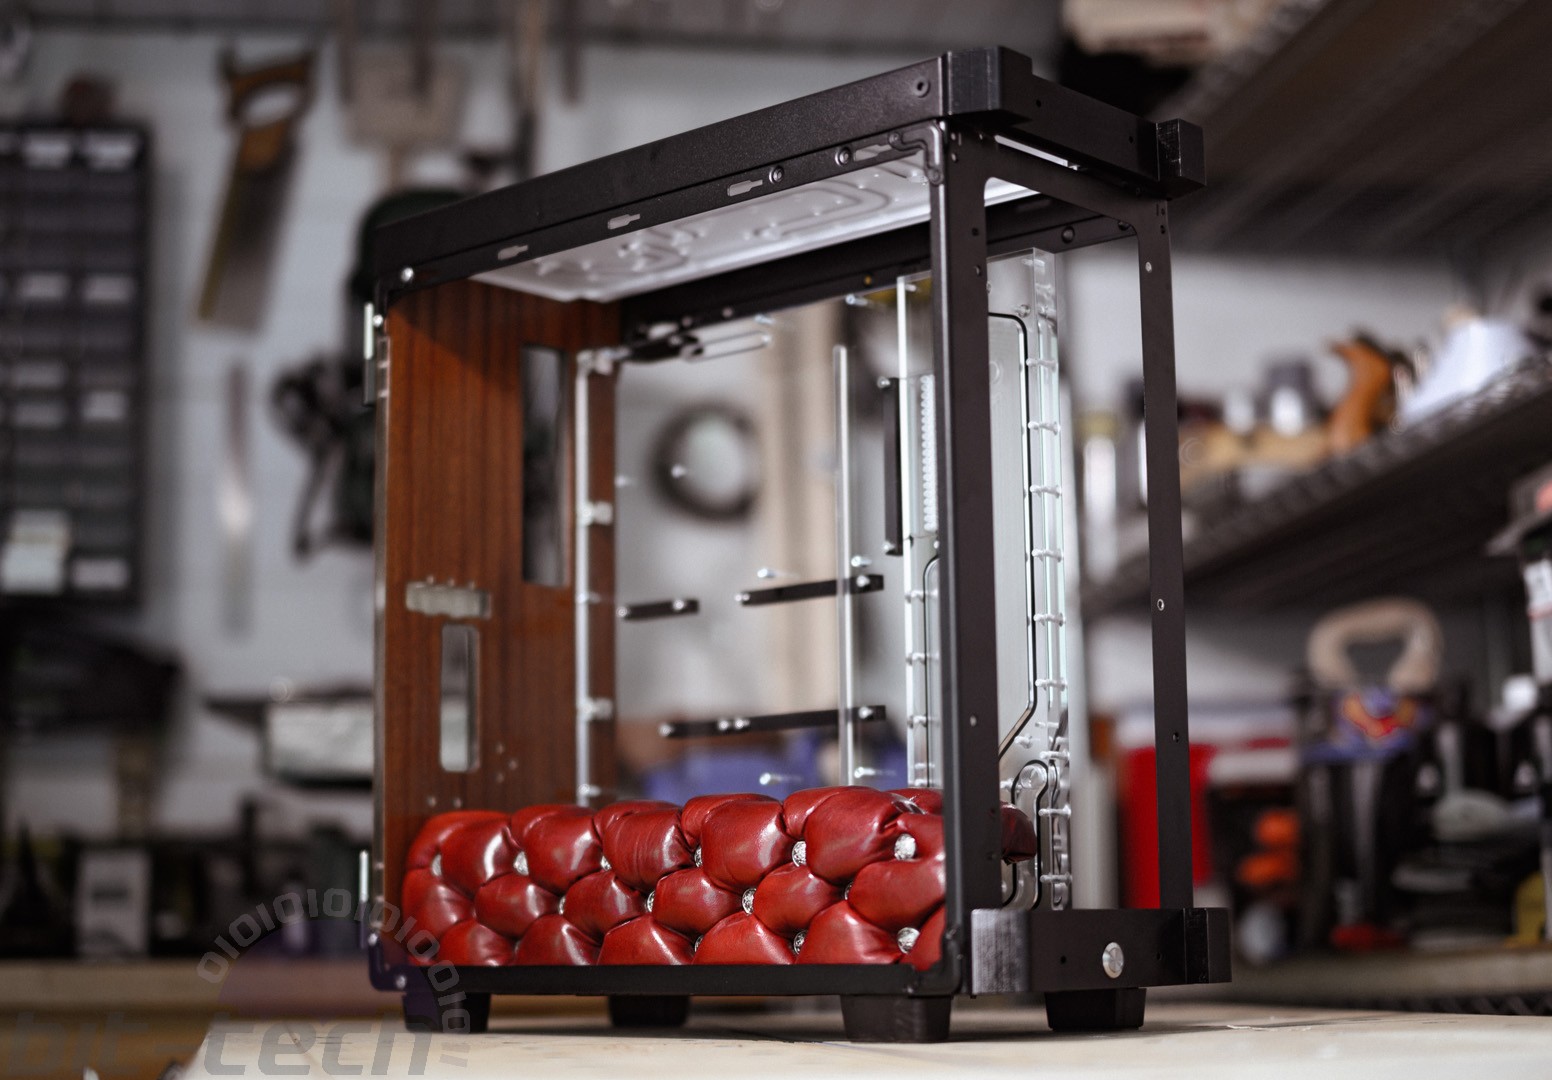
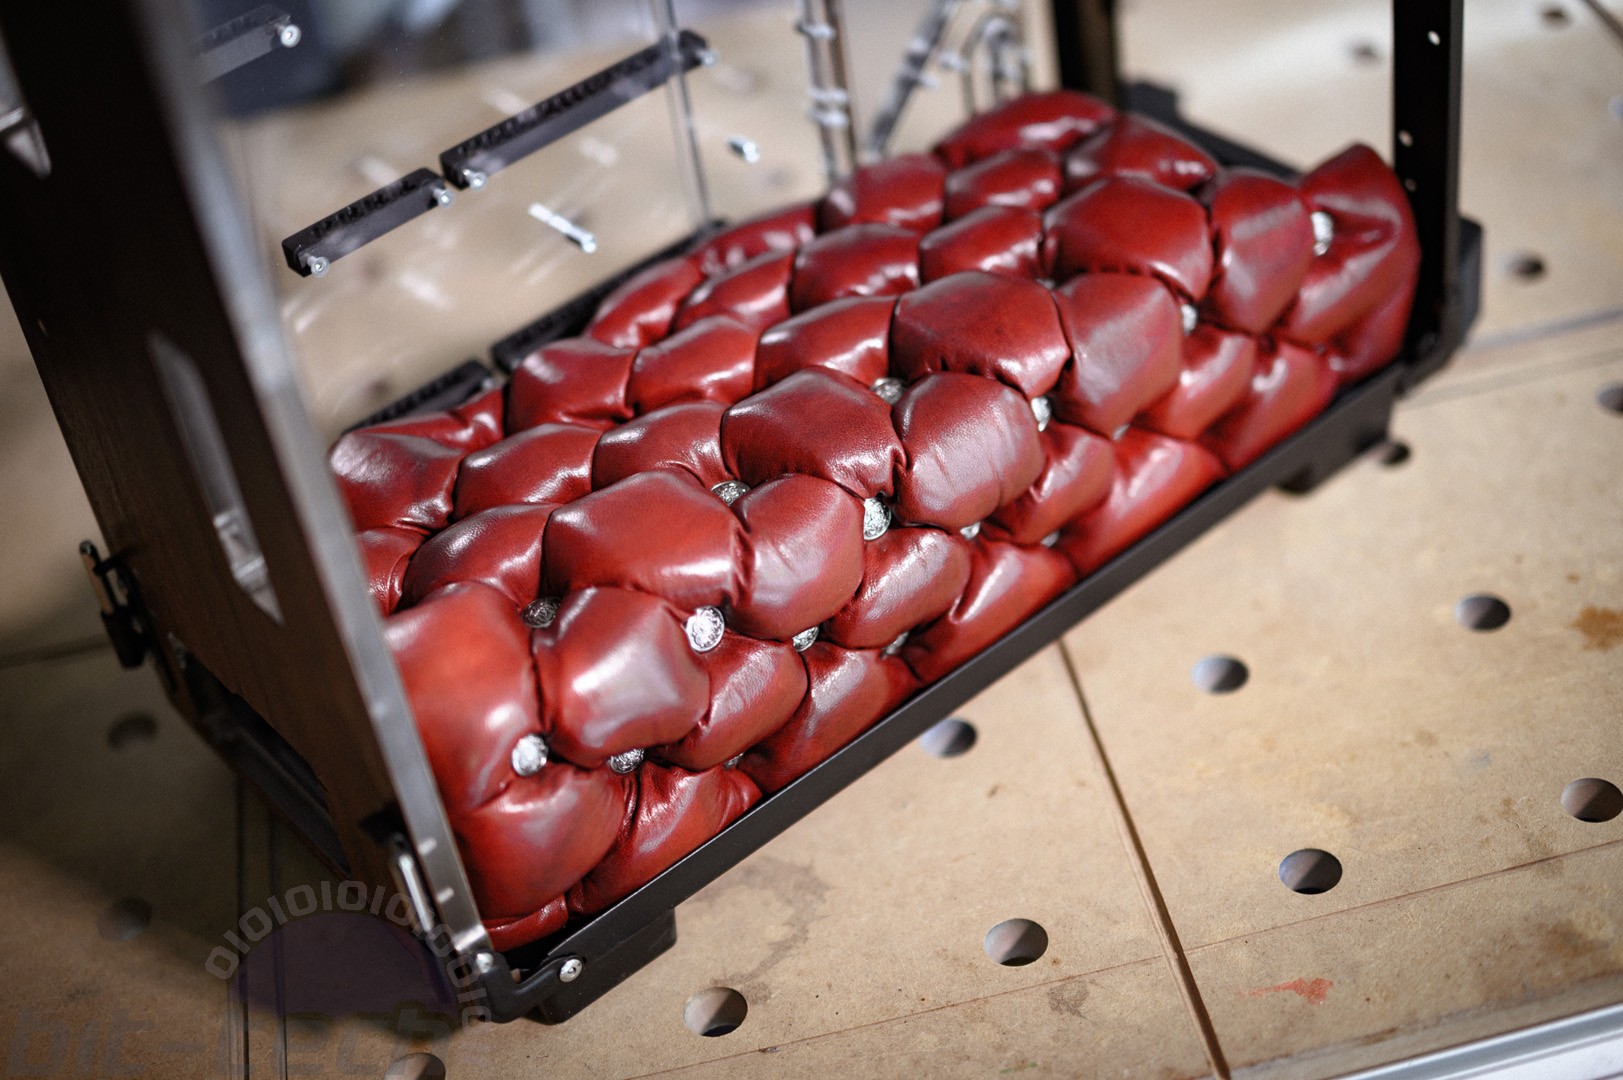
Clan Toreador are in essence a bunch of aristocratic hedonists, which is an interesting theme for a mod. Plush, luxurious, and sensual materials are a must here, and I also wanted to try to keep that feeling of antiquity - after all, vampires are immortal. To me, that screamed leather, wood, and rich burgundy - picture an ox-blood Chesterfield Chaise sitting in a hidden boudoir within the depths of château. I thought it could be fun, then, to bring one into the rig in a very literal sense by building a diamond-tufted leather PSU shroud.
Now, I've only ever lightly dabbled in anything leather craft related before, so this was largely a new experience for me. I set to work trying out different combinations of hides, finishes, button fixings, and wadding thicknesses with varying degrees of success. Trying to find pre-dyed leathers that matched the intentions proved pretty difficult, though; most were from overseas and had long lead times or were very thick varieties more apt for making bags and belts than miniature cushions.
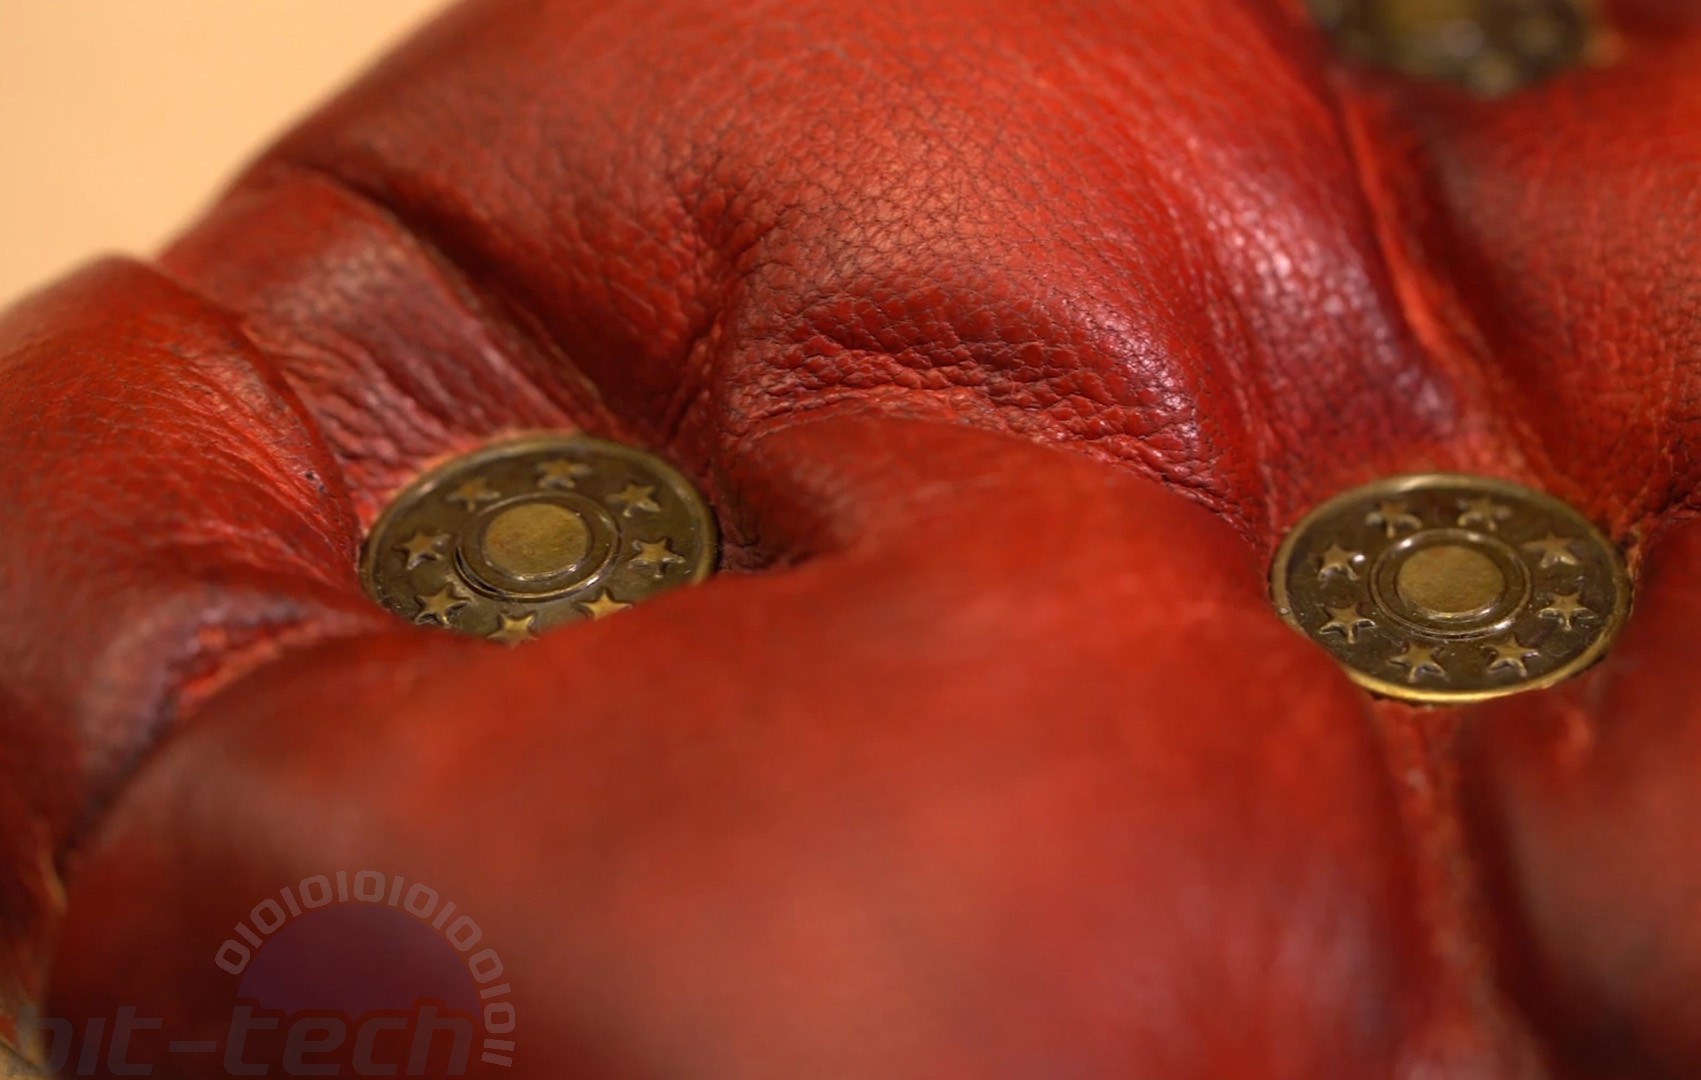
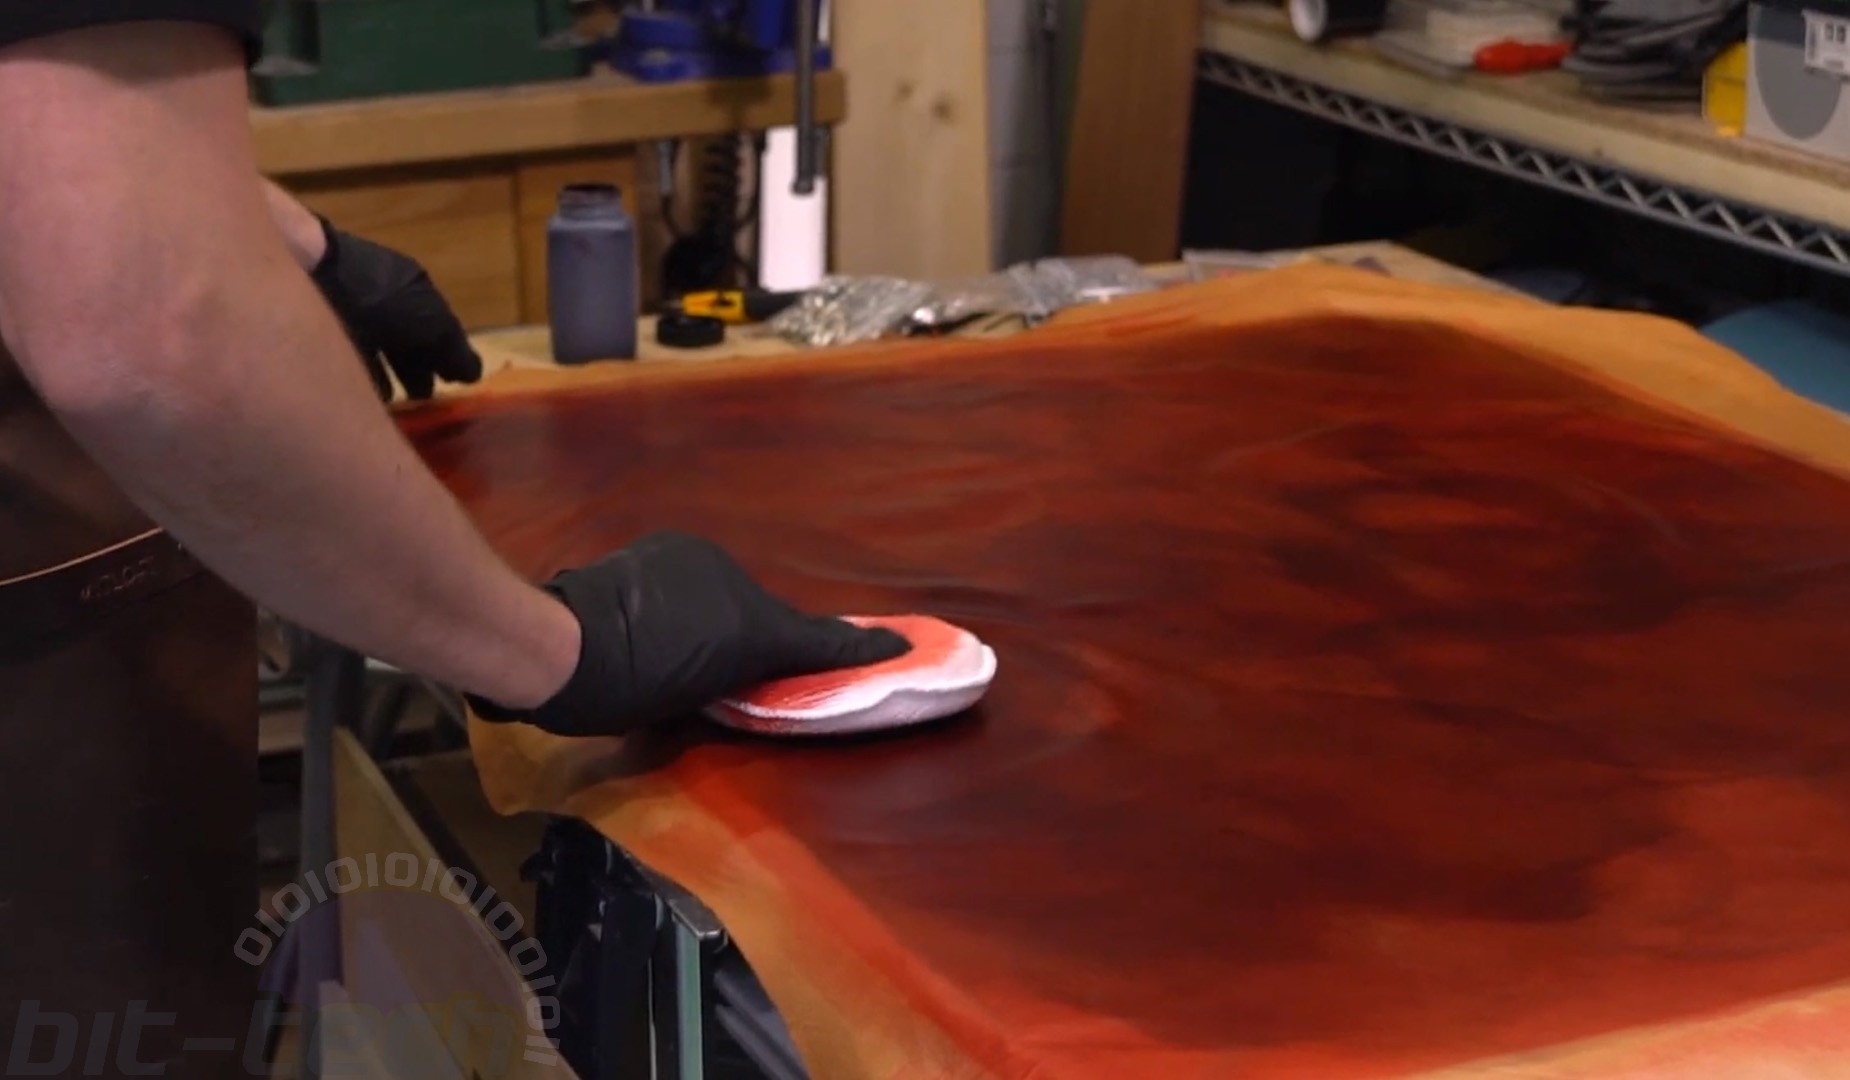
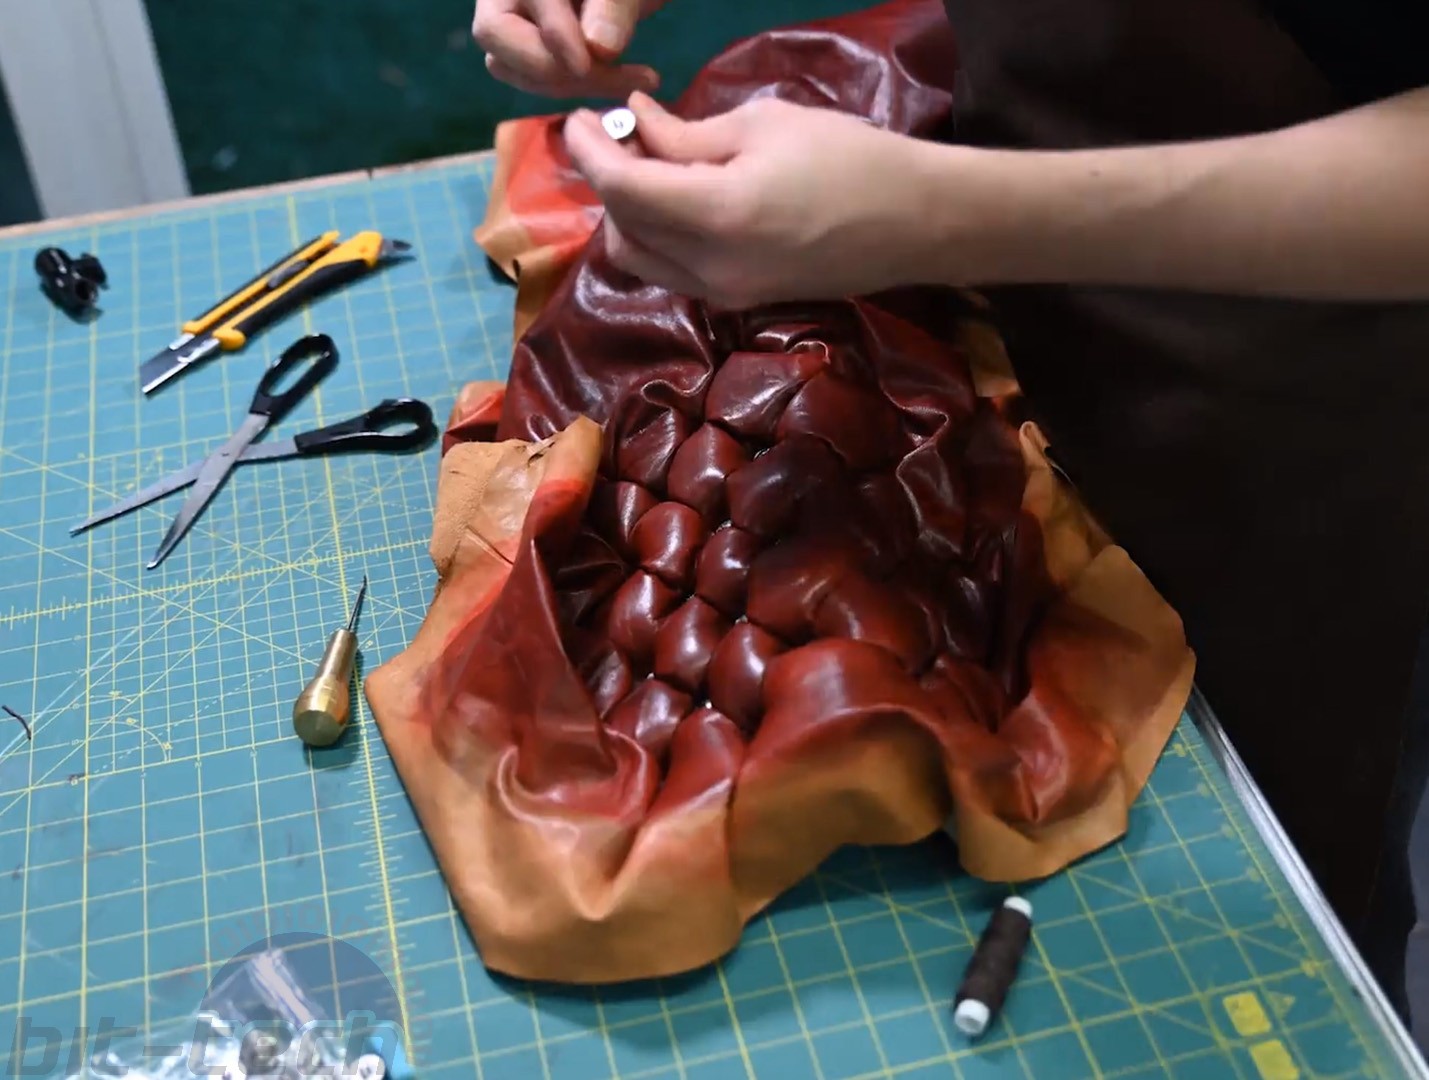
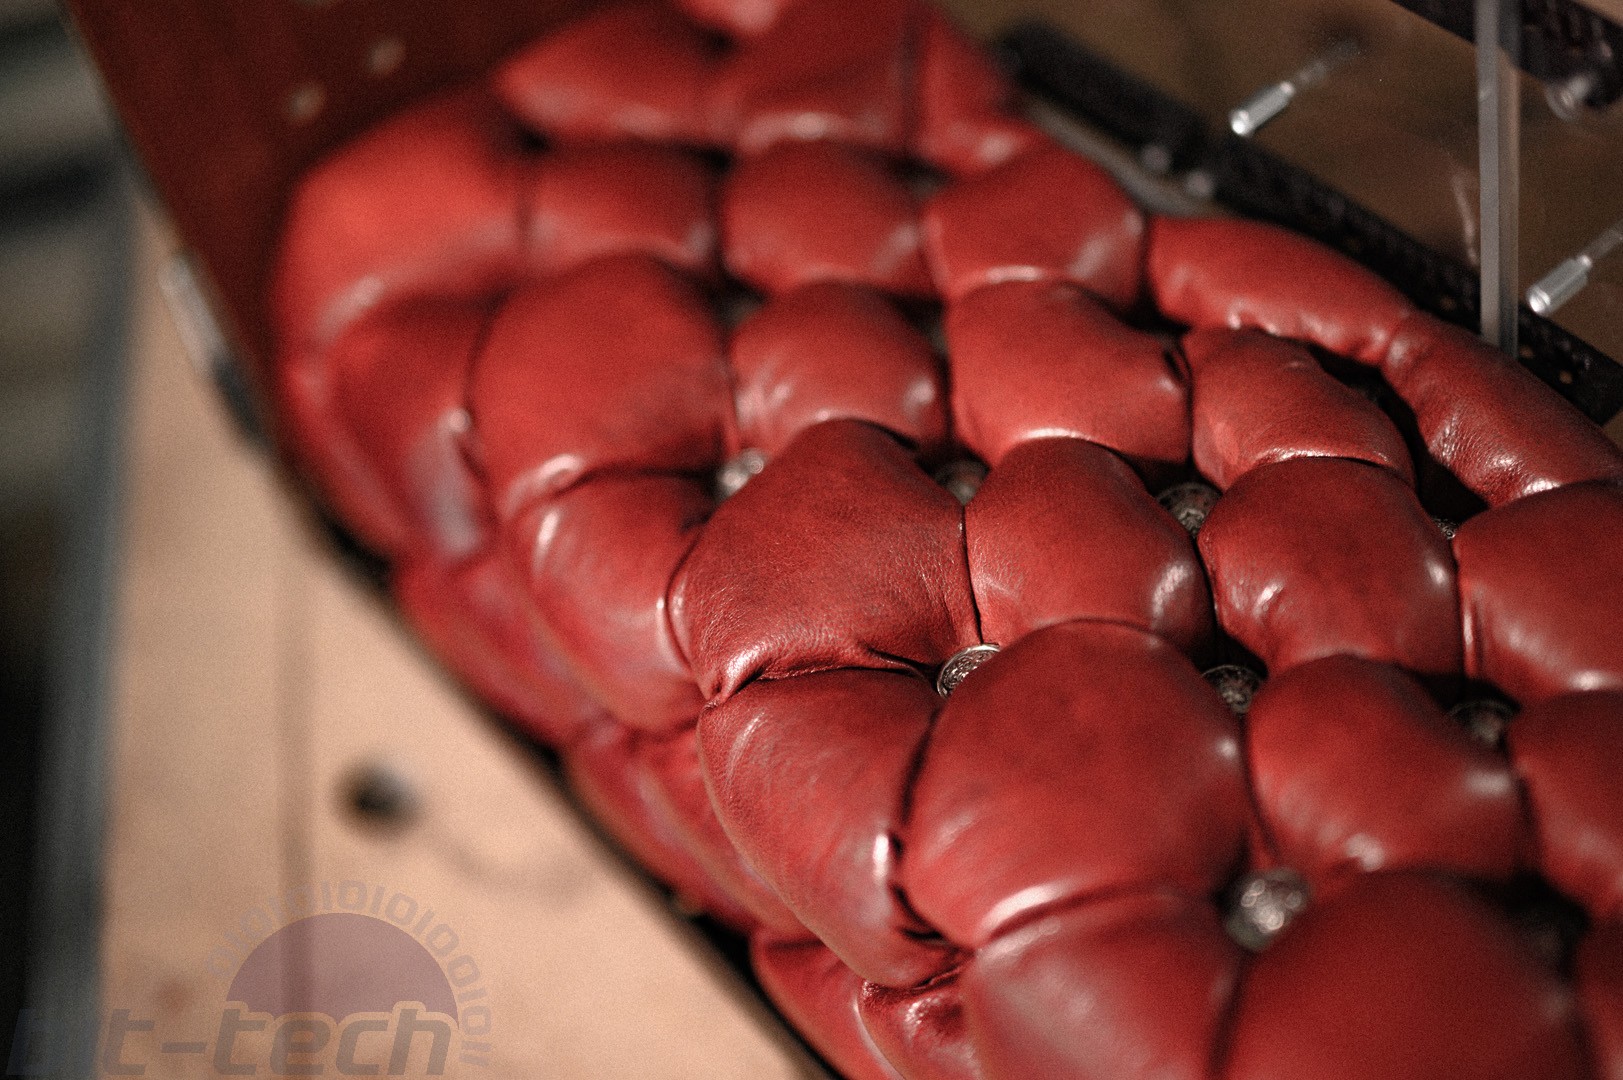
The first variety I tried out was a non-dyed, 1mm-thick, veg-tanned hide paired with 25mm thick upholstery foam. This actually worked surprisingly well despite the leather being quite thick, and there was a definite tuft going on, although the buttons were perhaps too close to one another. The biggest issue was the finish; I had dyed the leather after forming, and not only that but I used red first then topped it with burgundy. This was no good, as the red was so very bright that the burgundy all but slid off the surface once the red had been applied, which left it looking a bit like a model-making toy. I tried again using the same ingredients but in a different order, first dying the leather burgundy and polishing it with some wax, then using a looser button arrangement. This one was far more successful, the colour was rich and exactly what I was after, but the leather was definitely too thick, it was very difficult to work the tufts around the edges and I didn't fancy my chances with a more complex shape.
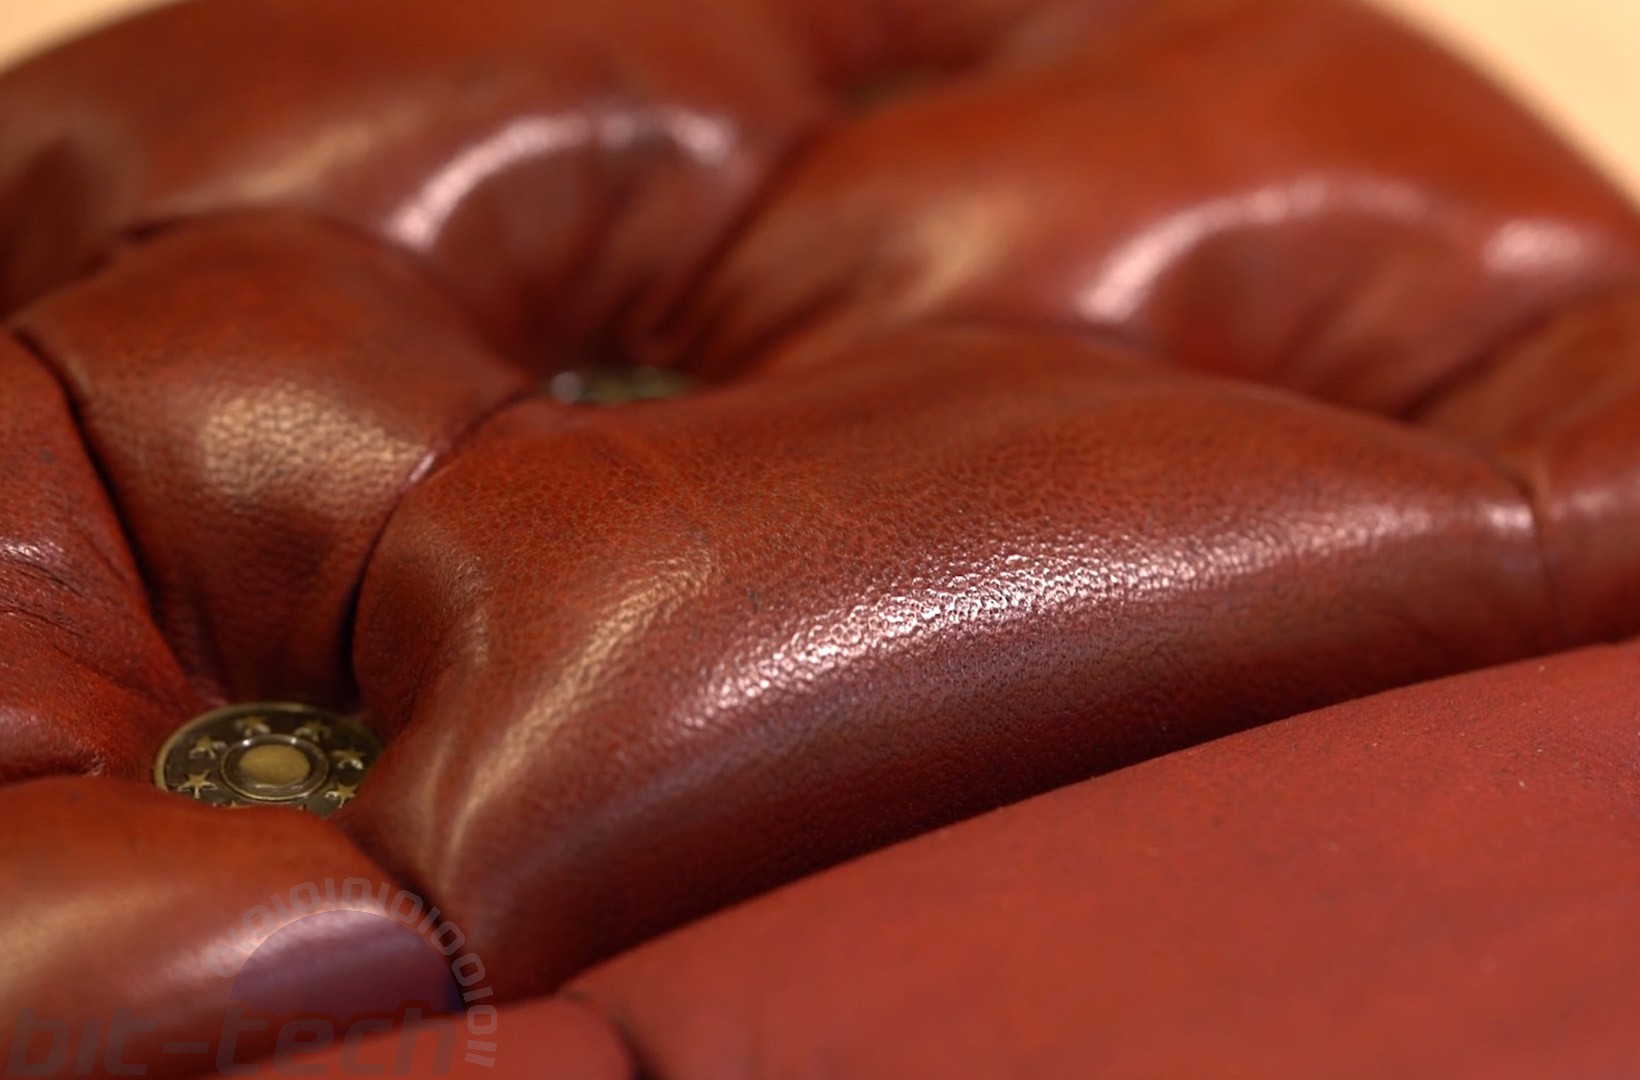
I then ordered in a bunch of much thinner goat hides, ranging from 0.3-0.5mm thick. These are the sorts of leathers used in glove liners or purses/wallets, so they're better suited for smaller work. The first one I tried was pre-dyed tan, but it was also coated with a glossy plastic layer (which I definitely didn't recall from the description), which made it impervious to dyes. The rear was smooth, though, so I gave that a go. It wasn't all that successful, especially when combined with the 12.7mm foam - not enough tuft and no polished finish. I tried one more using 0.4mm napa leather that was lightly dyed and paired with 1" foam; this one was on the money! It was soft, easy to work around corners, and took the dye and polish very well.
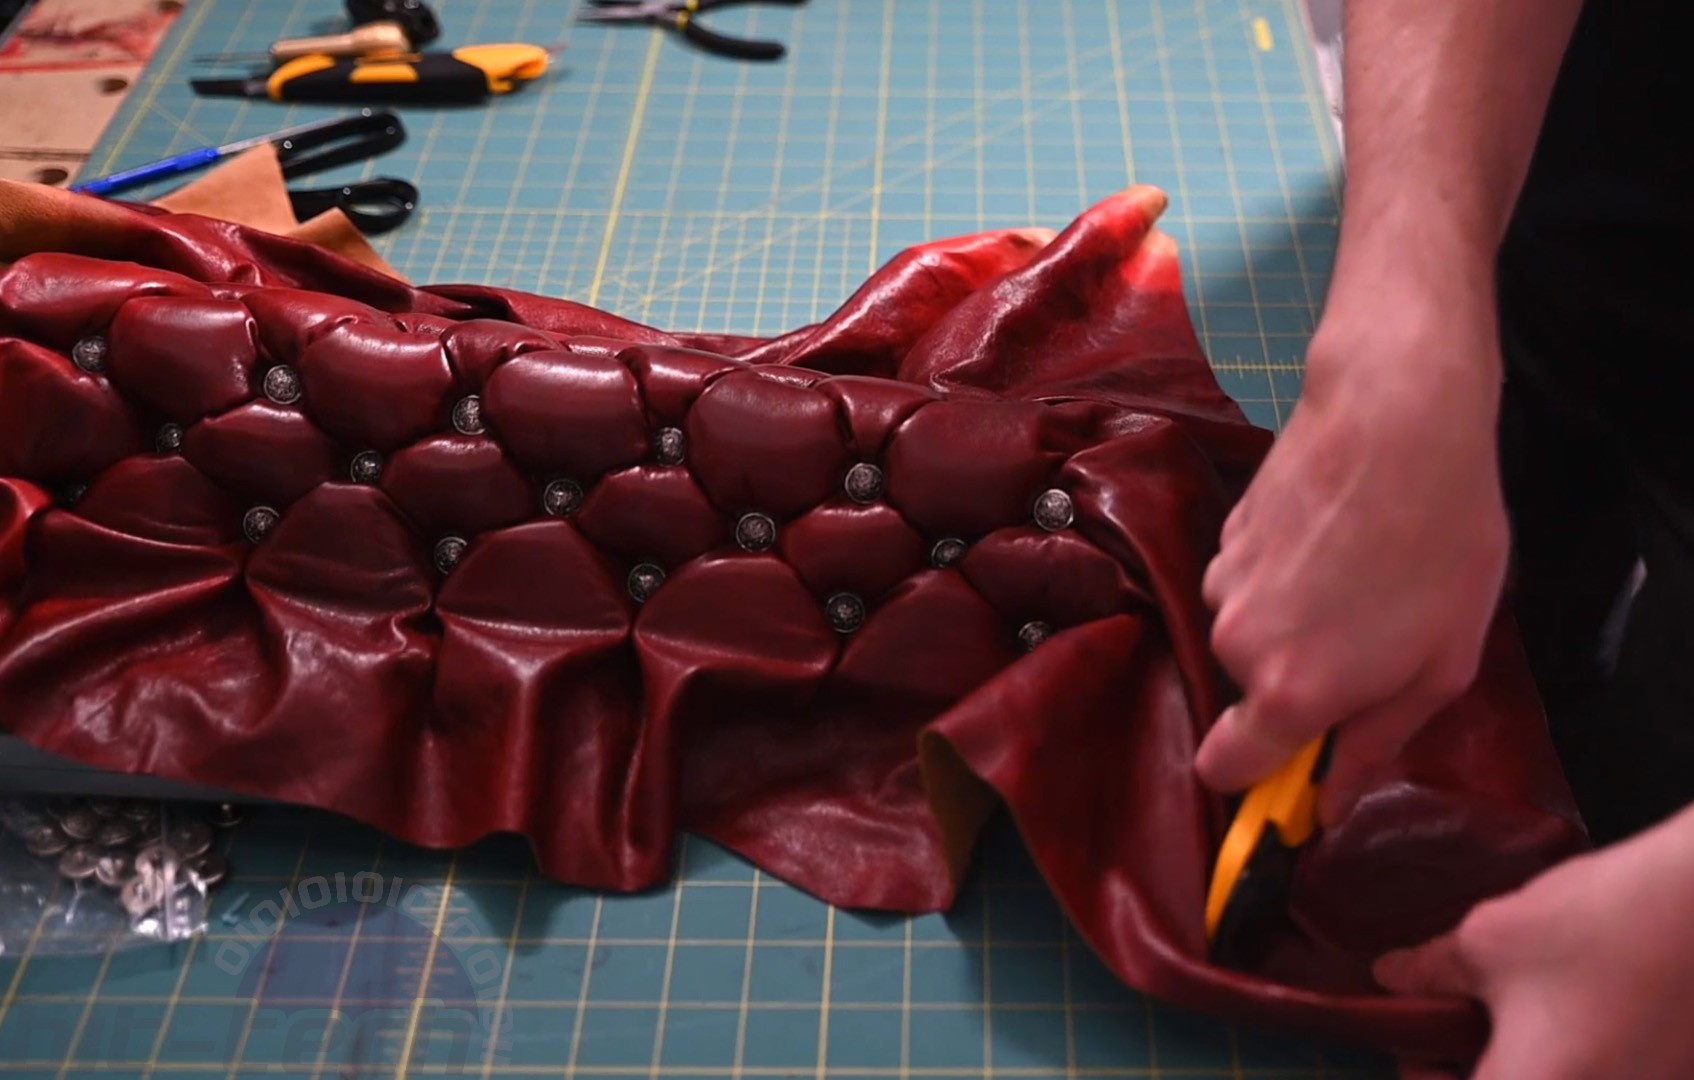
With the structure sorted, I turned to the buttons used for the tufting. Since Clan Toreador has a rose insignia, I thought it would be fun to try and work something like that into the buttons. By chance I found some floral filigree patterned steel buttons of the correct size on Ebay, so copped those along with a few things like waxed thread and a few leather working tools that I had foolishly thought I could get on without.
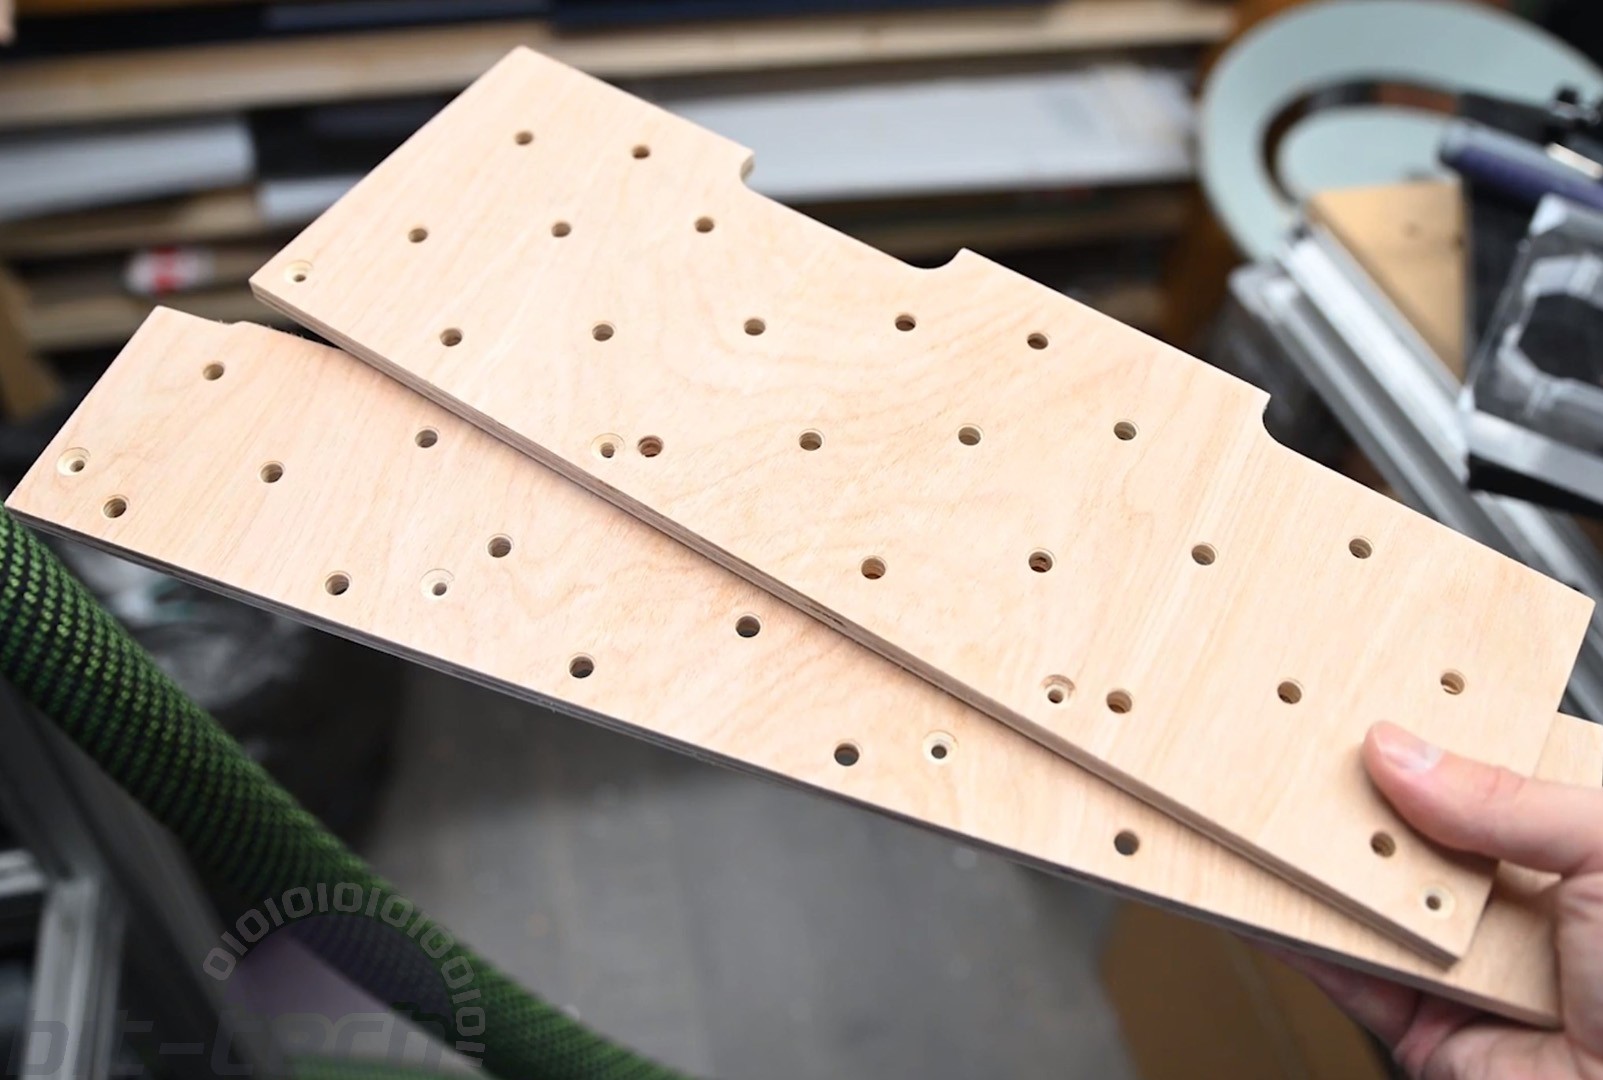
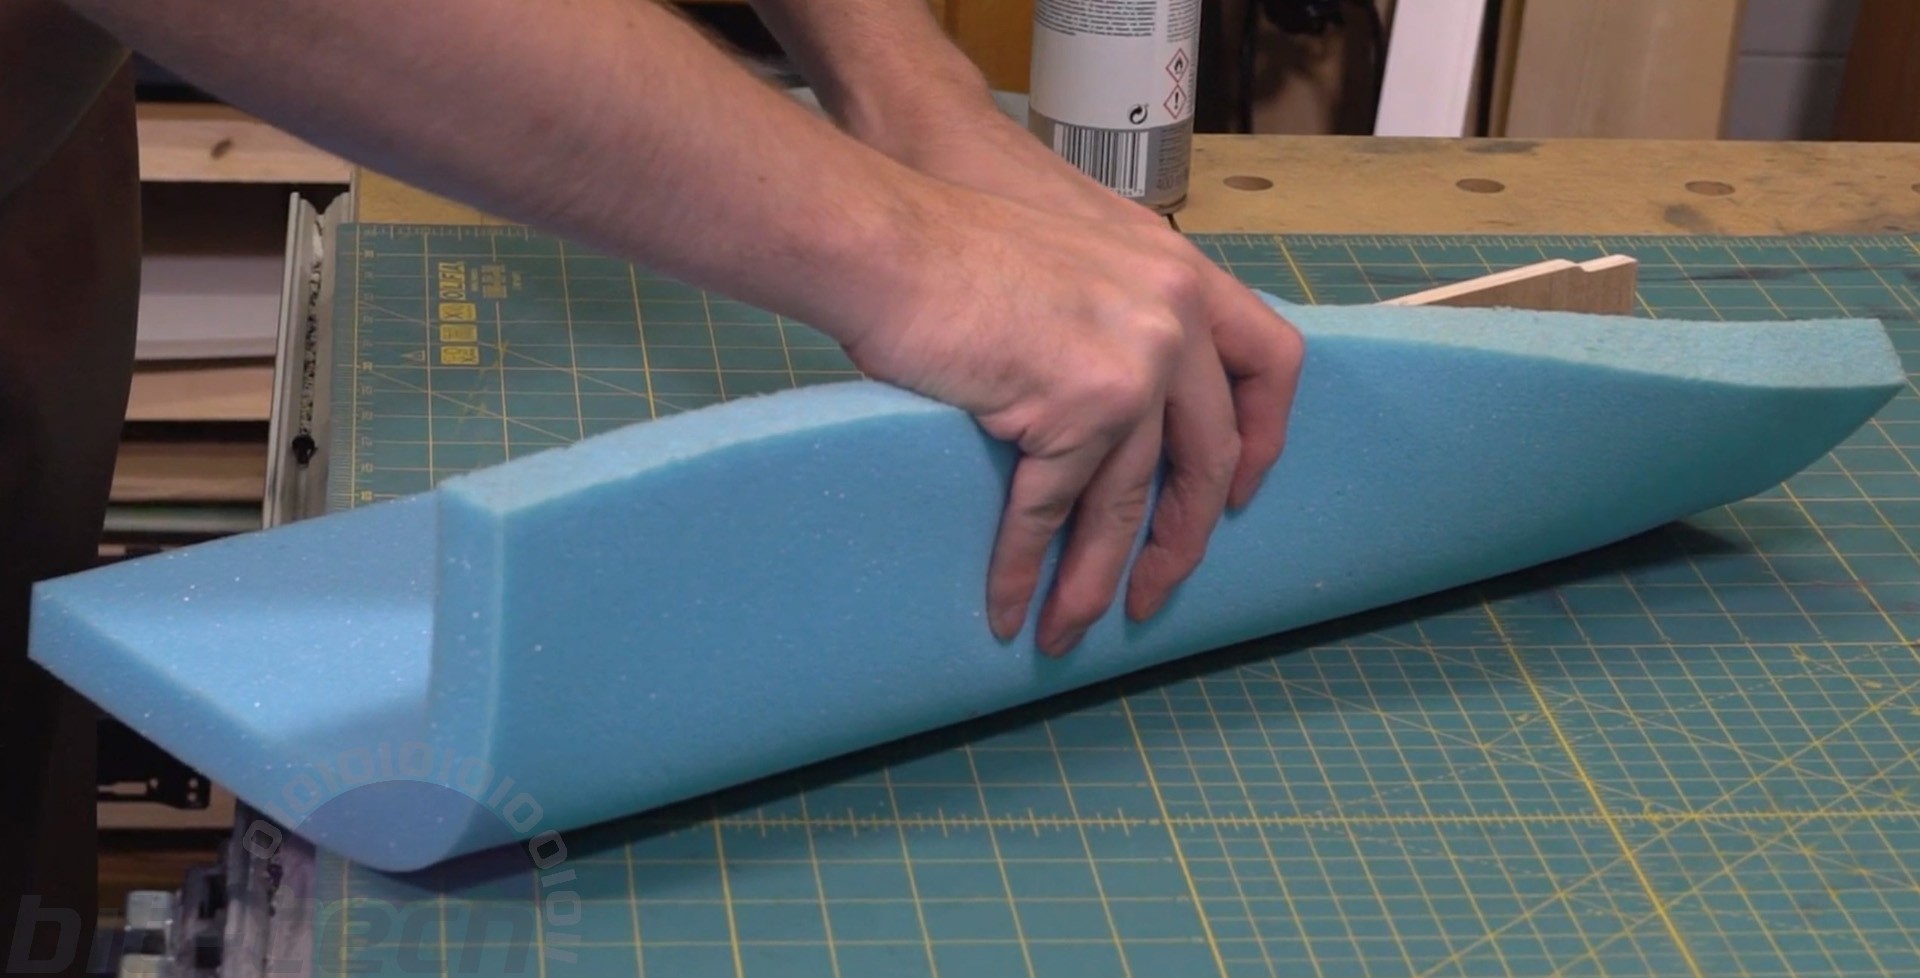
The shroud itself was really just a scaled up version of the test piece, using 30 or so buttons rather than just 5-8. Since I had the design drawn out accurately anyway, it just made sense to CNC-cut it from ply; at least that way the mounting holes would all line up as would the tufting holes. I 3D-printed a couple brackets to attach the two pieces (no time for gluing, as it needed to be strong that day) as well as a mount for inside the chassis. After that it was a matter of gluing the upholstery foam to the wood, dyeing the full hide and cracking on with things.
It was a very satisfying experience all in all, very different to other parts of the project that are more precision-based. It was great fun slowly developing a feel for the process as I went along. You can see how some parts aren't as clean and pronounced as I'd perhaps like, but that's all part of learning. I like to think that the next time I do this I can build on those new skills and then push a little further. That said it certainly looks comfy!

RELATED ARTICLES


MSI MPG Velox 100R Chassis Review
October 14 2021 | 15:04

Want to comment? Please log in.