LDLC Modding Trophy 2018 - Let's Build it!
January 23, 2019 | 19:00
Companies: #be-quiet #ekwb #epic-games #ldlc #thermaltake
You may remember that back in October, I was invited to take part in LDLC's 2018 edition of its modding trophy. Since then, the event has come and gone, with all four mods on display at LDLC's booth at Paris Games Week. Now that the rush is behind us, we're going to take a look through how the project turned out as well as what was done along the way to get it to that point.
The project brief was fairly open-ended: We each had to mod a supplied chassis and components to fit a chosen theme, this year's being the vastly popular battle royale game Fortnite. How we interpreted that was entirely up to us, and I opted to theme the build around one of the popular character skins from the game, the Red Knight. In the previous article, we went over some of the plans for the mod itself, including touching on a number of the themed elements and design decisions. Let's delve in and take a closer look!

CAD Me Up, Scotty
This build had a tight deadline to it, operating straight off the back of the 1000D project and needing to be completed in time to be transported to France for Paris Games Week. This meant that planning was of utmost importance: I needed enough time for the custom work to be completed, and ordering materials on short notice can be very risky. To help this run smoother, I decided it would be best to do a very thorough model in CAD, planning to the maximum permissible level of detail. It is true that you can lose some of the spontaneity of a project by planning like this, but at the same time you can work out all your materials and processes in advance and be more efficient with your time.
The Dark Base Pro 900 Rev. 2 is a very modular case in the truest sense of the word. The majority of the case is held together with screws, meaning you can take it apart easily to rearrange pieces. Being designed with disassembly in mind, it's also robustly constructed. A big pet peeve of mine with modern case design is the ruthless structural efficiency that's often employed. Very frequently, even in supposedly high-end chassis, one might remove the rivets for a PSU shroud or motherboard tray and see the case become a flimsy shell. Often this means you're forced into replacing more and more of the case with custom parts as you try to sort out the lack of structural integrity. Cases like the 1000D are good examples of this, where we ended up replacing almost the entire interior simply because the existing panels offered no support without the motherboard tray.
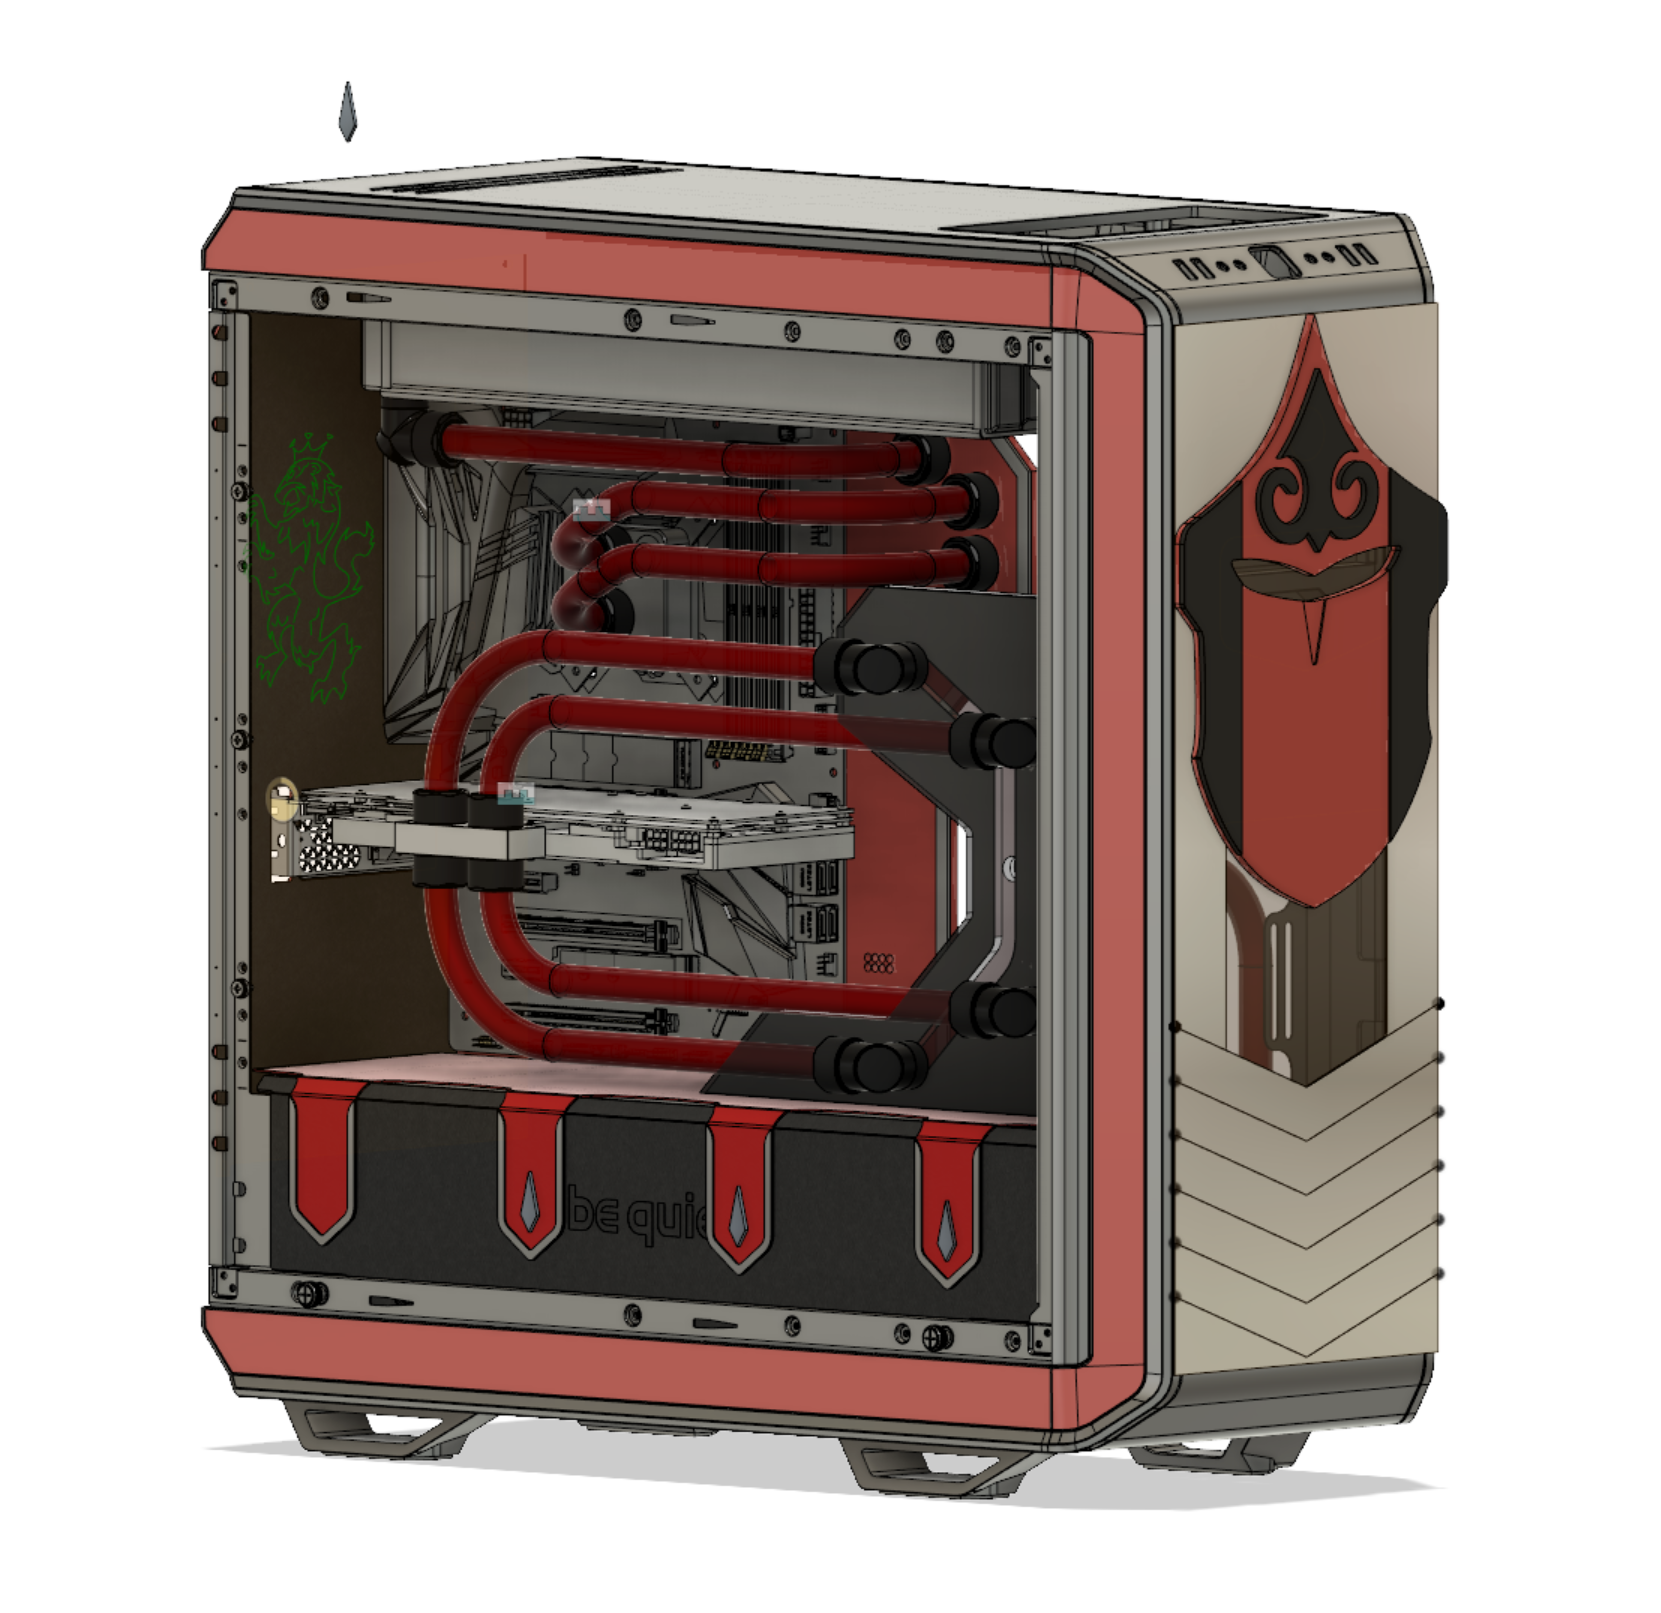
Be Quiet! definitely succeeded here by working around a base chassis, riveted like other cases but far more flexible. The main parts simply screw into this framework, completing the case as you see it. For this case mod this was particularly convenient, as it meant that there were suitable mounting points dotted all over the case for attaching new panels. I decided to rework most of the interior, replacing the motherboard tray and HDD area with an acrylic plate. This plate contains the cable routing for the motherboard and GPU, and it also adds colour to the build. A new rear panel was also designed, mostly to fit with the new acrylic piece but also to streamline the look and provide more options for artwork, such as the engraved lion sigil.
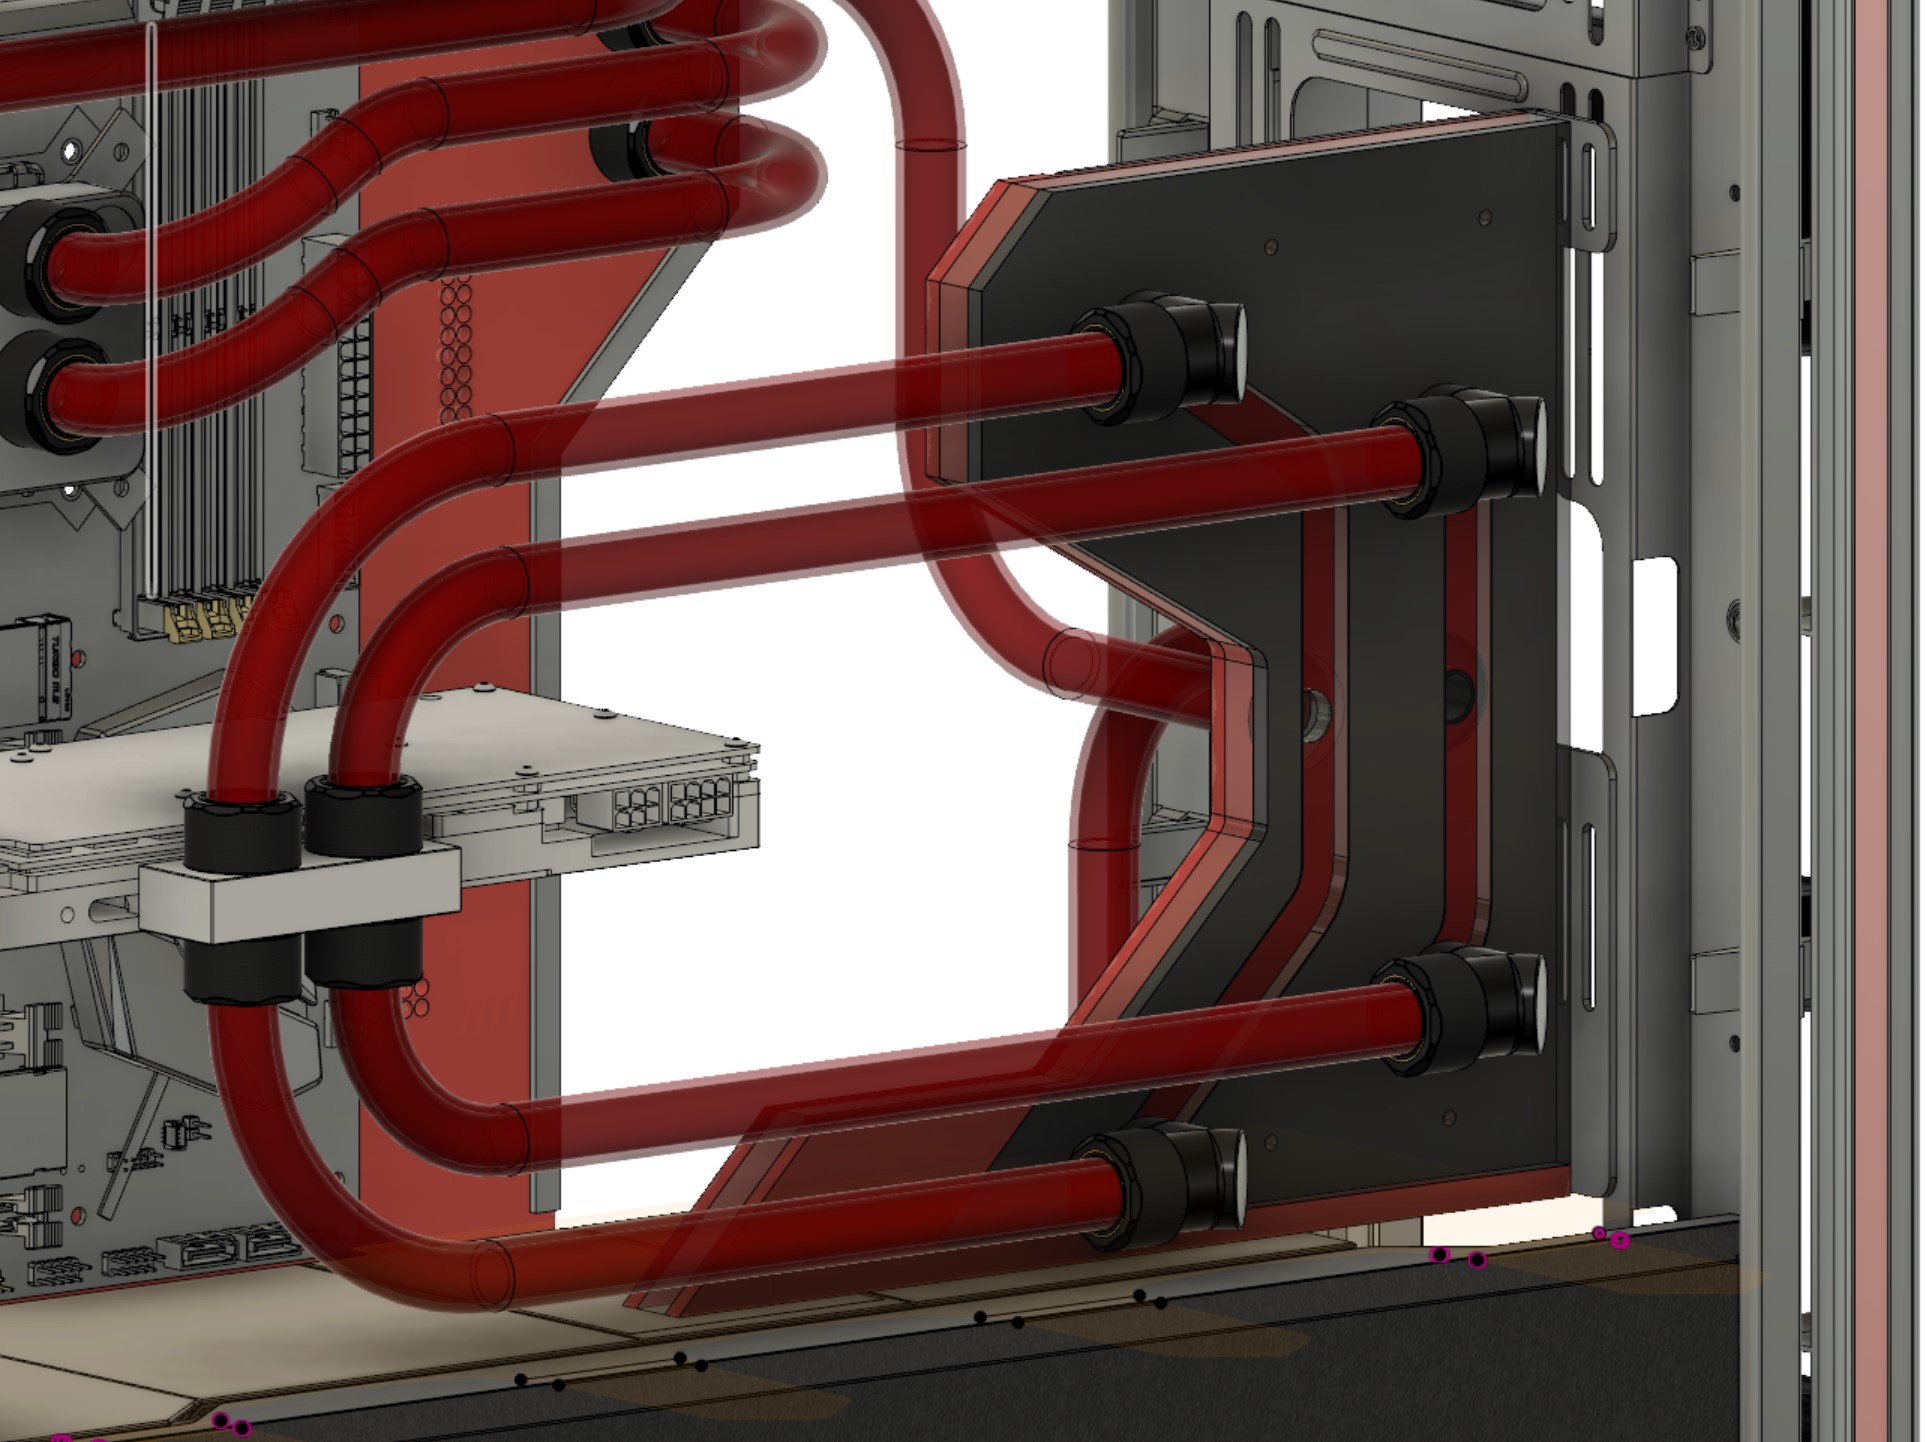
Since the build features a custom water loop, it made sense to try and make use of some machined reservoirs and distribution plates. For the front I went with a reservoir that could sit behind an aluminium and acrylic frame. The surface is engraved to emulate the chain mail that the character sports, with the top featuring the helmet. The sides of this front reservoir have LED channels built into them, so the coolant and engraved portions can glow when in use, and similarly the eyes in the mask will glow too when in use. For the interior I thought it would be nice to make the tubing itself more of a feature than I usually do, so I drew up a distro plate that creates a parallel-flow look for the GPU. This then connects to the motherboard tray via tubing and pass-through fittings, flowing in and out of the CPU water block.
Being able to visualise the system in full before starting construction meant I could plan in redundancy, such as spare acrylic in case the machining didn't work out or I got measurements wrong. Similarly by drawing in the tubing routes, it meant I could work out how many fittings roughly would be used, handy since we had a cooling budget.
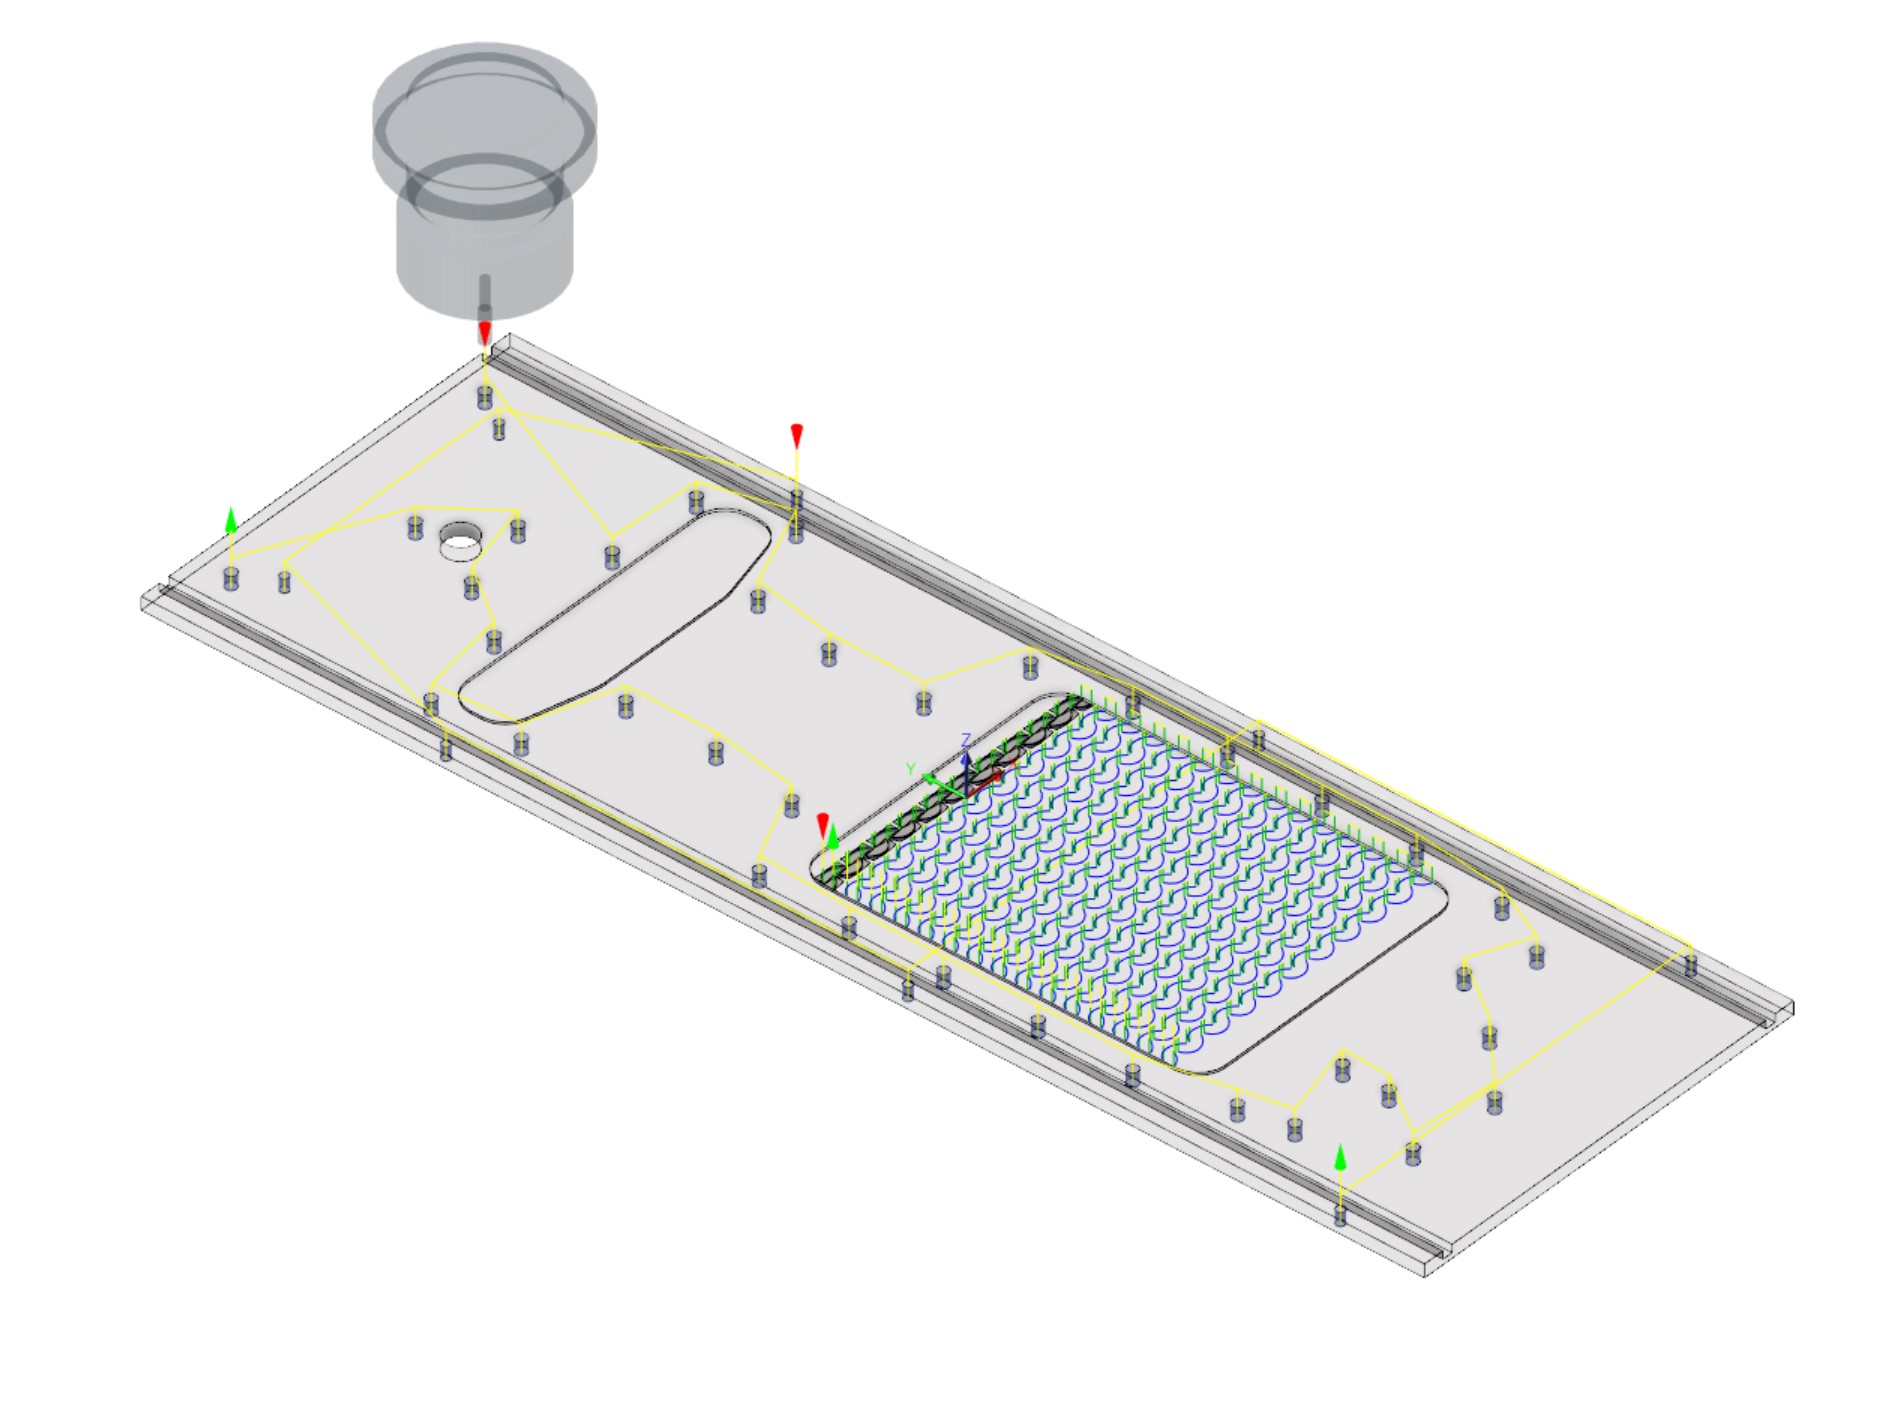
With the build fully drawn up, I took the parts and started the tool-pathing. I'm now able to cut parts in house thanks to the CNC router, so getting this step right is crucial and quite the learning exercise. The two distro plates are constructed from mirrored acrylic, which is extruded rather than cast. This makes them very flat but also harder to work with than cast, as extruded doesn't machine as easily. It's considerably easier to mess up the machining on an extruded part, so I'll usually run much more conservative settings and make sure to dump more coolant onto it than normal.


MSI MPG Velox 100R Chassis Review
October 14 2021 | 15:04

Want to comment? Please log in.