Machining
Up to this point, I've not actually cut 15mm acrylic on my machine before. Whilst not intrinsically different to 10mm, it does require some pre-treatment to have any hope of being accurate. To get around the wonky surface, a simple face milling job was in order. After taking off just under a millimetre, the top was now nice and level. Starting with an 8mm Datron 4-in-1 endmill, I roughed the main cavities and exterior, finishing with a 4mm to ensure the interior corners were crisp enough for the PCB to fit. It's not a complex set of cuts, but it is quite lengthy, as there's a lot of material to remove, plus it was pushing nearly 35°C in my shop thanks to the sun deciding to rock up.


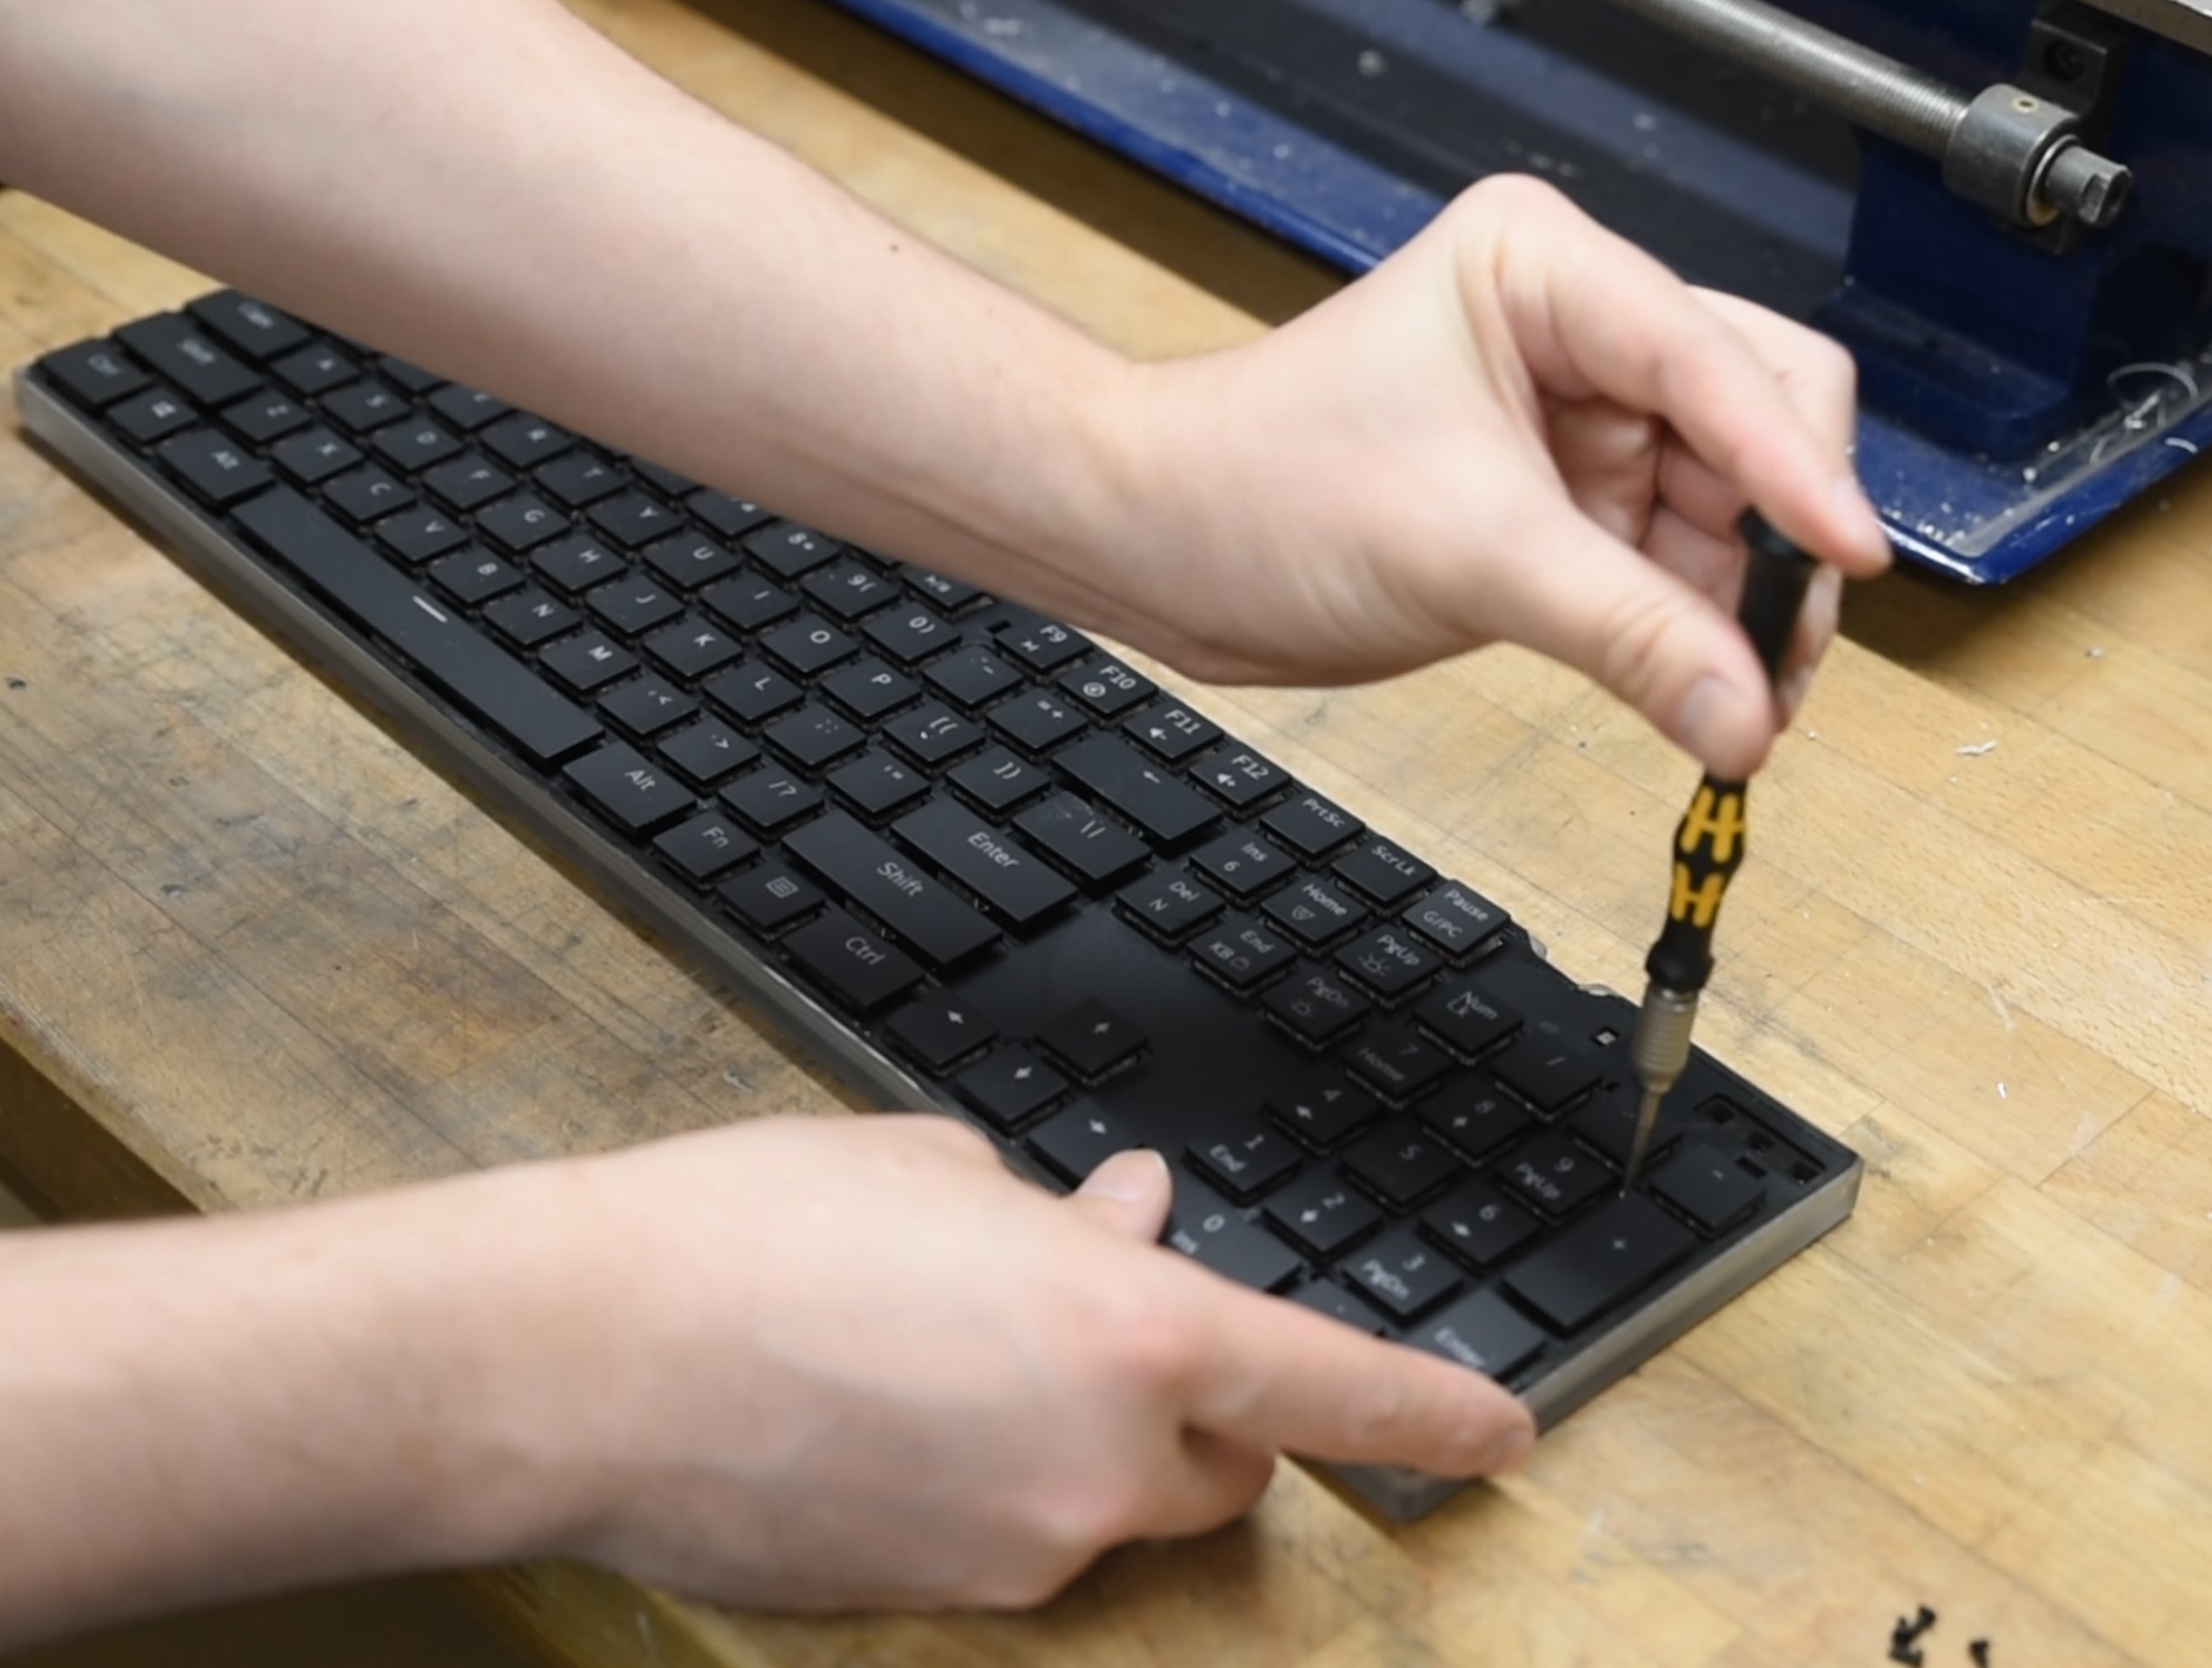
Skipping the finishing pass (since the exterior will be frosted anyway), I decided not to drill the mounting holes using the machine but rather to spot drill instead. Normally, it wouldn't be a problem, but M2 is tiny and I didn't have an endmill both long and narrow enough for the job. I could also have used a normal drill bit but didn't have a collet of the correct size around.
As expected, the material warped a little during the cutting, likely thanks to less than ideal workholding and temperatures. That said, it was only by 1mm or so, not good for further machining but fine for the mod itself. I used the pillar drill to add the mounting holes, which were then tapped to M2, and then flipped the part and used a 5mm bit to create a recessed housing for the screws underneath.


The underside has a chamfer that runs around the whole board. This would normally be a few seconds with a chamfer mill on the CNC, but with the warping it would just look terrible, so I decided to do it manually instead. Using the disc sander attachment on the little belt sander, I carefully sanded the edge so as to achieve the most even chamfer I could. Thankfully, the disc sander has a table with an angle setting, which made the process much easier.
After that it was just a matter of going at it with the random orbital sander with 180-, 320-, and 500-grit papers to leave a nice and smooth finish that would diffuse the light nicely.


Finishing
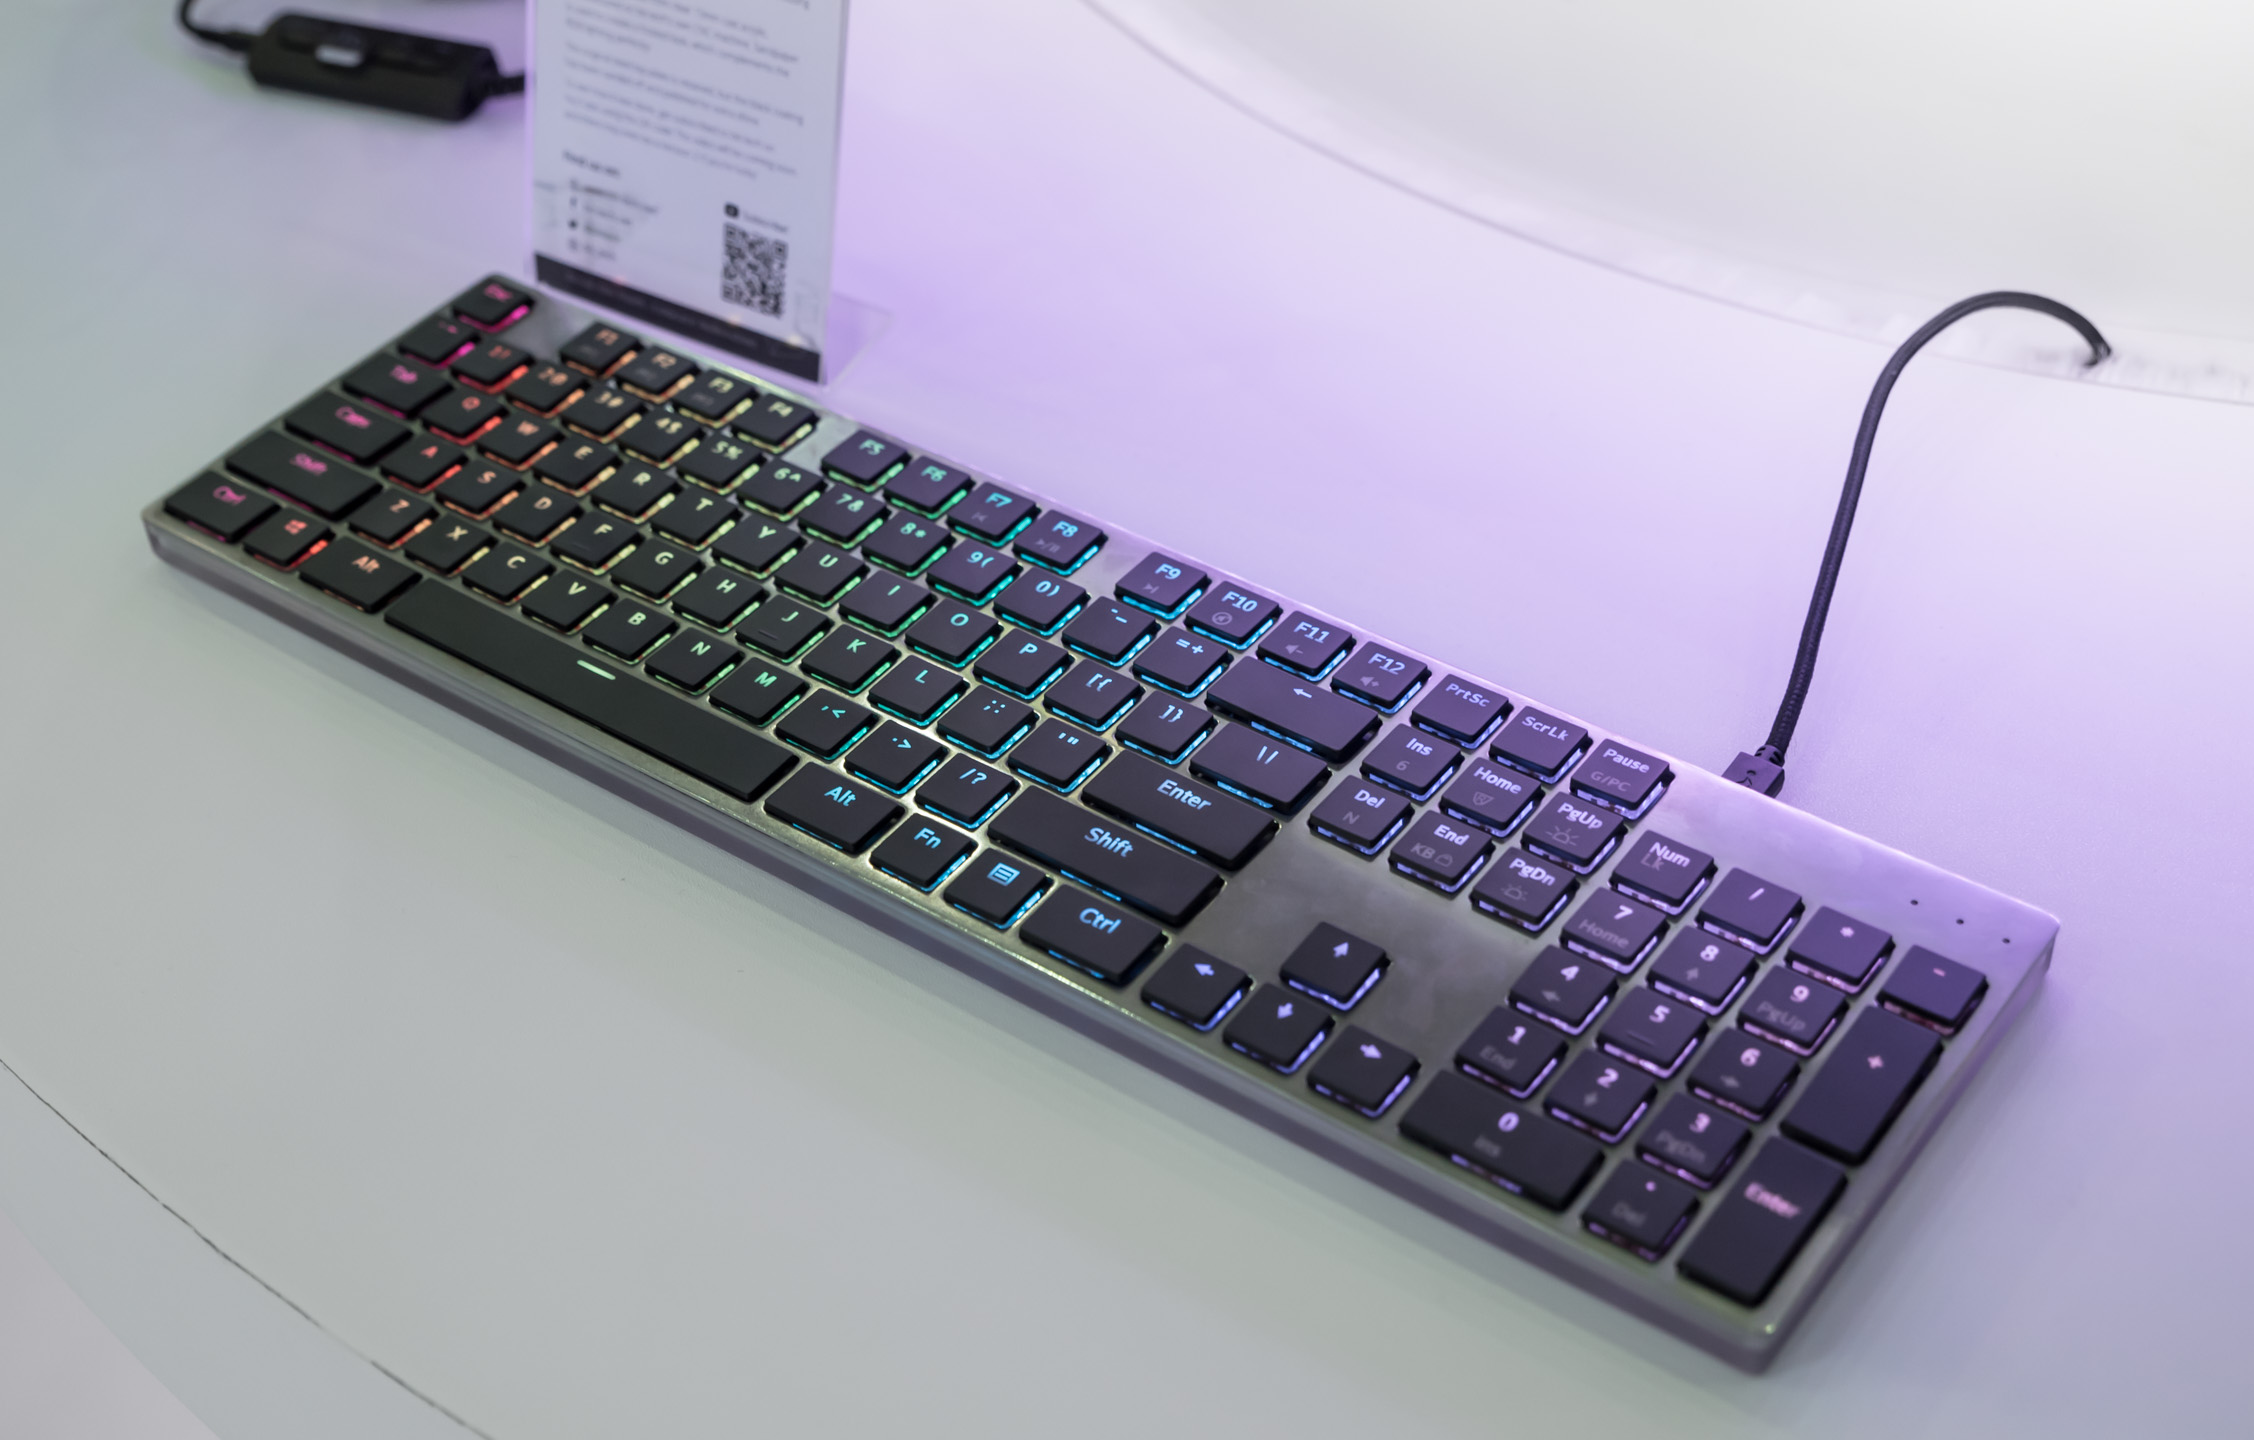
With the housing complete, it was time to have a look at the surface of the board. The top may appear at first glance to be plastic, but it is in fact a fairly hefty piece of steel that's been painted. So to bring out that material a bit, I decided to sand down and polish it. Starting with 120-grit and going in rotary mode, I removed the paint from the surface and the outer edge. Next, I worked my way up the grits, going 180/320/500/500 soft/1,000 soft/2,000 soft, then finally finishing with 6k and 11k polish on a lambswool polishing head.


With the faceplate looking all shiny and chrome, all that was left was to assemble the parts back together again. And no, I could not believe they fitted! All plugged in, I was rather impressed by how the LEDs could be seen from the side, and the updated faceplate also contrasted rather nicely too. RGB certainly isn't to everybody's liking nowadays, but I must admit I'm a bit of a sucker for it on my peripherals.
So, anybody down for a round two?


MSI MPG Velox 100R Chassis Review
October 14 2021 | 15:04

Want to comment? Please log in.