A few months back I showed you how you can design a distro plate of your own using Autodesk's Fusion 360, the CAD/CAM software which I currently use for my own projects. We also took a look at the process of integrating a reservoir such as Watercool's Heatkiller Tubes into a plate, allowing you to have a plate with a three-dimensional element to it.
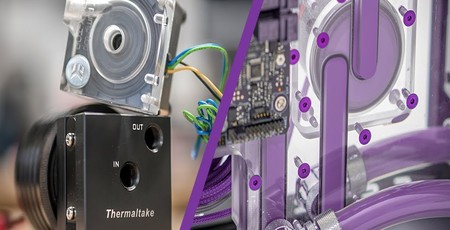
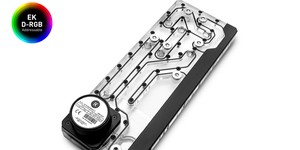
A very common request since then has been: 'How does one build a pump into a distro plate?' This is a good question since everybody seems to have their own way of doing it. Not only that, but companies such as Barrow and Bykski have been pushing their stock distro plates very hard over the last six months, many of which now come with mounting options for pumps built in. There's certainly an appeal to wanting the pump integrated into a distro. Not only is the pump an essential part of any regular water-cooling loop, but they can be really quite bulky and impractical, especially so for the large D5 pumps.
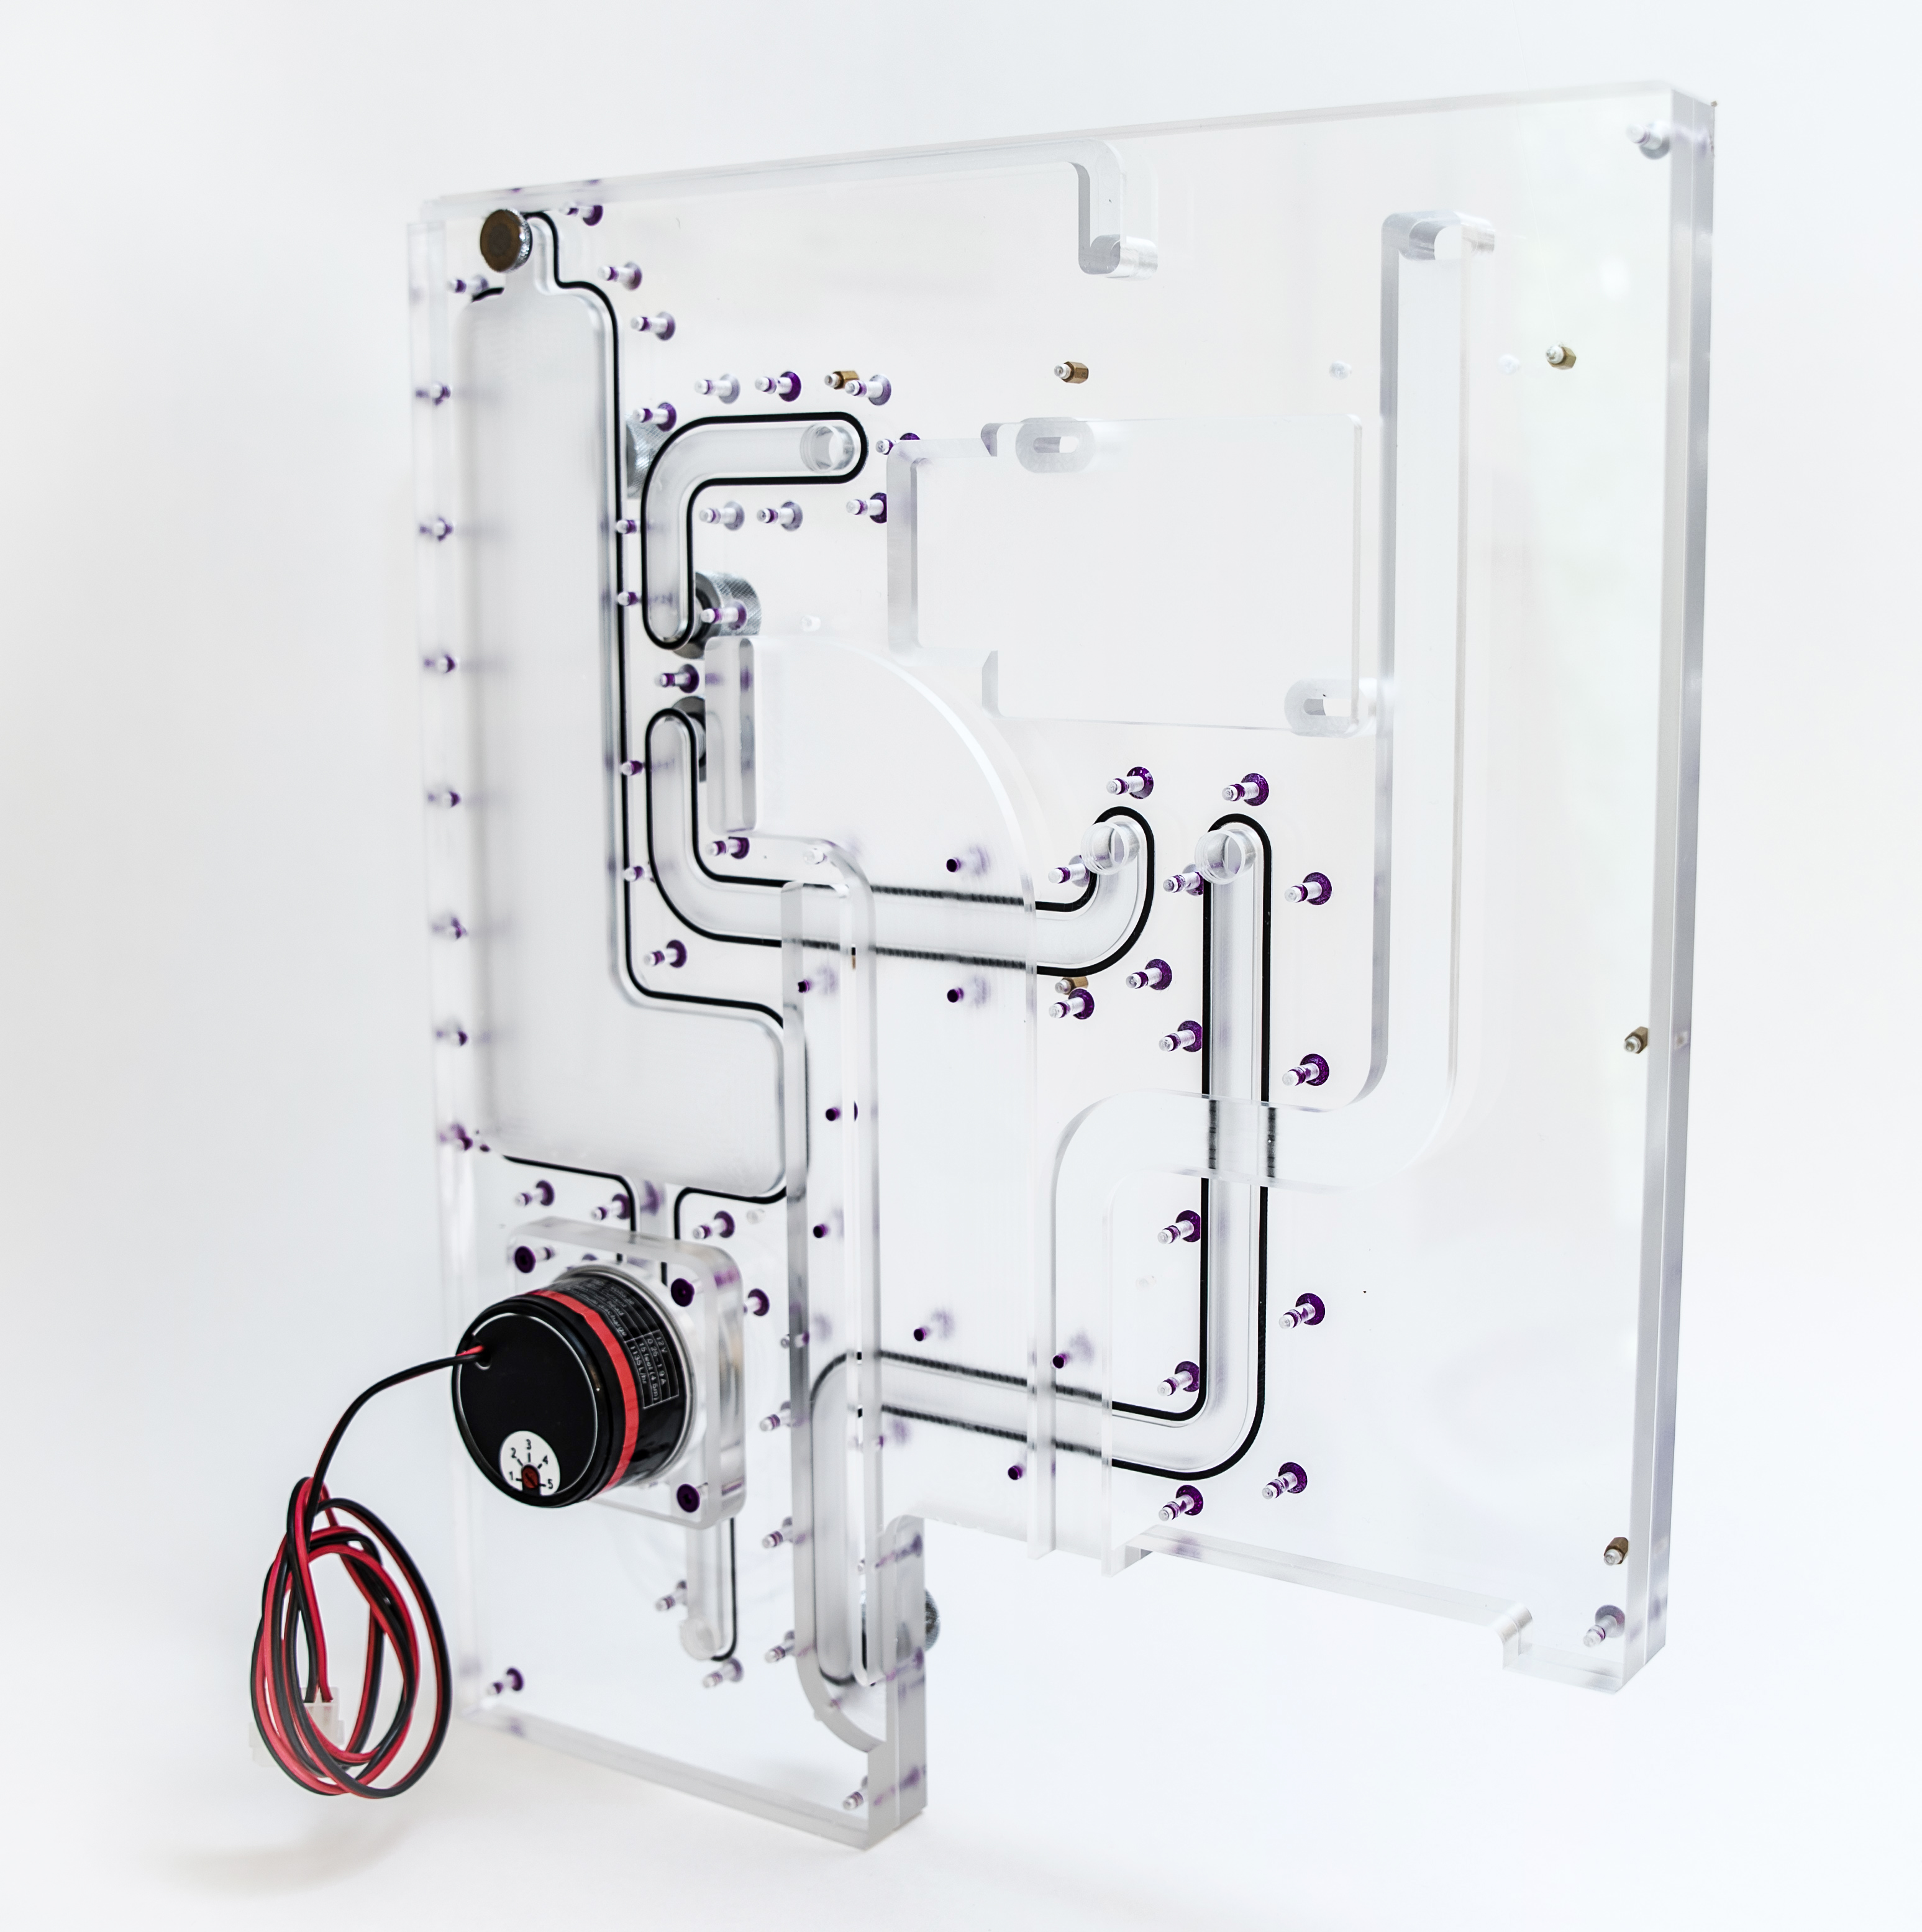
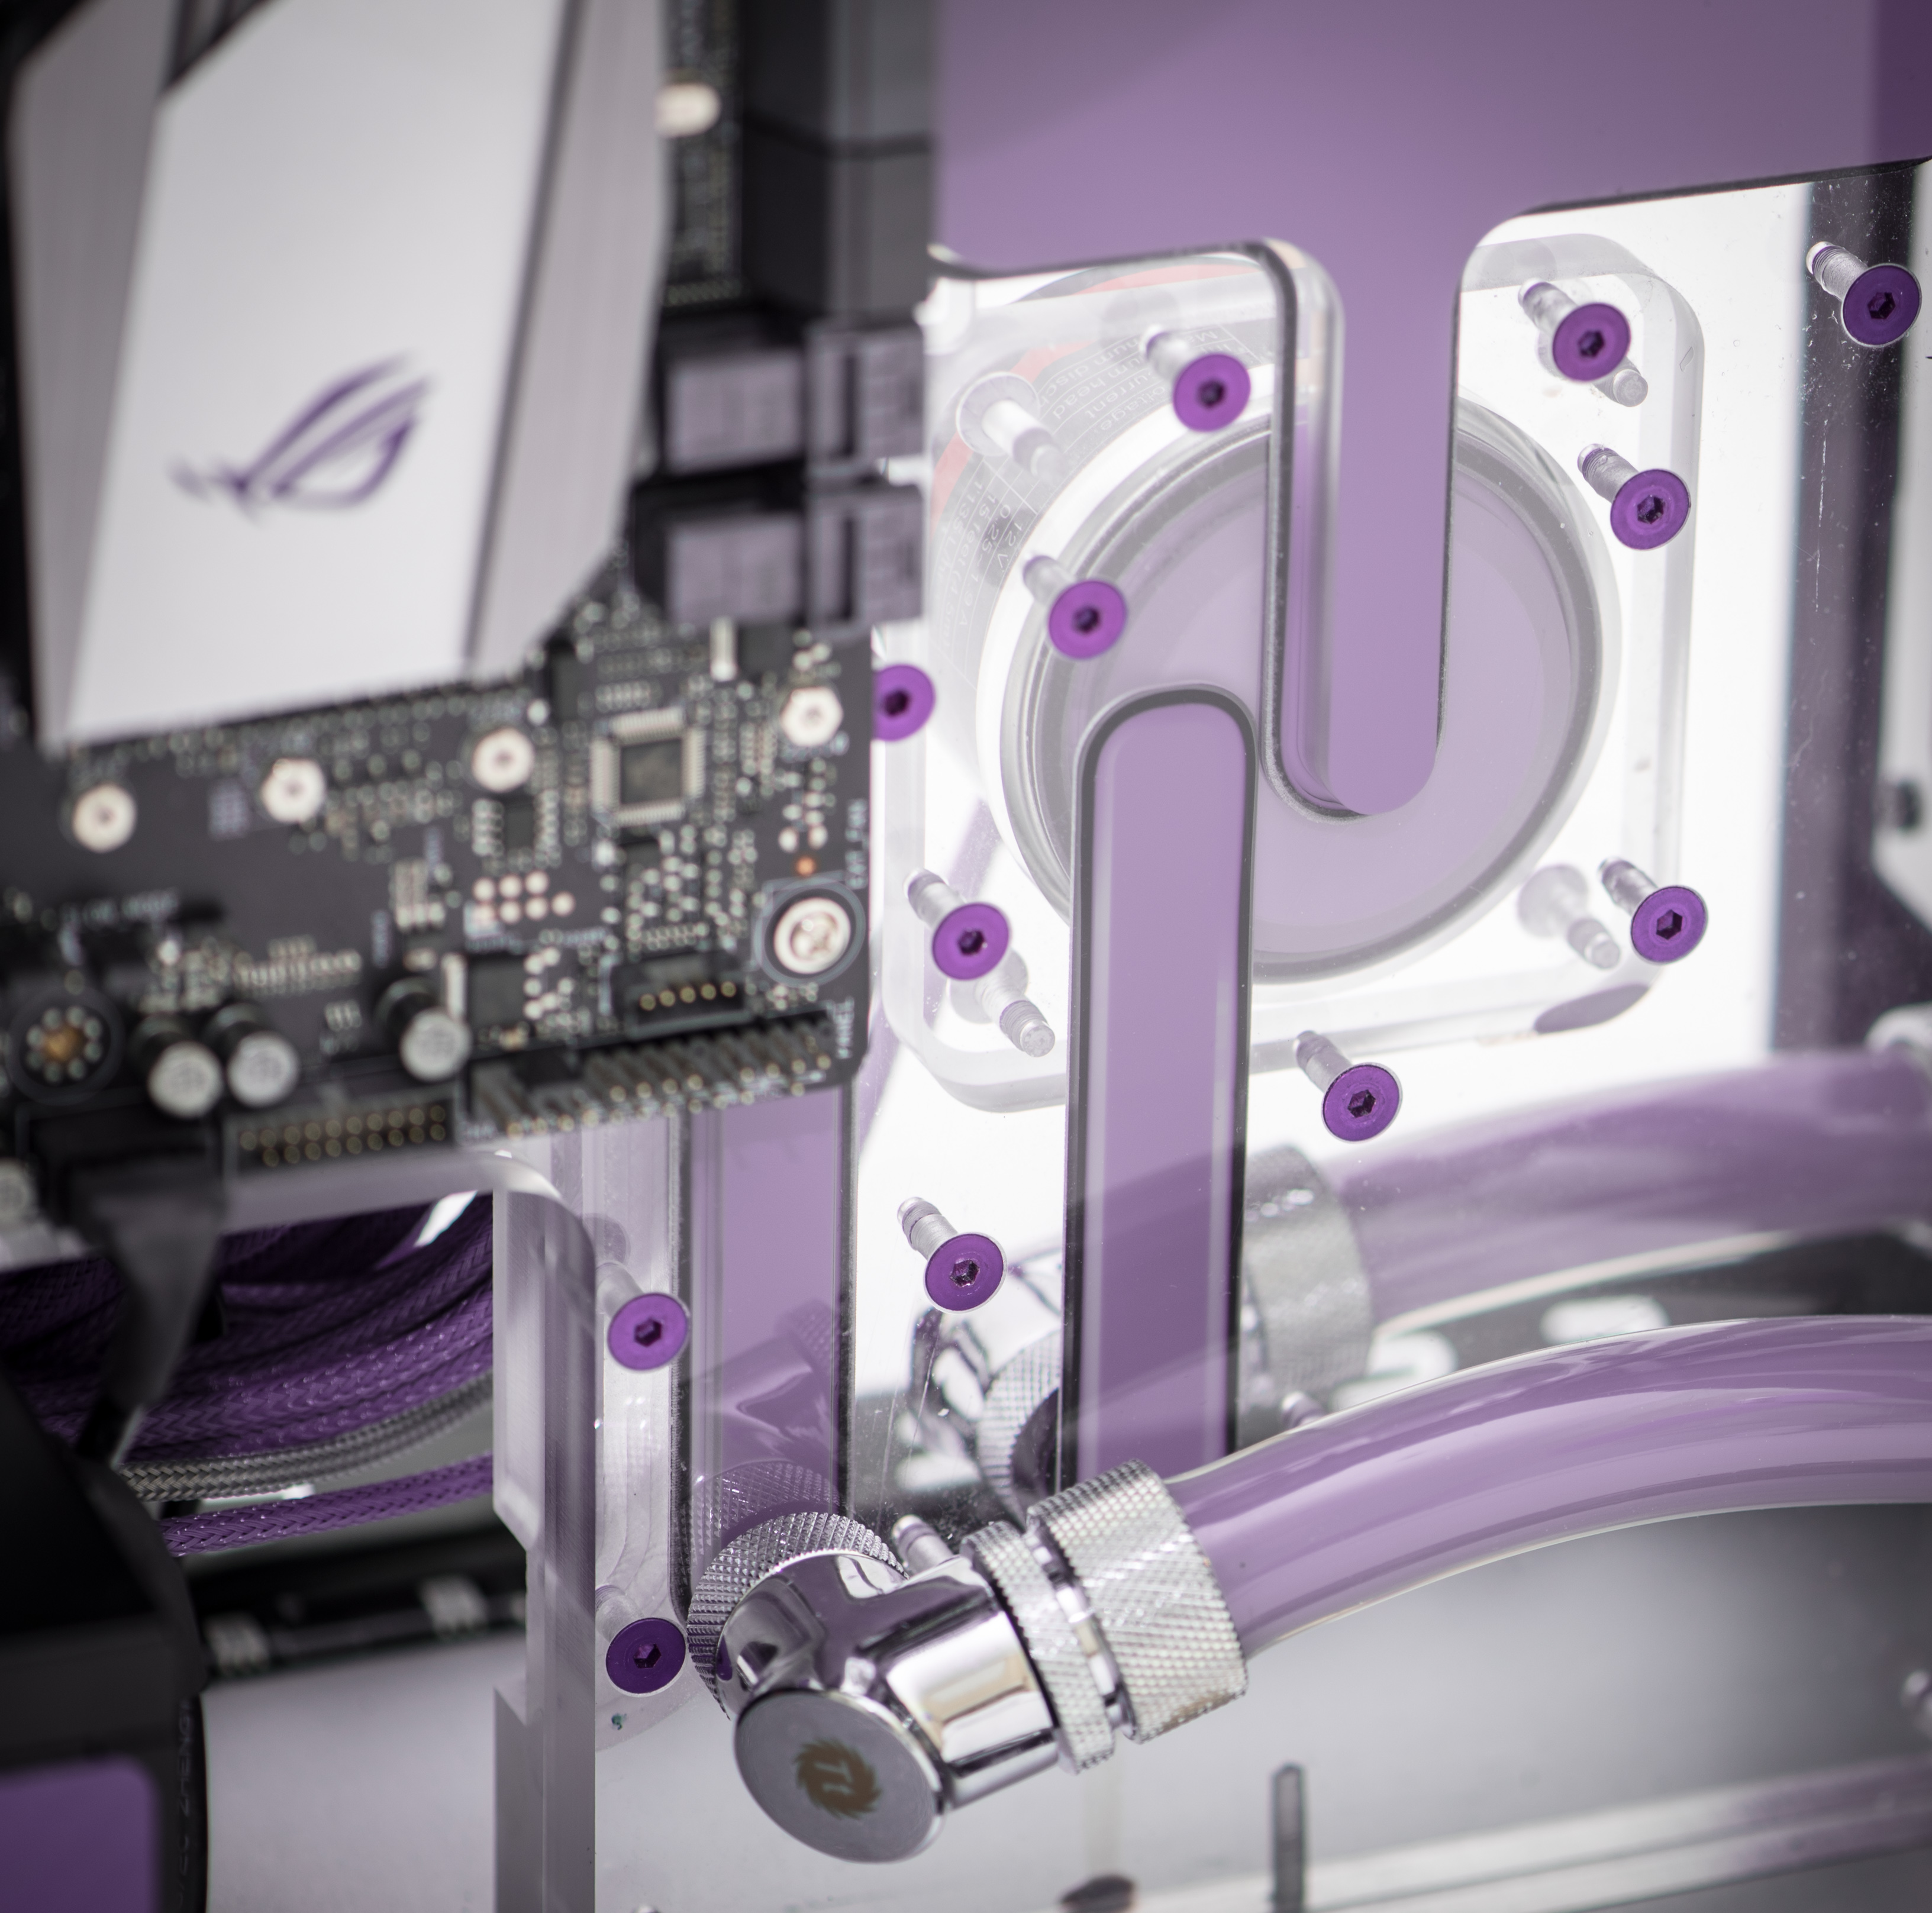
Taking the pump and placing it inside a distro plate is a fantastic way of freeing up space within a case. This is great for smaller form factor builds but also for large rigs that might feature multiple loops or multiple pumps. It also comes with the bonus that they can look fantastic since you can have full control over the aesthetic. So let's jump in and have a looksy! I'm going to be demonstrating two simple methods of incorporating first a DDC and then a D5 into a distro plate. By no means are these the only ways to do it, and they're also no doubt less efficient than some other designs. The main benefits are that this method is simple to model and easy to machine - both convenient factors when starting out.
You can download the 3D files made in this tutorial HERE.
How does a pump top work?
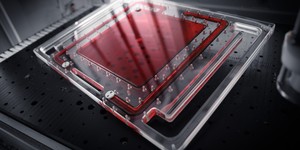
I would say the first step before making your own design is to have a look at how manufacturers handle it. Aftermarket pump tops have for a long time been very popular for both D5 and DDC pumps; they replace the stock, injection-moulded parts that both pumps ship with if you choose a basic kit. Nowadays many manufacturers ship pumps as enclosed units with their parts already fitted, such as in the EK DDC and Thermaltake D5 I'm using below. Pump tops really aren't any different to distro plates in how they operate, and as such it's not a bad idea to use them as a reference point for taking measurements. Most, however, will be constructed from a thick block of plastic (a few out there are brass) and machined on different sides to add the inlets and outlets in various positions. However, unless you have access to quite a fancy mill or are making something small, you're likely going to be using a sandwich of two plates like I showed in the distro plate tutorial, so some changes will need to be made.
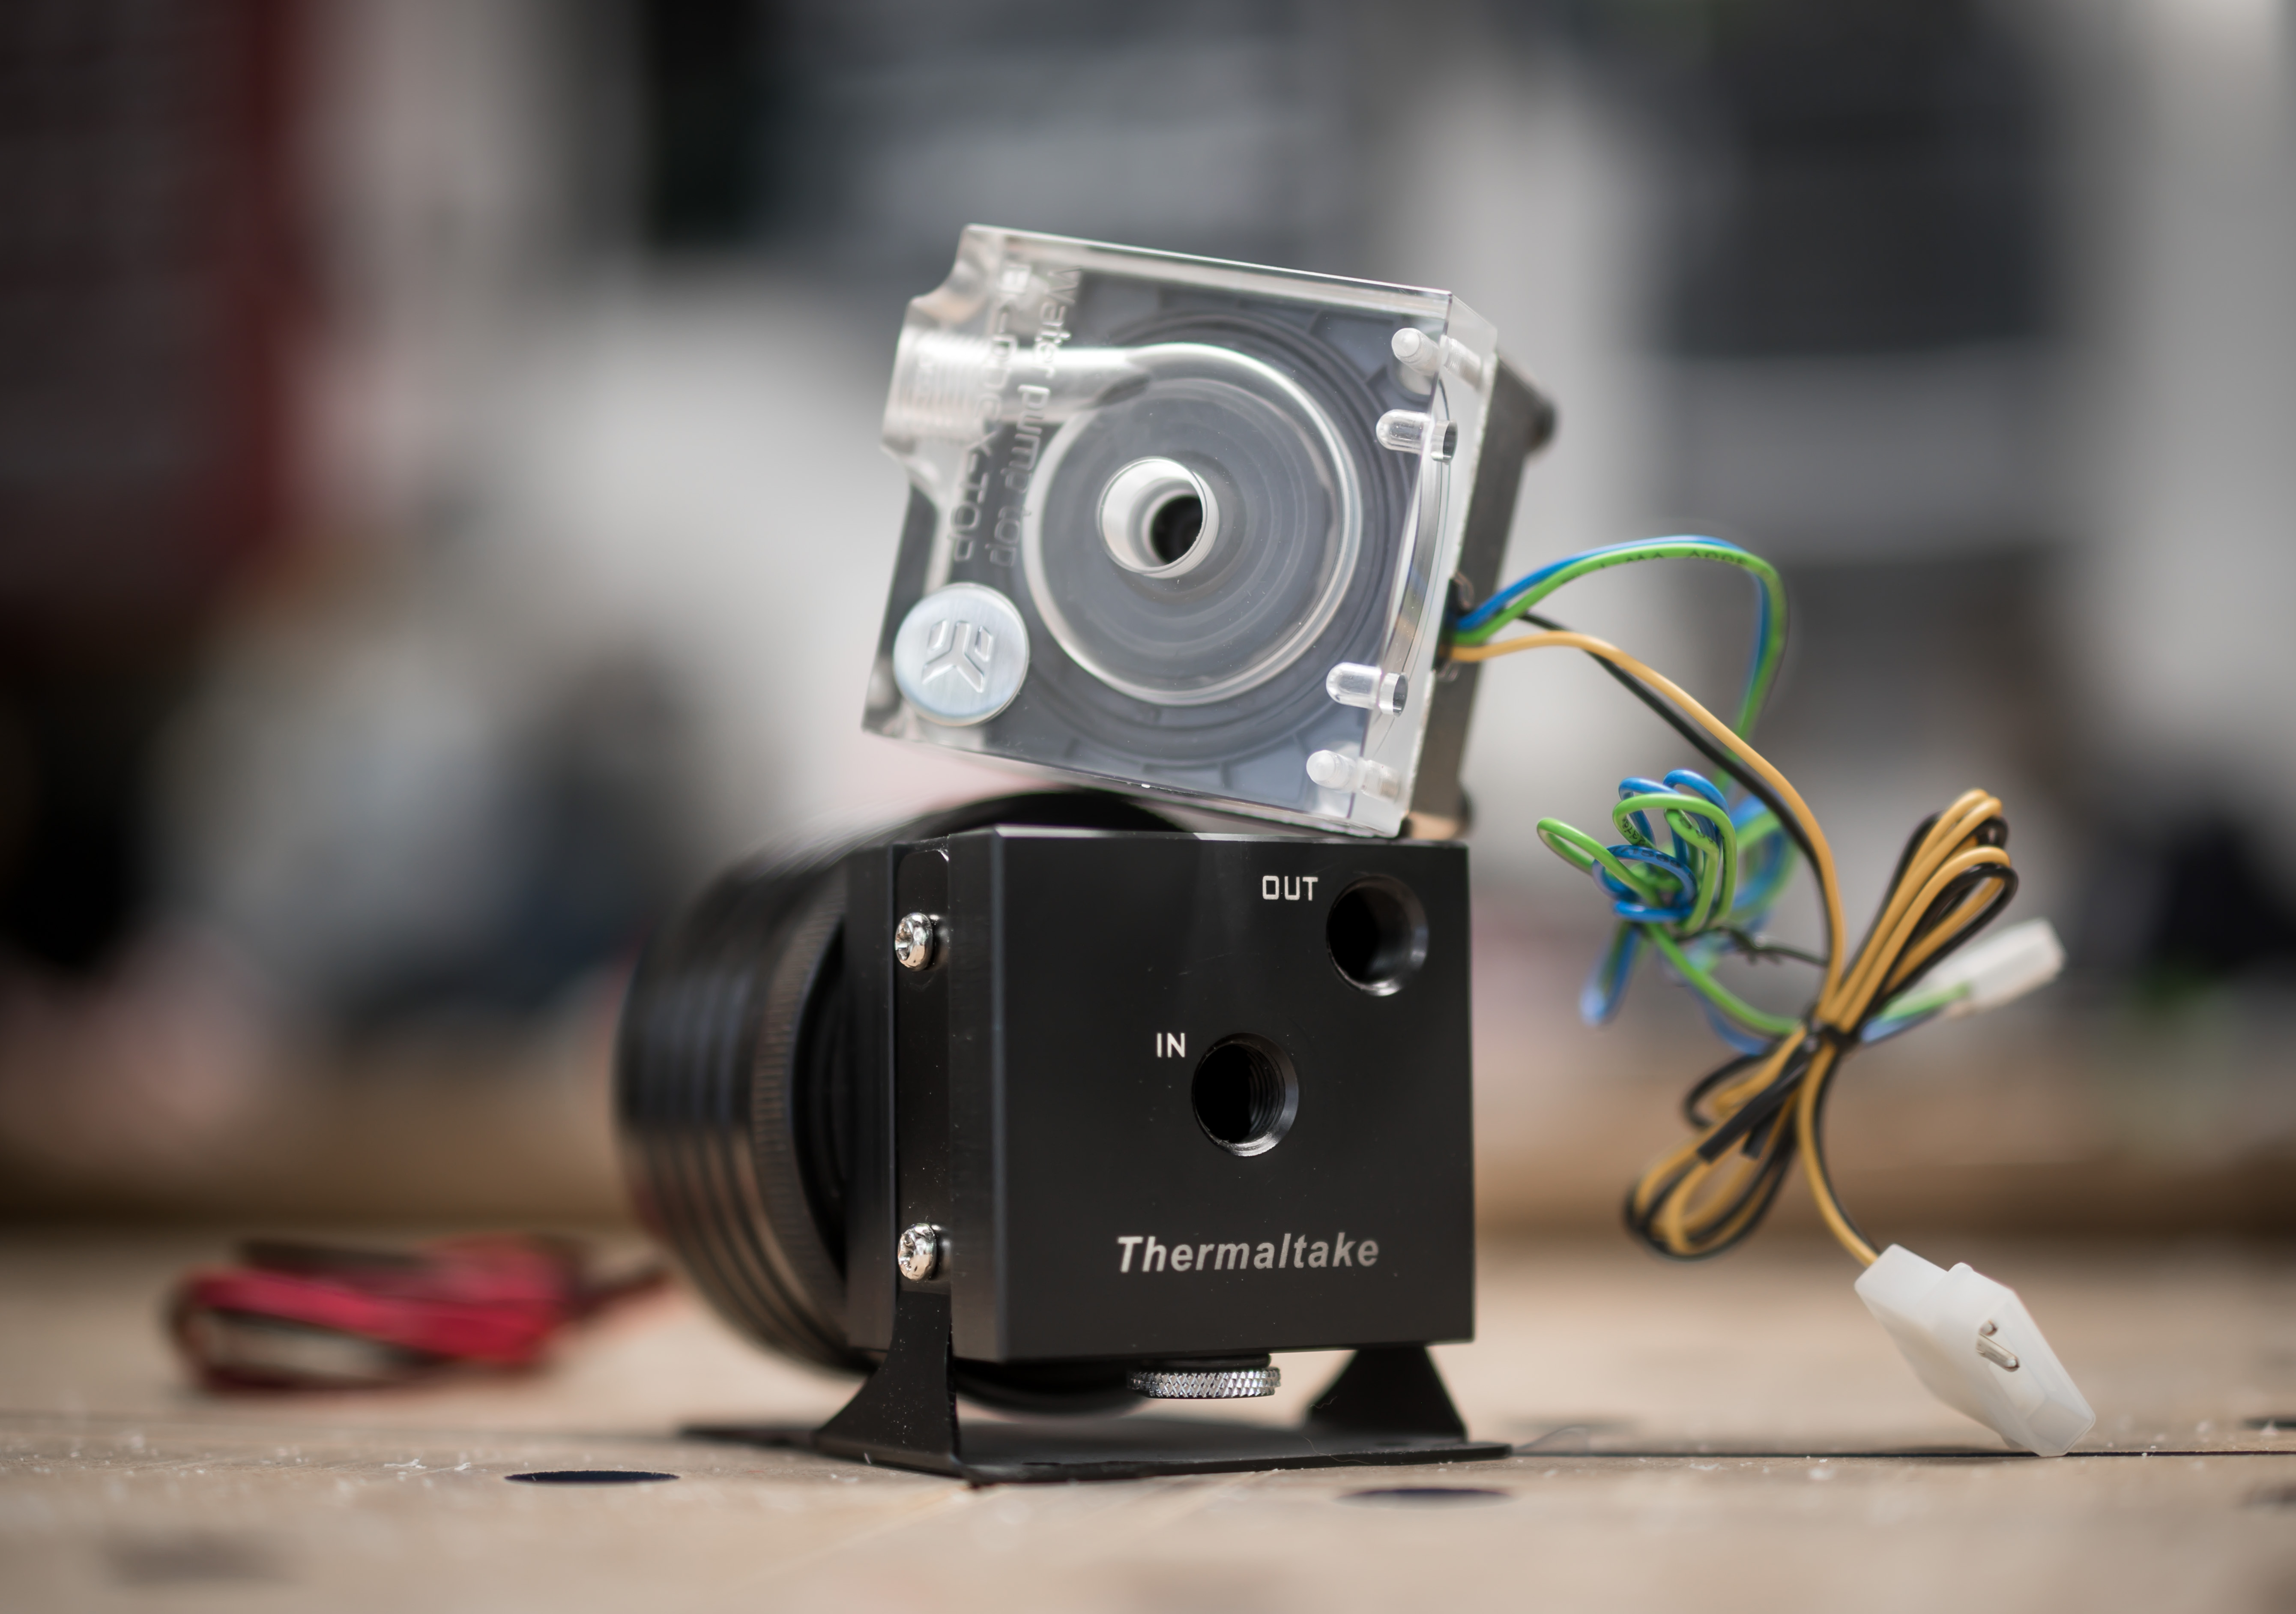
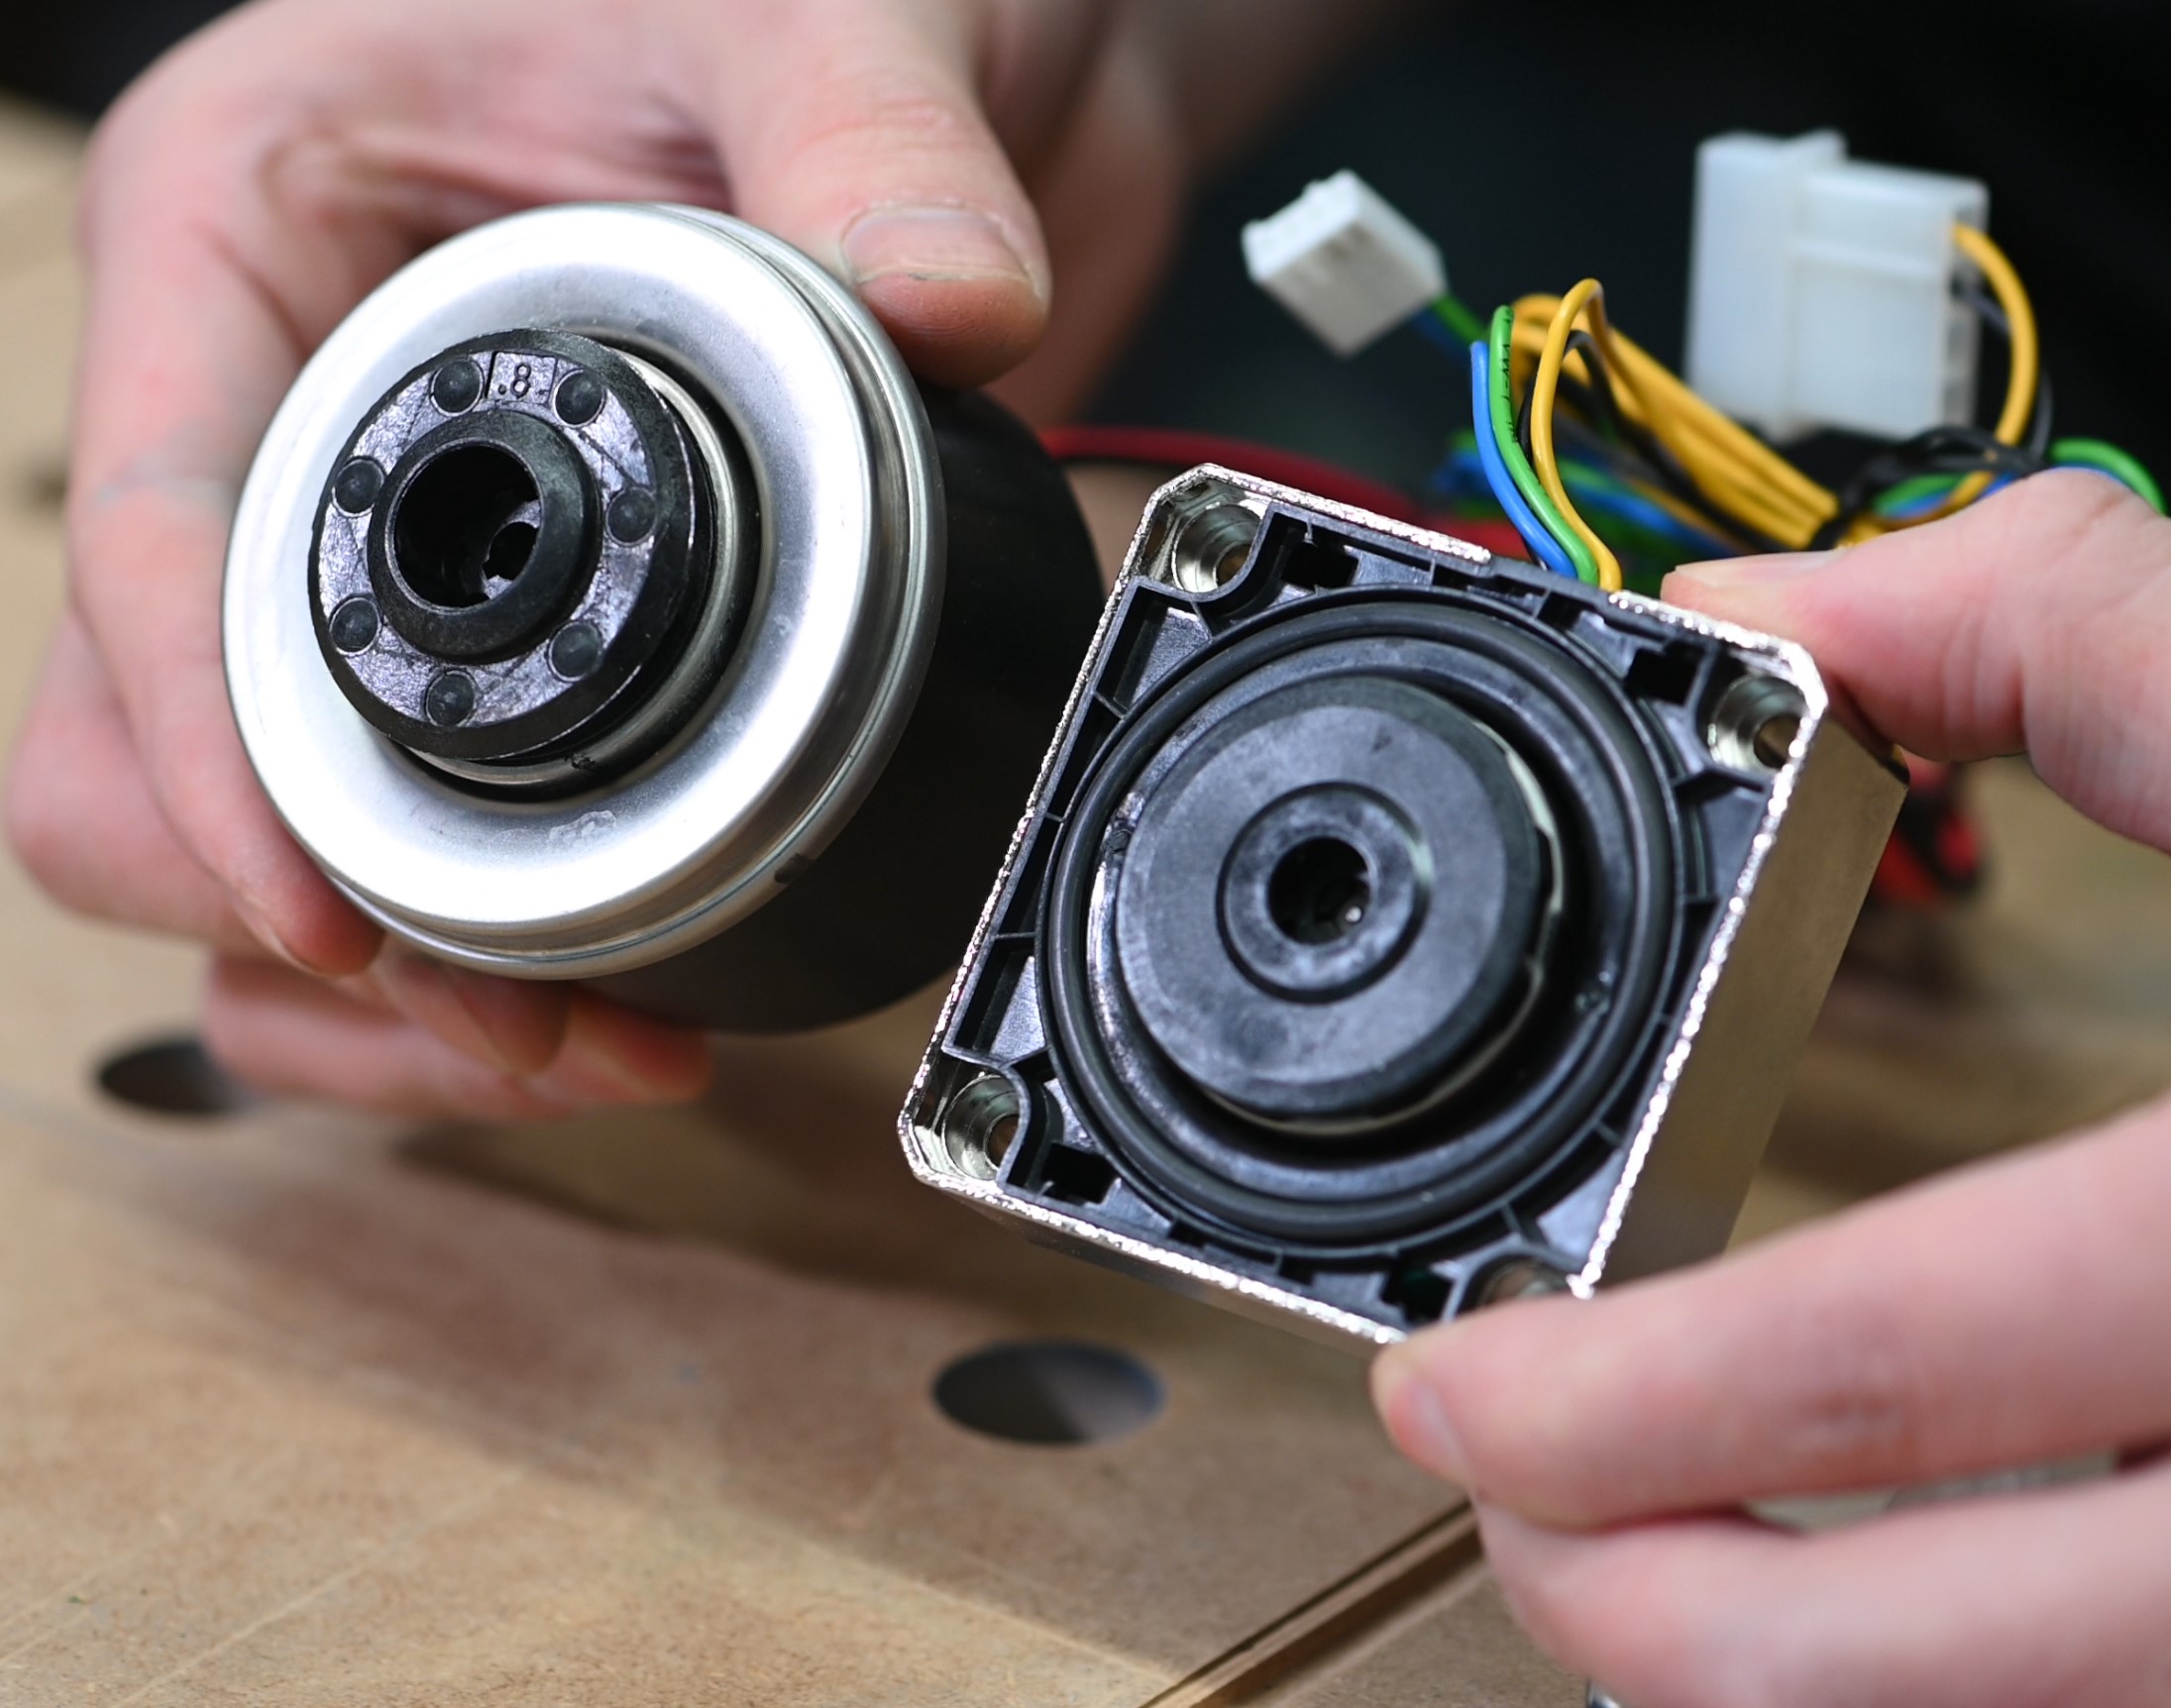
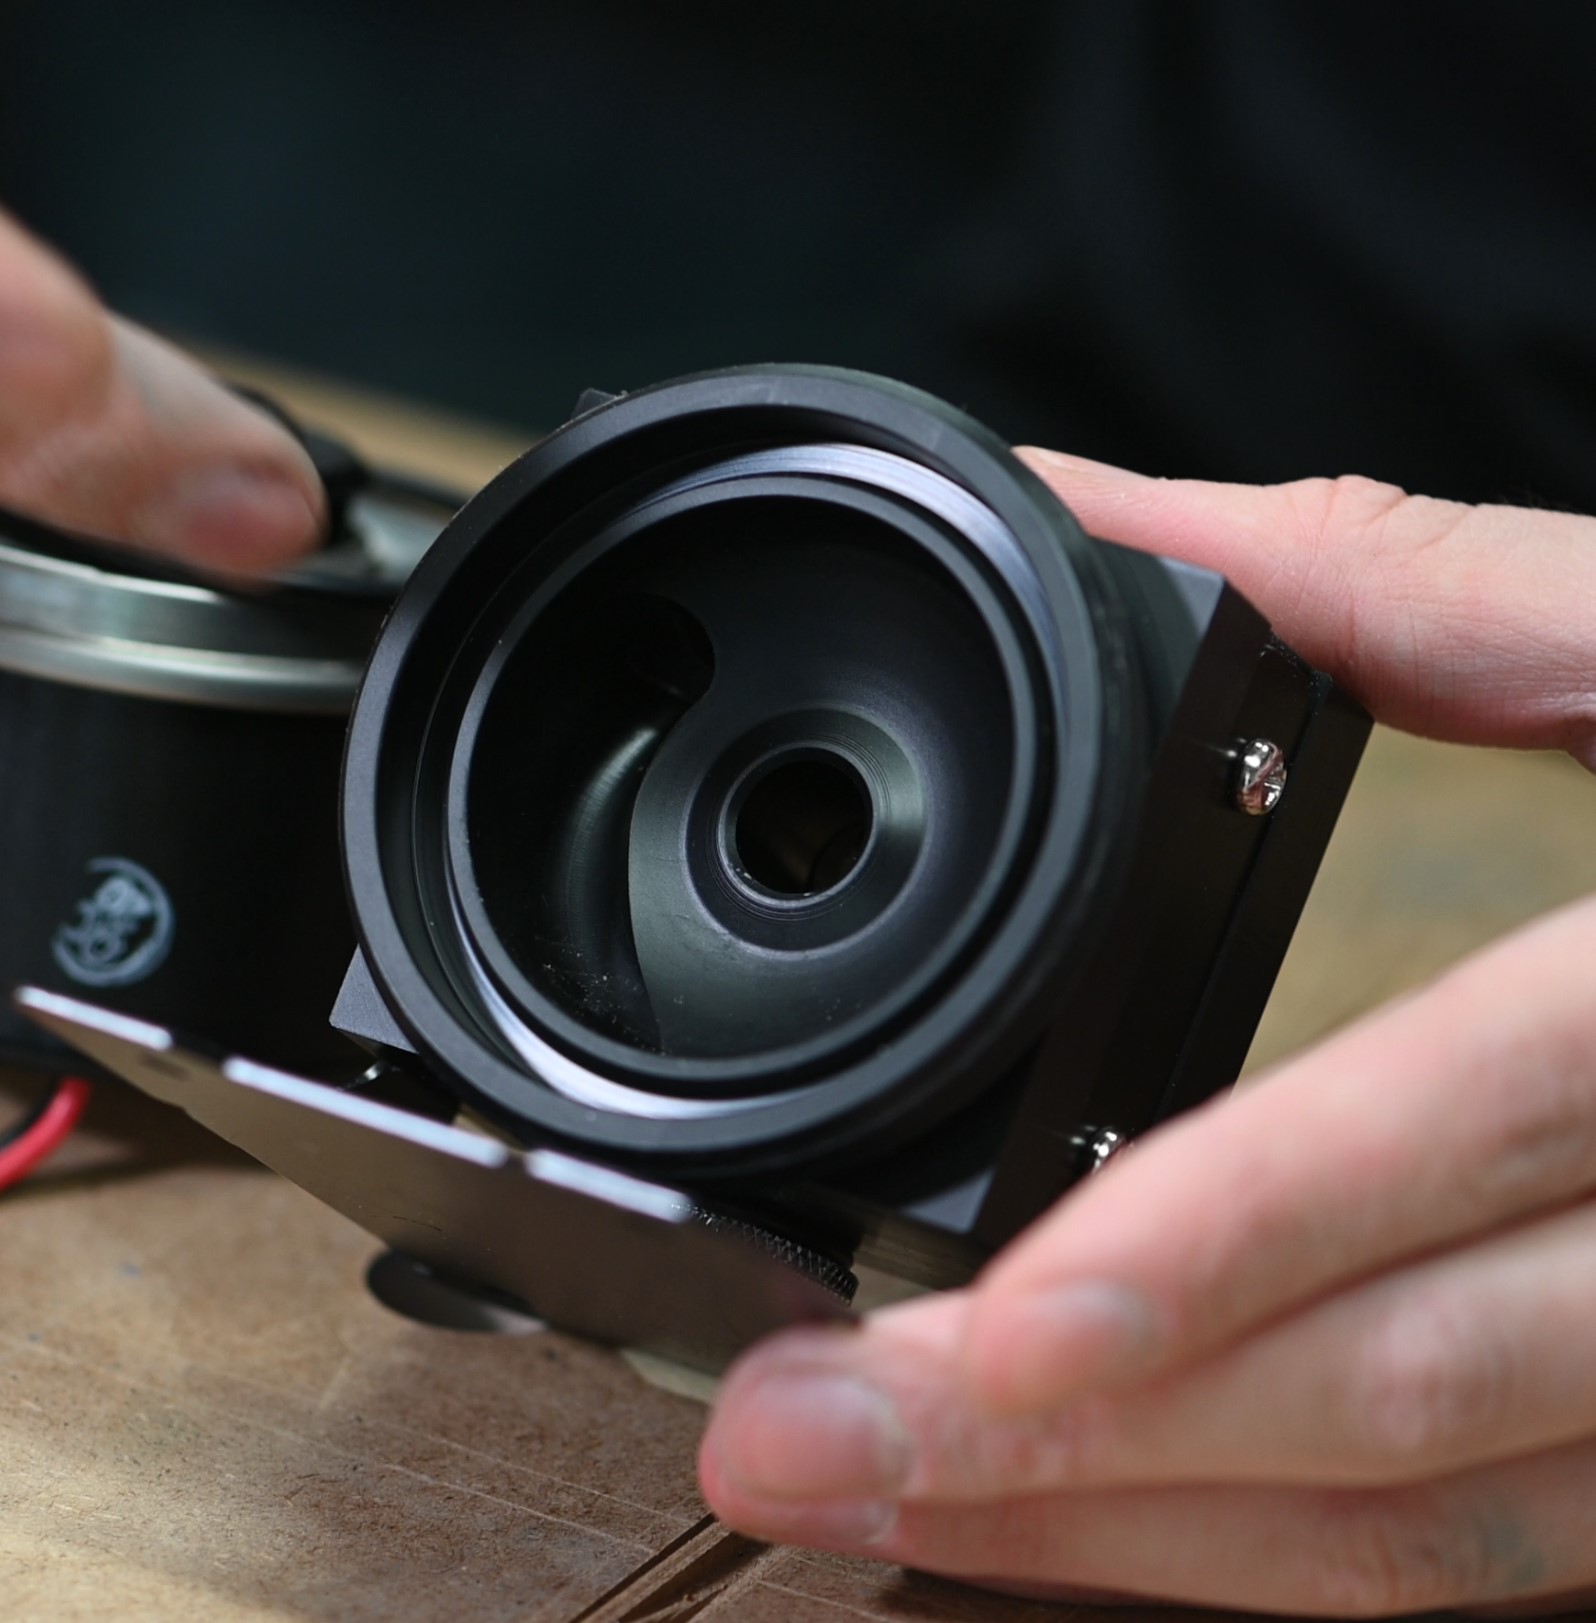
Taking a look at the two housings we have here, you'll notice that they're largely very similar. Both feature a central inlet, a (mostly) circular cavity in which the pump impeller spins, and then an outlet on the outside of the cavity. There are a couple differences, however, between the two pumps. The D5 is physically larger, requiring a wider diameter and deeper cavity to accommodate the larger impeller, and it also has an O-ring groove in the pump top, whereas the DDC has the O-ring groove in the pump body. This means that for the D5 you will need to remember to add an appropriately sized O-ring groove to the design; the DDC instead requires a smooth, flat surface around the cavity.
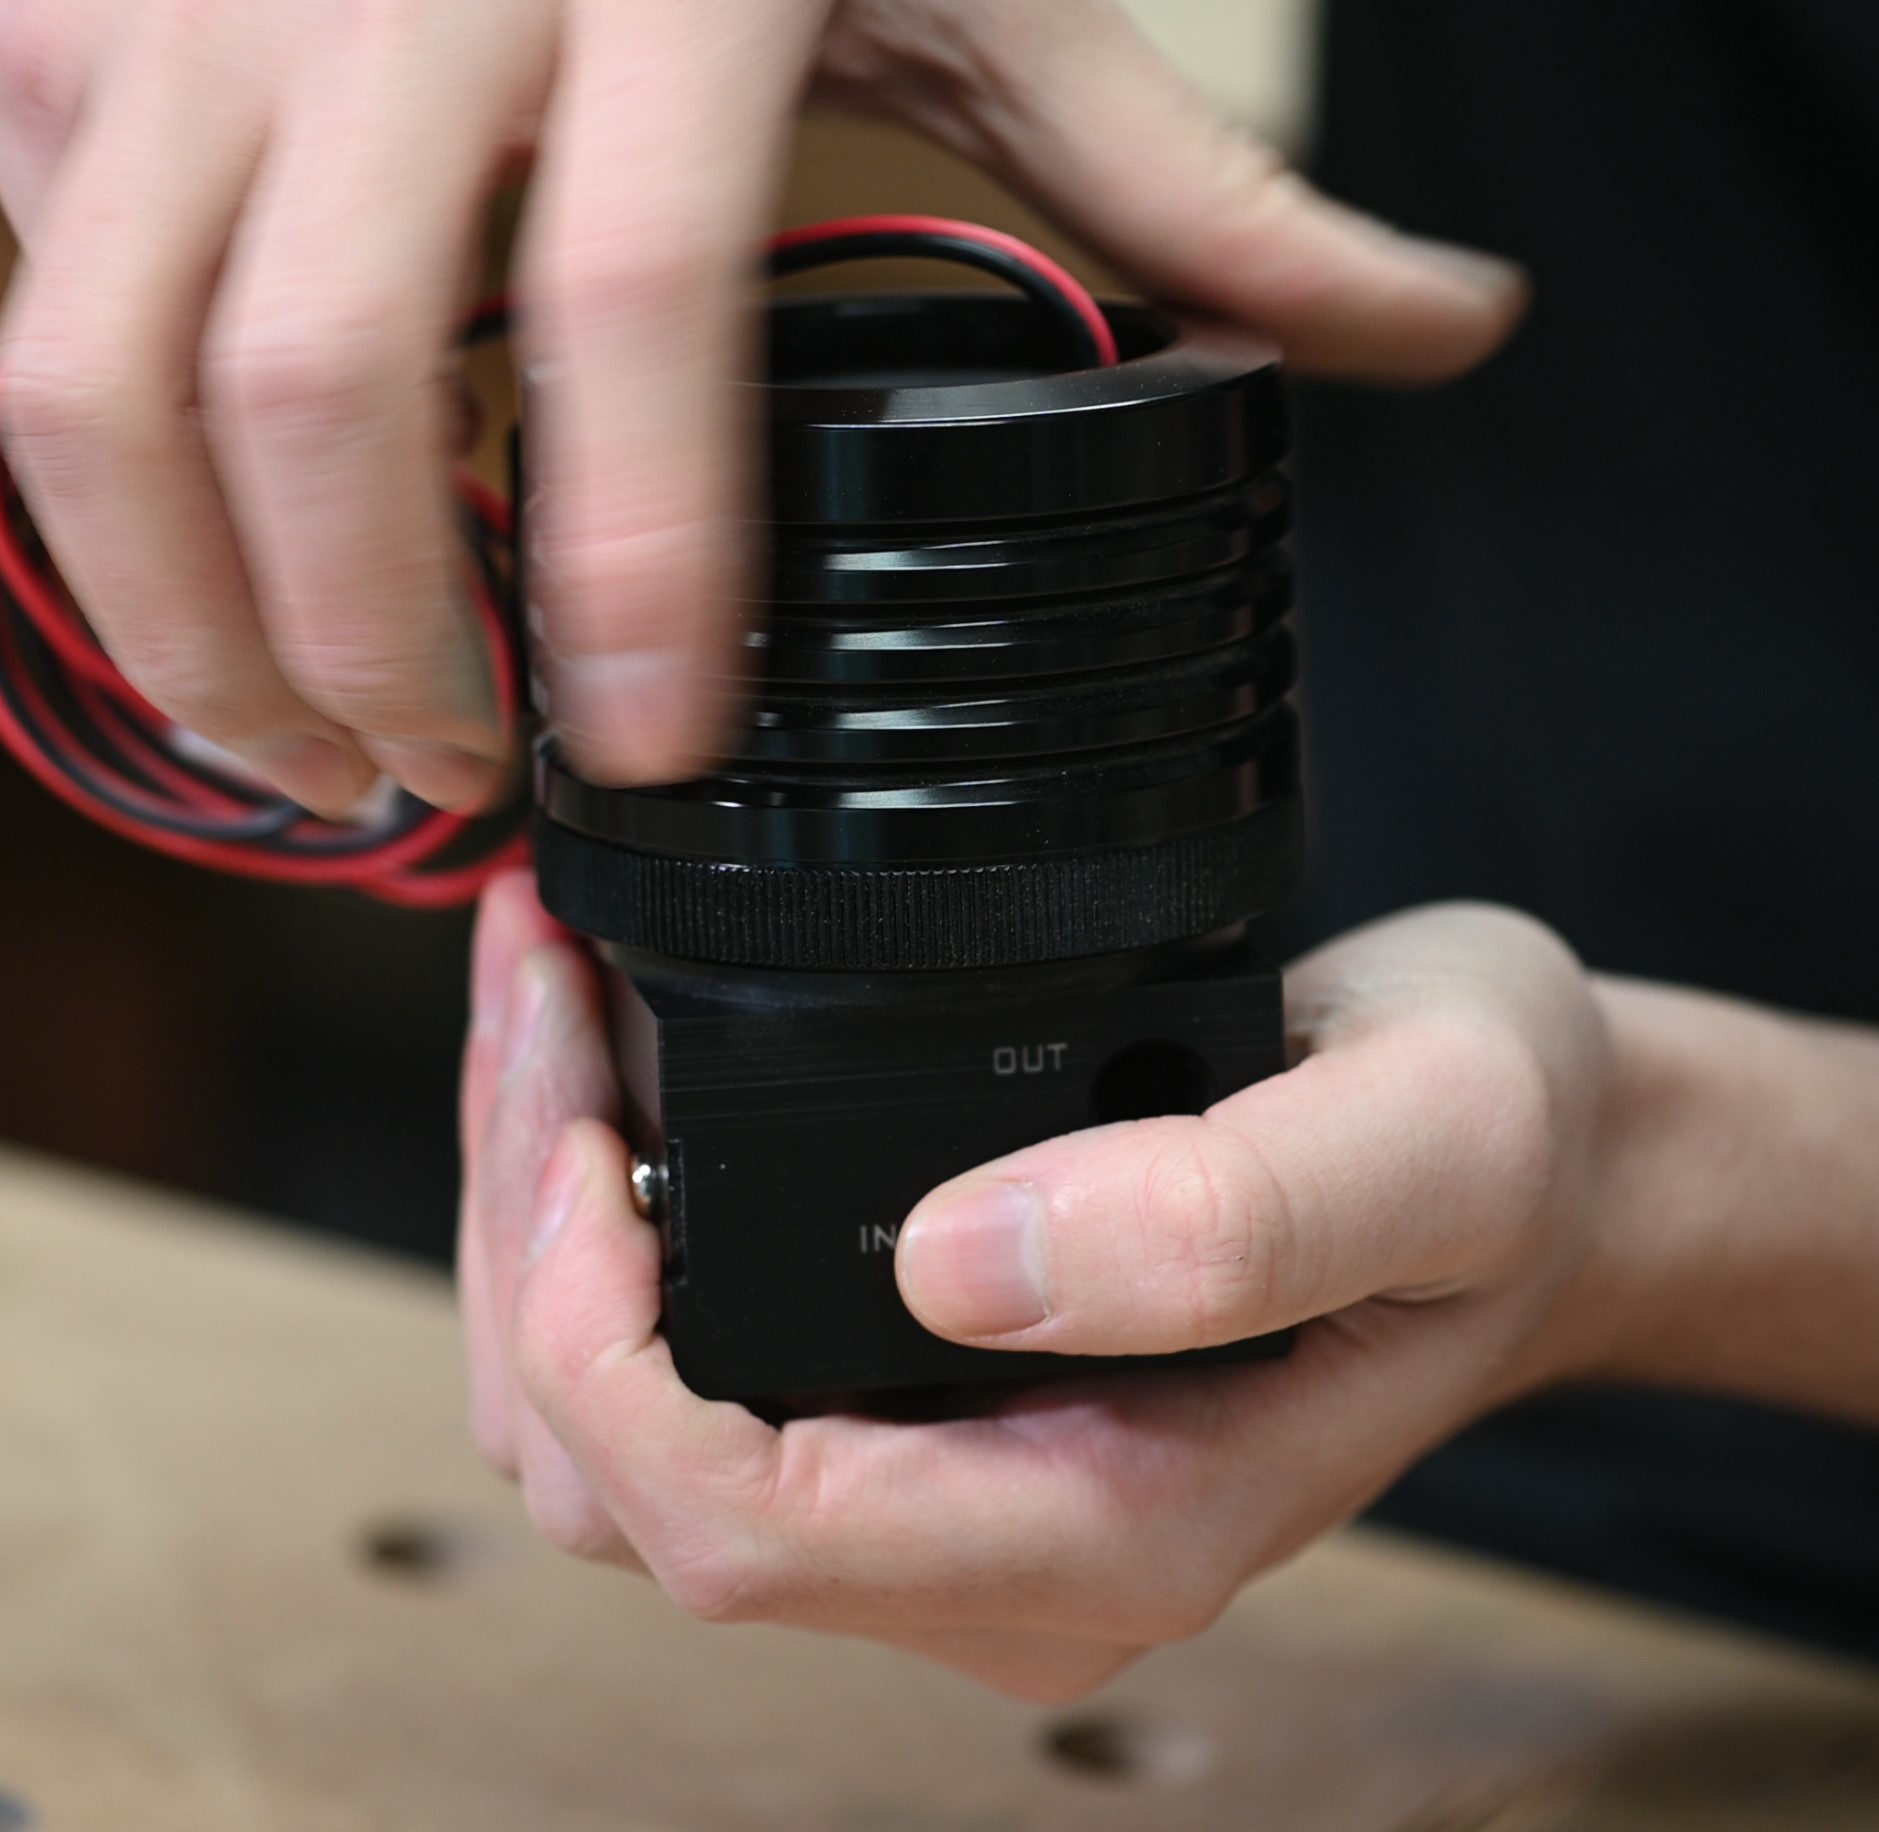

A big point to consider also is how the pumps themselves mount into their pump tops. The DDC comes in a housing that screws into the pump top, providing a tight seal. Since DDCs are air-cooled (the D5 is cooled by the liquid in the loop), I would suggest opting for one that has a heatsink housing like this EK one we're using. To mount a DDC pump like this one, you only need four threaded screw holes - very simple indeed. The D5, however, is a bit more complex. D5s typically ship without any housing at all beyond the basic unit; anything around the pump itself is usually an extra. Usually you purchase them without any housing, with a basic factory one or with a third-party kit installed already.
A lot of D5 pump tops use different methods to hold the pump in place. This Thermaltake pump kit uses a screw-on retention ring, which is similar to how the current EK and Bitspower tops function too. By screwing the housing down onto a thread cut into the top, it compresses the internal O-ring, providing a tight seal. A popular method that used to be used by EK (and that is still popular for square-shaped tops) is using a retention bracket instead. This is exactly the same principle, only instead of screwing the bracket into a large thread, it uses screws to compress it all, just like with a regular water block. Personally I prefer this method, mostly because I've had a couple times where I screwed in a pump without thinking, only to notice too late that it was rotated in the wrong direction, meaning I couldn't access the speed control on the back. Naturally with a PWM pump that's a moot point, but eh, I like them.
While the screw method is possible to do for a plate, you'll find that most who use it actually have it on a separate piece of material that then attaches to a distro plate, effectively like mounting a pump top to a plate. Otherwise you would have to remove an awful lot of material so that you can have that protruding thread.


MSI MPG Velox 100R Chassis Review
October 14 2021 | 15:04

Want to comment? Please log in.