Putting the keyboard in a dishwasher
Price A few pence of electricity and waterSupplier Your kitchen
Naturally, when you’re talking about cleaning an electronic item, your first reaction isn’t to pop it in the dishwasher next to last week’s empty tea mugs and leave it for 60 minutes. However, industrial dishwashers are sometimes used as part of the manufacturing process and you can also find many web testimonials as to its positive effects from compulsively clean computer geeks (a rare species, granted).
Dishwashing works because for electronics, generally speaking, water is only a problem if the product has a current carrying through it. The water conducts electricity and will short things out – often damaging a product permanently. That’s why, if you spill a glass of water on a laptop, keyboard or mobile phone – the advice is the same, remove the power source as quickly as possible.
If the product isn’t plugged in, many items can be washed in water – as long as they are also dried thoroughly.
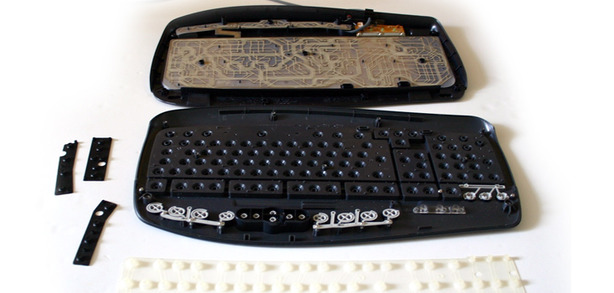
Taking a keyboard apart before putting it in the dishwasher means it dries more quickly
Most of the people we’ve spotted on the web are putting keyboards in complete. The problem with this is that the pressure from using a dish washer will force water inside. Once in there, it will take a while for it to dry out – as long as a week. You also run a much greater risk of destroying your keyboard.
We chose a Microsoft keyboard for this test, and rather than putting it in whole, we took it apart. After undoing the 12 screws from the back, it came apart nicely. The only part we were interested in cleaning was the top layer (i.e. all the keys). This contains no electronic parts and should dry pretty quickly.
 Most keyboards nowadays have retention brackets that hold all the keys in place. However, some keyboards don’t, so if you open it up all of the keys can fall out. If this is the case, you can still go ahead and wash them – but you're going to spend quite a bit of time putting them back in the right places!
Every dishwasher is different, but there are some key elements that stay the same. Firstly – use the gentlest wash setting possible. If it’s not tough enough, you can always wash they keyboard twice. Be careful not to obstruct any of the jets and be observant of where the heating elements are as these could melt the keyboard if they come into contact with it.
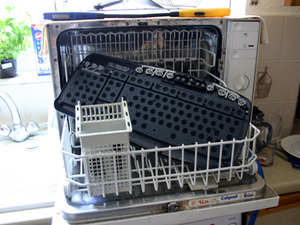
We only had a small dishwasher to hand – it barely large to fit the keyboard in – but we laid it at as flat as possible, with the keys facing down. We then sprayed it with some anti-bacterial cleaner, before putting it on for the gentlest wash with a dishwasher tablet. After one wash, it was significantly cleaner – but we went for a second wash to remove the most stubborn grime.


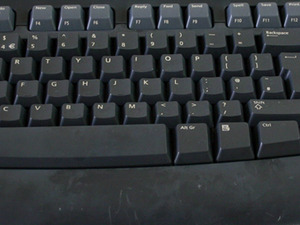
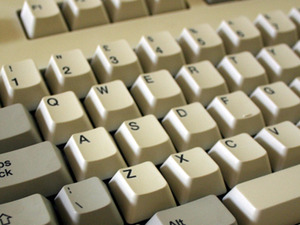
Left: the black Microsoft keyboard suffered; Right: the old Amstrad came out looking fantastic
An hour in the sun, 12 replaced screws later and we had a working, clean, and very hygenic keyboard. However, the results weren’t perfect – you can clearly see that the back has been bleached in a rather patchy fashion.
This method also works very well for laptop keyboards. These tend to keep the electronics on the laptop itself, so when you remove the keyboard – the only vaguely electronic component is the ribbon connector. Most laptops (not all) have screws on the base of the machine that are usually labelled. Unscrewing these will loosen it off. Then in most cases, there will be two sprung loaded clips at the top of the keyboard that need gently pushing in to remove the keyboard. Once out, you can follow the same instructions as a regular keyboard. We tested this using a black keyed laptop keyboard and noticed the same discolouration.
Most people who have tried this, have used white keyboards and commented on how white they come out. Either there was a bleaching action from the dishwasher tablet, or the dye used with the plastic is running due to the temperature of the water. Either way, if looks mean anything to you – we wouldn’t recommend this method for a black keyboard.
We also took a rather old Amstrad keyboard, which are hard to come by nowadays. This is the exactly the sort of keyboard you'd want to keep hold of as the action is superb. This didn't suffer from any colour bleeding and came out sparkling new! As we didn't dismantle this though, it did require a lot longer to dry – we recommend around a week, with occasional turning.
Verdict: This is clean-freak’s method of choice, but there are some drawbacks and the potential for damage is certainly there.
Conclusion
Brushes, canned air, hoovers and Cyber Clean are all great preventative methods against a manky, unhygeinic keyboard and the Cyber Clean goo was definitely our favourite method due to its simplicity, cost and speed.However if you’ve left things too late and you have years of gunk built up on your keys, you either need to consider dumping it in the dish washer, or purchasing a new keyboard. Dishwasher cleaning really does give the best results, but you do run the risk of damaging the colour of your keyboard, and of course, permanent damage if you don’t dry the keyboard out properly.
Has this feature prompted you to clean your keyboard? Feel free to show us before and after pictures in the forums!

MSI MPG Velox 100R Chassis Review
October 14 2021 | 15:04


Want to comment? Please log in.