Interior
With the hinged roof panel raised, you have access to the thumbscrews that hold the four main panels in place – there are two per panel, and once they’re loosened the panels simply lift up and pull away from the case, fully exposing its innards and making it as easy as possible to work with. This level of access is definitely a good idea, as the Evolv Shift’s space-conscious design makes it cramped in a number of places.


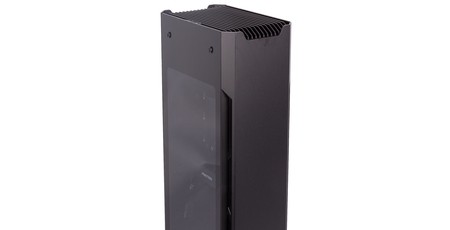
Looking at it vertically, the Evolv Shift is roughly divided into two similarly sized chambers. The motherboard is installed in the upper one, orientated such that its I/O panel pokes through the roof (there’s a hole for cables to route out of the roof section and out the back). You’ll definitely want to install your memory and CPU cooler prior to mounting the board, and the latter is limited to just 82mm. It is this section that the case’s front exhaust fan focuses on.

 Power supplies, meanwhile, are installed vertically in the lower section. This involves pulling off the bottom panel to access the screw holes, and connecting the short kettle lead that runs from the back of the case to your PSU. SFX and SFX-L models are both supported, and Phanteks also recommends using modular units; this is advice we suggest you follow given the tight dimensions.


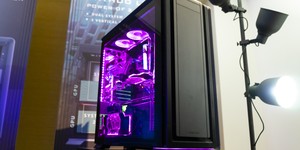
Your GPU is also installed vertically, this time directly behind the motherboard. This is achieved via a PCIe riser cable. The mounting bracket is fully removable, too, so you can prepare things away from the confines of the chassis. It’s also rotatable, so you can choose whether the front of your GPU faces inwards (recommended by Phanteks for when using an air-cooler) or outwards (recommended when liquid-cooling, which we can’t see being very often with this case). Note that any M.2 SSDs installed on the back of your mini-ITX motherboard will be trapped between the motherboard and graphics card, potentially exacerbating any thermal issues. Your graphics card is limited to 350m in length and 135mm in height, although taller cards might fit if you remove the case fan.

The double fan mounts in the bottom can be used to accommodate 140mm or 120mm all-in-one liquid-coolers. With the low CPU cooler clearance, it makes a lot of sense to use one of these for you CPU, but Phanteks also says it’s possible to use one for your GPU at the same time provided you stick to 120mm radiators no more than 27mm thick. This setup will also restrict the height of your GPU to those that are no taller than Founders Edition GPUs and eat into the length limitation too. The mounting struts are also designed to allow you to mount 120mm radiators either horizontally or vertically, which gives you maximum flexibility with regards to positioning your tubing.
Custom liquid-cooling isn’t really discussed by Phanteks, and this is understandable. We don’t doubt that a few of you forumites could install a custom loop inside the Shift, but it’s definitely not what it’s designed for. If the idea has piqued your interest, though, you might consider looking at the larger Shift X.


There are two 2.5” metal drive trays installed along the back wall using Phanteks’ nifty grommet-based mounting system. Removing these trays, you can also screw a single 3.5” drive into place on the opposite side of this panel. Alternatively, you can buy an extra Drop-N-Lock SSD bracket for this third position and have three 2.5” SSDs instead. We can’t really ask for much more of a case this size.


Cable routing as you go is the best approach with this case, preferably starting with the biggest cables first. The main channel sits just below the lower edge of the motherboard, with two routing holes covered with grommets feeding through into the PSU and cooling chamber. A nifty little magnetic, flip-down wall helps to guard cables in this channel from view from the outside, while a single Velcro cable tie is used to strap them down. There are also exits from the channel to the outer side of the front and back panels where you’ll also find some Velcro cable ties. Remember you can also take advantage of the blacked-out areas of the tempered glass side panels to hide cables. Zip ties are included, and there are plenty of places where you can use them.


MSI MPG Velox 100R Chassis Review
October 14 2021 | 15:04


Want to comment? Please log in.