Feel the Power...
Meanwhile, back in PSU City...
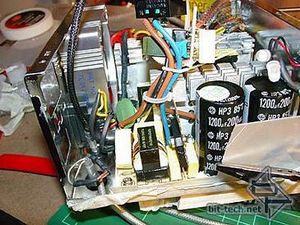
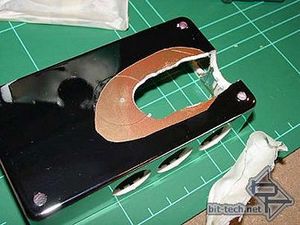
Here is the PSU all wired up with top cover LEDs wired into the external molex 12v, and the fans wired up (bottom left corner of PSU). An ATX plug had to fit through the back of the PSU junction box - hence the massive hole ground out while step drilling. Note to self: A Step Drill is not a Router! You can see where the chrome on the plastic has been torn off; however, this won't be visible at all once it is attached to the PSU.
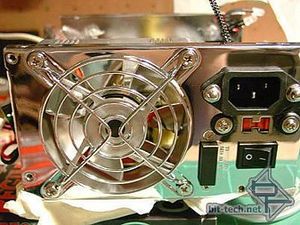
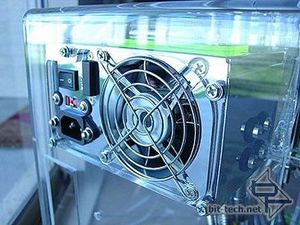
Things started to come together at this point - the fan colour works well now and little touches were added to the PSU such as short bolts and dome nuts on the mains power connector, rubber washers and nicer screws on the voltage switch. You can see the result when in the case. The top right-hand arm of the fan guard was removed, as it would have interfered with attaching the PSU to the case thanks to the curve of the rear opening. I suppose I could have filed the case to make it fit, but the 1 second it took to snip it off with side cutters was much more attractive.
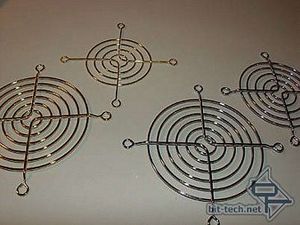
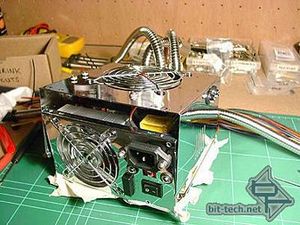
The grilles were changed from gold to chrome. The gold was nice but there is unfortunately no room for that colour in this mod. By this stage fitting the cover was starting to get difficult with all the extra wiring and circuit boards inside.
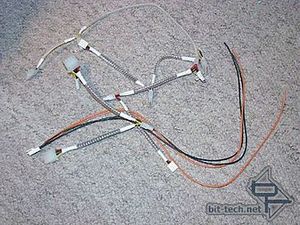
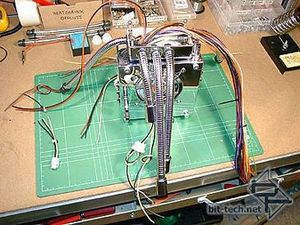
Any excess wires were cut off and the PSU junction box was attached with bolts coming through holes in the PSU - through the four holes in the corners of the box - and was secured with dome nuts. I put four small, thick rubber washers (made from small cut up grommets) over these bolts, between the PSU and the junction box. These help keep tension on the nuts holding the whole lot together and provide a small air-gap to allow the existing row of air holes (now covered by the junction box) to draw in some air.
Here I also began to run wires through the shower hoses. The P4 12v will be shortened (hence it was cut off) as will most of the 12v/5v lines. The old AUX connector which I would never have used anyway now has a use. I separated and ran the 5v and a GND through one of the hoses as a dedicated 5v line for powering my 4 x PC Rider+ LED controllers (I cut the rest off inside the PSU).
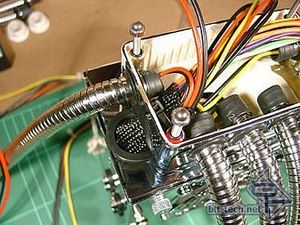
I used some of the larger diameter sample PET sleeving I was sent by Techflex to bridge the short gap between the PSU and junction box. A bit of cut-up grommet from the hand-shower heads, along with a small piece of rubber u-channel moulding covers edges and makes a nice transition between the PET and the chrome.
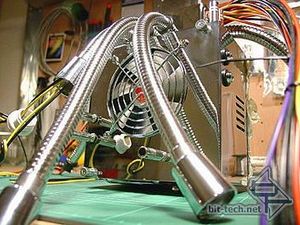
I had to split the ATX wires between 2 hoses as there were simply too many to fit into a single hose! As it was, it was a real challenge to twist and force the last couple of wires through each one. I will use the threaded ends of the shower heads to attach these to the ... well, that's a later article at a later time...
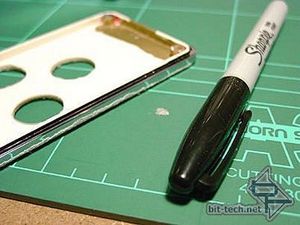
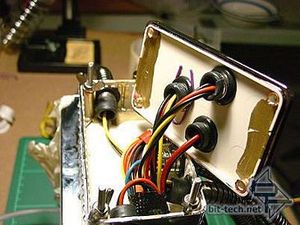
I ran a permanent marker around the inside edge of the lid to ensure not a hint of beige would show once it was fitted. All up there are three separate 12v/GND/GND/5v lines and one 5v/GND line running power.
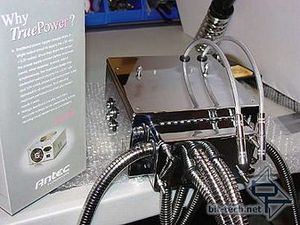
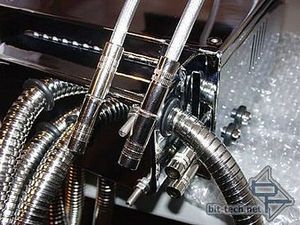
The nearly-completed main part of the PSU. The long bolts were later cut off with a dremel and cutting disk and dome nuts added. You can see the cabling effect with the fish tank hose and Techflex sleeving. The close-up of the jack plugs shows how I have plugged them into an inline socket (yet to be wired up). This is how the PSU fans (and Radiator/case fan) will be connected to the front panel fan controller.
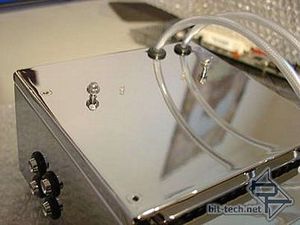
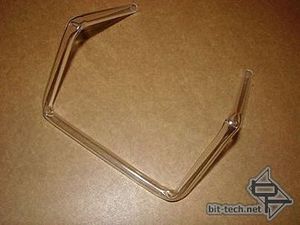
Top cover before and after the neon green Perspex panel (3mm) was attached. I drilled 4mm diameter holes, in the underside where the LEDs are, that only go about 2 ½ mm into the material. The LEDs sit nicely into the holes.
Meanwhile, back in PSU City...


Here is the PSU all wired up with top cover LEDs wired into the external molex 12v, and the fans wired up (bottom left corner of PSU). An ATX plug had to fit through the back of the PSU junction box - hence the massive hole ground out while step drilling. Note to self: A Step Drill is not a Router! You can see where the chrome on the plastic has been torn off; however, this won't be visible at all once it is attached to the PSU.


Things started to come together at this point - the fan colour works well now and little touches were added to the PSU such as short bolts and dome nuts on the mains power connector, rubber washers and nicer screws on the voltage switch. You can see the result when in the case. The top right-hand arm of the fan guard was removed, as it would have interfered with attaching the PSU to the case thanks to the curve of the rear opening. I suppose I could have filed the case to make it fit, but the 1 second it took to snip it off with side cutters was much more attractive.


The grilles were changed from gold to chrome. The gold was nice but there is unfortunately no room for that colour in this mod. By this stage fitting the cover was starting to get difficult with all the extra wiring and circuit boards inside.


Any excess wires were cut off and the PSU junction box was attached with bolts coming through holes in the PSU - through the four holes in the corners of the box - and was secured with dome nuts. I put four small, thick rubber washers (made from small cut up grommets) over these bolts, between the PSU and the junction box. These help keep tension on the nuts holding the whole lot together and provide a small air-gap to allow the existing row of air holes (now covered by the junction box) to draw in some air.
Here I also began to run wires through the shower hoses. The P4 12v will be shortened (hence it was cut off) as will most of the 12v/5v lines. The old AUX connector which I would never have used anyway now has a use. I separated and ran the 5v and a GND through one of the hoses as a dedicated 5v line for powering my 4 x PC Rider+ LED controllers (I cut the rest off inside the PSU).


I used some of the larger diameter sample PET sleeving I was sent by Techflex to bridge the short gap between the PSU and junction box. A bit of cut-up grommet from the hand-shower heads, along with a small piece of rubber u-channel moulding covers edges and makes a nice transition between the PET and the chrome.
I had to split the ATX wires between 2 hoses as there were simply too many to fit into a single hose! As it was, it was a real challenge to twist and force the last couple of wires through each one. I will use the threaded ends of the shower heads to attach these to the ... well, that's a later article at a later time...


I ran a permanent marker around the inside edge of the lid to ensure not a hint of beige would show once it was fitted. All up there are three separate 12v/GND/GND/5v lines and one 5v/GND line running power.


The nearly-completed main part of the PSU. The long bolts were later cut off with a dremel and cutting disk and dome nuts added. You can see the cabling effect with the fish tank hose and Techflex sleeving. The close-up of the jack plugs shows how I have plugged them into an inline socket (yet to be wired up). This is how the PSU fans (and Radiator/case fan) will be connected to the front panel fan controller.


Top cover before and after the neon green Perspex panel (3mm) was attached. I drilled 4mm diameter holes, in the underside where the LEDs are, that only go about 2 ½ mm into the material. The LEDs sit nicely into the holes.

MSI MPG Velox 100R Chassis Review
October 14 2021 | 15:04


Want to comment? Please log in.